The appearance of a black screen when loading an operating system can, at a minimum, cause confusion for the user. What is the cause of the problem when a black screen appears when you turn on the computer? In this case, there seems to be a launch, but the image itself does not appear (nothing is shown on the monitor). In some cases, even the cursor is missing, there is no signal, and measures must be taken to quickly correct the situation.
Then how to remove the black screen on a work computer when no image appears on it when you turn it on? First of all, you need to understand what exactly is the cause of the malfunction. The reasons for such a breakdown include technical and software, but in 50% of cases the user himself is to blame due to his inattention, and sometimes simple lack of knowledge.
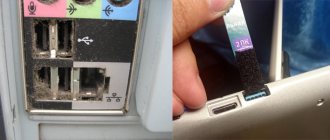
An example from life. A motherboard with a built-in video card was purchased. To increase performance in games, an additional external video card was purchased. When assembling the PC, everything was connected correctly and worked perfectly. Then, after cleaning or moving the system unit, the wires were disconnected and reconnected incorrectly. The wire from the monitor, instead of an external video card, turned out to be connected to the built-in one (VGA or DVI connectors are the same on all devices). Naturally, the PC was configured to work with an external video card and it simply wouldn’t start with the built-in one. Inattention or ignorance? Draw your own conclusions.
Black screen before loading
First of all, it’s worth answering a number of questions to eliminate the possibility of hardware problems:
- do all the buttons light up on the body of the user’s computer or laptop (provided that they were all on before the problem occurred)?;
- Is the noise of the coolers in the PC case audible?;
- Is it possible to adjust the monitor, for example, change the brightness? (this question does not apply to laptop owners);
- Are there any messages when you turn on the computer?
If the user answered yes to all these questions, then this indicates the serviceability of the hardware. Otherwise, it deals with hardware problems.
First of all, you need to check the electricity, namely the serviceability of the sockets, the integrity of the cords, etc. This is what causes the problem for most users.
Checking the integrity of the cords
To eliminate the possibility of damage, simply unplug the computer and then connect another electrical device.
It is also recommended to inspect your system unit. There is an additional switch button on the back. It must be in “ON” mode.
On a note! If no faults are found, then it is highly recommended to take the device to a service center to have professionals work on it.
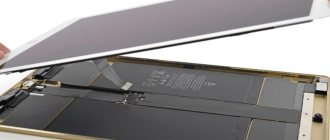
If you don’t want to take your PC for repairs, you can use other tips. You need to unscrew the cover of the system unit (on the side) and see if any lights are blinking there. If yes, then there is no problem with the power supply.
Another indicator is its noise. By carefully placing your hand close to it, the user will feel a slight whiff. If it is absent, then there are problems with nutrition.
You also need to pay attention to the contamination of the system unit inside. It is possible that too much dust has accumulated there and the device requires cleaning. A brush, vacuum cleaner or special devices are suitable for these purposes.
Cleaning your computer from dust
PC prevention rules
A computer is a complex piece of equipment that carries out millions of processes every second. Naturally, with such work, failures occur. It is easy to reduce the risk of their occurrence by carrying out regular prevention. This will not only protect against screen-related problems, but will also extend the life of many parts of the computer, and also speed up computing processes.
The cleanliness of the system unit is the key to good and stable operation of the computer as a whole. This is especially true for the cooler, video card and RAM, which begin to overheat when there is a thick layer of dust. Keeping your parts free of dust reduces their operating temperature, improves performance, and reduces the chance of a dark screen.
The second prevention is carried out exclusively in the computer system. Over time, any memory becomes clogged with unnecessary information, programs that run in the background, and all this overloads the computer. There are often cases when drivers of different versions overlap each other, which causes glitches in the monitor image. Clearing the memory of unnecessary old files, programs and checking the system for viruses will protect not only the elements associated with the monitor, but also the entire system as a whole.
What error is written on the screen
If at least some inscriptions appear during loading, then everything is fine with the hardware. It is very important to pay attention to errors that occur when starting Windows. Most often you can find “BOOTMGR is missing press cntrl alt del”. It occurs due to a number of reasons, namely:
- the user decided to install a hard drive when the first one was available, but forgot to configure his computer;
- incorrect settings in the BIOS specified by the user;
- wanting to speed up his PC, the user decided to install a tweaker or accelerator;
- Incorrect shutdown of your computer.
This error looks like this:
"BOOTMGR is missing" message
The most popular reason is resetting the settings in the BIOS. You can solve this problem like this:
- Press “F2” or “Del” while booting your PC. The user can see the desired key to call at the very beginning of the download.
We find the required key to call at the very beginning of the download - After the completed actions, the user will go to the menu. You will need to click on the “Boot” section and use the “Enter” key and the keyboard arrows to select boot from the USB HDD first.
Click on the “Boot” section and select boot from USB HDD - By pressing "F10" and thereby saving the settings, the above error should disappear.
The next popular error is “Reboot and select proper Boot...”.
Error on black screen
Most often the user himself is to blame. If he inserted a disk or floppy disk, and after work turned off the computer, but did not remove the floppy disk itself, then when he reboots, he may encounter such an error.
You need to remove the inserted disk from the drive, and then restart your PC again.
We take out the inserted disk from the drive
Windows repair/maintenance tools
Tenorshare Windows Boot Genius is a one-stop solution for all software fixes.
So try this tool if you are not feeling technical enough and want to see everything under one lid.
It helps solve black or blank screen problem and more.
Moreover, it can also help in data recovery in case of a new Windows installation.
Next up is “AVG TuneUp”.
This software will help your computer run faster and avoid problems like the infamous Windows black screen.
The program can also optimize the boot process, remove conflicting applications and schedule periodic maintenance.
A similar application is CCleaner.
CCleaner software speeds up the process of updating drivers.
Its PC health check helps in automatic software updates and bug fixes.
Like "AVG TuneUp", you can also change your computer's startup by disabling unwanted programs.
Summarizing the best ways to fix the black screen problem
Black or blank screen is a common problem in Windows computers, so users should learn these tricks to get rid of them.
It's better to update Windows to fix vulnerabilities.
But beyond that, you should use the maintenance tools listed above to keep your Windows PC running like new.
I hope this short article helped you fix your black screen.
Have you ever encountered the “Black Screen of Death” error on your computer?
Share your experiences and actions with us in the comments section below.
See you next time.
See you soon! Come in!
Average score: 5
Entering Safe Mode
The following steps will help you work with your computer if a similar problem occurs. For Windows 7 or XP users, just do the following:
- Press the start button on your PC or restart it.
- Continuously press the F8 key until the boot menu appears.
Boot menu - Use the arrow keys on your keyboard to select “Safe Mode” and press “Enter.”
- Wait for the system to boot and select an account. The user will note that some of the settings do not work, and the screen resolution has changed, which is the norm for this mode.
Select an account
If the user has Windows 8 or 10, then this method will not work. In this case, it is recommended to use the installation disk with which this operating system was installed. There you can immediately select “System Restore” and then “Safe Mode”.
Click on “Safe Mode”
Now it’s worth looking at the system’s reaction to attempts to enter safe mode. If there is no response from Windows, then bootable LIVE CDs will be required.
The easiest way to fix the problem
First you need to check whether the light signals work. You need to listen to the sound from the cooler, and also see if the button on the monitor is turned on. It happens that a laptop has the ability to connect an external monitor.
If the cooler starts working when you start the device, but the black color remains on the monitor, then most likely the external screen could be turned on. Try to find special keys on your keyboard that will help fix the problem.
Breakdowns often occur due to dust. In order to eliminate this problem, you need to clean the inside of the unit several times a year. Don’t forget that when cleaning, the button on the monitor often gets touched.
Help from the AVZ utility
If you successfully boot into Safe Mode, there is a good chance that your computer can be returned to working condition. To solve this problem, a useful utility “AVZ” was developed that will help restore the system.
On a note! It is recommended to always have it on your flash drive or disk, since with its help you can solve many problems: viruses, junk files, startup problems. Moreover, it is absolutely free and suitable for all versions of Windows, regardless of bit depth.
- You need to download the program from the official website and start your computer in safe mode. There is no need to perform any installation steps, since the utility is already completely ready for use.
- Having opened the program, you need to find “File” in the top menu and select “System Restore” from the drop-down list.
Select "System Restore" - The “Restore system settings” window will open; you will need to check the boxes next to items 1, 2, 3, 5, 6, 8, 11, 13, 16 and 17 (as in the screenshot below):
Check the boxes next to items 1, 2, 3, 5, 6, 8, 11, 13, 16 and 17 - Now you need to find “Perform marked operations” in the lower left corner and click the mouse.
No further action is required. In this simple and quick way you can save your computer from many problems.
Among the file managers for the Windows operating system, we can highlight the TOP best, namely “Unreal Commander”, “Multi Commander”, and also “Q-Dir”.
Using Registry Editor
When loading Windows, a black screen appears quite often and occurs when files in the registry are damaged by viruses. To be able to restore full functionality, you will need to launch the task manager and take the necessary steps to fix the problem. If after this it was not possible to remove the black color of the screen, and all actions were done correctly, then the reason is not due to damage to the registry data.