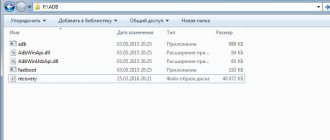
Gone are the days when you need to take extensive ROM backups of your device by storing them either in the internal storage or Micro-SD. Since the latest TWRP 3.1 update has been officially released, users can now directly backup their apps and data from their PC.
For those who are not aware, ADB (Android Debug Bridge) is a command line tool that allows you to access every nick of your Android phone through the command line. It is a very powerful tool and the latest TWRP 3.1 update brings ADB support to backup TWRP (nandroid) directly to PC.
Below is a handy guide to create an ADB backup using TWRP recovery. Follow this word and everything will be fine.
Sample list of TWRP features:
- installation of custom ROM builds;
- installation of updates, additions and corrections;
- connection to a computer in storage mode;
- connection to a computer for ADB debugging;
- saving copies of system files by backing up memory sections (system and user software, settings and other data);
- backup restoration;
- rollback of user settings;
- work with a removable drive (depending on the version, work with USB-OTG may also be supported).
What is the firmware of an Android device, why do you need to restore it?
Firmware is the main software of a multifunction device. The productivity, efficiency and practicality of the gadget directly depends on the relevance of the firmware version.
The performance of the device is based not only on the software version, but also on the careful attitude of the user. Every user should take care of the normal state of the firmware.
A good VPN is free for site visitors. Install the extension now
Owners of tablets and smartphones do not always think about the state of the firmware, installing a large number of programs on the device that leave behind garbage in the form of a clogged file system. Subsequently, this debris causes serious problems affecting performance. Then the user thinks about reinstalling the OS or restoring it to normal operating parameters.
Structure of TWRP recovery
- Install — installation of .zip archives.
- Wipe - cleaning system partitions: Cache - clearing the system of temporary files.
- Dalvik Cache - clearing the delvik cache (in the ART environment, this function is useless).
- Factory Reset - group clearing of user memory, cache and disk cache.
- System - clearing the main firmware section.
- External Storage —cleansing external storage.
- Internal Storage - clears the area of the built-in storage that is writable by the user.
- Android Secure - - clearing the hidden section of the memory card (to which applications are transferred).
- Wipe Battery Stats - delete battery statistics.
- Mount / Unmount System - storage area for the main firmware files.
- Zip file signature verification - enable/disable signature verification.
- Copy Log to SD – creating a report on the current session on microSD.
- System - reboot into the system.
What is Nandroid Backup
There are lots of ways you can take an android backup, but no way is effective like the Nandroid backup. A Nandroid backup includes the copy of the phone's stock ROM and custom ROM, all the apps (including all the preinstalled one), all system settings, all account settings, All Android Apps, contacts and messages, Widgets. Pictures, Images, and videos are not included in Nandroid TWRP Backup. Nandroid backup is only accessible through the Custom Recovery mode. You cannot restore TWRP backup via RWRP or any other recovery. For this, you will need the TWRP Recovery. You can easily take a full Nandroid backup using TWRP Backup method.
How to Root Android device using Magisk
Why Nandroid Backup is Important
Nandroid Backup is important if you are doing lots of thing with your Android device. When you are Rooting, Flashing Custom ROMs, and other things with Android devices, many things can be wrong, and these wrong things can brick your phone completely. So before you start anything with your Android device make a complete backup of Nandroid ROM using TWRP backup method. If anything can be wrong with the android device, then you can Restore the TWRP Backup. In a simple word Whenever you start depolarizing with Android's OS like Rooting, flashing custom ROMs, and so on–you should first make a Nandroid backup using TWRP.backup.
How to Install TWRP Recovery on any android device
Making Android backups is very easy. So, first of all, make sure TWRP Recovery is installed on your android device. Now Remove the lock screen (FingerPrint, Face Unlock, Pattern lock, etc.) on the android device. Why You need to remove Lock Screen before making the Nandroid Backup. The process of removing the lock screen is not mandatory, but in my personal experience, I recommend this. Because when you make a backup, the problem is not accrued at that time, the problem is accrued when you restore the backup. Read more here.
- Hold the Volume Down + Power key simultaneously to Boot Android device into Recovery (TWRP) mode. (Note:- Booting Android device into recovery mode can be different in your case, so please search it on Google.)
- Once you have entered into TWRP mode, Select Backup.
- Under the Backup section, you don't need to do anything because the Boot, Data and System Partition (Mandatory) are already selected.
- Data, recovery, Cache, – Optional, they include personal data and apps, and the backup takes up more storage.
- There are also few additional options like encryption, where we can protect a backup with password.
- Now Select Storage option, (Backups are fairly large, So Select the right storage for backup)
- At last, just swipe the bar along the bottom to back up.
- The backup will take 5-10 minutes to complete, so be patient. When it's finished, you can tap “Back” to go back to TWRP's main menu, or “Reboot System” to reboot back into Android.
12 Must have Rooted Apps for Android device
So, with the TWRP backup Method, you can take a full Nandroid backup.
Backup firmware with saving settings via TWRP
As we wrote above, using TWRP you can save the installed firmware, similar to CWM. It's quite simple to do this:
- boot into recovery;
- go to “ Backup ”;
- configure compression, system partition, backup path and name;
- we confirm the actions and wait for the end of the procedure;
- then we reboot into the system using the “ Reboot ” item.
On miroSD, according to the path selected in the backup settings, the backup archive with the .win extension will be placed.
Conclusion
TWRP is a powerful tool that offers many different features without having to boot into Android, including Backup Android via Recovery.
If you are interested in other features of TWRP Recovery, or you still have questions about creating Backup Android via Recovery, write in the comments below.
Interesting articles:
- Xiaomi Redmi Note 4 how to reset settings
- How to register for MIUI 9 beta testing?
- How to install LineageOS on any Android smartphone
- How to reset Explay to factory settings?
- What is the best launcher for Android 2017
News related to this material
Apple instructions
We extend the life of iPhone and other Apple devices
Smartphone News
Huawei Mate 8 official: 6-inch Full HD, Kirin 950 and Android 6.0 Marshmallow
Hi-Tech News
LG introduced transparent and rollable OLED displays for laptops
Problem solving
How to reset settings on Sony: 2 working methods
Apple News
Apple Watch can be upgraded!
Smartphone News
Installing firmware, kernels and updates via TWRP
First of all, you need to make a complete backup of your system and data. Then be sure to check the battery charge - the device should be charged more than 50%. Place the installation archive that you are going to flash on a memory card. If you install new firmware, it is recommended to clean the user data section using the “ Wipe/Factory Reset ” functions.
Instructions:
- connect the drive with the archive;
- launch recovery;
- go to “ Install ”;
- We look for the necessary installation archive and agree to the installation;
- We are waiting for the end of the procedure;
- then, if necessary, we clear the cache and data cache;
- We reboot the system through the Reboot .
Step to Restore from a Nandroid Backup in TWRP
The above process so that, How you can Make a Nandroid backup using the TWRP backup method. Now if you want to Restore this backup then Follow the below steps.
- Boot Android device into Recovery (TWRP) mode.
- Tap on Restore option.
- Locate the Backup folder you created from TWRP process earlier.
- Select the backup and Swipe the bar to restore.
- Once the process is done, Tap on reboot the system option and Reboot android device.
- So in this way, you can Restore any TWRP Backup, in case after restoring it's showing you the Lock Screen or Pin Lock option then read here.
Final Verdict
If you are doing lots of tweaks with your Android device then always take a full backup of your android device because if anything happens with your device, then you can easily restore the old backup.
Sources used:
- https://4pda.biz/android-obshchee/1383-twrp-recovery-instruktsiya-po-polzovaniyu.html
- https://sprosi.pro/questions/168007/izvlechenie-dannyih-iz-rezervnoy-kopii-twrp
- https://portal.mi-room.ru/instrukcii/sozdanie-bjekapa-cherez-twrp-recovery/
- https://androidsmartfony.com/257-twrp-recovery-kak-ustanovit-kak-delat-rezervnye-kopii-na-android-vosstanavlivat-sistemu-ustanavlivat-proshivki-patchi-i-yadra.html
- https://yrltech.com/right-way-nandroid-backup-twrp-backup/
SHARE Facebook
- tweet
Previous articleHow to enable and use full-screen gestures in MIUI
Next articleHow to recover your account in the Play Store?
How to make a proper backup of your entire Android system
But here things are a little more complicated, since we need a complete saved copy of Android.
Of course, it will take up more space, and there are several different ways to create it. For preventive purposes, we recommend performing such a backup once every few weeks, but before flashing firmware or carrying out other important system processes, it is simply necessary here and now.
Backup via system option (No Root)
The easiest and most comfortable option, suitable for beginners and simply users who did not want to waste their time. Open “Settings” , go to “System” - “Backup” Google Drive in the location Made. The following information will be saved:
- Standard settings (language, time and date);
- Wi-Fi hotspots and passwords, if activated;
- Screen settings (wallpaper, themes, brightness);
- Applications (in most cases just a list, but not internal settings and achievements in games);
- Content located in Google Calendar;
- Materials stored in Gmail, individual mail settings.
Root rights are not required; their presence does not in any way affect the quality of the backup.
Unfortunately, failures during the backup process are possible, which is why many users complain about the insufficient amount of stored information. And on some devices, such a system function refuses to work at all; this may affect phones with an operating system lower than Android 6.0.
Useful recommendation: periodically check whether all the necessary materials are safely backed up, so that, for example, after flashing you do not find completely empty archives.
Backup Android using FlashTool (No Root)
This is a more serious and difficult procedure that allows you to back up the entire firmware. There will be many stages, and we do not recommend this option for users who are not confident in their abilities and technical knowledge! But if you are an experienced Android expert, then you can safely get started.
To begin with, we prepare all the necessary materials so that during the backup process we do not have to be distracted by them.
- Download the program itself directly from the official website of the developer (flashtool.net);
- We find the original firmware made specifically for your smartphone;
- If there are no MTK drivers on your computer, download them.
- We gain access to the PC, since without it backup is impossible here, we check the functionality of the USB cable and the serviceability of the connectors.
- Next, we extract two files from the firmware, namely the name of the number with txt and weg_l.bin. We move these materials to a separate, empty folder.
- We also place the folder where the software is stored there.
- We launch the previously downloaded FlashTool program as an administrator, this is a prerequisite.
- A page opens on which you need to specify the path to scatter.txt using the built-in regular explorer.
- A new screen should appear where the memory blocks are located. It is necessary to make a backup with them. To do this, go to the “Memory Test” tab. We check the boxes next to the first five points.
- Turn off the phone and press “Start” on the computer .
- Now we connect the smartphone using USB.
- The information begins to be read and displayed on the screen. Once the process is completed, disconnect the device from the personal computer.
- Open Notepad and transfer the received data there. Please note that empty sectors do not need to be copied. Save and close the notepad.
- We return to the FlashTool main page again, uncheck the checkbox next to the first item.
- Open the “Readback” section – “Add”. A new line appears, which we double-click on.
- We indicate where exactly to save the backup and come up with a name.
- A small menu appears asking you to specify settings for each sector. Yes, yes, a separate memory block needs separate configuration. We change only the “Length” column, into which we add block data from the saved notebook.
- Click “OK” and click on the top “Read Back” button.
- And the last final step: reconnect the phone and watch the copying process. At the end, a green icon should appear indicating that the operation is complete. Made! Now we repeat similar actions with the remaining sectors.
After the backup is completed, the files can be moved to any cloud storage, because if some major trouble happens to your computer or hard drive, the saved information will be lost, don’t risk it!
So we made a backup on Android via FlashTool using a computer, now we are trying the following method.
Backup via Titanium Backup (Root)
Quite an easy and comfortable option using the special Titanium Backup program. You can download it without any problems from Google Play and install it in the standard way.
Titanium Backup ★ root needed
Developer: Titanium Track
Price: Free
Now we launch the application and give it access to root rights. Yes, the “Superuser” mode is required here , and this, in principle, is the main disadvantage of this utility. Click on the checkmark image in the upper right corner, go to the “Batch Actions” and select what data we want to save. Opposite what you want, click “Start” .
How to backup individual applications on Android
It is not always necessary to copy the entire system, and the process is quite painstaking. If you need to save only specific programs, we recommend using this method. And here the ideal option is the Helium application.
Helium - App Sync and Backup
Developer: ClockworkMod
Price: Free
This tool can be freely downloaded from Google Play. It works on two “bases”: either providing root rights and all manipulations are carried out only on the smartphone, or connecting a USB cable and access to a PC, if you do not have “Superuser” mode.
The application allows you to save copies on an SD card and in cloud storages, namely Drobox, Google Drive and Box, which is very convenient.
She can:
- Back up the history of incoming and outgoing calls;
- Backup of applications and their settings;
- Backup SMS and contacts.
The paid premium version has more advanced functionality, but if you only need to save, for example, games, the free version will be enough.
The application works perfectly on the latest versions of the operating system, mainly Android 7.0, 7.1 and 8.0. Now let’s look at what actions we will perform in it:
- Download and install the application on your phone. If there is no root rights, repeat this procedure on the computer. Versions are available for both Windows and Mac. Drivers are also required for the PC. You can find them on the official website of the manufacturer of the connected smartphone.
- Now let's proceed directly to the backup operation itself. To do this, open the application on the device. If necessary, we connect via a wire to the computer. We are offered several options: a full backup of the phone or only specific applications. Please note that you can copy the entire program with data, or just the data.
- After all the checkboxes are checked, click “Backup” . Choose where to save. If to the Cloud, then indicate the address; if to a computer, open the service with the IP address and transfer it to the search bar of the browser. There we allow copying. Ready. The copies were created successfully.
Introduction
Having received root on a smartphone, the average user begins to experiment with the device and install various interface modifications, themes, fonts, new kernels, firmware, radio and root applications. As a regular, long-time and active user of the 4PDA and XDA Developers forums, I can say that very often such experiments end in questions with the wording: “The phone won’t boot, what should I do?”
Even after reading the instructions very carefully, you can make a typo or press the wrong button, and then get a bootloop - an eternal boot of the phone with repeated bootanimation. In the worst case, you can get a “brick” - the phone will not turn on at all. This happens very rarely, and, frankly, you need to try very hard to, for example, kill flash memory. Usually, what users consider to be a “brick” can be successfully restored with the help of simple manipulations. And backup will help us a lot with this.
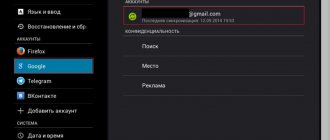
Basic backup functions that will satisfy most ordinary users are offered by Google itself. In your phone settings there is an “Accounts” tab where you can check the necessary boxes. After flashing or resetting the device to factory settings or activating a new phone, Android itself will restore contacts, history and tabs of the Chrome browser, Google Keep notes, photos, application data, calendar events, and so on. In the latest versions of Android, you can restore the desktop with all shortcuts and automatically install all previously installed applications.
However, Google can't backup everything. System and application settings will be reset, saved passwords (or rather, authentication tokens) will disappear, applications from third-party markets will not be installed again. Therefore, we need tools that can save everything. We'll talk about them.
WARNING
Most of the applications described in this article require root and BusyBox.