Let us now figure out what TWRP is on Android and how to install it, as well as flash the phone using this functionality.
This article is suitable for all brands that produce phones on Android 11/10/9/8: Samsung, HTC, Lenovo, LG, Sony, ZTE, Huawei, Meizu, Fly, Alcatel, Xiaomi, Nokia and others. We are not responsible for your actions.
Attention! You can ask your question to a specialist at the end of the article.
The initial functionality of Android gadgets is very limited. The TWRP utility offers the user a large selection of options that are not included in the standard functionality.
Method 1: flashing firmware via Fastboot mode
Fastboot mode allows you to interact directly with the boot partition. Therefore, for most Android devices, the main method of installing TWRP recovery is flashing the firmware via Fastboot.
The algorithm of actions is quite simple:
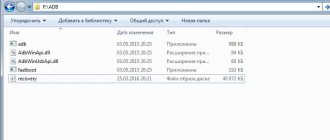
1) Place the TWRP file in the folder with ADB and Fastboot.
2) Next, connect the device in the appropriate mode to the PC.
3) In the command line, check that the connection is correct using the fastboot devices command.
4) If the serial number is displayed, then enter fastboot flash recovery recovery.img
5) One second, and the modified recovery is flashed.
For detailed installation, see the example of Xiaomi Redmi 3 and Xiaomi Mi5.
Among the disadvantages of this method, it is important to note that an unlocked bootloader is required. While the lock is active, you will not be able to install TWRP. It is also necessary to clarify the availability of such recovery for your model and the preferred installation method. Perhaps in your case, other, more convenient installation methods are available.
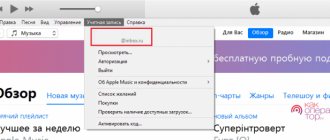
Using the Odin tool
Odin is a Samsung Corporation tool for flashing firmware and performing other similar manipulations with the company’s smartphones. Using it, you can install custom recovery without any problems.
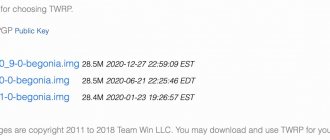
- Download TWRP recovery for Samsung Odin (.img.tar format) from https://twrp.me/Devices/Samsung/.
- Also download Odin tool https://samsungodin.com/ extract the contents of the .zip folder to your computer.
- Open the extracted directory and run "Odin3.exe".
- Enter “Download Mode”, to do this:
- turn off your phone;
- press the “Home” + “Volume UP” + “Power” buttons together;
- when you see warning signs, throw the buttons;
- Tap on the “Volume Up” key to select “Download Mode”.
- Connect your gadget to your PC.
- The COM port in the Odin program interface window should light up.
- Press the "AP" button.
- Select the .tar file that you downloaded in advance.
- Finally, tap “Start” to install TVRP.
- If the firmware is successfully installed, you will see a pop-up message “PASS!” on the screen and the phone will automatically reboot.
Here's how to install recovery using Odin. This is even easier than some other methods, so we recommend this method for owners of Samsung smartphones.
Method 2: Install TWRP via Flashify or Rashr
You can do without a computer and the long procedure of unlocking the bootloader if root rights are available on the device.
To get root, you should use Framaroot or 360 root programs. If there is a vulnerability in the firmware, the program will take advantage of the security hole and install root. More often, devices with Android version no higher than 4.4-5.0 are susceptible to hacking.
After obtaining root rights, you need to install the Superuser or SuperSU program to grant rights to the Flashify or Rashr programs. Both tools allow you to flash recovery, as well as make a system backup.
Installation algorithm
- Download and place TWRP in the device memory.
- Open Flashify or Rashr, provide root if required.
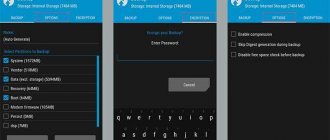
- Make backup copies of all available partitions. The Rashr utility offers more backup options.
- Choose to install TWRP locally.
- Agree to the terms and confirm the action.
Important! Do not use recovery offered within programs. Since there is no guarantee that the correct version will be installed, which will not disrupt the functionality of your device.
For detailed installation via the Flashify program, see the example of the Xaiomi Mi4c smartphone.
TWRP Features
If we compare it with the recovery utility that is installed by default, then TWRP recovery is much more powerful. This program provides the process of creating full system backups. With her participation, software and firmware are installed.
Factory recovery does not have such functionality. TWRP is installed on the internal memory of the gadget, instead of a little functional, standard recovery. If your device won't boot, in most cases TWRP will allow you to perform a successful system recovery process.
Main advantages of TWRP:
Help is needed?
Don’t know how to solve a problem with your gadget and need expert advice? Alexey, a smartphone and tablet repairman at the service center, answers your questions. Write to me »
- Installation of factory system updates, patches, and various additions.
- Installation of unofficial kernels, work with custom firmware is supported.
- Pairs with a PC using the USB connector.
- For your current firmware, the utility can create a backup of the entire system or individually of the system, applications, etc.
- Quick recovery from a previously created backup.
- There are options for clearing battery statistics, cache, and factory settings.
- Formatting microSD, creating partitions.
- Working with files.
- Entering terminal commands.
Method 3: Install TWRP through the official application
Important! The method is relevant for devices with an unlocked bootloader.
TWRP developers have a mobile application that allows you to select the correct version of the “partition” and then install it. The method is in many ways similar to the previous one, but there is no possibility of saving the system. But you won’t be able to confuse and install the wrong TWRP. In addition, the “Official TWRP App” software will notify you when a new recovery version has been released.
Installation algorithm
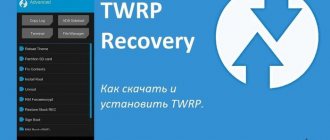
- Download the Official TWRP App.
- In the program, click on the TWRP Flash button.
- The next window will ask you to grant root rights.
- If you grant root access, the program will offer to install TWRP to the recovery or BOOT partition.
Important! TWRP is installed in the recovery partition. If you select Boot, the smartphone will not boot.
- If there is a TWRP file in the device’s memory, click on the S elect a file to flash . Otherwise, download TWRP from the site. To do this, click on the Select a device . Then enter the model. The application will find and display the latest available recovery version. After selection, the program will inform you that it will open the recovery page in the browser. All you have to do is download and save the file.
- After downloading TWRP, return to the program, where select S elect a file to flash . Specify the downloaded TWRP file.
- Next, click on the Flash to recovery . Confirm the action, after which the installation will begin.
Before flashing
Before installing the firmware via Recovery:
- Create a backup copy of user data and transfer it to another medium. When downloading Firmware, all personal information can be deleted: contacts, sms, bookmarks, saved passwords, photos, installed applications.
- Insert an SD card into the gadget. It should have enough memory for flashing the firmware.
- Find out your smartphone model.
- Charge it fully. If the battery dies while booting up, the device will no longer turn on. It will be difficult to restore.
- Find and download the archive with Firmware.
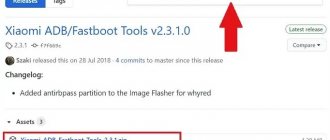
Method 4: using the QFIL program
The QFIL utility, which is included in the QPTS toolkit, is designed for flashing devices on the Snapdragon platform. In some devices, together with the system image, QFIL allows you to flash TWRP.
Algorithm of actions:
- Copy TWRP recovery to the firmware folder. Agree to replace the file.
- Launch QFIL and configure the connection.
- Select the firmware file, specify the location of additional files.
- To install the image, click on the “Download” button.
The firmware will be installed, and with it TWRP recovery.
The installation process is described in detail using the Lenovo a6010 as an example.
Firmware installation
Here's how to install the firmware via TWRP Recovery:
- Move or copy the Firmware archive to the root directory of the microSD card. Do not unpack it.
- Restart Android in Recovery mode. The memory card must be in the smartphone.
- Click "Install".
- Select the firmware archive.
- Swipe to “Swipe to Confirm Flash.” The system will be reinstalled.
- After this, you need to reset the device settings. Click "Wipe".
- Swipe to “Swipe to Factory Reset”.
- If you select the “Format Data” option, absolutely everything will be deleted (including data from SD). This is not necessary.
- Restart your device.
It’s quite easy to figure out how to flash a phone through Recovery - you just need an archive with Firmware. But if the device does not have such a mode, you will have to install it yourself. This can be done in different ways.
Share your opinion. Which is better - TWRP or CWM?
Method 5: Using SP Flash Tool
The SP Flash Tool program works similarly to QFIL, but flashes devices on the MediaTek platform. The program also allows you to install recovery.
Algorithm of actions:
- Download TWRP recovery.
- If a scatter file was included with the downloaded file, specify the location of the file in the SP Flash Tool. If the scatter file is missing, extract the file from the firmware for your device, and in the Flash Tool, specify the location and path to recovery. How to do this is described in detail here.
3. If you are using Flash Tool version 3, check the box next to DA DL ALL WITH Cheksum .
4. Click on the Download , then connect the switched off device. Wait until the installation is complete.
For a detailed installation process, see the example of Lenovo a328.
Option #1. GooManager
This application has now been renamed TWRP Manager. It is one of the simplest, and therefore most convenient, for setting the menu we need.
All actions are performed in the same window. In general, the developers did their best.
The installation process is as follows:
- First you need to download the manager on Google Play. There is a corresponding link for this.
- Next, the application is installed and launched. After this, you should go to the application menu. This is done by swapping to the left.
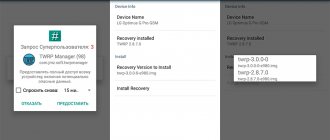
- In this menu you will only have to select “Install TWRP”.
- In the next window you just need to click “Install Recovery”.
- The installation file will be searched. Its name should include the name of your device. For example, if you have a Samsung Galaxy S3, then the downloaded file will be called “openrecovery-twrp-1.1.1.1-i9300.img”, and “i9300” here, in fact, means Samsung Galaxy S3 (this is the code for this phone).
- So, if the name of the downloaded file does not contain the name of your device, you should not install it. It is better to use other methods described below. And if there is, all you have to do is click “Yes” in the message that appears after downloading.
Rice. 1. “Install TWRP” item in TWRP Manager
Rice. 2. “Install Recovery” in the manager
Rice. 3. Request to install the downloaded recovery file
That's all, the process is completed, and you can safely use the new menu.
But it's not that simple.
Attention! To use this program you need root rights.
One of the easiest ways to give your device so-called superuser rights is to use the Root Checker application.
All you need to do after downloading and installing it is just go to the “Verify root” tab and click on the same inscription a little lower.
Rice. 4. Using Root Checker to assign root rights
In principle, this is true for almost all methods described in this review. Therefore, before performing each of them, assign root rights to your device.
This, by the way, is useful in many other cases when you need to add some unusual functions to your phone or tablet.
Now let's get back to installing the recovery.
Method 6: Installation from system applications
Programs such as Rom ToolBox, ROM Installer and the like offer to install TWRP or other recovery directly from the application. This installation method is outdated and irrelevant. Applications do not always correctly select the correct custom recovery, which is why owners get bricked. Therefore, do not use such harvester applications to install custom recovery.
The Flashify and Rashr applications also offer to install the recommended recovery, which is not worth doing. Use Flashify and Rashr only to flash the TWRP package that you downloaded personally from the official website. Do not use the recovery version that is inside the program.
Where can I find the firmware and why should I reinstall it?
Installing firmware via TWRP may be necessary if:
- Errors constantly appear in the Android operating system.
- Applications do not open.
- Many programs from the Play Market do not work.
- The phone itself reboots or turns off.
- It gets stuck on the OS loading screen.
- It works slowly or lags a lot when flipping through desktops.
- You decided to try a different version of Android.
- You are not satisfied with the functionality of the stock (official) firmware.
- The OS does not meet the system requirements of the smartphone.
Don't just download Firmware or run TWRP Recovery for no reason. If done incorrectly, the phone will simply break. If you don't like the interface or want to change the button design, it's better to install a new launcher.
To update the operating system through Recovery, you need to download it from somewhere. It can be done:
- On the official website of the manufacturer. Find your device model there. There should be a "Support" or "Drivers and Utilities" section.
- On the resource of Android application developers.
- On specialized services where users post custom or official OSes. For example, on the 4pda forum.
- Online. Type “download firmware for [smartphone model]” into any search engine.
Firmware must be accompanied by a description and instructions. If it indicates that the archive is being downloaded through Recovery mode, you can download it.
Do not use software that is not designed for your phone. If you try to load it with an incompatible OS, it will stop working.
Conclusion
The main way to install TWRP is through Fastboot mode. This type of installation is reliable and safe. For devices on the Mediatek platform, Flash Tool is used mainly. If you have root rights, installation is available via Flashify or Rashr. The QFIL utility is used primarily when installing on devices before 2014. Other methods are less relevant and reliable.
Leave comments with your wishes and suggestions for improving the article. Also share the article via social networking buttons to help your friends and acquaintances install TWRP correctly.
Option #5. Rashr
This is truly the simplest option in our review today.
All you need to do is download the program on Google Play, click on “TWRP Recovery” in the main menu and select the downloaded file in the window that appears.
Rice. 11. Using Rashr
Surely, one of these options will help you install TWRP. If something doesn't work out, write about it in the comments.
TWRP Recovery instructions
Simple Solution to Complex Errors
« Previous entry
Advanced settings in TWRP
In the Advanced section of TWRP there are several options that can be used.
Fix permissions
Fix permissions can be used if you're experiencing a lot of app issues, such as frequent crashes (and we mean frequent - randomly closing the app won't solve it).
Fixing permissions only takes a couple of minutes, and there are no downsides to it.
ADB Sideload
ADB Sideload allows you to connect your phone to your desktop computer and download apps through ADB, which is available through the Android SDK. This is typically used if you are replacing a system file with a customized version.
File manager
File Manager, as its name suggests, is a tool for accessing files stored on your Android device.
Wrap
TWRP is a powerful tool that gives you complete control over the insides of your phone without having to boot into Android.
It can be used to flash custom ROMs or minor application mods, as well as create and manage backups. Understanding how TWRP works and what you can do with it will make you more confident in attempting various types of Android hacks. It's also worth updating the software as new features become available and an extra layer of user friendliness is added on a regular basis.
TWRP vs ClockworkMod Recovery: which one to choose
The two main stock recovery systems for Android are TWRP and ClockworkMod (CWM).
In most cases, you don't have to choose between them; The rooting method you choose for your device will be based on using one or the other.
TWRP and CWM have similar feature sets and there are virtually no differences between them. They have different user interfaces and are not compatible with each other. A Nandroid backup created on one cannot be restored using the other.
Wipe data or reset settings
Next on the grid of options is Wipe.
If you are flashing a ROM, you will need to erase at least some parts of the device, if not all. (Follow the instructions for the ROM you are flashing to see what you need to erase.)
In TWRP, the default option is factory reset, which wipes the entire device.
Click the Advanced Erase button and you can select specific partitions to wipe - Dalvik Cache, System and Cache will be needed for most ROMs. Data will erase your data and this is often necessary. Internal Storage clears your internal storage and this is what you would do for a full factory reset, but it is rarely needed when flashing a ROM.
In any case, make sure you back up your data properly and not just using Nandroid Backup. To make backing up and restoring your application data easier, check out our Helium guide.
Again, once you have selected the sections to erase, you will need to swipe the slider to confirm. Once you do this, there is no going back.
Flash ROM or zip
One of the main ways to use custom recovery is to flash a custom ROM.
To do this, in TWRP, click the “Install” button. Assuming you've copied the ROM (in .zip format) or other zip file to the device's internal storage, you can use the Select Zip screen to find and select it.
Once you select your zip code, you will be taken to a Flash confirmation screen. You can add more lightning bolts if needed by clicking the "Add more lightning bolts" button.
When you're done, you need to confirm that you're ready to flash by swiping the "Swipe to confirm flash" slider. Once you do this, the flashing will begin.
Don't forget that you should always take a full Nandroid backup before flashing anything, no matter how harmless it is. We'll come back to the backup section shortly.
What is recovery?
Recovery is a small piece of software that runs in the recovery partition of your device.
You can boot into this section, which will allow you to enable and access files on your phone without booting into Android OS. Since Android is not booted, Android system files are not placed in memory, which means they can be accessed, edited, and replaced.
When you install a system update on your device, booting into recovery is part of the process. For this reason, every device has a standard recovery installed, but it does not have user-accessible features.
Replacing the standard recovery with a custom recovery like TWRP (Team Win Recovery Project) gives you access to parts of your device that were previously inaccessible. This is how you start hacking your phone.
RootKHP Pro Software
The RootKHP Pro application is easy to use, free, and has an official Russian version. Allows you to install root rights on Android 8 Oreo in just one click.
To obtain superuser rights using the RootKHP Pro 3.1 application, you need to follow these steps:
- Enable USB debugging mode.
- Using a USB cable, connect your Android device to a PC running Windows operating system.
- and launch the RootKHP Pro (no installation required).
- Click on the Root .
After completing these simple steps, a corresponding notification about obtaining superuser rights will appear in a few minutes. The rooting process will be completed.
along with RootKHP Pro . However, they do not cause harm and can be easily removed.