When installing a driver, the Windows operating system checks the authenticity of the digital signature, and if the signature is missing or changed, the system prevents the driver from being installed on the computer. The driver's digital signature is verified for security purposes.
In some situations, the user needs to install a driver that does not have a digital signature on the computer. To do this, you need to disable digital signature verification. It is not recommended to disable driver digital signature verification because it may compromise system security.
Drivers are designed to enable interaction between various computer hardware. Without installing drivers, the hardware installed on the PC cannot operate normally.
A large number of drivers are included in the Windows operating system; the necessary drivers are installed when installing the operating system. In another situation, the user independently installs drivers for new equipment on a PC, downloading them from the official website, or installing them from the supplied disk.
The digital signature of drivers informs about the manufacturer of this software, that this driver has been tested, verified and certified. The user can be confident that installing a driver with a valid digital signature is secure.
Installation of unsigned drivers is disabled in 64-bit versions of Windows.
What should I do if I need to disable Digital Driver Verification? For example, a driver for some equipment does not have a verified digital signature. Without installing the driver, the user will not be able to use this equipment on the computer.
The Windows operating system has options to disable driver digital signature verification. In the article you will find instructions on how to disable digital signature verification of Windows drivers for the operating systems Windows 10, Windows 8.1, Windows 8, Windows 7. Some methods disable digital signature authentication completely, other methods only work during the current session on the PC.
How to disable digital signature verification in Windows
First, let's look at a universal method that works in all modern versions of Windows operating systems. The Local Group Policy Editor will help us.
Only users who have older versions of the operating system on their computers, starting with Windows Pro and higher, will be able to use the Local Group Policy Editor. This system component is not present in home versions of Windows. In this case, you must use other methods described in this article.
- Press the “Win” + “R” keys on your keyboard at the same time.
- In the Run dialog box, enter the command "gpedit.msc" (without the quotes).
- In the Local Group Policy Editor window, go to User Configuration → Administrative Templates → System → Driver Installation.
- Double-click on the “Device driver digital signature” option.
- In the “Device driver digital signature” window, activate the “Enabled” option, and in the “If Windows detects a driver file without a digital signature” option, select “Skip”.
- Apply the settings, and then restart your computer.
In the Local Group Policy Editor, you can use another method: in the “Digital signing of drivers” window, select the “Disabled” mode, apply the settings, and restart the PC.
Group Policy Settings
Let us immediately note that for the home edition of Windows 7, the proposed option is not relevant, since the “Group Policy Editor” is missing in it.
- In the command interpreter we execute “gpedit.msc”.
- Go to the current user configuration section and expand “Administrative Templates”.
- We move down the hierarchy, as shown in the screenshot.
- Open the dialog for editing the “Digital signature...” entry.
- Move the switch to the “Disable” position and click “OK”.
How to disable digital signature verification in Windows 10
The Windows 10 operating system has a feature for custom boot options that you can use to change your boot options. Among other parameters, there is an option to disable mandatory verification of driver digital signatures.
You may also be interested in:
- Windows Command Line Commands: List
- Windows Run Commands: Complete List
This method will allow you to disable digital signature verification during the current session. After completing the session on the PC, after starting the computer again, the digital driver check will be turned on again.
- Go to the Start menu and launch the Settings app.
- Select "Update and Security", open the "Recovery" section.
- In the “Special boot options” option, click on the “Restart now” button.
- After the reboot, in the “Select Action” window, click on “Troubleshooting”.
- In the Diagnostics window, click on Advanced Options.
- In the "Advanced options" window, at the bottom of the window, click on the "View other recovery options" link.
- In the window that opens, click on the “Download Options” button.
- In the "Boot Options" window, click on the "Restart" button.
- After the reboot, in the “Boot Options” window, using the “F7” key, select the “Disable mandatory driver signature verification” option.
Install an unsigned driver on your computer.
Using third party software
All of the above methods require memorization. For the average user, it is much preferable to use specialized software that will perform this operation interactively. There are many such utilities, and as an example we will look at the DSEO program, developed by programmers from the NGOHQ company. The only purpose of the Driver Signature Enforcement Overrider utility is to permanently disable Windows driver signature verification.
In other words, the method is irreversible, which becomes clear from the principle of operation of the program - it embeds a cryptographic identifier in the driver, which is not certified by Microsoft.
And now a step-by-step algorithm of actions:
- open the official NGOHQ website in the browser, click on the Downloads button to download the utility;
- after the download process is completed, launch the utility;
- We answer in the affirmative when a window appears with the terms of use of the program;
- In the main menu, check the box next to Enable Test Mode, which will activate the operating system boot test mode. Reboot the PC;
- re-run the utility, select the third item – Sign a System File, click Next;
- a window will appear in which you need to enter the full path to the installer of the problematic driver;
- We confirm, exit the program and try to run the installer of the problematic firewood.
ATTENTION. If for any reason you need to reinstall the driver after downloading it, you will need to follow the same procedure each time.
Disable driver signature verification in Windows 8.1 and Windows 8
In Windows 8.1 and Windows 8 operating systems, use the same method as in Windows 10, which is practically no different in its application.
- Move your mouse cursor to the right edge of the screen.
- Click on the "Change PC settings" option.
- In the PC Settings section, click on Update & Recovery.
- Under Update & Recovery, select Recovery.
- In the “Special boot options” option, click on the “Restart now” button.
- After the reboot, in the “Select Action” window, click on “Diagnostics”.
- In the next window, click on “Advanced options”.
- In the Advanced Options window, click on Boot Options.
- Click on the "Reboot" button.
- After restarting the PC, use the “F7” key to apply the option to disable mandatory driver signature verification.
Signing the driver manually
If all else fails, you will have to sign the driver yourself. To do this, run a command like: “pnputil –ac:\*.inf”, where “c:\*.inf” is the path to the inf file of the problematic product.
To find the inf file, you will most likely have to unpack the installer, if one is used, using an archiver, for example, 7z.
You can also sign drivers. It will automatically start the system in a mode with software signature verification disabled, as described in the first section.
How to disable digital signature verification in Windows 7
In the Windows 7 operating system, you can use the advanced boot options option, similar in use to that used in older versions of Windows, the command line, or change registry settings.
Let's see an example of disabling digital signature verification using the Windows Registry Editor.
- Open Registry Editor.
- In the Registry Editor window, follow the path:
HKEY_CURRENT_USER\Software\Policies\Microsoft
- Right-click on “Microsoft”, select “New” from the context menu, and then “Partition”.
- Give the section a name: “Driver Signing” (without quotes).
- Select the “Driver Signing” section, right-click on an empty space in the section, first select “New”, then “DWORD Value (32-bit)”.
- Name the parameter "BehaviorOnFailedVerify" (without quotes).
- Right-click on the “BehaviorOnFailedVerify” parameter and select “Edit...” from the context menu.
- Check the parameter settings: value is “0”, number system is “Hexadecimal”.
- Close Registry Editor and restart your computer.
To enable driver digital signature verification in Windows, delete the previously created “Driver Signing” section from the Registry Editor.
Warning
Before you begin the procedure that we will describe in this article, make up your mind absolutely and decide - do you really need it? Are you absolutely sure what you are going to do and why? After all, if you disable driver digital signature verification in Windows 7, the security of your system is at risk.
On the one hand, there are no problems if this operation is necessary to install drivers from a reliable source. For example, from a licensed disc, and not purchased at a market stall. On the other hand, applications downloaded from the Internet from unverified sites and exchangers. By downloading a driver (application) in such a place and disabling protection, you can independently infect your computer with a spy who will collect data, steal passwords, or may even connect the computer to the network for DDoS attacks. In general, decide for yourself how much you need to disable digital signature verification of Windows 7 (32-bit) drivers.
Turn off digital driver verification using the command line - method 1
There are several options for disabling driver signature verification in Windows 7, Windows 8, Windows 8.1, Windows 10 by running commands from the command line.
The first option to use the Windows command line is:
- Run Command Prompt as Administrator.
- In the command line interpreter window, type the command and then press Enter:
bcdedit.exe /set nointegritychecks ON
- Restart your PC.
To enable signature authentication, do the following:
- Open Command Prompt as Administrator.
- Run the command:
bcdedit.exe /set nointegritychecks OFF
- Restart your computer.
Driver digital signature verification in Windows will be enabled again.
Special download option
Suitable if you need to temporarily work with unsigned software. When you want to run any emulator or test a device whose driver does not have a digital signature, it is better to choose the following method. It consists of running Windows 7 in one of the special modes.
- We reboot the computer and begin to wait between the completion of the hardware self-test and the moment when the OS starts loading.
- Using the cursor key block, we move to the “Disable mandatory check...” option.
Disabling digital signature verification in Windows PowerShell or the command line - method 2
Another method for disabling verification, which works the same in Windows PowerShell or on the command line. We will need to execute two consecutive commands to apply the settings in the Windows operating system and enable test mode.
- Run Windows PowerShell or Command Prompt as an administrator.
- Enter the command, and then press the “Enter” key:
bcdedit.exe -set loadoptions DISABLE_INTEGRITY_CHECKS
- Then run the second command:
bcdedit.exe -set TESTSIGNING ON
- Restart your computer.
To enable digital signature verification on your computer, run the following commands in sequence:
bcdedit -set loadoptions ENABLE_INTEGRITY_CHECKS bcdedit -set TESTSIGNING OFF
For security purposes, it is recommended to use methods that disable driver digital signature verification once, while the computer is running. In this case, after restarting the computer, the Windows operating system will again begin mandatory digital verification of drivers for authenticity.
Example
We will start, oddly enough, with a specific example when you may need knowledge of the Windows 7 operating system. You may always need to disable driver digital signature verification, for example, if you decide to play toys from the Fogame service. Previously, you needed to download a special client, as Mail.ru now does, but they decided to abandon it and built the entire system into the browser.
But along with the new technique came a new protection called Frost. In order for it to work, you need to perform the actions we are considering. Moreover, the advice of other users will be quite clear, but useless. As a result, two problems arise.
- Why does a self-respecting gaming service force users to disable protection?
- Why doesn't this method always help? And the user, upset by an unsuccessful attempt, forgets to return the settings to the initial ones.
As you can see, in Windows 7, disabling driver signature verification may be necessary, but how useful is this for the system and security? We in no way recommend that you not trust the sites given in the example, however, if problems arise, it is better to contact technical support instead of user forums. You will be helped and advised by specialists, not by unknown people with a dubious reputation.
Removing devices
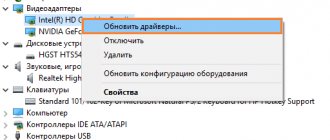
We have dealt with unnecessary and outdated software. However, the situation may turn out to be such that, even if the latest software versions are available, the device becomes hopelessly damaged. In some cases, to ensure correct operation of the new one, the old one must be completely removed from the system. Let's go back to the control panel.
Select the marked item and go to the PC device management menu.
Here everything is grouped by application area. Accordingly, you can find and remove the driver for a device that is no longer needed or does not work correctly. Let's choose a “victim” and see what needs to be done in this case. Let's try, for example, to remove the sound card driver.
Expand the group of devices and select the one to be deactivated. Call the context menu and find the item that allows you to delete it. The system will display a warning dialog box.
We put a tick in the indicated place and confirm our choice. As a result, the device will be completely removed from the list of used equipment, and the system will clear the software that controls it.
Removal procedure
A lot of unnecessary and outdated programs only interfere and reduce the performance of the computer, and sometimes users install drivers from third-party resources, which leads to serious failures in the OS, for example, such as the appearance of a blue screen or system error messages.
Therefore, owners of Windows 7 computers need to know how to properly remove the driver from the system. Before starting to follow the instructions below, it is recommended to create an OS restore point so that in case of unsuccessful attempts to tamper with the system software, you can rollback the “Seven” to a working state.
Method 1: Through Device Manager
To remove drivers, you need to perform the following sequential steps:
Following the described instructions, you can sequentially get rid of all drivers of unused devices, but you should be careful not to remove software whose purpose the user is not one hundred percent sure. Incorrect interference with the integrity of the system can lead to negative consequences for it.
If the user is unable to apply the above method due to objective reasons, then methods using the Windows 7 control panel and third-party programs are described below.
Method 2: Using the built-in tools of the Control Panel (CP)
You will need to do the following sequential actions:
Method 3: Using third-party applications
If your PC runs Windows 7 or a more modern version of the Microsoft OS, then the special program “Threexy Driver Fusion” will help you cope with the task.
It's free and allows you to safely remove unnecessary drivers without affecting your PC's boot software.
The application has support for a Russian-language interface, however, only in the English version it works without failures, so it is recommended that all actions to uninstall the software be performed in the English shell.
The following steps must be followed:
If the user wishes to use a program with a Russian-language interface, the “Driver Sweeper” utility is suitable.
It is also freely distributed and safe to use, of course, with a certain degree of caution from the computer owner himself.
It is equipped with a simple interface and will not complicate operation even for a novice user.
You just need to complete the following few steps:
Source