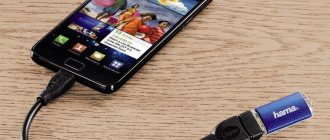
Often, owners of smartphones on the Android platform need to reconfigure the gadget so that the downloaded software is installed on the memory card and not on the built-in storage. On the Internet you can find many options for how to do this, but not all of them deserve attention. Below are the 4 best ways to switch your phone memory to a separate drive.
Is it possible to download applications from the Play Market directly to an Android memory card?
When downloading programs and games from the Google Play market, we are not given the right to indicate the type of memory on the phone in new versions of Android. There is an “Install” button that we click. After which it is downloaded automatically to the phone memory. This loading scenario is not suitable for many users. After all, every year games for Android are released that are the size of computer game files. And some smartphones, especially older models, do not have enough system memory to accommodate them.
Cleaning system memory with a third-party application
There are a couple of non-standard ways to download programs directly to an SD card, which we will look at next. We also have the ability to transfer already downloaded files to the memory of a flash card. Which you will also learn about from our article.
Setting up downloading applications to the SD card
Some users may have already changed the location where data is saved in the settings. But the application is still loaded into the phone's memory.
It is possible to bypass the system as follows:
- For those who have not yet changed the settings for installing files in Android, open the settings; Open Android settings
- We find here a parameter named “Memory”; Find "Memory"
- Next, find and open the “Installation location” item and click here on the line with the SD card. Find "Installation Location"
Now all your downloaded files from the browser will be downloaded to the flash drive. But the Play Market will still save files and programs to system memory. There's a reason we just set this to default. This is also necessary for the next instruction.
This may be useful: how to transfer contacts from phone to SIM card.
Replacement process
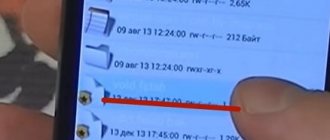
In order to begin the operation, open the Root Explorer program. We move to the address /system/etc. There you need to find a file called vold.fstab. In it you should find lines and parameters that are responsible for the mount points of external and internal memory. They are called, respectively, like this: SDcard and extsd. After this, you will need to swap the parameters. This will complete the active phase of the operation. Be sure to back up your files, and remember that such operations are performed at the user's own risk.
How to save applications to a memory card on Android
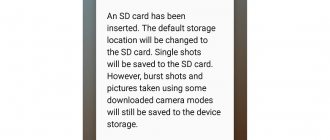
When the default setting in the system is to save to a memory card, you can proceed to the next step. It consists of uninstalling the Play Market update.
For those who don't know how to do this:
- Go to the settings of your smartphone; Open the settings of your Android smartphone
- Next, select the “Applications” item; Select "Applications"
- At the top, swipe the tabs and find “All”; Select the "All" tab at the top
- Find the Play Market store program in the list and select it;
- In the market settings window, click on the “Uninstall updates” block. Click on the "Delete applications" button
In some cases, you must confirm the deletion. Now go to the main menu of the smartphone and select the Play Market icon to launch it. We find in the search the application that you want to download to the SD card. Or a game that previously did not fit in system memory. Try installing the program now and check its placement.
This is interesting: how to transfer video from your phone to your computer.
Downloading games to your smartphone's external storage device
If your device does not have the ability to change the type of memory that will be used by default for downloading, applications from the Play Market will help. You need to find a suitable download manager, of which there are many in the online store. Download, for example, AppMgr III. It can not only change the path for downloading programs from Google Play, but also move applications already downloaded to system memory. And also flexibly manage them: send to devices, delete several at once, etc.
Download AppMgr III on Google Play
Google Play Market does not “trust” its applications to untrusted SD cards. That's why we have difficulty installing them directly onto the additional memory of your phone. Many of the applications that promise us to download and install applications on a memory card require Root rights. Only after your smartphone is hacked will you be able to open system folders and change previously inaccessible settings. It will also be possible to specify a flash drive as the main memory.
Getting rid of some system programs
I do not recommend deleting all programs related to the functioning of the system. However, some of them can be uninstalled. Getting rid of unused programs will free your smartphone from unnecessary load and reduce the rate of battery drain.
Not everything is so simple here, for example, for those who do not use email from Google, they do not need to have the Gmail program pre-installed. But try to remove it - nothing will work.
To remove such “persistent” programs, you can use one of the options:
- Install a program that will help you remove a lot of things on Android.
- Activate root rights on your phone - this will open up the ability to uninstall any system applications.
One of the most common ways to obtain superuser rights on Android is to use the capabilities of the KingRoot utility. Here's how to use this popular app:
- You need to download KingRoot from the official website kingrootapp.net and install it.
- Open the program.
- If the inscription “Try to root” appears, then there are no problems, all you have to do is click on these words.
- You will have to wait patiently for some time until root rights are activated.
But not in all cases this operation is successful. After an unsuccessful attempt, you can try installing the KingRoot for PC version on your computer. I will list the action items in order:
- Log in to the website of this program on your PC and download the KingRoot installation file to your computer. Perform installation.
- After connecting your device to the system unit with a USB cable, launch KingRoot, which will automatically “see” the desired device.
- A window will appear on the smartphone display asking you to give permission to debug using a USB cable. Be sure to allow this action by clicking on “OK” - without this the process will not advance further.
- Next, in the utility window on your PC, you will need to click on “ROOT” and that’s it – superuser rights on the device will be activated.
- On some brands of phones you will need to restart - a corresponding message should appear asking you to click on “OK” for the reboot to occur.
- If a restart is not required, the long-awaited “Finish” message will appear in the application on the computer - clicking on it will end everything.
The obtained root rights will allow you to do anything with any applications. It will be possible to remove system programs in the usual way.
KingRoot has many analogues. I will list them, maybe someone will find it useful:
- Towelroot.
- Root Genius.
- WeakSauce.
- IRoot.
- Framaroot.
- Kingoapp.
- UniversalAndroot.
- Vroot.
Many of these programs can also easily provide root rights.
It is worth mentioning another way to get rid of the unwanted presence of unused applications using the Super Cleaner utility. This brainchild of the famous application developer Hawk App Studio appeared not so long ago - in 2022.
Using Super Cleaner is very simple, but first you need to download it to your device from Google Play: https://play.google.com/store/apps/details?id=com.apps.go.clean.boost.master.
- Find the section in it responsible for uninstallation.
- Those programs that can be eliminated without affecting the operation of the system will be indicated. Those that cannot be deleted will also be marked.
- Next, you need to select the required application and delete it.
There are also similar programs, the principle of using them is identical - you should find the partition with the installed software and remove everything unnecessary. These are the analogues:
- CCleaner.
- Clean My Android.
- DU Speed Booster.
- Clean Master Lite.
The latest Clean Master Lite program is also a popular cleaner for Android mobile phones. It has many useful settings for automatically and manually clearing your phone's memory. In addition, it is extremely easy to use.
- First, you need to download it from the Google Play page: https://play.google.com/store/apps/details?id=com.cleanmaster.mguard&hl=ru.
- After launching it, use the “Garbage” button, which you need to click on.
- Wait until the program determines the number of files to delete. To get a system clean of all unnecessary things, all you have to do is click on the word “Clean”.
Instructions for saving files in Android to an SD card without programs
The latest versions of the Android operating system are reliably protected from changing the type of memory for installing applications. Users may not have options to change memory and some boot managers may not work. In this case, we can only buy devices with a large amount of system memory. Mobile phone manufacturers are pushing us to do this. But there is another way to use a flash drive for your smartphone to store videos, music and applications.
Open Android Settings from the Quick Access Menu
To download applications on Android above version 6 without any programs, open the settings;
- Then click “About phone” at the very bottom; Select "About phone"
- Find the “Device Version” item in the next window and quickly tap on it 7 or more times. This is necessary to switch to developer mode; Tap the phone version 7 or more times
- Then return to the main settings window and find “Advanced settings”; Find "Advanced Settings"
- In them, find the line “For developers” and select it; Select "For Developers"
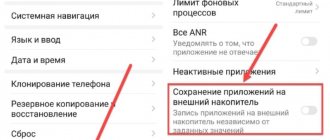
- Next, find the item “Allow saving...”. In it, you need to move the switch to the active position to enable the parameter. Make sure "SD Card Optimization" is also enabled. Enable saving data to the memory card
Now you need to use a mobile browser to download files from the network. And all the files you download will be saved in the SD card.
File manager on a smartphone
To find downloaded files, you need to open your file manager and look for them in your Downloads folder. Depending on the device and application, the folder may also be called “Download” in English.
Method No. 1. Changing the contents of the Vold.fstab file
The first of the described methods involves changing the contents of the system settings file “Vold.fstab”. After making these changes, the Android OS will consider your SD card as the internal memory of the device, but keep in mind that a number of previously installed applications may stop working.
It is important to know that this method only works on rooted devices that have an Android OS installed lower (!) than version 4.4.2. In Android OS versions 4.4.2 and higher, most likely you simply will not find the specified file.
Also keep in mind that an error in the implementation of this method (in particular, adding extra characters to the required lines) can have a tragic effect on the performance of your device. Therefore, carefully weigh the possible risks, and if, after all, you have made a decision, then proceed to implement it.
So, to implement this method, do the following:
- Launch any file manager (for example, the popular “Total Commander”);
- Go to the root of the file system;
- Find the “etc” folder there and go to it;
- Find the vold.fstab file there, tap on it, and go to its editing mode (in “Total Commander” run “Totalcmd-editor”); Go to editing mode of the “Vold.fstab” file
- This file contains many lines starting with the "#" character. You need to find lines that start not with a hash, but with the character combination “ dev_mount ”. Typically these will be two lines arranged in a column, one of them will indicate internal memory, the other will indicate external memory.
For example, these could be lines like this:
- dev_mount sdcard/storage/sdcard0 [email protected]
- dev_mount sdcard2/storage/sdcard1 auto/xxxxxx
To make the necessary changes, we need to swap the path in the specified lines, that is, simply put, instead of 0, put a 1 in the first line, and in the second, instead of 1, put a 0.
After the changes, these lines will look like:
- dev_mount sdcard/storage/sdcard1 [email protected]
Save the changes you made, and then reboot the gadget.
Another option on how to make a memory card the main one on Android:
Change the values in the required lines
Good to know: Normal Boot what is it on Android
Transferring applications to a mobile phone memory card
Like other functions in a smartphone, transferring programs has two ways of implementation:
| Built-in tools: | Using third party applications: |
| Suitable for smartphones with Android version 6 and higher. | Can be performed on any OS version. |
The first method is always a priority - we will consider it.
System programs are not transferred
. Sometimes the built-in utilities (that were in it from the store) are not system ones and can be transferred.
To do this:
- Select “Settings” in the main menu; Find your phone settings in the main menu
- Find the “Applications” item and select it; Select "Applications"
- Select the program or game from the list that you want to transfer to the SD card; Select the program to transfer from the list
- Find the “Memory” item in the settings window on your Android program and click on it; Select "Memory"
- In the next window there will be an “Edit” option. Click on it and select the memory card to transfer.
It happens that there is no button on downloaded applications. Perhaps the developer did not consider it necessary to provide us with the opportunity to transfer data. If you want to free up memory and thus increase it to install another application, try selecting others in the list. Move all programs for which the system allows you to do this.
Introduction to the problem
By the way, you should not think that only the Android operating system suffers from such a problem as a small amount of built-in memory. It is also available on iOS. These two systems constantly compete with each other. From time to time, “Windows Fawn” also intervenes in the combat, but it soon finds itself thrown out behind the tatami. What does the IOS topic cover? There are facts that invariably prove the “exposure” of this operating system to users. Initially, its code was a mystery. Nevertheless, a similar trend does occur. But the Android operating system, developed by Google specialists, is currently becoming more and more closed to potential developers with each update. This is exactly what bothers people who are so accustomed to this operating system.
Using special Android applications for export
A utility suitable for our task is Files To SD Card. This small tool (3.5 MB) is capable of quickly freeing up memory on Android devices.
Moving files in the File to SD Card app
Batch transfer of all types of files: music, photos, documents. The program allows you to create backup copies of your data. It can also work on phone models of any popular brands.
Thanks to an intuitive interface with just a few control buttons, you can quickly save any applications to an external memory card on your Android. It also has the ability to move data back to the system memory of the mobile phone or tablet.