The message “This device cannot start (Code 10)” can be found in the Windows 10 Device Manager indicating any device such as a USB flash drive, video card, sound, WiFi or network adapter. In most cases, code 10 appears when the device driver is corrupted. Let's look at how to fix error code 10 in the Windows 10 Device Manager.
Reasons for error code 10
The main reason why code 10 occurs is the timeout for a response from the connected device. That is, the system sent a request to it, but the equipment did not produce a response signal, and therefore error code 10 appears.
But there are many reasons why an error like “this device cannot start code 10” occurs. The main ones are:
- An incorrect registry entry is causing the hardware driver to not start.
- Driver failure or use of a driver that is incompatible with the current operating system.
- A conflict between several devices of the same type.
- The system spontaneously switches the equipment into energy saving mode, and then cannot start it again.
- The device is faulty.
These are the reasons why “Error Code 10” appears.
What to do if nothing helps
If none of the previous points helped, then the choice remains small. Try to completely reinstall the system, download and install all the drivers from the manufacturer there. Also try connecting another device to replace the problematic one. An old video card or something similar. If everything is fine there, then the problem probably occurs in the module itself.
In this case, without diagnosing the hardware, nothing can be said for sure. You should take the device to a service center and wait for the result. Such diagnostics are not carried out at home.
Removing erroneous entries from the registry
The first thing you should do is eliminate software errors that could cause code 10. That is, remove erroneous registry entries that indicate to the system that the hardware requires the wrong driver. Naturally, this causes the device to malfunction.
As practice shows, in 85% of cases this method helps eliminate the cause “This device cannot be started (code 10)”
It is recommended to make a backup copy of the system first. In Windows 10, this can be done using standard tools. Required:
- Open “Options” by pressing Win+I keys
- Enter “Disk creation” and select the first item.
- Follow step by step instructions
Remove the device in Device Manager and install again
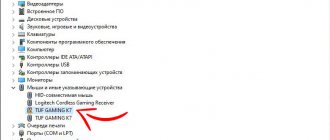
If you find error code 10, then you know how to get to the device manager. Just in case, let me remind you of a simple method. Press Win+R on your keyboard and enter devmgmt.msc in the line that appears. Click on “Ok” and the device manager will open in front of you. Now here find the section and module that are causing the failures. Right-click on it and select “Remove device.”
Now restart your computer. After startup, the system itself will detect the device and select the appropriate driver for it. If this does not happen, then there may be serious damage to the hardware or drivers responsible for communicating with the module.
The problem is that the system will install drivers that are suitable “in its opinion”. And this opinion does not always coincide with the opinion of the manufacturer. In such cases, it is better to install the necessary utilities yourself.
Reinstalling drivers
If the previous method did not fix the problem, you should try reinstalling the driver. To do this you need:
- Right-click on “Start”
- Select "Device Manager".
- Next, select the device with which problems are occurring, click on it PC and select “Update driver”.
- Next, restart your PC and check if code 10 is resolved.
Increase system memory
Follow the instructions carefully if you want to analyze the system memory and fix the problem:
- Launch Task Manager (press CTRL + SHIFT + ESC) > click the "More details" button.
- Go to the Performance tab and check how much storage space is available for use.
- Now that you have analyzed the amount of space, the next step is to add RAM to your computer.
Just make sure you're using the exact type of memory that came with your computer. If you have enough RAM slots, you can easily upgrade your system memory.
Eliminating error code 10 through the registry
- To launch the editor you need to press Win + R
- Enter regedit and click "OK".
- Next in the registry you need to follow the path: HKEY_LOCAL_MACHINE\SYSTEM\CurrentControlSet\Control\Class\{36fc9e60-c465-11cf-8056-444553540000}
- Select the “UpperFilters” item, call up the menu (right click) and select “Delete”. Do the same with the LowerFilters parameter (if available).
- If the problem occurs with an input device (for example: mouse, keyboard, tablet, printer), then a similar procedure must be performed in the folder {745a17a0-74d3-11d0-b6fe-00a0c90f57da} . That is, also remove 2 parameters.
- Then reboot the device and check if code 10 is resolved.
What does this command do? Forces the system to reinitialize the driver for the hardware. And if it is not detected in the OS, then download it automatically from the update center and install it.
If the error “This device cannot be started code 10” occurs with a flash drive, then you also need to delete 2 parameters in the folder {4d36e96a-e325-11ce-bfc1-08002be10318} (in the same path).
Introduction
When such an error occurs, the computer sees the device (for example, a network adapter) and even identifies it. But it doesn't work. And if you go to its properties through Device Manager, on the General tab you will see the message: This device cannot be started. (Code 10).
In the English version of Windows: This Device Cannot Start (Code 10).
There may be several reasons:
- error in the operation of the device or port itself;
- incorrectly installed driver;
- registry failure;
- equipment conflict.
Therefore, when a startup error occurs, you need to try to isolate the problem. And figure out exactly where the problems are: in the equipment itself, in the connection method, or in Windows settings. Then it will be easier to fix it.
In this article we will look at the most common ways to diagnose and solve the startup problem. Our step-by-step instructions with screenshots will help even inexperienced users fix problems on their own.
#1 Check the connection
Startup error code 10 may occur due to problems with the port or connection to it
Carefully inspect the device itself and the port to which you connect it. There may be physical damage.
If visually everything is normal, try the following:
- Disconnect and reconnect the equipment to the port.
- If it is connected via a cable or splitter, connect directly.
- Connect the equipment to a different port.
#2 Restart your computer
This may help if a device or port experiences a sudden failure
Or if shortly before the error occurs you:
- updated the operating system;
- made changes to the register;
- removed/installed/updated drivers or other software;
- cleaned the computer from viruses.
After all, after you have made changes to the system, the computer needs to reboot to apply the new settings.
#3 Disable other devices (physical and virtual)
Sometimes the device cannot start due to a hardware conflict
This happens more often on computers that have many external devices connected, as well as laptops in battery mode.
Disconnect other equipment for a while and the problem may go away.
If you have programs installed that create virtual drives (for example, Daemon Tools or Alcohol), they may conflict with a flash drive or external drive. Disable virtual drives or uninstall the program itself.
#4 Change your power supply
If your laptop is running in power saving mode (it can go into power saving mode automatically when running on battery power), connected gadgets may simply not have enough power.
Connect your laptop to the network. Change the settings to select the maximum performance scheme.
1 To do this, go to the system settings by pressing Win + I on the keyboard and selecting “System”
2 On the Power and Sleep tab, click More power options
3 Select Balanced or High Performance scheme
If the problem was precisely a lack of energy, the startup error will disappear and the connected equipment will work.
#5 Connect to another computer
This will help you in localizing the problem
If the equipment works on another computer, the problem is in the port or settings of your computer.
If the device cannot start on another computer , most likely the problem is with the device itself or with capricious drivers.
#6 Remove the device and install again
Open your computer's Device Manager. You can do this through Search on the taskbar by entering the phrase device manager in the search bar. Or use the Run tool: press the Win + R key combination, enter devmgmt.msc in the window that appears, click OK.
1 The dispatcher opened. In it you need to find equipment that cannot be connected. It will have an exclamation point in a yellow triangle next to it.
2 Right-click on it, select Remove device
3 Confirm the selected action in the dialog box
4 Now expand the Action menu at the top of the window, select Update hardware configuration. Or simply disconnect and reconnect the device.
We perform two actions
#7 Update or reinstall the driver
A driver is special software that is installed on your computer or laptop. It “helps” the operating system to interact with a specific model of connected equipment.
If Windows is throwing a code 10 due to driver problems, you may need to download it. It is best to search on the manufacturer’s website - this way you will be sure that you downloaded the right program and not viruses. Please note that drivers are created for specific operating systems: the one that is suitable for Windows 10 will not be suitable for Windows 7 or Windows 8.
Windows itself can search for suitable drivers on the Internet. Therefore, if you are not sure that you can find what you need, try entrusting the choice to the operating system. And only if it fails, download and install manually.
To figure out if there is a problem with your drivers and fix it, follow the instructions below.
1 Open Device Manager via Search or Run
2 Find the non-working device, right-click on it and select Properties
3 Go to the Driver tab. Select the desired action:
- Update the driver if you have never updated it or are not sure what to do,
- Roll back the driver (when the button is active) if the device stops working after the update.
4 Next, select Automatically search for updated drivers (Windows itself will search for a suitable one on the Internet) or Search for drivers on this computer (if you downloaded the driver yourself and it is stored on your computer)
5 Then follow the operating system prompts. They are clear enough and will not allow you to make mistakes
After the correct driver is installed, you may need to restart your computer.
#8 Clean your computer and check the registry
Viruses on the computer and connected device can interfere with the operation of the operating system
Make sure you don't have any. If an antivirus is not installed, use one of those described in this article.
Problems with starting devices can also occur when the integrity of the registry is compromised.
The registry is the base of operating system settings. It changes constantly: when changing parameters, installing and uninstalling programs. Accordingly, when infected with viruses or simply actively using the computer, failures may occur and accumulate in it.
Therefore, it is important to regularly not only check for viruses, but also clean the registry. One of the most popular and convenient applications for this is CCleaner. But you can use others - Advanced SystemCare, Wise Disk Cleaner, AusLogics Registry Cleaner. To learn more about them, read this article.
#9 Update (uninstall updates) Windows
When updating the operating system, support for new components is added, compatibility with old ones is improved, and defects in previous versions are corrected.
Therefore, if some problems occur, including device startup errors, the update may work.
1 Open Windows Settings by pressing the Win + I key combination on your keyboard. Select Update & Security
2 The Windows Update tab displays information about which updates are installed. If the Check for updates or Resume updates button is active, click it. The system will check, download and install the latest update files
But it also happens the other way around - the update may be unfinished or simply installed incorrectly. If you suspect that the device startup error appeared after installing the latest updates, then, on the contrary, remove them.
3 You can do this right away: go to the Update History, then click the Remove updates button
4 In the window that opens, find the update for the date after which the error supposedly occurred. Click on it and click the Delete button (above the list). Confirm the action
After removing all suspicious updates, restart your computer.
No. 10 Rename the device (assign a different letter)
This method is useful for storage devices, in particular flash drives.
When a new drive is connected to the system, it is assigned a drive letter, most often D, E, F. But sometimes errors occur: two devices are assigned the same letter or a letter is not assigned at all.
So try assigning a new letter manually.
1 Press the Win + R key combination on your keyboard. The Run window will open - enter the command diskmgmt.msc in the Open field, click OK
2 In the Disk Management window, find the drive and right-click on it. Select Change drive letter or drive path from the context menu
Another window will open, click Edit. In the next window, assign a different letter to your drive, click OK.
Update your system
A simple system update often helps to get rid of “Error code 10”. After all, Windows also checks for new versions of drivers for all equipment during this process. And if they exist, it installs.
- You will need to open Settings
- Go to "Update"
- Select "Check Availability".
- If there are new ones, install them.
After this, be sure to restart the computer (new driver versions will be used only after this).
Reinstall, update, or roll back your drivers
If the previous point did not help, then you should turn to changing drivers. Ten likes to install exactly those programs that Microsoft considers suitable. These drivers do not always coincide with those recommended by the manufacturer for a given version of the system. Sometimes drivers for previous versions of systems are even better than the recommended ones.
Before downloading everything manually, try rolling back the drivers to the previous version. The error may lie in an update that began to conflict with some programs or hardware. Go to Device Manager, find the problematic module there and right-click on it. In the section that appears, select “Properties”, and in the new window go to the “Driver” tab.
First, click on “rollback”, confirm all actions and wait until the operation is completed. Restart your computer and check if the device starts working correctly. If it doesn’t help, then enter the name of the device into Google and go there to the manufacturer’s website. Find the required module there and download the driver that is suitable for your system. You can even take it from previous versions, for example, from 8.1 for tens. Just follow the bit depth.
After downloading, open the task manager again and go to the properties of the faulty module. Select the Update button on the Drivers tab. A window will open in which select “Find drivers on this computer.” Click on the “Browse” button and specify the path to the unpacked archive. If you immediately downloaded the installation file from the manufacturer’s website, then try first running it as an administrator, sometimes this is enough.
It is better to carry out this operation not only with the problematic device, but also with the others. The problem may be that some other driver conflicts with the current module. So download and install all possible drivers.
Disable Fast Startup
All editions of Windows have the Plug'n'Play function. It is thanks to it that any connected device is automatically recognized and immediately put into operation. But sometimes it causes conflicts in the operation of the equipment, which ends in error “code 10”.
Most often, disabling this function allows you to fix a problem when the device stops working normally after the PC exits sleep mode (or hibernation).
How to disable fast startup? Necessary:
- Open Settings by pressing Win + I
- Select "System"
- Next, go to “Power” and select “Advanced options”.
- Then you need to select “Button actions” in the left column.
- Click on “Change settings that are not available.”
- Remove o, click “Save”.
- Next, you need to reconnect the “problem” device, the operation of which is causing problems.
Method number 1. Restart
Often, incredibly simple methods help in solving a problem, namely:
- Remove the flash drive or other device from the USB port and reinsert it. Often minor system conflicts prevent the drive from being easily detected by the PC. This is especially true for Windows 7 and other operating systems older than G8.
- Insert the storage medium into another port. It also happens that this particular port has stopped working correctly. This does not necessarily mean that there are any serious problems with it. It happens. After a while, try using that port again.
Also, be sure to check the flash drive itself on another computer - perhaps this is the problem and then it is best to simply format it to return it to functionality.
Did it help?
Most often this helps. If not, use the following methods.
Turn off USB port power saving
Very often, the “Code 10” error occurs due to the port power saving function. It is enabled by default in laptops in order to increase battery life. For example, if the mouse is not used for more than 10–20 minutes, the system switches it to energy saving mode. But after this, it may not be possible to start it again until the OS is rebooted.
Accordingly, if equipment connected via USB does not work correctly, then it is recommended to simply disable energy saving. To do this you need:
- Go to "Options"
- Next “System”
- Then select “Power” and select “Advanced options”.
- Select "Scheme Settings".
- Select "Advanced options".
- In the “USB Options” section, select “Prohibited” and click OK.
- Next, it is recommended to restart your PC.
After this procedure, the “Code 10” error should disappear
Change the USB connector
This advice applies to devices that are connected via USB. The first thing to do in this case is to disconnect the problematic device from the extension cord or splitter. The problem may be their own. Once you've done this, try other ports for your device. It is better to use those that are on the motherboard and located at the back of the computer.
Sometimes the situation is the opposite. Due to excessive load, it is the connectors on the motherboard that burn out, but the front ports, which are connected to the motherboard in a different way, remain working. Try going through all the options, while disabling all unnecessary devices.
Disable device power saving
Also, the device itself can automatically switch to energy-saving mode, which also causes error 10 (as there is a conflict with the system energy-saving parameters). And to disable this, you need:
- Right click on “Start” and select “Device Manager”
- Call the context menu on the problematic equipment and select “Properties”.
- Go to the “Power Management” section and select “Disable Power Saving”, click OK.
USB problem
On computers and laptops, a problem often arises with the device that is connected to the USB port. First of all, try simply reconnecting the wire of the device - perhaps the contact has simply come loose. If this does not help, then you can try reconnecting the device to another free port. For example, they do not work with USB 3.0 (and vice versa 2.0), so you can use a USB of a different generation.
You can try uninstalling and reinstalling the drivers for the USB controllers, but I still recommend doing a full installation of the drivers on the motherboard. I left a link to the instructions just above.
Setting up the power supply
If the problem occurs exclusively with the Wi-Fi adapter and USB, but it does not occur so often, then we need to look at the power settings.
- Go to “Control Panel” – “Power Options”.
- Opposite the active scheme, click on the link to go to the settings.
- Click "Change advanced power settings."
- Set the settings as in the picture below. After that, click “Apply” and reboot. If this does not help, then try installing a scheme that is aimed at maximum performance.

