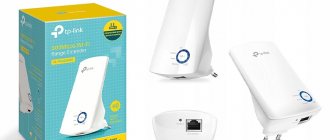
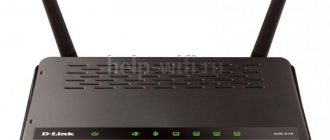
Owners of large apartments and houses are faced with the problem of poor signal in rooms that are far from the router. To solve this problem, you can install a Wi-Fi amplifier that will transmit the signal from the main router. The TP-Link Wi-Fi signal amplifier is capable of relaying a wireless network, eliminating the problem of poor coverage in a room that is located far from the router.
TP-Link is considered one of the best repeaters
How to install a TP-Link wifi repeater?
The installation diagram for a TP-Link WiFi repeater to boost the signal from the router is very simple.
- First, we determine in which room the signal on the laptop is weakest or non-existent.
- After we have found out where we need to strengthen the wireless wifi signal, we find the place where the network receives, but not so well - by one or two divisions on the phone.
- This is where we put the repeater - its operating area is circular, which means that it will pick up the signal from the wifi router and transmit it further.
Possible problems and solutions
D-Link DIR-300 - setting up a WiFi router
If the user's Internet does not work despite setting up the device, the following measures must be taken:
- in the router settings you can try changing the network channel;
- In order to be able to amplify the signal, it is necessary to install the repeater in places not remote from the router. Problems with the operation of the amplifier most often arise due to interference or a weak Wi-Fi signal;
- update the signal amplifier firmware;
- The repeater cannot connect to the router. To do this, you will need to return the devices to factory settings and try to connect them again;
- If you have problems setting up via WPS, then you need to try to pair with the required wireless network through the control panel.
Restoring TP-Link to factory settings
There are several ways to connect the amplifier to the router. If you strictly follow the described instructions, there should be no difficulties in implementation. Ordinary users can cope with the task; it is not necessary to seek help from service centers. But in some repeaters from TP-Link the “WPS” and “Reset” buttons are integrated, this must be taken into account, otherwise during setup a general reset to factory configurations may be carried out erroneously.
How to connect a WiFi signal amplifier TP-Link Extender
There are three ways to connect and configure a TP-Link wifi repeater:
- Through automatic connection of the repeater via WPS
- Via WiFi using a smartphone, tablet or laptop
- Through a computer connected to it via twisted pair
Automatic connection with WPS button
Like most modern models of wireless network devices, the TP-Link TL-WA850RE wifi amplifier supports automatic tuning to the signal of an existing access point.
To do this, the router must also have such a function - the “WPS” button is responsible for turning it on. On older TP-LINK devices it was called “QSS”.
We simultaneously press these keys on the router and amplifier, after which it should pick up wifi and start distributing it.
Setting up a TP-Link repeater from a smartphone
I prefer to keep the whole process under control, so I never use the automatic method of setting up the repeater, but do everything manually. To connect the TP-Link Extender signal amplifier from your phone or tablet:
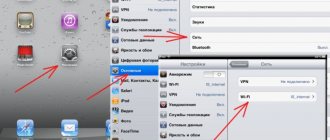
- turn on WiFi on your smartphone,
- press the central button on the device,
- and on the phone we find in the list of available networks for connection a network called TP-LINK_Extender_7320BA - this is the SSID that is programmed into the device by default.
- Let's connect to it. In my case, a password is not needed, but if your model requires you to enter an authorization key, it will be indicated on a sticker on the device body.
Immediately after the connection, we will be redirected to the authorization page in the admin panel for the initial installation - a window will open to enter your login and password. By default in this model it is admin/admin - yours may have others, so look either at the instructions or at the sticker on the bottom of the repeater - it usually contains all the access data.
We will find out what is hidden behind this authorization page in the next section, where we will go into the settings from a desktop computer.
Setting up a TP-Link wifi repeater from a computer or laptop via cable
This configuration option can also be implemented in two ways
- using the installation disk that comes with the wifi repeater,
- or via the web interface.
The second one is closer to me, so we’ll take it as the main one in this instruction.
Wireless connection
You can also configure and connect the repeater via a wireless network. To do this, you need to connect your computer or laptop to the amplifier.
- We disconnect the PC from our Wi-Fi network and connect it to the repeater.
- Open your favorite browser and go to the amplifier settings (I hope you remember this by heart).
- Now everything follows the well-known path - connect to the main Wi-Fi network, enter the password, give a name to the signal amplifier, click FINISH.
Watch the review, configuration and testing of the Tp-Link TL-WA855RE V3 (EU) model in the following video:
How many TP-Link repeaters can be connected to the router at the same time?
The number of wireless signal amplifiers that can be simultaneously connected to a router via Wi-Fi is not strictly regulated. However, in practice, installing more than 2-3 repeaters is impractical.
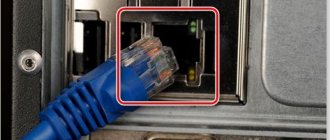
So, if you don’t have a smartphone at hand, then we connect the computer to the repeater directly using a twisted pair cable - the “Ethernet” light on the device will blink.
What is your opinion: is WiFi harmful?
Yes
22.91%
No
77.09%
Voted: 36455
Next, go to your computer in the following chain: “Control Panel > Network and Internet > Network and Sharing Center > Change adapter settings”
Here we need to select “Local Area Connection”. Right-click on it and select “Properties”. Here, as always, we are interested in the “Protocol version 4 (TCP/IPv4) > Properties” item.
If you already have a local network configured through your router, then write them all down on paper and save them, but for now, set all the checkboxes to “Automatic”:
We save and go to the browser at https://tplinkextender.net, which we also recognized from the magic sticker on the case. The already familiar authorization page will open, where we enter the login and password “admin”.
We get to the admin panel. Everything is very easy here - follow the step-by-step guide, entering the necessary data.
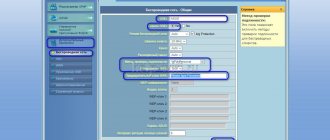
First, select the country, after which the device begins scanning available networks. If your wifi is found, select it. In the same case, if the security settings on the router hide the SSID, then you can check the box “Specify the SSID and MAC address manually.” And click the “Next” button.
In the next step, we need to select the encryption type of your existing network (set in the router admin panel) and enter the password for your Wi-Fi.
You can also specify whether the repeater will clone your network name (SSID) or whether it will have its own name, which you will set manually. In this case, the local network will remain the same, that is, your main one may be called Network 1, and the second Network 2. But in essence it will be the same thing, and no matter which of them you connect the PC to, it will see other devices, connected to the network.
And finally, in the last step we see our entire configuration, after which we apply it by clicking on the “Finish” button. After rebooting, the wifi repeater will begin distributing the Internet from your router, thereby increasing the wireless signal reception range.
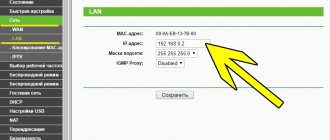
Also, after a quick configuration, the left menu will become available, in which you can configure the repeater in more detail - change the encryption key, disable the DCHP server on it, manually set the IP address, enable MAC filtering, update the firmware, view statistics, etc.
That's it. Now you can return the network settings on your computer to their original settings and disconnect the cable that connected it to the repeater. By the way, if you noticed, the PC also began to receive the Internet - via a cable from the repeater, that is, it can also work in client mode, receiving the Internet via wifi and distributing it via twisted pair to the computer. Now even in the farthest corner you will have stable reception!
I’ll tell you another little secret - if you have a second router lying around somewhere, you can use it as a repeater, and not buy a separate repeater itself. More details about this use in another article.
Repeater fine tuning
We are gradually moving on to more precise configuration of the access point. Once all the steps above have been completed, you can move on to a more user-friendly setup.
To do this, it is better to open “Wireless Network” - there you can change the network name, password, repeater operating mode, region, network name, MAC address and channel width. Once debugging has been completed, you can safely click “Save”.
If you want to set protection in the form of a password, then go to the “Wireless Protection” tab, and there we select the level, protection version, password and data encryption type. Those who might benefit from MAC address filtering can take advantage of this feature, but most other home setups won't be of much use.
Just like a Wi-Fi router, you can see who has connected to your network. To see this, do the following:
- Open the repeater's web interface via a direct connection to it (Ethernet cable).
- Open the “Network” column.
- In the subsections of the “Network” item, find the line “List of DHCP clients” and open it. The window that opens will display everyone who has connected to the repeater and the data of these users - IP address, MAC address, and how long the user has been connected.
Does the equipment support this mode?
You cannot use any router as a repeater, since not all of them support this function.
The potential use of a router, that is, a router, as a repeater is laid down by the manufacturer when creating the firmware for the equipment. Therefore, you can find out the corresponding capabilities in the instructions and description of the device. If this mode is fundamentally important, then it is better to check its availability before purchasing.
Interestingly, most devices from brands such as Zyxel and Asus initially had this function. But until relatively recently, some of the most popular TP-Link brands could only connect to bridge mode, and the repeater was unavailable. Now the situation has changed.
In some places the setup takes longer, in other situations everything is done much faster. The main thing is that the equipment supports the desired mode.