Hi all! What is the most important and expensive thing about the iPhone besides the phone itself? Absolutely right - the information that is stored in it. And if you dig a little deeper... what is the most valuable information? For many, the correct answer will be a notebook and, accordingly, telephone numbers. Losing your saved contacts is scary! Therefore, it is highly recommended to save them periodically, so that at one “wonderful” moment it will not be excruciatingly painful from the loss of everything at once.
Moreover, copying an iPhone phone book to a computer is a fairly simple task, if, of course, you know which way to start doing it. Moreover, there are a large number of ways to transfer contacts - for every taste and skill. Choose any! And now is the time to understand these methods in more detail...
Let's go! :)
Backup copy
The most basic way is because when you back up on your computer, a complete copy of the data from the iPhone is saved. Which of course includes contacts. You can perform this operation using iTunes (complete and detailed installation instructions). This is an excellent method if you need (now or in the future) to transfer contacts to a new iPhone. Restore the backup and that's it.
But for those who need to store only phone numbers on their PC, this option is naturally not suitable:
- It takes up a lot of space - all the information is stored.
- You won't be able to edit them.
- You cannot extract contacts separately from the copy.
How to get numbers from iCloud?
Log into your Apple ID on your iPhone or iPad, go to the iCloud section and activate the slider next to “Contacts”. To transfer all files to your Android smartphone, open iCoud in your browser and log in using your Apple ID. Go to the contacts section and select the required numbers or all entries at once.
Interesting materials:
How to launch Google Play on Maze? How to launch XBox 360? How to run an ISO image from a flash drive? How to run command prompt with administrator rights? How to launch? How to run from a flash drive? How to start the RDP service? How to start a Bosch Max 5 washing machine? How to make money on Instagram from subscribers? How to make money on Instagram?
iCloud
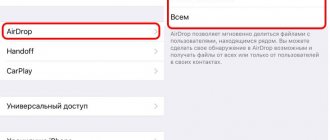
First, we enable synchronization of contacts on the iPhone with the cloud. To do this, go to settings - iCloud. Specify the parameters of your Apple ID account (if you haven’t done so before) and move the slider next to the “contacts” menu item.
We wait some time for the phone book to go to the “cloud”. After that, on your computer in any browser, open the address www.iCloud.com, enter your Apple ID and see all your numbers.
Here you can download them to your computer. For this:
- Select the required positions; if you need all of them, press Ctrl+A.
- In the lower left corner, click on the gear icon - vCard export.
I draw your attention to the fact that if nothing happens when you click on export, you need to change your browser. There are problems in chrome...
Now the entire list of contacts from the iPhone will be transferred to the computer in vCard format. What it is? This is a universal telephone directory storage format that is supported by most devices and programs. In fact, you can continue to work with it - transfer it to your Android smartphone, open it in Outlook, or simply store it - all your notes will be inside and will not be lost.
Export contacts
The following instructions apply to all iPhone and iPad models. There are several ways to collect all your existing contacts or some of them into one file. The resulting file must be in CSV or vCard (.vcf) format so that it can later be easily opened on any device.
Via iTunes
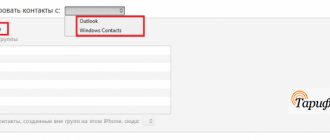
This method is suitable for those who want to transfer contacts to a computer. For example, they can be saved in Outlook or Windows Contact. But at the same time, there is the opportunity to create a file from which in the future it will be possible to get the necessary contacts using another third-party program.
Creating a Backup in iTunes
For this option, you will need the iTunes application installed on your computer.
- Connect your device to your computer via a USB cable and wait for iTunes to sync with your device. In the program, go to the device information, and then to the “Information” subsection. Open the “Information” section
- Check the box next to “Synchronize contacts with” and indicate what exactly to synchronize contacts with.
Activate the “Synchronize contacts with” function - If you want to get a file with contacts, then after activating synchronization, return to the “Browse” item and click on the “Create a backup” button. After the process is complete, you will receive a backup copy of your entire device, including your contacts. You can get the numbers you need, for example, through the third-party program iBackupbot. The file itself will be stored on your computer, but you can copy it to the desired location like any other file.
Create a backup copy of the device
Retrieving contacts from a backup
- To obtain contacts from a copy of the device, you can use any program designed for this. Let's take the trial version of iBackupbot as an example. After opening the application, use the section tree to select User Information Manager. Go to the User Information Manager section
- Click on the Export button and select one of the available formats. Usually contacts are saved in vCard, but you can use both Excel and CSV.
Select the contacts and click on the Export button
Via iCloud
You can also receive a file with contacts using the device itself, for example, through the iCloud service:
- Expand any browser and open the official iCloud website in it, log in and expand the “Contacts” tab.
Open the Contacts application via the iCloud website - Select one, several or all contacts at once, and then expand the settings menu by clicking on the gear. Select the "Export to vCard" function. After copying the files is complete, you will receive a file with the previously selected contacts.
Select the “Export contacts” function
Via Gmail
To use this method, you must log into Gmail with an existing account or create a new account.
Adding contacts to your Gmail account
Follow these steps to copy contacts from your device to your Gmail account:
- Go to the device settings menu. Open the Settings application
- Select "Mail, Addresses, Calendars".
Open the section “Mail, addresses, calendars” - Go to “Add a new account” and log in to your Gmail account. Using the “Add Account” function
- Once the account is added, you can choose what exactly should be synchronized. One of the items is contacts, activate it. After some time, if there is Internet access on the device, the contacts will be copied automatically. Enable account synchronization via Gmail
Retrieving contacts from a Gmail account
Once your contacts are added to your Gmail account, you can copy them to a file from there.
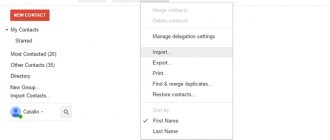
- Log in to your Gmail account through any browser, click on the Gmail logo and select the “Contacts” tab.
Open the “Contacts” section on the gmail website - Mark all or only the necessary contacts, expand the “More” block on the left side of the screen and select the “Export” function. The system will prompt you to specify the path where the contact file will be created on your computer.
Open the “Export” section on the gmail website
Via iFanBox
iFanBox is a third-party computer program, suitable for both Windows and Mac OS. To use it, there are two conditions: the device must be jailbroken, and iTunes must be installed on the computer. If these two parameters are met, you can start copying contacts:
- Connect the device and computer using a USB cable and wait for synchronization. Launch iFanBox. Using the folder and partition tree on the left side of the program window, go to the Raw File System/var/mobile/Library/AdressBook directory.
Go to the path var/mobile/Library/AdressBook - The final folder contains all contacts. Copy the required numbers to any folder on your computer. The resulting contact files can now be used for your purposes.
Copy contacts to your computer
Via iTools
iTools is a free program for your computer, which you can download from the developer’s official website.
- Connect the device to the computer via a USB cable and launch the application. Go to the Information menu.
Go to the Information section - Select the Contacts subsection and indicate which contacts should be copied. Click on the Export button and select one of the possible formats - CSV or vCard. It is also possible to transfer contacts directly to Outlook or Gmail.
Click on the Export button and select the format
Via app for iPhone and iPad
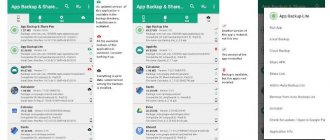
You can create a file with contacts directly from your device, without using a computer and standard services. The only thing you need is the My Contacts Backup app. You can download it from the App Store for free.
- Open the program and click on the Backup button.
Click on the Backup button - Wait until diagnostics and copying are completed.
We wait until the scanning of contacts is completed - Choose from two possible formats: CSV or vCard. Send the resulting file to your email by clicking the “Finish” button. If it has not been specified in advance, the system will prompt you to register it.
Specify one of the possible formats - In the application settings, you can specify the address where the received files will be sent, and configure the format parameters and the program itself.
iTunes
In addition to creating a backup, iTunes can synchronize your phone book with your computer. To be more precise, with two programs - Outlook and Windows Contacts. To do this, you need to have the latest version of iTunes installed and one of the programs listed above, plus do the following steps.
- Connect iPhone to PC and launch iTunes.
- In the upper left corner we see an iPhone or iPad icon - depending on what you connected. Click on it.
- Next, select the information - check the box next to synchronize contacts with... and indicate with what - Outlook or Windows Contacts. Click apply.
Please note that if this item is not present, then you need to disable uploading phone numbers to iCloud. How to do this is written a little higher, in the previous section.
Using a USB flash drive for iPhone
The second method that I would recommend to everyone is to back up your contacts using an iPhone flash drive. If you don’t know what kind of thing this “flash drive for iPhone” is, I advise you to familiarize yourself by reading the article at the link below:
- The ideal flash drive for iPhone - technologies from the future.
Naturally, you must first buy this flash drive, which means that if you don’t have it now, then you automatically move on to the next method.
But if you do get hold of this miracle of technology, watch and be amazed at how to transfer contacts from iPhone to iPhone with literally one movement of your hand.
STEP 1 - So... we need to have an iPhone with contacts, as well as a special flash drive with a Lightning connector. We insert the flash drive into the iPhone and install the companion application from the AppStore.
In my case, the manufacturer of the flash drive is Ugreen , which means the companion application for it is GeenDisk . You will be automatically redirected to the AppStore after you insert the USB flash drive into your phone.
STEP 2 - Launch the GreenDisk and go to the Settings section.
STEP 3 - Click on “ Back up Contacts ” and wait a couple of seconds
STEP 4 - Now insert the USB flash drive into the new iPhone. Here you also need to install the GreenDisk application.
STEP 5 - Again go to Settings , but now select the “ Restore Contacts ” item.
This is all! This is how contacts are transferred between any iOS devices in two clicks. In this case, old contacts will not be replaced and will remain on your device.
Now let's look at the case when you have neither access to iCloud nor the money to buy a flash drive. Both are very bad! Do something to get out of this state! In the meantime, I propose a method for very advanced cases.
Transfer and save contacts to PC using third-party programs
The most common are iFunbox and CopyTrans. The first is completely free and more functional - it allows you to work not only with the phone book, but also with other files. This requires jailbreak.
And the second is exclusively “tailored” to working with contacts - saving, transferring to other devices, backups, plus the interface is easier to use and more and more clear and visual. Although there are also disadvantages - a limitation on the number of free operations. But you don't need to hack the device.
It’s up to you to choose, I’ll write briefly about both. By the way, to use these programs you will still need iTunes installed.
iFunbox
Download and install, it is better to download from the official website. Here is the link. I won’t tell you too much, because if you were able to jailbreak, then you’ll figure it out without any problems.
In the main window on the left you can immediately see the file structure of your iPhone. We need a folder called addressbook. It is located at /var/library. This contains all the information about your contacts. We just download them to our computer.
If necessary, you can always perform the operation in the opposite direction and thereby return the phone book entries to the iPhone.
CopyTrans
Link to download the program. After downloading and launching, the Control Center opens - which offers to install one of the utilities produced by the company, each of them is designed for a specific task - maybe you will find something else useful for yourself? But today we need CopyTrans, so we select it.
In the main window, everything is quite simple - there is a list of phone numbers that are on your iPhone, you just need to mark the necessary ones and click at the top - export the selected one.
We choose where exactly to export (you can not only to a computer, but also to smartphones - Android, Windows, even Blackberry!) and that’s it! We keep, cherish and cherish :)
Saving contacts
If you accidentally deleted an important contact, disconnect your phone from the Internet to prevent synchronization from deleting it from the cloud storage as well. Go to iCloud.com and make sure the recording was saved. You can transfer it from the cloud storage to another device.
Saving on Mac
If you have a Mac OS computer at hand, you can sync data from iCloud with it. It is important that the phone remains disconnected from the Internet, otherwise the contact will be deleted.
- Go to OS X System Preferences.
- Open the "iCloud" section. Enter your Apple ID information to sign in.
- Launch the Address Book or Contacts application (depending on the system version). Inside you will see all the contacts that you managed to synchronize with iCloud.
If you are unable to synchronize your data, return to the iCloud section in system settings and make sure there is a checkmark next to Contacts.
iCloud content
To save phone book entries as a separate file, select them, expand the "File" menu and select "Export". Save your data as a vCard file to always have a backup on hand.
Export from iCloud
Windows does not have pre-installed programs for working with Apple services, so to transfer contacts, you can use iCloud.com.
- Open iCloud.com in your browser and sign in using your Apple ID.
- Go to the "Contacts" section. Select the entries you want to transfer to your computer or other storage device.
- Click on the gear in the bottom corner and select "Export vCard".
export contacts
The saved file can later be uploaded back to cloud storage and synchronized with your phone.
Long and tedious way
There is another option. You can also send contacts to your PC one entry at a time using email (don’t forget to set everything up correctly before using it) - to transfer a contact, open the desired first and last name and select send via Mail.
But it won’t be possible to transfer everything en masse, so if the phone book is large, then it is better to use one of the above.
A little advice - perform the operations indicated in the article periodically, even when this is not particularly necessary. After all, at one “wonderful” moment, the iPhone may refuse to turn on or charge, and if the problem is serious enough, then the service center will not spare the phone’s memory and will erase everything. Including precious numbers.
PS Did one of the methods help? Like it"! Nothing succeeded? Write in the comments - we’ll figure it out and try to solve the problem together!
Create a copy of your contacts using email
For those who have not set up iCloud or do not want to do so, using email is the best option. The first thing you need to do is make a backup contact file. You can do this with a ton of free programs from the AppStore. One of the most popular of these is Easy Backup, which can be installed on iOS 9 and newer versions. And through it you can also immediately send an email with a phone book file.
So, after launching it you will need:
- grant permissions (access to contacts, storage, etc.);
- go to the “Contacts” tab;
- select “Create a backup”;
- select the backup format VCF (vCard);
- wait for the operation to complete;
- go to the main tab of the application, open “My backups”;
- select “Send by e-mail”;
- indicate your email address, then add the newly created backup file to the letter;
- wait for the message to be sent.
In the future, on your PC, just open the letter sent to your e-mail and save the backup file (or immediately add it to your contact list in Windows, MacOS). By the way, in the same way you can save a copy of the phone book on another phone or upload it to Google Contacts - this will be convenient if the user decides to switch to using Android smartphones.