Safari is the default browser on Mac computers. It's a browser that works great, and if you'd rather use your own software instead of downloading third-party browsers, we've got it. However, unlike Edge, Safari doesn't have an easy built-in tool for taking full screenshots. We're not sure if Apple ever plans to introduce this feature in a simpler way, but don't worry, if you're interested in capturing full-screen screenshots, there are ways around this issue that we'll cover in the guide. below, so read on to find out.
Full Screen Capture
Image capture is performed in several stages.
- Display the required image on the display.
- Users are advised to temporarily disable desktop helper widgets.
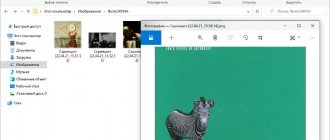
- By pressing the “Shift”, “Command” and “3” buttons, the Mac saves the finished image in PNG format. The fresh screenshot will move to your desktop.
If you have two or more monitors combined into one, the computer will save parts of the image from each display as a separate file. New pictures can be found on the desktop.
Additional buttons and features
If, along with any of the above combinations, you additionally hold down the Control button, the screenshot will be placed on the clipboard, and the file will not be created on the desktop.
To paste the image in the desired location (in most cases this will be a graphics or text editor), press Command + V.
While selecting an area of the screen (after the combination Command + Shift + 4), you can hold down the following function keys:
- Spacebar - Freezes the size of the selection rectangle and allows you to move it around the screen.
- Shift - blocks the selection rectangle from stretching in only one direction (vertically or horizontally).
- Option - allows you to stretch the selection rectangle from the center (in all directions at the same time).
How to take a picture of a window
Photographing an individual panel or tab is done in a similar way:
- The first stage is preparing the required application window.
- Press the key combinations “Shift”, “Command” and “3”, then immediately press “Space”.
You should pay attention to the cursor - the icon should transform into an icon with a camera.
- Place the pointer over the desired window.
- The contents of the window will be highlighted in blue.
A screenshot on a macbook is saved after a single left click.
How to take a screenshot of an entire page on your phone?
Press the power and volume down buttons simultaneously - a standard combination of buttons for taking a screenshot. A screenshot menu will appear at the bottom of the screen - look for the arrow button here. Press and hold the button and you will see the screen begin to scroll.
Interesting materials:
How to find where a relative is buried? How to find where a person is registered? How to find where my grandfather fought? How to find where he is buried? How to find geographic longitude and latitude? How to find geographic latitude? How to find GIF in telegram? How to find the hypotenuse if the leg is known? How to find the hypotenuse of an isosceles triangle? How to find the grammatical basis of a sentence?
Screenshot of the selected area
Highlighting a small area of a window or full-screen application is a useful feature launched with a simple button combination.
- The desktop is prepared or the required program is launched in windowed/full screen mode.
- Briefly holding the Command, Shift, and 4 keys will change the cursor icon.
- Using the “Sight”, you need to select the required area of the display by holding down the left mouse button.
- Release the pointer button.
Change the folder where your Mac saves screenshots
As we mentioned earlier, by default, all screenshots on a Mac will be saved to your desktop. The saving format will always be .png, and its name will be written in the format: “Screenshot year-month-day at time.”
However, this is not always convenient. You can easily change the location where all your screenshots will be saved. For example, we save all screenshots immediately to an iCloud folder, so they are always and immediately available on all our devices.
In older versions of the system, this could only be done through the terminal. In the new ones everything is much simpler. Press the key combination Shift + Command+ 5 . In the Save , you can select a new default location.
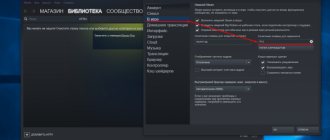
You can choose one of the proposed options, or click on “Other location” and select your own.
Where to save OS X screenshots on your laptop
By default, snapshots are placed in the root directory of the desktop. This order causes a lot of inconvenience, so it is recommended to change the final path of moving the screens. To do this, users:
- Create a directory to save Mac OS screenshots.
- Launch OS X terminal.
- Enter the command “defaults write com.apple.screencapture location {directory location with future screenshots}”.
- Press "Enter".
- Then enter the additional command {killall SystemUIServer}, then click “Enter”.
- Close the terminal window.
The pictures taken will be automatically saved in the specified folder.
Using the command system, users are given the opportunity to replace the standard screenshot name “Screenshot” with their own. This technique is performed as follows:
- Launch the terminal in normal mode.
- Enter the line “defaultswrite com.apple.screencapture name {preferred name}”.
- Next comes the final command {killallSystemUIServer}.
- Close the terminal.
The described methods also apply to iMac, MacBook Air.
Screenshot thumbnails
Starting with macOS 10.14 Mojave, we offer a redesigned screenshot and screen recording option. It has become simpler and more flexible, and the editing tools have been improved.
When you take a screenshot, a thumbnail appears momentarily in the lower right corner of the screen. It allows you to edit the image before the system saves the file in .png format.
You can click on a thumbnail to crop, rotate, write an annotation, or share a screenshot. You can drag and drop the thumbnail into an image editing application, email, or instant messenger.
Annotation of screenshots
Click on the thumbnail and the screenshot will open in Markup as a preview. Here you can type text, draw characters, sign, crop and rotate images and PDF documents.
This way you can quickly sign an image before sending it to someone.
Thumbnail menu
If you press the Ctrl button and click on the thumbnail, a small menu will open. There are commands here to save the screenshot to your desktop, Documents folder, or clipboard.
Taking a screenshot to the clipboard
Users can leave a photo of the display in temporary storage. A similar principle works on Windows computers. To do this you need:
- Display the required image on the screen.
- Press and hold the “Command”, “Shift”, “Control” keys and the “3” button located on the top panel.
- The entire display image will be placed in a temporary memory buffer.
- The user will only have to open any text or graphics editor, then use the “Insert” command. Having placed the screenshot in the working field of the program, you can begin editing and saving the final file.
It is possible to take a screenshot on Mac OS X and transfer it to the clipboard using another tool - partial selection.
- Having finished selecting the displayed image, press the “Command”, “Shift”, “Control” buttons and the “4” button.
- Using the selection tool, adjust the area of the future screenshot.
- The image is moved to the buffer automatically.
There is an algorithm for creating a window screenshot:
- Prepare the window of the desired application, adjust the size.
- Press "Command", "Shift", "Control" and the "2" button, take a screenshot.
- Open any editor.
- Insert a screenshot from temporary memory.
Using TechSmith's Snagit Desktop Tool
If you don't mind paying for software, then perhaps TechSmith's Snagit could be the end all be all of your screenshot needs. This is because Snagit will not only work with Safari but also on your Mac, so in addition to capturing websites, you can use the Snagit tool to capture other screenshots, such as from apps, games, etc.
- Download and install Snagit
- Launch Snagit and click the All-In-One tab on the left.
- Click the "Capture" button
- Select the area of the website you want to capture and click the "Start Panoramic Capture" button.
- Click Start and start scrolling down the website and then click Stop.
Keep in mind that Snagit is not free. There is a free trial that you can check out to make sure it's what you want, but once the trial is complete you'll have to pay $50 for a single-user license. It's expensive, but if you think you can get your money's worth, why not?
Grab Utility Program
The built-in Screenshot utility greatly simplifies the process of recording a screenshot. Unlike the techniques used on Windows, taking a screenshot on a Mac is much easier.
- Launch the application. Path to the program: Finder – Programs – Grab Utility. An alternative option is to use the search engine Lanchpad or Spotlight.
- The described program did not receive its own interface, so you can take a screenshot on a Macbook using the hotkey combinations “Command”, “Shift” + a specific letter on the keyboard:
- “A” – used to capture an arbitrary area using the cursor;
- “W” – activates the function of saving a screenshot of the active window of the graphical shell;
- “Z” – a snapshot of the entire screen with a 10-second delay, without a timer – a separate combination of “Command” + “Z”.
- After clicking the above combinations, the OS will display a notification about the successful creation of the image. By clicking the mouse anywhere outside the dialog box, you can set the path where the image will be saved.
- The Grab Utility program will automatically open the resulting screenshot for quick editing.
Using the Awesome Screenshot extension for Safari
If none of the above options sound appealing to you, you might be interested to know that you can use a browser extension for Safari called Awesome Screenshot, which makes the whole process a lot easier.
- Download and install the Awesome Screenshot Extension
- After installing the extension, go to the website you want to record.
- Click the extension icon and select Capture Full Page.
- You can now edit the screenshot if you wish.
- When you're ready to save it, click the download icon and it will be saved to your computer.
Third party utilities
Photos of the display are also taken using external software.
Skitch
An application aimed at creating high-quality screenshots and then editing them. The following tools are available for photo processing:
- pruning;
- size correction;
- inscriptions;
- “putty” and markers.
The utility will delight you with its simplicity. Intuitive controls and a user-friendly interface allow users with any level of computer skills to quickly get used to it.
On a Macbook, you can take a screenshot in several ways: full, partial, or with a timer. The only drawback is that the application will not be able to capture the active window, unlike the standard OS X program.
Lightshot Screenshot
A compact utility whose shortcut will be placed in the bottom menu bar. The application is provided free of charge, the distribution is available in the App Store.
The program is not equipped with a full-fledged interface; there are only a minimum of visual and functional settings. LightShot is activated by pressing hotkeys. Having created the required image, the utility transfers it to the built-in editor.
Users can save screenshots in a memory buffer or cloud storage.
Joxi Screenshoter
Another simple utility, much like Lightshot. After activating the program, you need to select a shooting method, mark the necessary areas, and when the capture is complete, process the image.
Ready screenshots are suitable for publication on social networks. The Joxi platform provides a separate 1 GB cloud. The utility has many adjustable options and an attractive interface that allows you to take screenshots from any angle.
Taking screenshots on a MacBook is easy and enjoyable. The OS provides ample opportunities for implementing this function, and third-party programs will help you not only create, but also instantly edit images at the user’s discretion.
Let's film! Screenshots on Mac with a standard utility and more
Many people have to take screenshots on Mac. Designers, programmers, web developers, application reviewers and other professionals from time to time need to show something from their computer screen, take notes and send them to colleagues, or simply capture something cool on the computer screen. Unlike Windows users, OS X has an excellent built-in utility for working with screenshots, but not everyone knows about all its capabilities or needs more functional applications.
The editors of iGuides have collected all the tricks that can be used when working with the built-in utility and several applications that will appeal to advanced users.
Built-in utility
Keyboard shortcuts
The three main keyboard shortcuts that users need to remember are:
— Cmd+Shift+3 — screenshot of the entire screen,
— Cmd+Shift+4 — screenshot of the screen area,
— Cmd+Shift+4+Space — screenshot of the application window.
In this case, the screenshots will be saved on the desktop, but if you use “Ctrl” instead of “Cmd”, the screenshot will be saved to the clipboard, from where it can be pasted into the desired application.
For more precise positioning, you can use the modifier keys. While the user selects the boundaries of the screenshot to capture an arbitrary area of the screen, you can hold down the “Space” to fix the size of the selected area and move the selection around the screen, while holding down “Shift” will allow you to change only one of the sizes of the selected area, and while holding down the “Option” button » The size of the selection will change proportionally.
The possibilities for advanced work with screenshots on Mac don’t end there – but you’ll have to use the services of the Terminal.
By default, screenshots on a Mac are called "Screenshot" and are appended with the date and time. If you need to name the pictures differently, in the Terminal you need to write:
defaults write com.apple.screencapture name "Required name"
killall SystemUIServer
By default, pictures are saved to the Desktop. If you only need to take a couple of screenshots, this is not inconvenient, but when working with a large number of images, it is better to send them to a separate folder:
defaults write com.apple.screencapture location ~/Folder path
killall SystemUIServer
Initially, the system takes high-quality images in png format, but you can take more compact screenshots in jpg, and even use the less common formats pdf, bmp, pict, tiff:
defaults write com.apple.screencapture type format
killall SystemUIServer
By default, the system takes screenshots with a small drop shadow, but you can remove it using the command:
defaults write com.apple.screencapture disable-shadow -bool true
killall SystemUIServer
You can return the shadow back using:
defaults delete com.apple.screencapture disable-shadow
killall SystemUIServer
Lightshot Screenshot
If you not only need to quickly take screenshots, but also send them to social networks, email, print or edit them, you should try the tiny Lightshot Screenshot utility. Its icon will live in the menu bar, from where it can be launched manually or using a hot key, although the developers chose “F13” for this, and I could not figure out its secret.
After launch, the user needs to select the area of the screen that needs to be saved. It’s convenient that the application tells you the size of the picture in pixels. In addition to the usual saving, you can choose one of the actions, for example, get a link to the screenshot, print it on a printer, send it by mail, on social networks or in Google image search. In addition, the Lightshot Screenshot service has a good online image editor.
Download in
Mac App Store
Monosnap
If Lightshot Screenshot lacks functionality and flexibility, another free app called Monosnap is worth checking out. It allows you to not only take screenshots of a selected area, but also the entire screen. Unfortunately, you won’t be able to take a screenshot of the window, but the application allows you to record screencasts and take pictures from your webcam.
Monosnap has a built-in photo editor that allows you to perform basic actions, such as cropping, captions, and adding arrows. Finished images can be saved locally or sent to the developers’ server.
There are quite a lot of settings. You can change the format and quality of pictures, select default actions, configure hot keys and choose the path for saving pictures on the network: Monosnap, SFTP, FTP, WebDAV.
Download in
Mac App Store
Skitch
Another simple application for creating screenshots is Skitch. It cannot boast of advanced functions, for example, it only allows you to take screenshots of a selected area and the entire screen, but it has a good built-in editor for adding inscriptions, drawing arrows, geometric shapes and cropping images. Nothing outstanding, but there is integration with the Evernote service, which for its active users may be a good reason to choose Skitch.
Download in
Mac App Store
LittleSnapper
For professional use and getting maximum functionality, free applications are not suitable, so it is worth spending a little money and buying good quality software, for example LittleSnapper. It can be called iPhoto or even Apperture for screenshots, since the application's responsibilities include not only taking screenshots, but also storing and organizing them.
Screenshots are saved in LittleSnapper, where the user can sort them into folders, add tags, create smart folders and collections. In addition, screenshots can be divided by type, for example, web pages, screenshots from an iPhone or iPad, or sketches.
The application allows you to take pictures of the entire screen, timed screen, window, selected area or open page in the browser. In addition, links can be opened in LittleSnapper to take screenshots of the entire site or individual elements.
The application also has the necessary minimum tools for editing, for example, text, cropping, arrows, blurring an area, highlighting an area, and others.
LittleSnapper is the best screenshot tool. It is ideal for users who work a lot with screenshots and do not delete them soon, but store and organize them. The application is not cheap, but for professional use it more than pays for itself.
To buy in
Mac App Store