Where are screenshots saved?
All screenshots you take on Android are automatically saved in the root directory in the /Pictures/Screenshots or /ScreenCapture folder (depending on the manufacturer).
We hope that today you have learned a couple of new ways to make a print screen on different smartphones running Android OS.
To receive news about gadgets, read new articles and reviews before anyone else, subscribe to us on VKontakte, Facebook, Twitter; subscribe to our Youtube channel and share articles and videos with your friends. See you again!
UpDron.ru was with you
Bye!
A screenshot is an instant snapshot of everything that is on the phone screen, that is, the image of the screen itself, and not the physical objects on it, as some of you might think. Roughly speaking, this is a “photo” of the screen taken by the phone itself. This article will provide all the necessary information, after reading which the reader will understand how to take a screenshot on Android.
Content
Screenshot apps
If you have Root rights on your device, you can use one of the applications.
Here is a list of the most popular programs that provide the user with the ability to take a screenshot of the phone screen. All programs are available in the Google Play store or you can download them from some trusted website on the Internet:
- Screenshot Ultimate.
- Screenshot Pro.
- No Root Screenshot it.
By the way, several of the applications presented above do not require superuser rights, but they require a connection to a computer to use them.
Special Settings
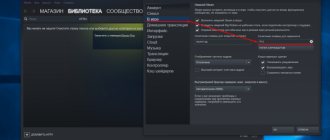
Some models, such as Asus ZenFone, support variable key settings. This means that you can assign the “Take Screenshot” command to another button or gesture in your smartphone settings. Below are a couple of examples:
- Asus ZenFone. To set up a screenshot for the multitasking icon (bottom right button), go to settings, select “Asus settings”, then go to “Key settings”. There you will see “Press and hold to take a screenshot” - check the box next to this item. Now you can remove the screen by holding down the lower right button.
- New Samsung. Almost all models of Samsung smartphones and tablets released after 2015 have a gesture control function. To configure the print screen for a gesture, find the “Control” menu in the settings, “Palm control” in it, select “Screen capture”. Now you can take a photo by simply sliding the edge of your palm across the display.
- Quite often, manufacturers add the ability to remove the screen through an additional menu, which can be called up by holding down the power button.
If none of the methods work
If you can't take a screenshot, try holding the buttons longer. Don't forget: the buttons must be pressed at the same time
. If you are taking a screenshot for the first time, it may only work the third or fourth time.
If none of the methods work, then:
- The smartphone or tablet was made by another manufacturer. To learn how to take a screenshot, contact your device manufacturer for assistance;
- The smartphone or tablet has non-original firmware installed. To take screenshots, contact a Samsung service center to change the firmware.
- This device is a fake. Many functions of original devices do not work on fakes.
Pritscreen apps
If the user cannot take a photo of the display because he does not know how to take a screenshot on an Android smartphone using keyboard shortcuts, then the only way out is to download a special program through Google Play or the Play Market. They work equally on all tablets and mobile phones, the only limitation is the Android version.
On a note! Some applications used for screenshots have one function - choosing a photo display method. You can simply press the camera key or shake your mobile phone. It is important that many programs can be installed on your smartphone for free.
Screenshot Capture app
The smartphone owner can download this program through the Play Market for free; root access is not required. How to use it to make a print screen on an Android smartphone in Viber:
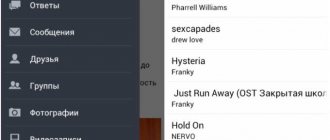
- Enable access to multimedia on your mobile phone or tablet. Expand the menu list and go to “Triggers”.
- Click “Start” to activate the background service.
- The program icon will appear on the display. The widget can be moved at the user's discretion.
- Log in to Viber. Click on it to open the creation of a photo or video.
- After the screenshot, the editor will come out. The owner of a smartphone can use it to crop a photo and add stickers or a drawing to it.
To view it, you need to open the interface and go to the menu where screenshots are stored in Android: “Images” or “Video”, depending on the display capture. You can also take a picture of the correspondence and send the dialogue to the Viber group.
ADB Run Snapshot App
Using this interface, you can instantly take a photo of the screen. Utilities for the program are downloaded from the store. After launching the application, the settings menu will appear on the display. All commands are entered using the keyboard. The user must enable USB debugging mode on the phone and connect it to the PC. Then go to the application:
- Menu “Screenshot/record”: enter number 14 in the Input line;
- Enter 1 so that the print screen is displayed in the “ADB RUN Screenshot” folder, which is created immediately after downloading the program;
- Go to the subsection and edit the resulting image.
You can also use another program - MyPhoneExplorer. After downloading the application to your computer, you must perform the following procedure:
- After activation, click on the “Add user” item;
- Specify the USB connection, confirm the selected action;
- Wait until the program connects to the gadget, click “Miscellaneous”, “Smartphone keyboard/download photo of the display”;
- A window similar to a mobile phone screen will appear on the PC monitor; click on the floppy disk to save the information;
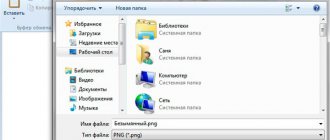
- Give the photo a title and send it to any folder on your computer.
Attention! The main advantage of these applications is that screenshots are immediately copied to the PC’s hard drive, and if necessary, it is easier to edit them and make appropriate adjustments for further use.
Taking a Screenshot on Android
Method 1: universal
The first versions of the Android OS did not have the function of creating screenshots, which was a clear inconvenience. Therefore, if you have a very old device, go straight to method 6.
Since version 4.0, the developers have built in a universal method - simultaneously pressing the “Power + Volume (down)” buttons (as a rule, the buttons must be pressed for 1-2 seconds until the created screen appears on the phone screen). See photo below.
Power + volume (down)
This option works on most modern smartphones. Unless there are certain difficulties with some models from Samsung, Xiaomi and HTC (for them, see methods 2, 3, 4.).
Method 2
- turn on the phone and open the application (location) that you want to screenshot;
- press the “Home” and “Power” buttons simultaneously for 2-3 seconds;
- Afterwards you should hear a slight click (as when taking a photograph) - the screen is ready!
Method 3
This method worked and was relevant on the first models of Samsung devices. However, judging by the reviews, it still works.
- find the screen you want to screenshot;
- press the “Home” + “Back” buttons simultaneously and wait 2-3 seconds;
- after clicking the shutter, the screenshot will be saved.
Method 4
Some devices (LG, Bright & Quick, etc.) have smartphone software that contains a built-in function for taking screenshots. To use it, just lower the notification panel curtain and click on the appropriate tool (“Screenshot” - see the picture below).
Note: on modern LG devices the tool may be called “QMemo+”. This option will allow you not only to create a screen, but also to process it: apply inscriptions, trim the edges, etc.
Open the menu at the top
Method 5
Well, I couldn’t help but note one more option (it is, however, still rare, for example, on Redmi devices):
- find the image you want (the one you want to capture);
- press the “Power On” button;
- in the menu that appears, select the “Screenshot” tool (it will be along with the “Restart” and “Power” buttons). See example below.
Android smartphone or tablet
The most commonly used mobile device today is Android. Alas, for older versions of this OS there is no standard way to take screenshots. This is due to the lack of a standard regarding hardware buttons. Many smartphones and tablets today come with on-screen buttons, and only the power button and volume control are hardware buttons.
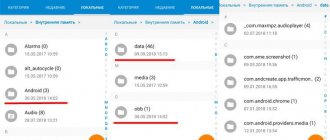
Therefore, third-party programs are often used to take screenshots in old Android. They usually save screenshots to the ScreenShots folder located in the root of the memory card. It should be taken into account that different programs may name the folder differently, and the case also matters. For Android, the Screenshots and ScreenShots folders are two different folders that coexist on the same memory card without problems.
But in Android versions starting from 4, a standard method appeared. As was said, any smartphone or tablet has a power button and a volume button.
Therefore, it is enough to simultaneously press the power and volume up buttons and hold them for about a second. The screenshot will be saved to the Pictures/Screenshots folder.
Other photo recovery apps
To protect yourself from losing important screenshots, you can use the Dumpster mobile program - Trash for Android. The menu allows you to configure the data retention period, folder size, backup to the cloud, etc. Recovering photos and images from the Recycle Bin is free, other functions require pro.
UltData for Android will help out in various situations: loss of images after a software failure, erroneous deletion, etc. The program is paid, but there is a test period. Requires installation on a computer and connecting a smartphone via a USB cable. Scans external and internal memory, recovers any types of files.
Instant Access Panel
To take a screenshot, the user will need to perform a few simple steps. The screen photo algorithm is as follows:
- Open the status line where you need to receive a photo;
- On the instant access panel, select the “Scissors” image for the screenshot.
Attention! A photo of the display is taken automatically after pressing. An icon will be displayed at the top of the screen to view, save the page, edit and transfer data.
Windows Phone Smartphones
On Windows smartphones (starting from version 8.1), to take a screenshot you also need to simultaneously hold down the Power button and the Volume Up key. Unlike Android, you don't need to hold them down; the screenshot is taken instantly.
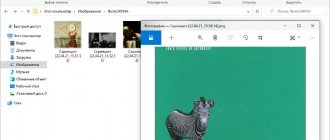
You can find the created screenshots in the Pictures/Screenshots folder if you connect your smartphone to your computer. On the smartphone itself, they are displayed in the general list of photos.
Good time!
What can be shown in a screenshot (picture) cannot always be explained in words (it’s not for nothing that there is a saying “It’s better to see once than.”