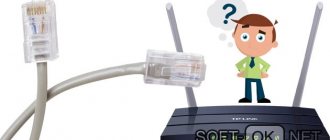
In this short step-by-step instruction “for dummies,” I will show you how to connect a router to a computer using a network cable. If we are talking about a laptop, then it must have an Ethernet port. If it is not there, then you can connect via WiFi. In the future, there are two ways to configure the router - through the web interface of the control panel or using the utility on the CD. I will analyze connecting routers via a network wire using the TP-Link TL-WR740N and TL-WR741ND as an example, but this guide is suitable for any model.
Why use a cable
The need to create a wired connection to the router may be due to:
- lack of a Wi-Fi module;
- network adapter failure;
- setting up the router;
- firmware update;
- insufficient Internet connection speed.
Speed may not be sufficient when processing videos while surfing the Internet or transferring files from computer storage. The network may be overloaded by the online video surveillance system. If the computer is located far from the router or users constantly connect to the Internet, then connecting a laptop or desktop device via a cable will be the optimal solution.
Appearance and functionality of the router
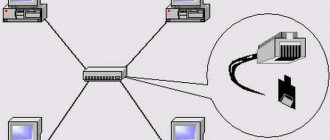
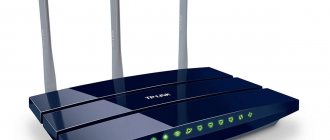
Modern routers are a small box with one or more antennas for better Wi-Fi signal transmission. The bulk of the devices are unremarkable: a “flattened” box with a number of indicators that indicate the operation of the device. Several ports: one for incoming signal, others for its distribution.
Each router has input and output sockets
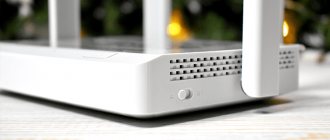
Some routers have an increased number of input and output ports, as well as additional connectors, mainly USB type, for connecting a network printer, disk or mini-modem. However, some devices are a masterpiece of design because they are not immediately recognizable as routers. The abundance of strangely shaped antennas makes them look like, for example, spiders.
In some devices, routers are not immediately recognizable due to the original design
Preparation
Before you connect your computer to the Internet via a router via cable, you will need the following things:
- the router itself;
- power cord.
- the computer in which the network card is located.
It is worth pointing out that most modern computers already have built-in cards, just like laptops, but if the procedure is to be done with an old sample, you will need to buy a new card.
It is best to take a cat5e cord, which is crimped on both sides. Usually it comes with a router and is more than 1.5 meters long. The cable is suitable if the router is located near the PC. In another situation, you will need to calculate the preliminary required length of the conductor and buy a new cord.
If the power cord comes with the router, the instructions for the cord may be helpful. You must act in accordance with it.
Where to install the router for optimal signal
Before connecting to a WiFi router from a laptop, decide on the location. If devices are connected to each other by wire, there are no special options - they will have to be installed in close proximity. It's another matter if you plan to connect your laptop to a Wi-Fi router and use a wireless connection. Here the user has more options.
Main recommendations:
- Do not place the router near electrical appliances, such as a TV, microwave, or cordless telephone. This and other equipment can operate in the same ranges, which will lead to interference and signal degradation.
- Consider metal barriers - walls and doors. Concrete or brick partitions can contribute to signal deterioration. Try to connect the Internet to your laptop through a router installed as close as possible or with a minimum number of obstacles.
- If there are a large number of consumers, place the router in the center of the apartment or house. This solution guarantees uniform signal distribution throughout the room. To avoid negative effects from WiFi rays, try to place the router outside of living rooms.
- If you need to connect the router to a laptop without a cable, place it as high as possible, for example, fix it on the wall. The antennas can be placed in any convenient position.
If the choice of location does not allow you to achieve a high signal level, you may need to install additional equipment, for example, a repeater. Or you can install a second router and configure repeater mode on the router.
How to connect cable internet to a computer
To carry out this procedure, you need to take a router with one unoccupied cable connector, a cord included, and a PC. Then take the cable and connect one end to the yellow LAN connector on the back of the router. The order in which the cable is connected does not matter. The other end of the conductor must be connected to the same connector on the PC.
All that remains is to check the appearance of the indicator when connecting the conductor connector to the computer. If this happens, the device display will show the corresponding information. The notification panel at the bottom right will show the connection without errors.
Preparatory procedure
After unpacking your newly purchased device, you should think about where exactly to install the Wi-Fi router. Most likely, you will use the Internet not only on a desktop computer, but also want to enjoy the capabilities of a wireless network on various portable gadgets, including laptops, netbooks, smartphones, tablets, phones, and so on. If your apartment has several rooms, try to place the equipment in the middle of the apartment, then the signal should be heard normally on any device in any room.
Another important point is the provider cable. When calling a technician, you can pre-arrange where to run the wire. If the Internet cord has already been stretched, you will adapt to its length and current location.
Pay attention to the package!
In addition to the router itself, the kit should include a power supply, a network cable (LAN) and an instruction manual. In some cases, the antennas are disconnected from the case, which means you will need to connect them yourself.
Let's look at the connectors we need on the back panel of the WiFi router
- Power socket.
- WAN port. Basically, it is highlighted in blue with the inscription or Internet icon. The provider's Internet cable will be connected to it.
- LAN ports. Often highlighted in yellow with the corresponding name at the top (LAN1, LAN2, LAN3, etc.). Responsible for the wired connection of PCs/laptops on your home local network.
- Also on the modem body there are built-in on/off and reset buttons.
Let's move on to the Wi-Fi router connection diagram
- We insert the adapter into the socket and turn on the router; the indicator lights should light up or blink;
- We connect the connector of the provider cord to the WAN connector;
- Next, follow the instructions below for connecting to a computer.
How to connect the Internet via cable to a new computer
In the situation of an online connection to a computer device, the algorithm will be different. You will need to create and configure a connection. First you need to insert the cable into the computer card. Then take the appropriate steps:
- Go to Start.
- Find "Options".
- Click on the network management center.
- Select the settings for the new connection.
- In the new window, select “Internet Connection”.
- Click “Next” and select the appropriate option with a high-speed connection.
To set up communication on Windows 7, you need to follow the appropriate steps:
- Click on the “Start” menu.
- Select "My Computer".
- Then find "Control Panel".
- Find “Network and Sharing Center”.
- Click “Set up a new connection or network.”
- Select "Internet Connection".
- Opt for “High Speed”.
In the menu you will need to fill in some fields with your username and password to log in. The developer indicated this information in the service agreement. As a rule, they are standard. In one and the other field you need to insert the word admin. If the manipulations are performed correctly, a symbol of the created connection will be visible at the bottom of the computer monitor.
If the router was donated by someone and it is used, then you need to reset the settings and return the factory settings.
To do this, take a paperclip and click on the Reset button of the turned on router. It’s better to hold the button for a couple of seconds, since some routers have protection against sudden clicks, and the system turns off within 5–15 seconds if pressed continuously. During the reset, the network name and login password will be reset to the factory settings.
How to properly configure a Wi-Fi router?
First of all, you should enter the virtual interface for setting up a Wi-Fi network.
Login information is often located on a sticker on the back of the equipment.
- If the above data is missing, open any browser and try entering 192.168.0.1 or 192.168.1.1 (after entering, press Enter);
- In most cases, login And password to access the web interface - admin And admin;
- The design and layout of the menu with functions depends on the firmware, manufacturer and model of the router, despite this, look for a tab called “Network”, “Network Configurations” or something like that;
- Let's look at the WAN section.
Let's look at the settings items in more detail:
- Connection type. PPPoE, dynamic, static or other, is pre-negotiated with the ISP, as are several other sections.
- Username. By default, it corresponds to the SSID name on the back of the WiFi router.
- PPP or PSK password. The standard PIN can also be found on the label. If desired, you can specify a different one.
- IP address and subnet mask. The data for both items is entered automatically. If nothing is displayed, we recommend clicking the “Refresh” button and the information will change.
- Connection mode. Select Always Active.
- Maximum downtime. You can leave it alone or write down what you want.
- Authentication type. Specify "Auto".
- After entering the new parameters, click “Connect” and then “Save”.
By the way, there is a “Quick Setup” function. It is easier and more convenient to work with it. It is a step-by-step wizard that will help you step by step in setting up the router and organizing an Internet connection.
Connecting the Internet without a router
To ensure a direct provider connection to the network user card, you will need to connect the cable directly to the Ethernet port. It is located on the back of the computer panel. A new connection needs to be configured. In the case of Windows 10, you must perform the following sequence of actions:
- Click the Start menu.
- Select "Options".
- Click on “Network and Internet”.
- Go to the VPN tab and “Configure adapter settings.”
- Then, in the folder with the location of all existing connections, hold down the right mouse button on the Ethernet tab.
- Then select “Properties” in the pop-up window.
- After this, select the TCP/IP version 4 protocol and click on “Properties” again or double-click on the item.
- All that remains is to provide a static IP address. To do this, you can clarify the settings with your provider.
- If you need to obtain a dynamic IP, you can not change anything in the protocol properties. Any settings and field values will be made by the server automatically. Just press the “OK” button and the network will be available via cable to the device.
Common problems and solutions
There are often situations when it is not possible to connect to the Internet the first time. In such circumstances, it is necessary to have step-by-step instructions at hand.
If you cannot connect your Wi-Fi router to your laptop, the reason may be incorrect settings or failures in the equipment itself. Do the following:
- Restart your laptop and router. In the latter case, it is better to remove the voltage for a few minutes, and then apply it again.
- Check that the Wi-Fi module is enabled on the laptop.
- Change the wireless network mode. Try connecting to the Internet after changing the mode to 802.11n. Use different options.
- Change the SSID name. One of the reasons why you cannot connect a Wi-Fi router to a laptop wirelessly is duplicate names. Go to settings and change SSID.
- Check the fact of payment for the service to the provider. Due to lack of funds in the account, the service may be disconnected.
- Set network settings to automatically connect if this has not been done previously.
In most cases, if the settings are made correctly, there should be no connection difficulties.
Why the Internet may not work after connecting
The root reasons why a wired connection may fail are different. Therefore, to eliminate any of them, you will need to perform a number of specific actions:
- The cable connection is not detected. To do this, you need to understand whether the conductor is connected to the required connector.
- A red cross appears on the taskbar, indicating a faulty cable, network card or LAN port of the device. If the difficulties are not in the conductor, then you should make sure that the computer is connected to the network. If everything is normal, then you will need to repair the network card.
- Flashing indicator, no network operation. In this case, you need to install or reinstall the driver.
- The new driver is installed, but the connection does not occur. You should go to the control panel, “Network Center”. For an online connection that says “Disabled,” press the power button.
- The router is faulty. If the conductor is not connected to the computer directly, but through a router, then the problem may be due to the fact that the router’s settings have gone wrong. In such a situation, you need to check this point and connect the network cable directly to the PC.
- There is no connection. If all of the above points were done correctly, but the malfunction remains, then perhaps the reason is the end of the period paid to the provider. You should contact the provider's technical support and check the balance status. Pay the bill, if necessary, and reconnect to the Internet.
- The connection failed due to viruses. It is necessary to scan the entire system with an antivirus, delete unnecessary files and, if necessary, reinstall the operating system.
If there is no network connection, a detailed explanation and step-by-step guidance is required. So, if the exclamation mark next to the Internet network icon is lit, it means there is no access to the network. In this case, you need to do the following:
- Press Win + R on your keyboard (Win is the Windows icon).
- In the search engine that opens, insert the command: ncpa.cpl.
- In the window with network connections, select “Properties”.
- Then find “Local Area Connection” or “Ethernet”.
- Next, open the IP line and click on its “Properties”.
- Set it to automatically receive the server address and save the settings.
If these steps do not help, then you can check the router settings. To do this, you need to go to the provider’s interface, enter your username and password, and enter the appropriate tab.
If, after connecting, the red cross on the network icon is lit, this means that you need to check the cable condition, the tight insertion of the cable to the LAN port and check that the network adapter is turned on. In the first case, the cable may have an intact structure externally, but due to strong kinks, the copper cores inside may be broken. Therefore, the conductor should be replaced. In the second case, due to the fact that small deviations may be visible during the manufacture of port connectors, the cable is not always inserted into the port. When connecting, it is ideal to hear a click and see the LED light up. In case of marriage, there will be no connection. In the third case, to check the network adapter, you need to go to the network connection and use the right mouse button to open the tab. Next, click on the “Enable” icon.
Through the device manager, which can be opened with the command in the search engine devmgmt.msc, you need to find the “Network adapters” tab and try to click on “Disconnect device” by selecting the appropriate router.
If something goes wrong
Typically, these actions are enough to have a network on all your home devices. But sometimes it happens that something goes wrong. Each situation requires separate consideration. But most often users encounter the following problems:
Connectors for connecting devices
- damage to the network cable (it often happens that it is simply crimped incorrectly or poorly);
- problems with the network card (it is not on the computer, there are no drivers for it, or it is simply disabled);
- problems with the router (it is faulty or disconnected from electricity).
Settings
There are a lot of routers on the market and they all differ in both appearance and firmware. But the setup principle itself is the same. When you get inside you will have two choices: either set up the Internet and WiFi through quick setup. This feature will allow you to quickly walk through the main parts of the configuration. The second way is to do everything manually.
Below I will give an example of the initial setup for one device, but you can see the complete setup for your Internet center:
- D-Link
- ASUS
- Tenda
- TP-Link
- Xiaomi
- ZyXEL Keenetic
- Linksys
- Netis
NOTE! For a separate model, you can find instructions on our portal - to do this, enter the full name of the transmitter in the search bar on the website.
I'll show you using ASUS as an example. Everyone else tunes in at about the same level.
- We find a section in the menu that will most likely be called “Internet”. Sometimes it is also called “WAN”.
- After that, in this section you need to find the item for selecting the connection type. Typically this is: Dynamic or automatic IP, PPPoE, PPTP, L2TP or static address.
- The choice will determine whether you need to enter additional data to connect. For example, login, password or provider server address. If nothing is specified in the contract, then most likely you have a “Dynamic” or “Automatic” IP address. We just point it out. After this you don't need to enter anything else.
- Be sure to click on the “Save” or “Apply” button at the end of the settings.
- Now you need to set up a wireless network - if you need it. Find the “Wi-Fi” or “Wireless Network” item in the menu.
- And so, first of all, we come up with a network name and write it in the “SSID” line. If you click “hide SSID”, the network will not be visible, but you can connect by entering your name and password. We do not change the channel width, wireless mode and the channel itself and leave the default values. Sets the authentication type as "WPA2-Personal", it may also be called as WPA2-PSK. Next, we come up with a password and enter it in the line that appears just below.
- Click “Apply” and reboot the router - this can be done through the device settings from here. Or you can press the button to turn the router off and on again.
If you encounter any difficulties, have questions or additions, feel free to write about it in the comments under the article and I will be happy to help you.