Recently, very often there are users who want to connect a router via a cascade router via cable or via WiFi. This is done, for example, to connect to neighbors or expand your home network. Not all customizers undertake to do this because they simply do not know how to do it. Nevertheless, setting up a cascade connection of routers to each other is quite simple, you just need to know some subtleties. In this article I want to dwell on this issue in detail.
What you need to know before connecting routers
In order not to suffer with the settings and further connection of two routers, it is recommended to purchase devices of identical models. Firstly, they will probably be compatible. Secondly, it is easier to configure identical routers, since you will need to understand the nuances of only one model, and work with the other by analogy.
There are two ways to create a network between two routers:
- Wired. Provides stable speed and connection. The only drawback in this case is the need to pull the cable, which sometimes causes discomfort.
- Wireless. Produced through WDS technology. Routers are connected to each other in bridge or repeater mode. In this case, the only advantage is the absence of wires. The rest is: periodic loss of connection, reduced speed and possible drawdowns.
From the description it is obvious that the first method is preferable. In addition, with a wireless connection the connection range is about 10 m, and with a wired connection up to 100 m.
A life hack for those who want to save money - you can buy the most budget access point for your router without routing capabilities.
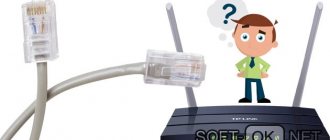
For a wired connection you will need a twisted pair cable. It must be pressed on both sides.
Performing basic setup
When a user needs to connect one router to another, he must be prepared for possible difficulties. Most of the difficulties are related to the problem of connecting the router to the computer or laptop, due to which it is impossible to make changes. A global solution to this problem is that the connected devices must be on the same network. There are two ways to do this.
First way
If a DHCP server is enabled in the factory settings of the router, then we can say that the user is very lucky. He only needs to set the settings on the computer so that the IP address is provided automatically. You can do this as follows:
- Click "Start".
- Then “Options” (gear icon).
- Select "Network and Internet".
- Select “Ethernet” and the connected network.
- Next, find “IP Destination” and click “Change”.
- All that remains is to select “Automatic (DHCP)”.
- Save settings.
The instructions are suitable for Windows 10.
Second way
If the DHCP server is disabled, you will need to spend more time figuring out what steps you need to complete. First of all, it is important to note that there is nothing complicated about this - you just need to figure out how to log into the router with an authorized login.
Both ways out of a difficult situation are worth considering in more detail.
Setting a dynamic address
At this point, you should return to the situation when the DHCP server is enabled on the router. You can check this in the router settings “Connection settings”; depending on the device model, it may be “DHCP settings” or “My networks and Wi-Fi” and so on. If it is not possible to open the settings of the access point, then you need to make sure that the computer or laptop can receive a dynamic network address. In older versions of the OS than Windows 10, the instructions for it were described above, you must perform the following sequence of actions:
- Log in to the “Control Panel”.
- Go to "Network and Internet". This item may not be available in some versions.
- Then find “Network and Sharing Center”.
- Click on “Change adapter settings”.
- Right-click on the active connection.
- Select “Properties” from the drop-down menu.
- Select “Properties” again in the TCP/IPv4 line.
- On the monitor in the window that appears, two lines “Receive automatically” will appear, in front of which you need to check the boxes.
After completing the steps, do not rush to close the window. To begin with, it is recommended to take a screenshot, since at this stage there may be properties of the Internet that will be necessary when both routers are fully configured. It may be helpful to write down the information in a notepad.
Setting statics
To connect, you must set static parameters to the computer if the DHCP server is disabled. In this case, to figure out how to connect the router to the router, you will need to study in detail the instructions that come with the device. It should indicate the IP address of the router. It looks in 192.168.1.1 format. The subnet mask will also be written. Its format is 255.255.255.0 (values may vary).
To configure, you need to act in the same way as setting a dynamic address, adding some data:
- Through the “Control Panel”, open the “Network Control Center”.
- Select "Change adapter settings."
- Call the context menu containing the “Properties” item.
- Manual settings must be made opposite the “Use” lines. Here you should enter the found IP address and subnet mask. The gateway and preferred DNS usually differ only by the last digit. As for the alternative DNS, it can be left empty.
The user can only save his actions and exit the settings.
Wired interface
If suddenly the router has a malfunction and its WAN input does not work, then you can use the method with a wired interface. The connection will occur between routers. There is a chance that this method will lead to a conflict between equipment with the same network address. Play it safe and use the router menu to deactivate the DHCP server on the repeater:
Go to the LAN tab through the device menu.
We set the static address of the repeater with the range of the router.
To increase the number of connections, you can change the network, but this is not necessary for home use.
How to connect a router to a router
Connecting two devices to each other implies that one of them will be a router and the other a repeater. Accordingly, in order for the user to figure out how to connect a router to a router via a cable, he should decide which one will take on which role. If the devices are different models, then the more powerful one should act as a router. Obviously, the cable will connect both routers.
To make it convenient, both devices should be next to each other. Firstly, it will be more comfortable to work with two routers. Secondly, the wire will not get in the way. When working with devices, they must be connected to the power supply.
To minimize the risk of connection problems, it is recommended to reset routers to factory settings. Most of them have a Reset button on the body; you need to hold it for at least 10 seconds. An exception may be the case when the router is configured for the work of the provider.
Connecting a router to a router can occur in two ways:
- LAN-LAN.
- LAN-WAN.
On a router that is considered the master router, the connector is always connected to a free LAN port. This means there are two options on the repeater. To understand how to do it correctly, you need to understand the principle of operation of each of the schemes.
LAN-LAN scheme
It is considered a completely working scheme, but not the best choice. This is due to the risk of problems with settings on devices that will subsequently connect to Wi-Fi. LAN-LAN has one advantage - the circuit itself is simpler.
Let's consider the algorithm for constructing a general network:
- Connect both routers to each other with a cable, inserting the connectors into the LAN ports. Usually there are several of them on the device, and they are yellow. A successful connection is indicated by the glowing connection indicators on the router and repeater.
- DHCP is disabled on the repeater so that there is no conflict between devices for distributing IP to clients. The router will take on this role. To disable it, you will need to enter the program of the router itself on your PC, select “Connection Settings” and select “Disable” in the “DHCP Server” drop-down list. The action must be “Save”. On some routers, DHCP settings may be placed in a separate item.
- Change the IP address on the repeater so that they and the router are on the same network, but different from each other. For example, if the first address is 192.168.0.1, then the second should have a different last digit, you can replace it with 2. This can also be done in “Connection Settings” or “DHCP Settings”.
After these simple steps, the routers should work, and it will be possible to turn on Wi-Fi.
If you have problems connecting to the Internet (mostly due to disabled DHCP), then you need to perform the appropriate manual configuration according to the scheme described above.
LAN-WAN scheme
The LAN-WAN scheme is more popular. It differs from the previous one in that the devices are no longer on the same network. The router is responsible for receiving the Internet, and the repeater is a secondary network that receives information from the first one.
LAN-WAN is preferable due to operational advantages:
- The secondary network can be controlled, which means the user can limit access to certain sites. For example, so that children cannot access resources for adults.
- The connection becomes more secure, third-party interference with this scheme is less likely;
- Reduces the risk of problems occurring.
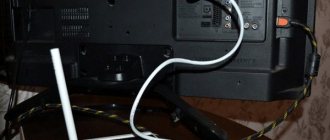
In this scheme, the cable is connected to the router via the LAN port, and to the repeater via the WAN - this is the blue port, usually there is only one on the device.
There is no need to touch the main router. It will remain connected to the Internet and distribute it. You will need to work with a repeater. It needs to be configured via a dynamic IP address. This process is performed according to the paragraph in the article “Setting a dynamic address”.
As a result, the router will send connection settings to the repeater, and the client can connect to the latter in the standard way.
Important nuances
In conclusion, let's say a few points that should not be forgotten:
- Often, mobile operators block the distribution of Wi-Fi from the phone to third-party devices, limit or require an additional fee for this service.
- When you connect your phone to a PC, both mobile Internet and WiFi can be distributed.
- USB and Bluetooth are backup options. They are not suitable for distributing the Internet from a phone to a smart TV - only Wi-Fi.
- The number of possible clients connected to a mobile access point is limited – usually up to 10.
- The battery of a smartphone that distributes a wireless network drains much faster than in normal operation. Take care about periodic recharging.
- You shouldn't expect much from your phone's Internet speed. It doesn't matter whether it's an old model or a more modern one. Wi-Fi speed is primarily affected by whether the gadget is within 3G or 4G coverage. This is immediately visible by the icon on the status bar.
More about settings
Weighing the advantages and disadvantages, it turns out that a physical connection via the LAN-WAN scheme is more promising. Therefore, after the cable connects both routers, the first thing you should check is whether the DHCP server is enabled. The new device will receive a network address automatically.
If you can connect the client’s device to the router, this indicates that the distribution is happening correctly and there is no need for additional settings. If there is no connection, then you need to go back to the router settings.
To do this, the user must perform the following steps:
- Enter the device's IP address into the browser's address bar. On the router itself there is a sticker that says “IP.
- Enter the written name and password, which are located on the sticker on the bottom of the router.
- Go to the “Control Panel” of the device.
- Find the "DHCP" section. Some software may not have such a section separately, so you need to look in other menu items.
- Go to the “DHCP Settings” subsection. Using the TP-Link router software as an example, this will look as shown in the figure below.
- In the “DHCP” column, check the “Enable” box.
- When device setup is completed, you need to restart your PC.
- As for the repeater, it also needs to be configured through the “Network” tab in the settings on the device’s control panel.
- In the “WAN” menu you need to select “Dynamic IP address”.
After these steps, you can proceed directly to setting up the network.
Sometimes it happens that the connection fails due to a faulty WAN port. Then you will have to use a LAN-LAN scheme.
Other distribution options
Via USB cable (smartphone as a modem in Android, iOS)
This method is usually used to distribute Wi-Fi Internet to a desktop computer. Remember that an Android mobile phone can only share a signal with versions of Windows OS, but not with Mac. iPhones are a different matter: they distribute wireless Internet both to “native” computers and to the operating system from Microsoft.
The procedure is simple:
- Connect your smartphone to your computer with a USB cable. Specify that no data transfer is required.
- Go to the “Modem and access point” gadget settings section. Set the “USB modem” option slider to On.
- An icon for working Internet access should appear on the computer's taskbar. A new separate adapter will appear in the list of connections.
When connecting an iPhone, the algorithm is the same. The only addition: if the Internet does not appear, install iTunes on your PC and try everything again.
We use Bluetooth
The option is complex and not the most popular, but we will also mention it. A pair is created between the phone and the computer by activating it on a Bluetooth mobile gadget.
Next, the computer starts searching for devices with Bluetooth. When the phone is detected, select it. The system will prompt you to enter a password on any of the devices. After a successful connection, activate the Bluetooth modem mode in the smartphone menu. All of the above applies to Android. On your iPhone, go to the “Modem Mode” menu and turn on the slider next to the “Allow others” option.
Routers TP-LINK
TP-LINK routers are leaders in their industry and for good reason. The manufacturer thought about the buyers of its equipment, so all devices are equipped with technology that itself expands the coverage area so that the client does not bother with the settings. It is called WDS. This means that devices can be connected to each other via Wi-Fi and used to their full potential.
P7
To make such a connection, you must perform the following steps on the repeater:
- Go to wireless options.
- There will be an option in the menu “Enable WDS”.
- Then enter the name of the router. You can do this through a search if the name is unknown. The user only needs to select a router and click “Connect”. As a result, an automatic redirection to the Wi-Fi settings will occur.
- All that remains is to give the access point a name, set a password and encryption type.
Why do you need to combine routers?
Connection equipment used:
- in offices;
- large apartments;
- private houses.
Expanding the coverage area is necessary when the signal quality is low or the number of ports for network devices increases.
Merging is necessary for several reasons, each user has their own questions:
- To increase the range, the signal is distributed throughout the entire house, apartment or office. The connection allows you to access the Internet at a greater distance from the access point and strengthen reception.
- Connecting a large number of devices - another modem is needed to increase the number of ports.
- Insufficient power for wireless device maintenance - one router should have no more than 10 devices. Another device will increase coverage and distribute to all phones, tablets, laptops and computers.
Important! There are several options for creating a single mesh from two adapters. Each technique is effective under certain conditions.