“I want to root my old Android phone to free up internal memory and improve performance; however it just got stuck at 90% and stopped. I have tried several ways to troubleshoot root issues, including using a different cable or a different computer, doing USB debugging mode and Unknown sources enabled, etc. But it doesn't work, how to solve this problem? "
Although there are many 1-click Android rooting toolkits in the market, they cannot be guaranteed to be able to root any Android device successfully. In this tutorial, we will focus on why Android root crashed , how to troubleshoot, and how to root Android devices successfully.
- Part 1: Why you couldn't root your Android phone
- Part 2: How to recover data if root fails
How to get Root access
There are two ways:
- Via telephone;
- Use PC.
Let's take a closer look at how to get superuser rights on Android devices.
Via smartphone
Even a novice user can work with such utilities. The program will do everything itself. If desired, create a backup copy of your data before starting work.
FramaRoot
The software roots a large number of phones. Even if the smartphone is not in the supported list, try it. Because there is a possibility of obtaining Root rights. The program is available at: https://forum.xda-developers.com/t/Root-framaRoot-a-one-click-apk-to-Root-some-devices.2130276/. Install it from the ARC file. If after startup the phone is supported by the utility, a list of actions will be displayed on the screen. The names of exploits (program code or a program that uses vulnerabilities in a particular software) will appear a little lower. They are needed for devices with different processors. Click on one of them. If one method doesn't work, try another. Reboot your phone.
KingoRoot
The utility works in one click. To enable Root access, download the utility from: https://root-apk.kingoapp.com/kingoroot-download.htm. After launch, deactivate the “Install” item so as not to install unnecessary software on your phone. Next: Wait 3-4 seconds.
Via computer
To obtain superuser rights, use specialized software that automates the entire process. Therefore, even a beginner can work with such applications.
KingoRoot
Unlike the program discussed above, this is a PC option. Download it from: https://www.kingoapp.com/. To get Root access, connect your PC and phone with a USB cable. Enable USB debugging on your smartphone. After installation, open the application. The phone model will be detected automatically. Further:
Root Genius
Download the application at: https://www.Rootgenius.com/ru. Connect your smartphone and PC with a cable, then:
Wait:
Click "Back" to exit to the program menu.
Solving the problem “No Root rights”!
Administrators Root rights
There are various application administrators with Root rights:
- SuperSU
- SuperUser
- SuperUser (CWM)
- Magisk
The most popular application at the moment is SuperSU, so we will “solve the problem” through it. Those who have another application should not be upset, since all operations are almost identical, the only difference is the location of the settings.
ps The presence of an administrator application with root rights SuperUser does not mean the presence of Root!
Request root rights
When you launch an application that requires Root rights or an operation that requires Root, you will see something like this window:
If you do not click “Grant” or click “Deny” within a few seconds (10-15), the application will be blocked from using ROOT.
We fix and provide Root
Go to the application administrator Root rights:
Settings:
We check whether Superuser is enabled (if not, then enable and restart Android) If you install applications from trusted sources and are definitely not afraid of catching a virus, enable Root provision automatically, to do this, go to “Default Access” Select “provide” from the proposed options
We go to the list of applications and see applications that have been granted Root rights (
# ) or vice versa are prohibited ( # ) If you want to return access to the Root application, then tap on it and in the access field select “Present” If you still have any problems with Root, then go to:
Android Settings Menu -> Applications -> Your Application Root Administrator
And reset its cache and data!
How to disable Root access on Android
Delete files that put the phone into Super User mode (user with advanced rights). Install the file manager first. Launch it. Follow the path and delete the file.
Find and delete the “superuser.apk” file located in the “System” - “APP” directory. Reboot your device.
SuperSU
The program works if third-party firmware has not been installed on the phone. Otherwise, after a reboot, the smartphone software will return Root access. To disable, download, install and run the utility. Further:
A little theory...
What is Root already in the know? Where can I get them too? Well then, let's continue! After receiving Root (in the classic version), the su in the /system/xbin/ section, as well as the administrator application SuperSU.apk , or SuperUser.apk or KingSuperUser.apk (or other similar ones) in the /system/app section /.
The administrator application is necessary in order to control the provision of Root to applications that request it; this is done for security purposes. On your part, you have the opportunity to provide Root to the application or, on the contrary, refuse it.
If you accidentally (or purposefully) denied Root rights to an application, then the application ends up in the “black list” and after that, it begins to seem to newcomers that there are no root rights!
90% of “it seems there are no root rights” is due to the random refusal to grant root rights to an application that requires them!
How to restart root insurance?
Here's what you do:
- Open the application.
- Below your inactive insurance card are instructions: Click here to reinstate your policy.
- Answer a few questions (we want to know if anyone on your policy had an accident after you canceled it).
- Purchase. You will be charged for the days between cancellation and reinstatement.
Interesting materials:
What is a good multiplier effect? What is a good lifestyle? What is a good electronics cleaner? What is a good ping on a speed test? What is a good overclock for the GTX 970? What is a good WTR rating? What is a good voice changer? What is good light? What is good color contrast? What is a good humidifier at a reasonable price?
Root rights - what is it?
Root is the device's main administrator account, which, when accessed, greatly expands the capabilities of the average user. Essentially, root allows you to change and delete system files, operate various settings on the gadget, launch hidden files executable under Linux, and perform other tasks unusual for the average user.
In fact, having received the appropriate access, you will be able to install any applications, use additional Android functions, use special software at the right time to improve the performance of the gadget, delete everything unnecessary from folders to which you were previously denied access, remove ads from installed applications, and much more. .
How to check if you have 100% Root rights?
It happens that the Root administrator application has not installed or you just have questions about whether you were able to get Root rights? You can check this in 2 ways:
Method 1
Download and install the Root Checker application from the Google Play store
This method is not entirely accurate, since you simply could “forget” to provide Root using the administrator (of course, if it is installed).
Method 2
This method is the most accurate! Download and install Root Browser and go to the path /system/xbin/ if the su is there, then you have Root rights! If not, then there is no Root (Thanks for the tip to Captain Obvious)! The presence of the su file means that you have Root rights on your Android device!
If for some reason you have not installed the administrator application, then install it from the Google Play store (links are given above).
Root may occur on Samsung due to built-in Knox protection - get rid of Knox.
If SU , then you can get root rights on our Android +1 !
Disabling root rights
It often happens that users who have received administrator rights want to return everything to its original state. The most common reasons for disabling superuser mode are the appearance of slowdowns and freezes of the device, vulnerability to virus attacks, and lack of warranty service.
In any case, removing root rights will not take much time if you install ES File Explorer or ES File Explorer. Using a file manager, you can easily find the necessary files responsible for root access and remove them from the device.
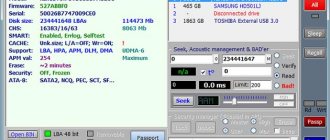
Installing drivers
There are several methods for installing ADB drivers. Let's list the most common ones.
- After downloading the archive with drivers, you need to unpack it. Charge Only ” mode must be activated on the phone USB debugging is disabled). Next, you should find the folder of your device’s company, in which you need to find, run and install the exe file. That's all.
The “ Charge only Storage ” or “ Data storage device ” and “ USB debugging options are unchecked .
- The second method is a little more complicated, but it will come in handy in case the first one doesn't work. First you need to download usb_driver.zip here. After which the archive needs to be unpacked and the phone connected to the PC in the “ Charge Only ” mode ( USB debugging is disabled). Then right-click on “ My Computer ” and select “ Manage ”, and then “ Device Manager ”. Among the list there should be something called “ Adb interface ” or “ Unknown devices ”. Find your smartphone, right-click on it, select the “ Update driver ” option. In this case, you need to select manual installation and do everything yourself: in the Explorer window that appears, select the folder with drivers, open Android ADB Driver , select the file android_winusb.in , click “ Open ” and do all the following steps. If, when selecting an inf file, a message appears with the text “ No hardware information found ,” then you need to use this guide, starting from point 3.
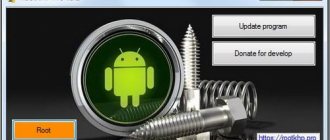
Instructions for Kingo Root for Windows
- We go to the official website of the project and download the Kingo Root for Windows.
- Run the setup file and install Kingroot.
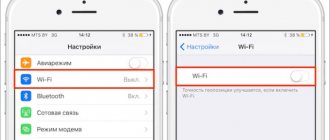
- We activate the debugging mode on the smartphone/tablet through the corresponding option in the “For Developers” menu section.
- We connect the mobile device to the computer via a USB cable and launch the application.
- We confirm access to the digital key fingerprint by checking the box on the pop-up form and confirming the action with the OK button.
- We start the rooting process by clicking the Root button in the graphical window on the PC.
- We are waiting until everything is ready. During jailbreak, your device may reboot several times, so don't worry, everything is going according to plan.
Enabling debugging mode in the device settings menu
> Confirmation of access to the digital key fingerprint
Starting the procedure for obtaining root privileges
Rooting process
This method is more reliable than the one that takes place entirely on a communicator. From version to version, the developers hone it, which is noticeable from the frequent updates in the history of the main branch of applet releases.