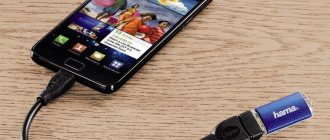
It is very difficult for a modern personal computer user to live without a removable storage medium, which can be either external hard drives or more convenient and stylish flash cards. For players, such devices become a necessity, because when going out of town or to visit friends, you urgently need to throw a new product in the gaming industry as a souvenir and show it off to your friends. However, how to record the game on a flash drive?
Before moving on to the step-by-step guide, it's worth paying attention to the device itself. Firstly, it must have enough free space to accommodate your favorite game. The latest releases require at least 30GB of memory on your hard drive or removable media, so take this into account before recording. Secondly, make sure that the game archive, as well as the device, are not infected with viruses. Regardless of the computer's power or build quality, the malware will happily ruin all your plans for a fun weekend or a few hours of hardcore gameplay.
Subtleties of installing software on a memory card in Android
By default, Android applications will be installed on your smartphone, because... The OS does not provide an option to install directly into internal memory (except for OS version 6.0 and higher and only if you make a flash drive as internal memory). But they can be transferred, and standard Android tools allow you to do this in a few clicks. But here it all depends on the version of your operating system. With each new version, new features appear, and earlier versions simply become outdated. We will describe methods for all the most current and common versions of the system.
So, to completely transfer your software, your smartphone must have an OS no lower than 2.2. These are devices that were released on the world market back in 2011-2012. But there are some important points here! On certain models, the ability to transfer may not be possible due to the specifics of the developer.
Installing a game on Xbox 360
To continue, we need to transfer game files to the Xbox 360 hard drive. The standard explorer of this console is very similar to the well-known file manager for PC Total Commander. On the left we can open the disk itself, and on the right its contents will be displayed. Find it in the main menu and launch it. After this, you need to open the game folder and press the right Shift of the joystick. To start copying, press button A.
The process will start. After it is completed, you need to go to the main screen. Then select console settings. Here, find the “Scanning” item and activate it. This will allow the Xbox system to search internal memory and update the list of applications if new ones are found there. When the system carries out such a check, you will be able to launch the game from the general list. You can also simply restart your game console. Every time the system starts, it checks for updates on its own.
Using SD card as default
Different versions of Android use different features to install games on the SD card by default. There are no universal instructions, so let’s look at the most popular methods:
- We define a flash drive as a data storage device. For this:
- Open “Settings”.
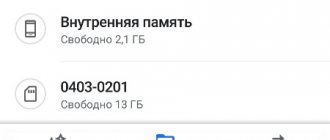
- Go to the “Memory” section.
- In the “Use as default” item, check the box next to “Memory card” or “SD card”.
- Save the changes.
After this, you will be able to download default games and programs to the Android memory card.
- We combine a flash drive and internal storage. In this case, the SD card is formatted into a new file system and merged with the internal memory. The system will not see the partitions, but will show the total amount of memory. Also, after this procedure, you will no longer be able to connect the SD card to a computer or other device. So, the following procedure is performed:
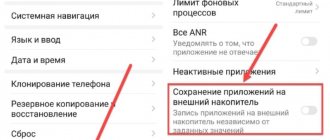
- Open developer options. If you haven't done this before, go to Device Details/Software Details. Find “Build number” and tap on this item quickly 12 times. A message should appear indicating that developer mode is enabled.
Return to the main Settings page and find Developer Options.
- Enable the option “Allow saving to external…”.
After these manipulations, not all programs will appear in external storage, but installing games with cache will be possible on the SD card.
- Association of SD card with internal memory. This feature is available on devices with Android firmware version 6 and higher. However, the option is not available on all phone models. To combine a flash drive and internal storage:
- Install an SD card on your phone. If the flash drive is already installed and was previously formatted as a portable drive, you need to remove it, connect it to the PC and format it at a low level using the HDD Low level format program, and then install it again on the phone.
In the notification window that appears, click “Configure”.
- Select “Integrate with device”.
After this, the memory card will be formatted and all data will be deleted. Please note that the SD card cannot be used with other devices.
How to transfer a game from one laptop to another?
If the game is on disk, then first you need to install it on the laptop that has a disk drive (optical drive). We insert the disc with the game into the laptop, first create a folder, specify the path to this folder, install the game from the disc into the folder. Next, you need to move this folder to a second laptop without a disk drive.
Interesting materials:
Single entry visa for how many days? Holidays where you don't need a visa? What is an open visa? Why can they not give a visa to Germany? Why can they not give a visa to Italy? Why may they not give you a visa to the USA? Why can they not give me a visa? Why can a Schengen visa be denied? Why can they refuse a visa to the Czech Republic? Why can they refuse a visa to France?
The procedure for recording games, necessary programs and features of their launch
In order to launch games from a flash drive on PS 2, you need to correctly download and then write the files in the correct format.
PS2 uLE v4.39 boot DVD ISO.iso image from the Internet and burn it to disk.
.
The best program for recording images on PS 2 is Alcogol 120%
.
You will also need to download the FreeMcBoot
, which will subsequently need to be unpacked onto a USB drive. Before you start working with a flash drive, it is important to format it in FAT 32 using a computer or laptop.
OpenPS2Loader 0.8 must be installed on the console
, designed for the correct operation of disks with a capacity of more than one gigabyte, which can be downloaded from an off-site.
After this, the DVD and flash card must be inserted into the console and the prepared disk with information loaded. Through it you need to install the FreeMcBoot
. After installing FreeMcBoot, you will need to reboot the set-top box, as a result of which additional programs will appear in the usual console window, which will subsequently accompany the correct operation of the set-top box with disks and allow the launch of files from external sources.
Now let's move on directly to the work related to immediate activity. You need to download the desired game from the Internet, create a DVD folder on a formatted USB drive, where the downloaded files will subsequently be transferred. The game image must be in ISO format, the name must have the following structure: disc code, file name, iso. If the image name has a different structure, it must be renamed. The image with the correct name must be placed in the DVD folder of the flash card.
After this, the preparatory stage can be considered complete. It is worth noting that if the file exceeds four gigabytes in size, then it must be written using the USBUtil program.
Now you can insert a drive with recorded files into the console using the additional uLaunchELF
installed earlier when working with FreeMcBoot, go to the menu where the flash drive settings window will be displayed. You need to select “save games” or Save changes through the menu. After rebooting the set-top box, a list of files recorded on the external drive will open.
In order to launch the toy, you need to press “x” next to the corresponding file and wait until it loads. It makes no sense to tell gamers how to play on PS 2, since further use of the console has standard settings and rules.
A method for different OS versions is to use special utilities
On Google Play today you can find simply a huge number of applications for transferring apk. files to removable media. We will consider only the most relevant and functional ones from the entire list.
- SDFix: KitKat Writable MicroSD.
- App 2 SD.
- Link2SD.
This program was one of the first to appear in the Google Play service, providing all users with the ability to transfer applications. To work, just download it and open it. The system will require you to have root access. Be sure to allow the program these rights and restart the phone. Next, go into the program and transfer everything you wanted to the removable card.
This is another multifunctional program that allows you to transfer the necessary applications from your phone to an SD card in just a few clicks. In addition to these features, you will have access to a set of dozens of tools. You will be able to transfer software with a cache, disable or enable any programs and services, view information about your smartphone, etc.
A great tool for transferring from your phone's internal memory to an SD card. Moreover, you will be able to transfer not only the entire application, but also its individual libraries. The program is designed to be ported to Android 2.2 and below. Cannot be used in new OS versions.
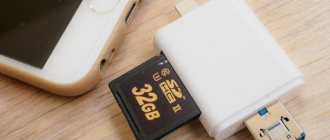
Preparing a flash drive for recording
Our USB drive needs to be formatted. With these actions, all files on it will be destroyed. And it will be very difficult to restore them. Take care of them in advance and move them to a separate folder on your computer.
Next you need to do the following:
- The flash drive must be inserted into the appropriate slot on the computer. Open Windows Explorer and find it in the window. Right click on the icon and select “Format”;
- In the new window, you need to select “FAT32” or “FAT by default” in the “File system” line;
- There is no need to change anything else. You can uncheck the “Quick cleaning” checkbox at the bottom so that the system completely deletes the files without the possibility of recovery.
Select the USB flash drive in Windows Explorer
The set-top box only understands this file system format. If your flash drive has NTFS, then it must be formatted. Many flash drives are already sold in the format we need. If this is your case, then it is already ready for recording.
What you need to run games via USB drive on Sony PlayStation 2
It is considered the most reliable source of storing files, and is also more convenient to use than disks. Accordingly, it is not surprising that most gamers prefer to use external drives to store games, and also wonder how to run a game on PS 2 from a flash drive.
In order to bring your plans to life, you will need:
- Sony PlayStation 2 console, preferably already chipped, since otherwise you will have to deal with the firmware of the console.
- A good quality USB drive with a capacity of at least four gigabytes;
- A blank new disc, preferably a DVD;
- Special programs.
It is worth noting that both the disk and the flash drive must be of decent quality, since the speed of reading information and the duration of their operation directly depend on this.
Method two: boot image
The boot image is a virtual copy of the licensed media, since when an external drive is connected, the system automatically prompts the user to install the game on a personal computer. Unlike the method described above, you do not need to re-download the archive from the flash drive, nor do you need to unzip it.
Of course, this process of copying a game to a flash drive is somewhat more complicated, but several times more effective. How to do it?
- Download and run the image creation utility. These can be either standard and familiar programs Daemon Tools and Alcohol 120%, or more specialized programs such as Windows 7 RTM USB/DVD Download Tool. Despite its name, the program allows you to create a bootable USB flash drive in a couple of clicks, without forcing the user to get acquainted with the flexible software settings;
- Select an ISO archive to create a bootable image on a flash drive;
- Run the program and wait for the process to complete.
After a few tedious minutes, you will have at your disposal an ideal bootable flash drive, with which you can easily install absolutely any computer game.