A modern TV provides high-quality image and sound. Console lovers can use it as a display to enjoy their games more. The connection is not difficult, but you must follow the instructions exactly.
- Ways to connect PS4 to TV
- How to connect PS4 to Wi-Fi
- What you need to connect
- How to prepare your TV
- How to connect PlayStation 4 to TV
- How to connect ps4 to tv using remote play
- How to connect ps4 to old tv
- How to connect to a laptop
- How to connect PS 4 to a monitor
- Connection problems
How to connect PS4 to Wi-Fi
To connect the set-top box to the wireless Internet, you need to enter the settings and go to the section dedicated to the network. Here you can choose between a wired or wireless connection.
When you select Wi-Fi, a list of available networks will be displayed from which you must select the one you need. After this, you need to enter a password if necessary and connect. Immediately after this, the PS4 will check all the basic parameters of communication with the network. Before you connect your PS4 to your TV, you will need to create your account or log in to an existing one to use the console. This procedure will be described in detail below.
Maksim
Equipment repairman
Ask a Question
Question to the expert
Why does a user need an account?
Without it, you cannot fully use the console.
Why does the set-top box check the Internet access characteristics?
It will function efficiently only if the connection speed is sufficiently high.
What you need to connect
Although the connection procedure is simple, sometimes it does not work correctly. Some players complain that the balance of the colors used on the screen is imbalanced, there is an excess of yellow and other difficulties present. To prevent this from happening, to make the connection you need to make the necessary adjustments to both the set-top box and the TV. If the preparation has been done properly, then during the game the image will be of high quality.
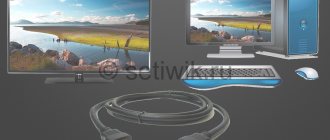
To make the connection, you need to establish a connection between the PS4 and the TV. This is most conveniently done if the latter has an HDMI connector. In this case, the connecting cable of the set-top box is used.
If you have an old TV, you will need an adapter through which you can connect HDMI to the ports that the device has. This could be, for example, DVI, VGA or tulips. If the TV or Smart TV set-top box you are using has a Wi-Fi communication module, you can equip it with wireless communication.
For the set-top box and TV to work, they will need to be connected to power using the appropriate cables. The gamepad will also be used when connected. You will also need a connecting cable with USB and miniUSB connectors.
Once the connection is established, you need to set up the PS4 and TV. When this is done, you can start using it.
Good to know
Before buying a TV or monitor, you need to know some nuances. All this will help you make the right choice.
If you have a regular console, not the Pro version, and you are planning to buy a 4K monitor, we hasten to disappoint you.
If you want maximum fluidity while gaming, you should consider purchasing a screen with a 60Hz or 120Hz refresh rate. The higher this value, the smoother the image will be.
Input-Lag is a characteristic that reflects the signal processing time of the TV. It is measured in milliseconds. The less time it takes to process, the better. The optimal value is 25-35 ms, the best value is 13.5 ms. The record figure is set for some Sony TVs.
To reduce Input-Lag, you can enable Game Mode on your TV.
TV manufacturers rarely talk about this parameter, but experienced players always pay attention to it. We advise you to spend a little time and find information about this on the Internet.
How to prepare your TV
Before you connect your PlayStation 4 to your TV, you need to configure it properly. To do this you will need to do the following:
If your television receiver has a game mode in the settings, you need to turn it on. This will minimize the load on the equipment during operation.
It must be remembered that all settings made relate to the selected signal source. If there are two HDMI ports here and the user switches the cable from one to the other, then the settings will need to be set again. The following are approximate TV settings that will allow you to get more pleasure from the game. They may vary slightly depending on user preferences. Typical recommended values are as follows:
- the clarity value should not exceed 50;
- It is recommended to turn off the black tone;
- It is better to deactivate dynamic contrast;
- Brightness is often chosen to be 55;
- motion+ is recommended not to be used;
- the color parameter should be approximately 50;
- A contrast of 80 is best;
- for tone a value of 350/50 is suitable;
- The presence of backlighting is set according to the user's taste.
These recommendations are approximate. After the user launches the game on a Sony PlayStation, he will see how closely these parameters match his preferences. If necessary, he will be able to adjust them as necessary.
HDMI
The HDMI interface is the most convenient and functional way to connect the PlayStation to a TV. All you need is a modern HDMI cable with a data transfer rate of 10 Gbps and higher and support for Quad HD resolution. It is worth saying that the cost of high-quality wire starts from 1 thousand rubles per meter. Saving may result in the inability to synchronize devices.
The hardware linking process is extremely simple. The first end of the cable is inserted into the TV, and the second into the game console.
The software settings for displaying an HDMI signal on a television system will be discussed below.
How to connect PlayStation 4 to TV
To start connecting the Playstation 4, you need to connect the cable to the HDMI connector on the console. It is located on its rear end side.
After this, the game console is connected to the outlet via the power cable. To ensure safety, this wire is first connected to the device, then the plug is inserted into the socket. Doing the opposite can lead to problems.
If your TV receiver has an HDMI input, you need to find it and connect a cable to it. After this, you can turn on the PlayStation. To do this, you need to press the appropriate button. To work with this device, you will need to connect a gamepad to it.
This is done using a cable with USB connectors. In this case, microUSB is connected to the gamepad, and USB is connected to the console.
Now you need to press the Playstation button on the gamepad.
After pressing the gamepad, a white signal will light up, it will blink several times, then a solid blue color will appear. After this, you can see the Playstation icon on the TV receiver.
Next, you can begin the console setup procedure. A screen should appear giving you access to your PS4 settings. The procedure for entering the required parameters is as follows:
- Here you can select the interface language from the very beginning. Next you will need to register an account. This requires the Internet.
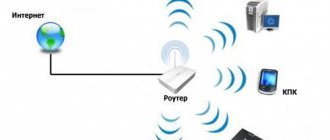
- The next screen will give you a choice between using Wi-Fi or wired internet. The first option is often used in cases where there is a router at home. In this case, the Internet enters the house, for example, via cable, connects to the device, and a wireless signal comes from the router. It is also possible to connect a cable to the router to connect to the set-top box. In the settings you need to specify the selected connection type. When using Wi-Fi, you need to select the desired wireless network and enter its access key.
- Next, a settings window will open and you will be prompted to install a video camera. The last step is optional and can be waived. You will need to indicate your region and make date and time settings.
- The license agreement will be presented on the screen. You need to familiarize yourself with it. If the user agrees with the provisions of this document, he must check the appropriate box.
- You will be prompted to update the console. You need to agree to it. This action is necessary for the normal functioning of the device in the future. At this stage, all actions are performed automatically. The user must wait for completion.
- Next, you need to come up with and enter your username and password in the appropriate fields. If he previously had an account, he can choose from two options: use the old one or create a new account.
After completing the procedure described here, the PS4 console will be ready to use, but additional settings will be required for it to work properly.
Obtaining an account is necessary before connecting the PS4. If it was done in advance, then after specifying the type of Internet connection, network access will be checked. This operation may require several tens of seconds.
Then, after the verification has been successfully completed, access to the settings will open again. Now you will need to enter the necessary parameters in the “Sound and Screen” section.
Next, go to the video output settings sub-item.
Here, it is recommended to leave most of the parameters unchanged. HDR is only automatically adjusted if present on the TV. Otherwise it needs to be disabled. It is recommended to disable supersampling mode. This is necessary in order not to overload the equipment.
Next, you need to go to the “Display Area Settings” subsection.
If necessary, shift the corners of the display area so that it occupies the entire screen.
Audio output connector settings are needed in cases where the player uses non-standard means, for example, a special model of headphones. In normal cases there is no need to change them. You can change the audio output format by selecting it from the drop-down list.
You can set the sound that is produced by pressing keys. If desired, you can set background music.
After this, the setup of the set-top box will be completed. Now the user can directly engage in games.
If your TV doesn't have HDMI
There are television receivers that do not have an HDMI connector. Next we will talk about how to connect the set-top box in such cases. This particularly applies to older TVs. In this case, you need to determine which connector is present and find an adapter from HDMI to this connector. Otherwise, the connection procedure will be no different.
How to connect ps4 to tv using remote play
Developers are constantly working to improve the console. After one of the firmware updates, the Remote Play function became available. In order to be able to use it, the device must meet the following conditions:
- The hardware in question must be running software version 3.50 or higher.
- Requires a DualShock controller.
- A device that allows the console to access Remote Play. To do this, you can use a smartphone, laptop, or desktop computer. They can run Android, Mac OS or iOS.
It is necessary to have access to the Internet at a speed of at least 5 Mbit/s. This is the minimum acceptable value, but it will be better if the speed exceeds 12 Mbit/s.
In order to take advantage of this feature, you need to make changes to the console settings:
- You will need to allow access to it from the Internet. To do this, in the settings you need to go to the “Connection settings for a remote user” section. To activate the function, enable the “Enable remote playback” option.
- You need to set the status of the console you are using to “Basic”. To do this, go to “Account Management” in the settings. Then “Activate as PS4 primary device” is connected.
- Sets the ability to remotely start the console from a state when it is in sleep mode. To do this, you need to open the power saving settings, then go to “Settings functions available in idle mode.” In the list that appears, check for the “Stay connected to the Internet” and “Turn on PS4 from the network” options when turned on.
After the correct settings have been made, in order to connect, you need to download the Remote Play client for your computer. This can be done if you are using Windows or Mac OS operating systems. After downloading from the manufacturer’s website and installation, you need to launch the program. Next, perform the following steps:
- Launch the console.
- Click on the “Start” button.
- Part of the PlayStation Network. To do this, you can use your PS4 account login and password.
- The search for the set-top box and connecting it to the client program will start automatically.
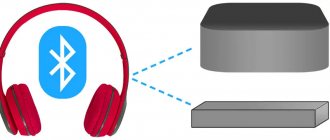
- The DualShock controller is connected to the computer. This can be done via a cable with USB and microUSB connectors or via a wireless connection using Bluetooth.
You can now play the game on your computer using the Remote Play feature. Of course, after this there are no questions about whether it is possible to connect other players via the network.
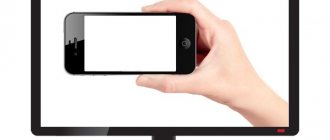
How to connect to a laptop
To connect a Sony Playstation, you need to use a cable with an HDMI connector. The laptop has this type of output, but to work with the set-top box, an HDMI input is required. Therefore, you will need to use an RCA cable. To transmit the video signal you will need to use an adapter. For the white and red plugs, use an adapter to the AV-Jack connector.
On PS you will need to reset user settings. To do this, you need to long press the “Start” button and wait for the sound signal to turn on. After connecting to the laptop, you will need to select the “Tulips” icon in the settings. After this, you can start playing on the console.
S-Video
The S-Video interface is an older version of the AV plug and has particularly low image quality. Despite all the shortcomings of Separate Video, synchronizing devices using this method may be the only possible option for some TVs.
The user will have to purchase this accessory independently, and the connection will occur as follows:
- the flat end of the cable is inserted into the PlayStation AV connector;
- colored plugs responsible for transmitting stereo sound are connected to the corresponding color sockets of the TV device;
- the third round plug is connected to the TV video connector.
Oddly enough, the old connector has one advantage over its modified version - “built-in” support for transmitting audio codecs, so connecting external audio equipment is not required.