A computer mouse is one of the most familiar and convenient pointing devices for controlling the cursor on a PC. But the standard wired version has one critical drawback - freedom of movement is limited by the long cable. You can solve this problem by connecting the mouse via radio (Wireless) or Bluetooth. We will tell you how to connect and configure a wireless mouse to a laptop or computer, and also highlight the main advantages and disadvantages of such a device.
Bluetooth mouse
A wireless mouse without an adapter is great for a computer or laptop that does not have enough USB ports for all devices. To do this, it must have a Bluetooth module installed. You can connect a Bluetooth mouse to your PC as follows:
- Open Start and select the Devices and Printers tab if you're using Windows 7. In Win10, you'll first need to open Control Panel.
"Devices and Printers"
- Turn on the mouse and click on “Add device”.
"Adding a device"
- Wait until your computer detects the device.
Device discovery
- Now you need to install the drivers - to do this, simply select your device from the list of found ones and click “Next”.
Now you need to install the drivers
- The system will automatically begin searching and installing drivers. Wait for the process to complete and check the functionality of the mouse.
All subsequent connections of the wireless Bluetooth mouse will occur automatically after it and the PC are turned on.
Instructions for connecting via adapter
A wireless mouse adapter usually looks like a small piece of free-form plastic, most often rectangular, with a metal USB connector protruding from it. This standard is usually called just that – “for a USB mouse”. Modern adapters are very small in size and practically do not protrude beyond the laptop body. But small sizes can also become a problem - if the adapter is lost, it is difficult to find it. Wireless USB mice are very popular due to their low price. Also, they usually do not need to configure anything for different operating systems - the adapter is simply inserted into a free port, and after a few seconds the mouse is ready for use. In some mouse models, the adapter is not located separately in the package and is not inserted into the mouse from the outside, but is hidden in the battery compartment (bottom). The adapter can only be removed by opening the compartment. Detailed connection instructions are as follows:
- First you need to provide the mouse with energy, because it does not receive power through wires. We insert the batteries. The battery compartment cover usually opens through the bottom of the mouse, although there are some unusual designs with a cover on the back or side.
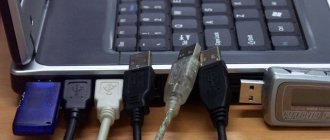
- Now you need to ensure communication between the PC and the mouse. Insert the USB adapter into any free slot:
- If necessary, change the mouse settings - for left-handedness, cursor movement speed, PC reaction time to double-clicking the mouse button, etc.
After connecting the mouse, you need to take into account the signal reception range. Most likely, you will not be able to control the cursor on the screen if the distance from the mouse to the adapter/laptop is more than 20 meters.
Manipulating the mouse and adapter
If you have a wireless mouse, the first thing you need to do is find and connect the adapter. Typically, it comes in a box with the product itself or is hidden inside the mouse body. It is usually located in a special recess or compartment on the back of the mouse.
Make sure your device has fully charged batteries. After that, plug the adapter into the USB port on your laptop/computer and turn on the mouse. Move the switch to the On position. If the wireless mouse is a laser mouse (not to be confused with an optical one, in which the beam is not visible), then when it is activated, you will see a red light under it. Place it on a glossy surface and check its functionality.
Driver installation
Many mice are detected by most versions of operating systems and without specially installed drivers. At the same time, there are a number of models for which a driver must be installed to be fully functional. You can find it:
- on the disk that comes with the device;
- on the global Internet on the manufacturer’s website.
Enter the full name of your mouse in the search engine and go to the manufacturer’s official website. You can usually download drivers in the “Support”, “Downloads” or “Software” sections. You can find the necessary drivers for your model on the websites of Asus, A4tech, Corsair. These are the most popular and well-known brands among computer mouse manufacturers. If you don't know how to install a wireless mouse on a laptop, you can also look for information in the instructions for the mouse.
You can see if the driver is installed correctly and even update it in the task manager. If the driver is not installed correctly, there will be a yellow triangle with an exclamation mark next to the device. Right-click on the device (for example, via a touchpad) and select “Update Drivers” to update through the OS.
Settings in the operating system
As a rule, with a correctly installed driver, there is no need to perform any settings in the OS. But through the interface, the user can configure various parameters of the mouse’s functioning: its sensitivity, pointer type and much more. To go to the desired section, follow the following instructions:
- Go to your control panel. On Windows 10, right-click on the Start icon.
- In Control Panel, select Mouse. A window will appear with several tabs where you can fully configure the device.
- In the “Hardware” tab, make sure that the system recognizes your device. The “Status” field should read “The device is working normally.”
RF mouse
These mice work via a USB adapter that comes with it. To connect an RF mouse to your computer, follow the instructions:
- Plug the adapter into any USB port on your PC.
Insert adapter
- In this case, the search for drivers will start automatically, just wait.
- Check whether there are batteries in the mouse or whether the battery is charged.
- Don't forget to turn on the device - usually such a button or switch is located somewhere at the bottom.
Don't forget to turn on your device
- If there is a round button on the top of the mouse, press it to connect. Don't confuse this with the DPI switch. If there is no such button, just wait.
Round button on the mouse
- When the drivers are installed, check the functionality of the mouse.
How to connect a wired mouse to a laptop
How to connect a wired mouse to a laptop
You can connect a wired mouse to a laptop or netbook via a USB connector.
If you have an old mouse with a PS/2 connector, you can also connect it to this connector via a special adapter.
There are special mice with a thin coiled wire.
How to connect a wireless laser mouse to a laptop
How to connect a wireless laser mouse to a laptop
The wireless mouse runs on batteries through a special small receiver that connects to the USB port of the laptop.
Some mice also have a switch on the sole that needs to be turned on.
In order for the mouse to work, you need to insert the batteries into a special compartment, connect the receiver to the laptop and move the latch to the “ ON ” position.
Attention! When installing batteries, ensure correct polarity, otherwise the mouse will not work. Some mouse models also have a “ CONNECT ” button, which must be pressed after connecting the receiver to the laptop’s USB port.
Usually modern mice find the necessary driver themselves and start working after a couple of minutes. If this does not happen, the operating system will prompt you to download and install it. In this case, you will need an Internet connection.
Connecting a wireless mouse via Bluetooth connection
Connecting a wireless mouse via Bluetooth connection
All modern laptops have built-in Bluetooth, so you won't need anything other than the Bluetooth mouse itself.
When connecting a Bluetooth mouse to a laptop, you need to insert batteries into it and press the “ ON ” button.
Now you need to turn on Bluetooth on your laptop and search for devices.
In Windows 7, Devices and Printers in it .
Click on the “ Add device ” link at the top of the window.
Select your mouse when it appears in the search results. Then click " Next ".
After a short time, the system will find the necessary drivers and install them. Now you can work.
The touchpad can be disabled while the mouse is connected. For information on how to do this, read the instructions for your laptop. Typically, this requires simultaneously pressing the “Fn” key and the mouse key.
How to disable the touchpad on a laptop?
The touchpad causes a lot of trouble when working, because when typing text, you inadvertently constantly come into contact with it. But you can disable it if you have an official utility from the manufacturer installed on your laptop.
Click on the “Start” menu and enter “Mouse” in the search - then click on “Mouse Options”.
In the device section, click on “Advanced settings...”.
There should be a checkbox on one of the tabs that will disable the touchpad when such a device is connected. It doesn’t matter which device is wired or wireless. At the very end, click “Apply”. I showed you the example of a Lenovo beech, but this function is available on all laptops.
How to set up a wireless mouse: pointer speed, cursor type and more
To configure the mouse, open the corresponding tab in the settings:
- In the search on your computer (Win + S), type “Cursor”.
- Select a search result, which will take you to the “Cursor and Pointer” settings section.
"Cursor and Pointer"
- Here you can configure the cursor icon, its thickness, the speed of movement and rotation of the mouse wheel.
- The pointer speed can also be adjusted on some mice using the button on top in front of the wheel. It can be signed as DPI.
Possible problems and solutions
Wireless equipment may not connect for a variety of reasons, from incorrectly installed drivers to defects. We recommend the following setup steps:
- turn the mouse on and off several times and then check again;
- check if the battery is charged;
- Check the functionality of the USB port into which the adapter is installed (try connecting another device to it).
- make sure the bluetooth module is working properly (connect your phone or tablet to your laptop);
- install the driver (be sure to restart your computer after this);
- Make sure that the operation of the wireless adapter or Bluetooth module is not blocked by administrator rights or other software (antivirus).
Some hardware problems can be solved with specialized software, for example, MS Fix IT or Connection Tools. After launch, the program prompts the user to check the system for the absence or presence of malfunctions. The software will scan. If problems are detected, a window will appear asking you to fix them. Before answering positively, carefully read what exactly the program will correct.
Now you know all the troubleshooting methods. Having solved them, you will be able to freely use a wireless mouse. If the described methods do not help, take the mouse to the purchase store and present your claims about its inoperability (if the product is under warranty). Alternative options are to take the device to a service center or simply buy a new mouse.
Sources
- https://ichip.ru/sovety/ekspluataciya/kak-podklyuchit-i-nastroit-besprovodnuyu-myshku-k-noutbuku-ili-kompyuteru-595622
- https://masterservis24.ru/246-podkljuchit-besprovodnuju-mysh.html
- https://droidov.com/kak-podkluchit-mouse
- https://wirelesscover.ru/other/kak-podklyuchit-besprovodnuyu-mysh-k-noutbuku
- https://safe-comp.ru/kak-pravilno-podklyuchit-besprovodnuyu-mysh-k-kompyuteru.html
- https://moydrygpk.ru/noutbuk/kak-podklyuchit-myshku-k-noutbuku.html
- https://WiFiGid.ru/raznye-sovety-dlya-windows/kak-podklyuchit-besprovodnuyu-myshku-k-noutbuku
What to do if your wireless mouse doesn't work
If your wireless mouse suddenly refuses to work on its own, there may be several reasons for this:
- There is a problem with the computer itself. If the keyboard also does not respond to calls, and the image on the screen is simply frozen, restart the computer - even if it is trivial, but most problems are solved this way.
- The batteries are dead or the battery is dead. If your wireless mouse runs on batteries, change them and check if everything works. If it has a battery, check if it is charged - just connect the mouse to a power outlet or PC via a USB cable.
- The USB connector is broken. No less banal advice than rebooting, but just as effective - insert the Bluetooth adapter from the mouse into another port on the computer. Perhaps there is nothing wrong with the outlet, and it is simply clogged - carefully clean it.
- The drivers have fallen off. Open “Device Manager” (right-click on the “Start” button), find your mouse there and check the status of the drivers for it. If necessary, update or reinstall them.
- Viruses in the computer. Have you scanned your PC for malware lately? Use antivirus or Windows Defender to check your system.
- The mouse itself is broken. To check this, connect it to another PC. If it doesn't help, then the device is faulty.
What are the disadvantages of wireless mice?
The main disadvantage for ordinary users is the periodic replacement of batteries in the mouse. One AA set can last for 3-5 months, depending on the intensity of use and the quality of the batteries.
For gamers, the signal transmission delay caused by a wireless connection can become critical, but only if you are an eSports player and every millisecond is extremely important to you.
A guaranteed option to get instant response is to use wired models. But today you can also buy a wireless gaming mouse: their range is quite large.
By the way, another way to get rid of wires is to connect a wireless keyboard. In one of our materials we have collected the optimal models. And if you don’t know how gaming mice and other professional devices differ from regular ones, read another article.
Additional devices
Sometimes you have to use the typing functions on your TV. This can be done by calling up the virtual button panel, but pressing the controller each time you type a character is inconvenient and time-consuming. Connecting a keyboard for Smart TV will solve the problem.
Users are rarely interested in this issue, since connecting the keyboard to the TV is quite simple. It is enough to insert the USB output of the device into a specially designated socket on the monitor and wait for the devices to synchronize.