User Account Control (UAC) is a built-in tool in the Windows system that displays notifications about changes made to the system by an application or program, as well as by the user himself, thereby warning and protecting the system from the penetration of malware.
This tool was introduced in Windows Vista and is present in both Windows 8, 8.1, as well as Windows 7 and 10. By default, User Account Control is enabled on systems. But if it is disabled for any reason, any of the methods described below will help you to enable or configure it.
How to enable User Account Control on Windows 8
What is UAC
This function can be considered informational. It notifies the user when performing an action that requires System Administrator rights. At the same time, a message appears on the screen: “Do you want to allow the following program to make changes on this computer?” You can confirm or deny this manipulation.
What is it used for?
User Account Control was implemented to protect the OS from running malicious code. Thanks to it, the user is aware of important events regarding programs: installation, removal, modification. The other side of the coin: not everyone will understand what exactly UAC is asking for. This is confusing for newbies.
Enabling UAC in Windows 7
Along with enabling the security feature, activating UAC means that a confirmation window will always appear to confirm that an action has been completed, typically launching a program/installer. Thanks to this, many malicious applications in the background will not be able to launch important system components or a “silent” installation, since UAC will ask for confirmation for these actions. It is worth understanding that this method does not protect the user 100% from threats, but in combination it will be a useful tool.
Method 1: "Control Panel"
Through the “Control Panel” you can quickly get to the settings of the required parameter. Follow the instructions below:
- Open Control Panel through the Start menu.
Go to the "User Accounts" section.
On this page, click the “Change User Account Control settings” link.
You'll see a bar showing how often Windows notifies you when changes are made. By default, the control is at the very bottom. Pull it up to the indicated marks.
- How to disable User Account Control (UAC) in Windows 7
Each label assigns a different level of UAC response, so be sure to read the information to the right: it tells you in which cases you will receive notifications and which choice is recommended in which situation.
The system will prompt you to restart your computer to activate UAC.
Please note that if you want to configure the level of UAC behavior to an even higher level (for example, with input from an administrator account) or disable the darkened desktop background, you will not be able to do this through this window. Use the recommendations in Reason 4 at the end of this article. It talks about how to edit the behavior of the UAC window in more detail through the Local Security Policy .
Method 2: Start Menu
You can get to the window specified in step 3 of the previous method much faster if you open “Start” and left-click on the picture with your profile.
After this, all you have to do is click on the link “Change User Account Control Settings” and perform the same manipulations as indicated in steps 4-6 of Method 1.
Method 3: "Run"
The Run window can also quickly take you directly to the UAC Alert Level Edit window.
- Use the Win + R key combination to launch the Run window. Write the command UserAccountControlSettings.exe in it and press “OK” or Enter on the keyboard.
- You will see a window in which you can move the slider to turn on and set the frequency of alerts. More details about this are written in steps 4-5 of Method 1.
After completing these steps, restart your computer.
Method 4: "System Configuration"
You can also enable UAC through the standard System Configuration utility, but here you cannot select the level of operation of this function. By default, the highest response level will be assigned.
- Press the Win + R key combination and write msconfig in the window. Click on "OK".
- Switch to the “Tools” tab, single-click the “User Account Control Settings” tool, click “Run”, and then “OK”.
Restart your PC.
- Disabling User Account Control for a specific application in Win 7-10
Method 5: "Command Line"
Users who are accustomed to working with CMD will find this method useful.
- Open the console by expanding the menu, searching for the Command Prompt application and running it as an administrator. You can also run it by opening the Run window using the Win + R keys and writing cmd in the corresponding field.
- Enter the command C:WindowsSystem32cmd.exe /k %windir%System32reg.exe ADD HKLMSOFTWAREMicrosoftWindowsCurrentVersionPoliciesSystem /v EnableLUA /t REG_DWORD /d 1 /f and press Enter.
- A notification indicating successful activation will appear.
All that remains is to reboot the system.
Method 6: “Registry Editor”
The Registry Editor utility allows you to perform almost any manipulation with the operating system, so you should use it very carefully. However, enabling UAC through it is not difficult, and this method will be more effective than others in the event that viruses block the activation of this function.
Disable Windows 10 UAC in Control Panel
The way to disable or change UAC is the fastest and does not require running any commands. To use it, you need to open the Control Panel. You can do this by right-clicking on Start and selecting Control Panel.
Start - Control Panel
In the Control Panel we find the User Accounts section.
user accounts
Next, open a subsection with the same name.
user accounts
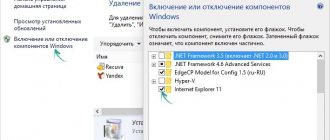
The next window is the Manage Your Account page. Click on the Change User Account Control settings link.
Change User Account Control settings
Now the most important thing. To completely disable UAC, drag the slider with the left mouse button to the very bottom and click OK.
Disabling UAC
But I personally recommend not to do this, but to try to start by placing the benunok at least one level higher. This will allow you to leave your computer's protection turned on and working, even if not as effectively as in the up position.
Recommended UAC Level
Why disable UAC?
It is worth disabling if you are tired of constant requests for changes in the system. This applies to inexperienced users who still find it difficult to evaluate the adequacy of a request every time; they will not be able to figure out whether a routine action will be performed or whether it is a virus that is “breaking” the OS.
In exceptional cases, Account Control is deactivated to get rid of failures of a specific program. Under such circumstances, after fixing the problem with the problematic application, UAC is activated again.
What is UAC
Starting with Vista, Windows introduces a new security mechanism called UAC or User Account Control. Why is UAC needed and how does it work? Essentially, this is a function that allows you to prevent spontaneous execution of executable files on the system by asking the administrator for permission to perform operations that can make more or less significant changes to the operation of the system, programs or other user accounts. This protection mechanism is currently used in all latest versions of Windows.
- How to disable UAC? And is it worth turning it off? В» Support for Windows 7-XP users
Externally, the way User Account Control works in Windows 7/10 is that when the process starts, a window appears asking you to confirm an action that requires administrator rights.
This switches the desktop to protected mode, preventing the user from interacting with other applications. The only exception is for the built-in Administrator account, which is not restricted by UAC, but is disabled by default.
The benefit of UAC is obvious - if it were not there, any virus could run with higher rights when a user is working in an administrator account. Of course, UAC is not a panacea, but it is quite capable of stopping such unauthorized launch of an executable file. However, many users do not like UAC, and the main reason for this is its intrusiveness. Therefore, it is not surprising that ordinary users often have the question of how to disable User Account Control in Windows 7/10.
Video: how to disable UAC
Disabling User Account Control mode may result in you accidentally starting a process that will make changes to the operation of the system and lead to its failure. Therefore, if you disable UAC, be extremely careful in your actions: do not run programs that seem suspicious and do not recklessly edit various folders and files located on the operating system disk.
- Author: Denis Dolgopolov
Rate this article:
- 5
- 4
- 3
- 2
- 1
(2 votes, average: 2.5 out of 5)
Share with your friends!
Ways to disable UAC
Windows 10 UAC can be disabled in many ways, as in the seventh or eighth version. Let's look at them separately from simple to more complex.
Using the control panel
Using the tenth version of Windows as an example, everything is done like this:
- Right-click on Start and select “Control Panel” in the context menu;
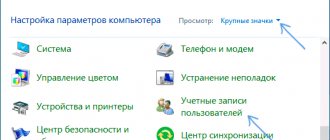
- at the top of the window that appears, in the “View” block, set “Icons” and “Categories”;
- in the main part of the window, find and go to “User Accounts”;
- Click on the line “Change control parameters” - it is located at the bottom of the window;
- in the new window, move the slider to the lowest position and save the changes by clicking “OK”;
- the system will ask if you need to record new settings - confirm the action.
There is a quick way to get to the necessary Control Panel menu. For this:
- hold down the Win+R combination;
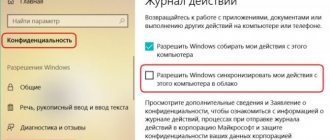
- copy the command UserAccountControlSettings;
- Confirm the launch by pressing Enter.
Result – the “Account management settings...” window will open.
How to disable a service using the command line
To disable UAC Windows 7, follow the following algorithm:
- hold down the Win+R combination, copy the cmd command into the window, run it by pressing Enter;
- run it by pressing Enter;
- Restart your computer for the settings to take effect.
Disabling UAC in Windows 10 through the registry
To do this, take the following steps:
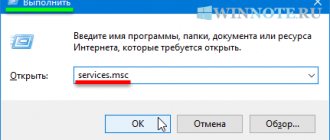
- hold down the Win+R combination, enter the command regedit and press Enter - the Registry Editor will launch;
- in the left pane of the Editor, follow the path HKEY_LOCAL_MACHINE => SOFTWARE => Microsoft => Windows => CurrentVersion => Policies => System;
- double-click to change the values of the following parameters in the right panel of the Editor: PromptOnSecureDesktop, EnableLUA, ConsentPromptBehaviorAdmin, and the required new parameters therefore: 0, 1, 0;
- after each parameter change, save the changes by clicking on “OK”;
- For the settings to be activated, reboot your computer.
How to disable UAC for a specific program in Windows 10? There is a method for which you need to edit the registry. The result is that the program will run and/or change system settings without notification from UAC, although it will not be disabled system-wide. You need to act in the following sequence:
- In the Registry Editor, go to the following branch: HKEY_CURRENT_USER => SOFTWARE => Microsoft => Windows NT => CurrentVersion => AppCompatFlags => Layers.
- In the right part of the window, right-click on the empty space: “Create” => “String parameter”. This parameter must have a name that matches the path to the executable file. For example, for Skype it will be C:Program FilesCPUIDSkypeSkype.exe. In each case, you need to go to the folder with the installed application and copy the contents of the address bar.
- After creating the parameter, right-click => “Edit”. A window will open and copy RunAsInvoker into the “Value” line, save the changes by clicking “OK”. Now UAC will not bother you when you open this application.
If you need to disable Control for several applications, the procedure can be simplified. For this:
- create a text document;
- copy into itWindows Registry Editor Version 5.00[HKEY_CURRENT_USERSOFTWAREMicrosoftWindows NTCurrentVersionAppCompatFlagsLayers]“C:\Program Files\Skype\Skype.exe”=”RUNASINVOKER”
- in this example, replace “C:\Program Files\Skype\Skype.exe” with the path to the executable file for which UAC is disabled;
- note that double slashes are used;
- change the file extension to .reg;
- Double click on this file and confirm making changes by clicking on “Yes”.
Disabling UAC in Windows 10 using third-party utilities
The UAC Tweak utility will do. Launch it after downloading and installing. If an error occurs, go to the properties of the executable file and activate compatibility mode for Windows Vista. After starting UAC Tweak, a window will appear similar to the User Account Control settings in the Control Panel, but in a more concise form. You just need to put a mark opposite the bottom line.
Control Panel
Disabling UAC Windows 7 looks like this:
- Start - Control Panel.
- "User accounts".
- "Changing account settings."
- A window will open with descriptions and a slider. Move it to set the desired settings. On the right side there will be an explanation of the selected option.
- There are four o means that a warning dialog box will pop up when starting absolutely any program.
- If you need to completely disable UAC, move the “carriage” to the bottom “Never notify” bar. But then the risk of infection by virus programs will increase, and Windows will be at risk.
- It's better to leave the slider somewhere in the middle. So that User Account Control notifies you only when an application tries to change something in the system. If you place the rectangle in the third position, when the message appears, the picture on the monitor will darken. If you set it to the second division, the display will not darken.
Configure when to show notifications
Entering this menu and disabling UAC can be done faster.
- Click Start.
- Click on your account image above.
There is no such slider in Windows Vista. Accordingly, detailed configuration of the function is impossible. Only enabling and disabling the mode is available.
Changing UAC Settings in Registry Editor
Disabling UAC and choosing any of the four options for Windows 10 User Account Control is also possible using the Registry Editor (to launch it, press Win + R on your keyboard and enter regedit).
UAC operation parameters are determined by three registry keys located in the HKEY_LOCAL_MACHINE SOFTWARE section Microsoft Windows CurrentVersion Policies System
Go to this section and look for the following DWORD parameters on the right side of the window: PromptOnSecureDesktop, EnableLUA, ConsentPromptBehaviorAdmin. You can change their values by double clicking. Below are the values of each of the keys in the order in which they are specified for different options for User Account Control alerts.
- Always notify - 1, 1, 2 respectively.
- Notify when applications try to change parameters (default values) - 1, 1, 5.
- Notify without dimming the screen - 0, 1, 5.
- Disable UAC and do not notify - 0, 1, 0.
I think that anyone who can be advised to disable UAC under certain circumstances will be able to figure out what's what, it's not difficult.
How and why a UAC window may appear
There are several possible scenarios that could cause the UAC window to appear:
- When trying to install/uninstall programs
- When you try to open a system utility such as MSConfig or Regedit (registry editor)
- Any kind of program that tries to access system components, or check for updates to third-party tools, or change the system time
- When you try to remove/add directories in the "Program Files" folder or in the system directory (usually C:\Windows)
- Last but not least. The UAC window is shown only when you initiate a process such as installing/updating/uninstalling software, drivers, plugins, or in some cases when starting programs (for example, games), as well as when installing Windows updates. And it's all. If the UAC window appears when you have done nothing, then there is probably malware on your system.
Note : However, depending on your settings, UAC windows may not appear. For example, if you have configured a ban on elevation of rights for ordinary users. But more on that later.
Disconnection methods
For less common versions of Windows OS, you can completely disable Control using a similar algorithm as for more popular Windows.
Windows Server 2012
To disable Windows UAC in Windows Server 2012, do the following:
- Go to “Control Panel”, “Accounts...”, “Changing settings...”.
- In the new window, click on “Enable or disable …” => “Continue”.
- Uncheck “Use Account Control...” and save the changes by clicking “OK”.
- The system will ask you to reboot. If you need to deactivate UAC now, select “Restart later”.
Windows Vista
- Hold down the combination Windows + R, enter msconfig in the window, run by pressing Enter.
- In the window that appears, go to the “Service” tab.
- In the list, find the item “Disable User Account Control...”.
All ways to disable UAC
Well, now let's get back to how to disable UAC in Windows 7/10. The most obvious way is through the interface. You can access the necessary settings through the User Accounts applet in the Control Panel, but to avoid going too far, you can run the UserAccountControlSettings (it works in Windows 7, 8, 8.1 and 10).
Four UAC operating modes are available:
- The first mode disables User Account Control; prompts do not appear when performing any actions.
- When working in the second mode, the system requests permission to launch programs, but the desktop does not darken.
- The third mode is set by default. You are asked for permission to run programs with the desktop in safe mode.
- The fourth mode includes the maximum level of protection; the mechanism is triggered not only when programs are launched, but also when the administrator himself tries to make changes to the settings.
To disable UAC, drag the slider to the bottom and click OK. If the system requires it, restart your computer.
Disabling UAC through the registry
Open the registry editor with the regedit and expand this branch:
HKEY_LOCAL_MACHINE/SOFTWARE/Microsoft/Windows/CurrentVersion/Policies/System
Find the EnableLUA and change its value from 1 to 0, save the settings and reboot.
Also pay attention to the PromptOnSecureDesktop (0 disables only dimming) and ConsentPromptBehaviorAdmin (1 enables the maximum level of protection with a password requirement) options.
Using the Command Line
The same actions can be performed using a command line running as an administrator. In this example, the command to completely disable UAC would be:
C:/Windows/System32/cmd.exe /k %windir%/System32/reg.exe ADD HKLM/SOFTWARE/Microsoft/Windows/CurrentVersion/Policies/System /v EnableLUA /t REG_DWORD /d 0 /f
The first part of the command is the path to the registry control file, the second is the editable key, EnableLUA is the parameter responsible for disabling UAC, 0 is its new value. By replacing the parameter and its value with other data, you can change the settings of other UAC modes (see above). As in the case of making changes through the registry, you will need to restart the computer.
Local Group Policies
You can also disable UAC using the Local Group Policy Editor. Run it with the gpedit.msc and go to Computer Configuration – Windows Configuration – Security Settings – Local Policies – Security Settings.
There are many policies to manage User Account Control settings in the right column, but to disable UAC you only need one - all administrators run in Administrator Approved mode. Double-click on it and set the radio button in the dialog box to the “Disabled” position, and then restart the computer.
User Account Control (UAC) Guide
User Account Control is probably the most underrated and perhaps even the most hated feature that debuted in Vista and has been part of all subsequent versions of Windows. Much of the hate that users throw at User Account Control is, in my opinion, undeserved, since the feature provides real benefits. I completely agree that User Account Control (UAC) can be quite annoying at times, but it was introduced into Windows for a purpose. No, not to interfere with users, but to facilitate a smooth transition from a standard (restricted) account to an administrator account.
In this article, I'll explain what UAC is, how it works, why it's necessary, and how to configure it. I have no intention of telling you why you should use UAC, but rather informing you of what you're missing out on by disabling it.
A little background and account information
As you should know, Windows works with so-called accounts. They come in two types: administrator and standard (limited).
The administrator account gives the user full access to all functions of the operating system, i.e. the user can do whatever he wants. A standard account user has reduced rights and is therefore only allowed to do certain things. This, as a rule, is all that affects only the current user. For example: changing the wallpaper on the desktop, mouse settings, changing the sound scheme, etc. In general, everything that is specific to a specific user and does not apply to the entire system is available in the standard account. Anything that can affect the system as a whole requires administrator access.
One of the tasks assigned to these accounts is to protect against malicious code. The general idea here is that the user performs normal work under a limited account and switches to the administrator account only when an action requires it. Paradoxically, malware receives the same level of rights with which the user logged in.
In Windows 2000 and Windows XP, performing actions as an administrator is not implemented flexible enough, and therefore working under a limited account was not very convenient. One of the ways to perform an administrative action in these versions of the system looks like this: logging out of a limited account (or quick switching if you were using Windows XP) -> logging into the administrator account -> performing an action -> logging out of the administrator account (or quick switching if Windows XP was used) -> return to a limited account.
Another option is to use the context menu and the "Run as another user" option, which opens a window in which you must specify the appropriate administrator account and password to run the file as an administrator. This is a fairly quick way to switch from one account to another, but it does not apply to any situation that requires administrative privileges. Another problem with this method is that the administrator account must have a password, otherwise execution will fail.
That's why User Account Control was introduced in Windows Vista and brought to near perfection in Windows 7.
What is UAC
UAC is a feature in Windows Vista, 7, 8, 8.1 and 10 that aims to make the transition from a restricted environment to an administrator environment as smooth and hassle-free as possible, eliminating the need to manually run files as an administrator or switch between accounts. In addition, UAC is an additional layer of protection that requires little effort on the part of the user, but can prevent serious damage.
How UAC works
When a user logs into their account, Windows creates a so-called user access token, which contains certain information about that account and mainly various security identifiers that the operating system uses to control the access capabilities of that account. In other words, this token is a kind of personal document (like a passport, for example). This applies to all versions of Windows based on the NT kernel: NT, 2000, XP, Vista, 7, 8 and 10.
When a user logs into a standard (limited) account, a standard user token with limited rights is generated. When a user logs into an administrator account, a so-called. administrator token with full access. Logical.
However, in Windows Vista, 7, 8 and 10, if UAC is enabled and the user is logged into an administrator account, Windows creates two tokens. The Administrator one remains in the background, and the Standard one is used to launch Explorer.exe. That is, Explorer.exe runs with limited rights. In this case, all processes launched after this become subprocesses of Explorer.exe with inherited limited privileges of the main process. If a process requires administrative rights, it requests an administrator token, and Windows in turn asks the user for permission to provide the process with this token in the form of a special dialog box.
This dialog box contains the so-called secure desktop, which can only be accessed by the operating system. It looks like a darkened snapshot of the actual desktop and only contains an administrator confirmation window and possibly a language bar (if more than one language is activated).
If the user does not agree and clicks “No,” Windows will deny the process an administrator token. And if he agrees and selects “Yes,” the operating system will grant the process the privileges it needs, namely, an administrator token.
If the process is already running with reduced rights, it will be restarted with elevated (administrator) rights. A process cannot be demoted or promoted directly. Once a process has been launched with one token, it will not be able to obtain other rights until it is launched again with new rights. An example is the Task Manager, which always runs with limited rights. If you click the "Show processes of all users" button, Task Manager will be closed and launched again, but with administrator rights.
When using a standard account, UAC asks you to specify a specific administrator account and enter a password:
How UAC protects the user
UAC by itself does not provide much security. It just makes it easier to transition from a restricted environment to an administrative one. So a better way of asking the question is therefore how a restricted account hinders the user. Under a restricted user profile, processes cannot access certain system areas:
- main disk partition;
- other users' user folders in the \Users\ folder;
- Program Files folder;
- Windows folder and all its subfolders;
- sections of other accounts in the system registry
- HKEY_LOCAL_MACHINE section in the system registry.
Any process (or malicious code) without administrator rights cannot penetrate deep into the system, without access to the necessary folders and registry keys, and therefore cannot cause serious damage to the system.
Can UAC interfere with older programs that are not officially compatible with Vista/7/8/10
Should not. When UAC is enabled, virtualization is also enabled. Some old and/or simply poorly written programs do not use the correct folders to store their files (settings, logs, etc.). The correct folders are the folders in the AppData directory that each account has and where each program can create a folder to store whatever it wants.
Some programs try to save their files to Program Files and/or Windows. If the program is run with administrator rights, this will not be a problem. However, if the program is running with limited permissions, it will not be able to make changes to files/folders in Program Files and/or Windows. The operating system simply won't allow it.
In order to prevent problems with such programs, Windows offers virtualization of folders and registry keys that programs with limited rights cannot access in principle. When such a program tries to create a file in a protected folder, the operating system redirects it to a special VirtualStore folder, which is located in X:\Users\<your-profile-name>\AppData\Local\ (where X: is the system partition, usually – C:). Those. Through the eyes of the program itself, everything is fine. She faces no obstacles and feels like she creates files/folders exactly where she wants them. VirtualStore typically contains Program Files and Windows subfolders. Here is a screenshot of Program Files in my VirtualStore folder:
And here is what is in the SopCast folder, for example:
Those. if UAC was stopped, or the program was always run as administrator, these files/folders would be created in C:\Program Files\SopCast. In Windows XP, these files and folders would be created without problems, because all programs in it have administrator rights by default.
This, of course, should not be considered by developers as a permanent solution. The responsibility of each author is to create software that is fully compatible with current operating systems.
UAC Dialog Boxes
You may have noticed that there are only three different UAC dialog boxes. Here we will look at those in Windows 7, 8.x and 10. In Vista, the dialogs are somewhat different, but we will not dwell on them.
The first type of window has a dark blue stripe at the top and a shield icon in the upper left corner, which is divided into 2 blue and 2 yellow sections. This window appears when confirmation is required for a process with a digital signature that belongs to the operating system - the so-called. Windows binaries. We'll talk about them below.
The second type of window also has a dark blue ribbon, but the shield icon is completely blue and has a question mark. This window appears when confirmation is required for a digitally signed process, but the process/file is not owned by the operating system.
The third window is decorated with an orange stripe, the shield is also orange, but with an exclamation mark. This dialog appears when confirmation is required for a process without a digital signature.
UAC Settings
User Account Control settings (operating modes) are located in Control Panel -> System and Security -> Changing User Account Control settings . There are only 4 of them:
Always notify is the highest level. This mode is equivalent to the way UAC works in Windows Vista. In this mode, the system always requires confirmation of administrator rights, regardless of the process and what it requires.
The second level is the default in Windows 7, 8.x and 10. In this mode, Windows does not display the UAC window when it comes to the so-called Windows binaries. Those. If a file/process that requires administrator rights meets the following 3 conditions, the operating system will grant them to it automatically, without confirmation from the user:
- the file has a manifest built-in or as a separate file, which indicates automatic elevation of rights;
- the file is located in the Windows folder (or in any of its subfolders);
- the file is signed with a valid Windows digital signature.
The third mode is the same as the second (previous), but with the difference that it does not use a secure desktop. That is, the screen does not darken, and the UAC dialog box appears like any other. Microsoft does not recommend using this option, and I will explain why later.
Do not notify me is the fourth and final level. This essentially means disabling UAC completely.
Two remarks are in order here:
- The Windows digital signature refers specifically to the operating system. I say this because there are also files that have been digitally signed by Microsoft. These are two separate signatures, with UAC only recognizing the Windows digital signature as it acts as proof that the file is not only from Microsoft, but is part of the operating system.
- Not all Windows files have a manifest for automatic elevation of rights. There are files that deliberately lack this. For example, regedit.exe and cmd.exe. It is clear that the second one is deprived of automatic promotion, because it is very often used to launch other processes, and as already mentioned, each new process inherits the rights of the process that launched it. This means that anyone could use the Command Prompt to run any processes seamlessly with administrator rights. Fortunately, Microsoft is not stupid.
Why is it important to use a secure desktop?
A secure desktop prevents any possible interference and influence from other processes. As mentioned above, only the operating system has access to it and with it it only accepts basic commands from the user, that is, pressing the “Yes” or “No” button.
If you are not using a secure desktop, an attacker could spoof a UAC window to fool you into running their malicious file with administrator rights.
When are administrator rights needed? When does the UAC window appear?
In general, there are three cases in which UAC addresses the user:
- when changing system (not user) settings, although in fact this only applies to the maximum UAC level;
- when installing or uninstalling a program/driver;
- when an application/process requires administrator privileges to make changes to system files/folders or system registry keys.
Why it's important not to disable UAC
User Account Control provides a high level of protection, and requires virtually nothing in return. That is, the UAC efficiency is very high. I don't understand why he annoys people so much. In everyday work, the average user sees the UAC window 1-2 times a day. Maybe even 0. Is it that much?
The average user rarely changes system settings, and when they do, UAC does not bother with its questions if it works with the default settings.
The average user does not install drivers and programs every day. All drivers and most of the necessary programs are installed once - after installing Windows. That is, this is the main percentage of UAC requests. After this, UAC intervenes only when updating, but new versions of programs are not released every day, not to mention drivers. Moreover, many do not update either programs or drivers at all, which further reduces UAC issues.
Very few programs need administrator rights to do their job. These are mainly defragmenters, cleaning and optimization tools, some programs for diagnostics (AIDA64, HWMonitor, SpeedFan, etc.) and system settings (Process Explorer and Autoruns, for example, but only if you need to do something specific - say, disable a driver /service or program starting from Windows). And all these are programs that either need not be used at all, or in rare cases. All frequently used applications work absolutely fine with UAC and do not ask any questions:
- multimedia players (audio and/or video);
- video/audio converters;
- programs for image/video/audio processing;
- programs for capturing screenshots of your desktop or video recordings on it;
- image viewing programs;
- web browsers;
- file downloaders (download managers and clients of P2P networks);
- FTP clients;
- instant messengers or programs for voice/video communication;
- disc burning programs;
- archivers;
- text editors;
- PDF readers;
- virtual machines;
- and etc.
Even installing Windows updates does not use the UAC window.
There are people who are willing to sacrifice 1-2 or more minutes a day to "optimize" the system with some crookedly written programs that do nothing useful, but are not willing to spend a few seconds a day to respond to UAC requests.
Various statements like “I am an experienced user and I know how to protect myself” are not enough, because no one is immune and the outcome of certain situations does not always depend on the user. Moreover, people tend to make mistakes; it happens to everyone.
Let me give you one example: let's say you are using a program that has vulnerabilities, and one day you find yourself on a site that exploits those vulnerabilities. If User Account Control is enabled and the program runs with limited rights, an attacker will not be able to cause much trouble. Otherwise, the damage to the system can be colossal.
And this is just one of many examples.
Running applications alongside Windows with administrator rights
I admit that there may be users who turn off UAC simply to be able to run programs along with Windows and with administrator rights. This is not possible in the normal way because UAC cannot send a request to the user until the desktop is loaded. However, there is a way through which you can leave UAC enabled. Here he is:
- open Task Scheduler ;
- click Create task ;
- in the Name , enter something of your choice, and at the bottom of the window, enable the option Run with highest rights ;
- go to the Triggers and click Create ;
- From the drop-down menu at the top, select When you log in ; if you want to create a task for a specific user, select the User and then click Change user ; enter your username and confirm by pressing the OK ;
- go to the Actions and click Create ;
- click Browse , select the appropriate application and confirm your choice;
- go to the Conditions and disable the option Run only when plugged in ;
- on the Options , disable the Stop task that takes longer to complete option;
- confirm by clicking OK .
Ready. The task has been added so that the application will now load automatically with administrator rights. There is, however, one small catch here: all such tasks are performed with a priority lower than normal - below normal (below normal). If you're okay with that, then it's okay. If not, then you'll have to work a little harder:
- launch Task Scheduler if you have already closed it;
- select Task Scheduler Library ;
- mark your task, click Export and save it in .xml format;
- open the .xml file in a text editor;
- find section 7 , which should be at the end of the file and change the seven (7) between the opening and closing tags to a five (5);
- save the file;
- In the Task Scheduler, select your task again, click Delete and confirm deletion;
- Now click Import task , point to the file you just saved and click OK .
That's all. Whether you use UAC or not is up to you, but it's important to know what you're losing when you disable it, as well as being aware of the risks. Thank you for your attention!
How to remove existing updates in Top 10?
It happens that when UAC is disabled, OS updates are installed that cause system instability. This can be resolved by removing them as follows:
- Hold down the Win+I combination and go to the “Update and Security” menu.
- In the new window, follow the path: “Windows Update” => “Update history” => “Uninstall updates”.
- A list of installed updates will be displayed. Select what you need and click “Delete” at the top. If you need to select and clear everything, hold down the Ctrl+A key combination.
Cleaning up old files after updating Windows
- Enter the query “Disk Cleanup” in the system search and run the corresponding utility.
- In the new window, specify the local drive where the OS is installed.
- Click on “Clean up system files”.
- Specify the Windows drive again.
- Check the list next to “Previous Windows installations”.
- Start the process by clicking “OK” at the bottom of the window.
Principle of operation
We'll talk about ways to disable control later, but for now let's look a little deeper into the mechanism of UAC. When a user logs into an account, they are given two tokens or, more simply, a list of permissions. The first token is user, the second is administrator. From this we can conclude that the PC administrator uses the permissions of the second list, but this is not entirely true. It just works with it, but the token itself is "owned" by the UAC mechanism, so even if you run applications with administrative rights, you will still need User Account Control permission.
This may not be the most accurate way to describe how UAC works. Control, rather, can be thought of as a kind of intermediate link between the user and administrator lists of rights. Let's take a closer look at what happens during installation/launch of a program when User Account Control is enabled. When the user runs the installer, the ShellExecute function calls another CreateProcess function, which in turn runs the AppCompat, Fusion, and Installer Detection systems to check whether the program needs elevated privileges. If necessary, the CreateProcess function returns the ERROR_ELEVATION_REQUIRED error, and the ShellExecute function launches the UAC dialog box.
This is roughly what the chain looks like. But UAC's powers don't end there. It also participates in other mechanisms, for example, in file system and registry virtualization, redirecting the writing of programs that do not have administrative rights to specially designated places, instead of writing their data directly to protected directories and registry branches.
Administrator or regular user - pros and cons
Most ordinary users are more accustomed to always logging into the system with administrator rights, this makes it easier to install/uninstall programs, drivers, games, etc. The downside to running as administrator is that it makes it much easier for malware such as viruses and rootkits to harm your system. There is also a high chance that you could accidentally damage your system due to easy access to system tools such as the Windows Registry (Regedit) and System Configuration (MSConfig). If you log in as a standard user, your access will be limited, but you will be able to perform most actions, with the exception of making system-wide changes and adding/removing programs.
With UAC, you can perform administrative actions even if you are a regular user. You can continue to log in as an administrator, and at the same time configure UAC to require a password for administrative actions (more on this later).
Note : To enable the UAC password request, you must be logged in as an administrator because you will need to launch the system local policy settings editor (secpol.msc).
A little trick.
To enable the default hidden super-administrator entry, under which absolutely all programs will be launched as an administrator without a UAC window, you need to open a command prompt with administrator rights and enter the following text:
- net user administrator /active:yes (for Russian Windows: net user Administrator /active:yes)
Enabling and configuring KUZ in Windows 10
The easiest way to enable UAC is through the Control Panel. You need to get to the “Account Management Settings...” window and raise the slider from the lowest level. Detailed instructions for opening the corresponding window are in this block of the article. Let's look in more detail at the parameters that are set using the slider in the window from the bottom to the top:
- Control is completely disabled. There will be no notifications about requests to perform actions with Administrator rights.
- The notification appears, but the screen does not dim. UAC is enabled and when it is triggered, an informational message appears asking you to take action, but the work area of the display is not blocked.
- The notification appears and the screen goes dark.
- Notifications occur not only when system settings are changed, but also when actions are performed by any installers.
Sources used:
- https://gamesqa.ru/kompyutery/chto-takoe-uac-i-kak-ego-otklyuchit-v-windows-7-8-10-i-server-2012-12335/
- https://lumpics.ru/how-to-enable-uac-in-windows-7/
- https://viarum.ru/uac-windows/
- https://remontka.pro/uac-disable-windows-10/
User Account Control slider
In Windows 7 (and higher), UAC settings on the computer are controlled using a special slider (called through the Control Panel or the UserAccountControlSettings.exe file). Using the slider, you can choose from four predefined UAC protection levels.
- Level 4 - Always notify - Always notify (maximum level of UAC protection);
- Level 3 - Notify only when programs try to make changes to my computer (default ) - Notify only when a program tries to make changes to my computer (standard protection level);
- Level 2 - Notify only when programs try to make changes to my computer (do not dim my desktop ) - the same as the previous level, but without switching to Secure Desktop with desktop locking;
- Level 1 - Never notify - Never notify (UAC disabled).
By default, Windows 10 has UAC protection level 3