Microsoft in Windows 10 has introduced a special utility through which video communication is carried out. But a novice user often experiences difficulty turning on the webcam for the first time, not knowing where to find it and how to install the drivers if they are not installed automatically.
The OS is built in such a way that it is easy and convenient for the user to manage the operation of all elements responsible for video and sound. To open the camera on a laptop running Windows 10, you need to follow our instructions:
- Open “Start”, where we go to the general list of applications and look for the “Camera” service;
- The monitor will display detailed information about the application. If the webcam is configured correctly, it will be activated and you will see the image from it.
As you can see, turning on the webcam is not difficult; immediately after this action you can use all its capabilities.
How to set up a webcam on Windows 10
In order for you to be able to set up a webcam on Windows 10, you will first have to launch a special application called Camera.
You can do this by clicking on the Start - Camera button. When a window opens in which you will see the image from the webcam. This app can take photos with jpg extension and videos with mp4 extension. In this application, the navigation buttons for taking videos and photos are on the right side. The large button indicates the current mode; if you hover the cursor over it, the current shooting mode will be displayed in the form of text. How to set up a webcam on a computer
In the center there is a button for changing the brightness. In a darkened room, you can click on this button and a semicircle-shaped slider will appear near the large button. If you move this slider up, the brightness will increase. Accordingly, if the slider is moved down, the brightness will decrease. After adjusting the brightness, press the big button. In the Photo Capture mode, you can take a photo using a timer that can be started for 2, 5 or 10 seconds. Having set the timer, click on the big button and the timer will start in the form of a circle that will disappear.
Setting up a camera on a laptop
You can also open the settings in this application, and to do this you need to click on the gear-shaped icon located in the upper right corner of the open application window. In the settings that open, you can configure:
At the bottom there is an option to Change the location for saving photos and videos.
How to set up a built-in webcam on a laptop
If you click on this item, Windows Settings - System - Device memory - Change where new content is saved will open.
How to set up a camera on a Windows 10 computer
By clicking on the last item, a window will open in which you will find the item New photos and videos will be saved here. From the pop-up list, select a storage device, such as a flash drive, and then click on the Save button that appears.
How to set up a camera on a laptop
After this, a folder will automatically appear on your storage device that will be named after your user name. This folder will contain all the photos and videos you take. If you do not configure this item, photos and videos will be saved to the Images folder - Camera Album.
Source
How to check if the camera is working?
Many users check whether the camera works in the programs installed on the laptop. For example, they call friends and relatives on Skype. However, this method is not 100% reliable. The fact is that the webcam can be disabled in the settings of a particular application while it is in working condition.
Special online services allow you to find out whether the camera is really turned on. One of the simplest and most convenient is WebcamMic Test. To check the video camera, the user must:
- Go to webcammictest.com.
- Click on the “Check webcam” button.
- When using the service for the first time, the browser may ask for consent to turn on the device. You need to confirm the action by selecting the “Allow” option.
If the camera is turned on and working properly, the user will see his image on the laptop or PC screen. Otherwise the following message will appear.
In addition, you can find out whether the webcam is turned on on the laptop even without access to the Internet. On computers with Windows 10, a standard application is installed that allows you to perform this check. You need to open the Start menu and find a program called “Camera” in it.
The webcam will automatically turn on when it starts, and an image from it will appear on the screen. A malfunction will be indicated by a corresponding notification.
Device installation
Today, most webcams are universal, that is, they work on almost any computer. Follow these steps to connect and install your device:
Operating systems such as Windows 8 and Windows 10 must recognize new hardware themselves, and drivers are usually installed automatically.
If your operating system does not install drivers automatically, you can go to the manufacturer's website and download the necessary software. If your webcam came with a CD, you can install this software to add additional features.
The webcam needs to be placed in front of you and at approximately the same level as your face when you are sitting. The best place to install it is on the top of the monitor; most devices sit there, with an adjustable clip that pushes into the back of the display to secure it in place. Adjust the latch as desired; When finished, the webcam should be pointed at your face.
How to use
Once you have connected and installed the camera on your computer, you can use it to show your video. You can use popular video conferencing services and software such as Microsoft Teams, Skype, Webex and Zoom. When you join a conference call using the software, you can activate the device to display live video.
The service should have a button with a video camera image. Press it to turn on the device and activate the necessary functions. Depending on the video conferencing service, live video sharing begins immediately or displays a preview.
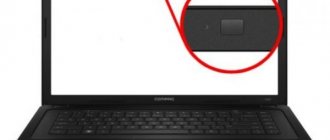
Today, some laptops come with a built-in video camera, eliminating the need for external hardware. However, it is not easy to see and easy to miss. In most cases, laptop webcams are located in the middle of the top edge of the screen in a plastic housing. The size is usually 1/2 inch or less. It could be a small dark circle or a small square with a slightly less dark circle inside it. If you have any difficulties with the OS, you can find out prices for installing Windows in Kyiv.
Connecting and setting up an external camera
An external camera should be understood as a separate device that connects to the USB port of a computer. The design and shape of the device can vary greatly, which primarily depends on the manufacturer. Many models have a built-in microphone, which helps avoid unnecessary financial costs. To connect, it is recommended to use active extension cables, which will provide the webcam with additional power, which has a positive effect on the signal quality. Using an active cable, you can place the camera at a distance of up to 10 meters from the computer, while when using a passive cable, the limit is 5 meters.
The camera package includes a disk containing all the necessary drivers and software from the manufacturer. To configure the camera, connect it via the USB port, turn it on if the corresponding key is provided on the case, install the disk in the drive and load the drivers. Using software from the manufacturer, you can adjust the microphone volume, turn the camera on and off. In most cases, you don’t even need to install drivers - the system finds them automatically after connecting the device.
Checking and disabling the webcam
To disable the webcam, you need to follow the following path: Start - Settings - Privacy - Camera. We have functionality that allows us to activate and deactivate it. If you have problems with the camera's performance, proceed as follows:
The quality of video communication is affected by the characteristics of the available graphics equipment. If you have fast Internet, but at the same time the picture has a lot of noise, then this will not be affected in any way. The only way to solve the problem is to buy a new camera.
Possible driver problems
If you do not find your webcam in the “Device Manager” or it is indicated as unidentified equipment, then for its normal functioning you will need to download drivers. This can be done using the capabilities of Windows 10 OS - the system will find them in its database and automatically download them to the computer. To do this, right-click on the hardware and select “Update drivers.” We select the automatic search method if you have not previously downloaded drivers to your computer. Next, they will be automatically downloaded from the Internet and installed on your computer. There is another way - visit the device manufacturer’s website and download the latest version of drivers from there.
How to turn on the webcam on a Windows 10 laptop and what to do if it doesn't work
All laptops are equipped with a built-in webcam. Users can use it as a tool for video chats in various instant messengers, for example, Skype. Windows 10 has a special standard Camera application that allows you to quickly launch it on your laptop like on a phone to take an instant photo or shoot a video. Today we’ll look at how to enable and configure the camera in the application of the same name, as well as how to give certain programs access to it. In addition, we list effective ways to troubleshoot problems with the web.
Let's sum it up
There are several ways to check whether the webcam is working on a laptop. The simplest and most reliable are to use special online services or a standard application for Windows. Manually turning the camera on and off is done through the device manager. It also displays the status of the webcam and updates drivers. To expand the capabilities of the camera, numerous specialized programs are available - they allow you to apply effects to the image, improve and supplement it in every possible way.
Thank the author and share the article on social networks.
How to turn on the camera on a laptop with Windows 10
You can activate the laptop’s webcam to take pictures at the current moment in time; to do this, launch the classic “Camera” application. If you want to use it in other utilities, give them access to it in Windows settings. Let's look at how to do both.
Launching an application from the Start menu
Calling the Camera application is quite simple: it is in the list of utilities in the Start menu. Follow the short instructions:
Video: launching the Camera utility on Windows 10
Turning on using special keys
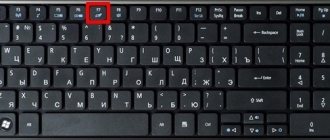
Many laptop computers have special keys that allow you to activate the webcam (open a window where you can see yourself). They are different for each manufacturer's models. Switching on occurs through a combination of two buttons, the first of which is always Fn. The above-mentioned key is added to it: it usually has a camera icon, so you should study the keyboard carefully. For Lenovo laptops there are two combinations: Fn + F5 and Fn + Esc.
For many laptops, Fn + V also works.
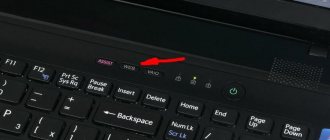
Older laptop models have a separate button, which is usually located next to the Power button. In this case, you only need to press it; Fn is not needed in this case.
Setting permission to use the webcam by other programs
If, when you launch the Camera app, a white window appears on your screen asking you to share your camera and microphone, it means you have disabled access to them in your privacy settings. In this case, no programs will be able to use the web. We'll tell you in detail how to enable access:
Immediately click on the first switch to allow all utilities to use the camera.
Switch to the third block called “Camera”. You can also launch it from the application of the same name, if it works for you. To do this, click on the gear in the upper right corner, scroll the panel on the right side of the window down to the “Related parameters” block. In it, click on the “Change privacy settings” link. The system will immediately redirect you to the desired tab in the Windows Settings window.
Windows tools allow you to configure the camera to turn on only for specific applications. If this is your case, scroll down the page a little and in the list of utilities find those that you want to give access to the web. For them, set the switch to the “On” position.
Possible problems
Users periodically encounter difficulties when using a webcam. First, you need to clarify whether the laptop actually has a webcam, since some models (especially those with edge-to-edge screens) are produced without a camera. The tool can also be hidden in the sliding mechanism or under one of the buttons.
If any application refuses to show a picture taken on a webcam, it is important to check whether the appropriate permission has been granted to the program. To do this, use the “Privacy” section from the “Options” menu. If even the correct settings do not allow you to launch the webcam, you need to forcefully update the drivers:
After installing the latest software, the webcam should work. It would also be a good idea to test the operating system for viruses, since malware periodically affects the performance of some elements of the laptop.
Source
What to do if the camera doesn't work
Users of the Windows operating system sometimes fail to launch the classic Camera utility. In this case, as a rule, a message appears in the window stating that it is not possible to find the camera or turn it on. Each error has its own code. Most problems can be resolved by updating or rolling back video device drivers.
Checking antivirus settings
Most antiviruses have a feature that protects the user from being tracked via a webcam. It allows or blocks access to the video device for certain scripts and programs. However, there may be problems with this feature. For example, an antivirus may suddenly disable the camera for the standard Camera application or the third-party Skype utility, considering them a threat. In this case, a message usually appears in the Skype messenger that it cannot connect to the webcam and that you need to close the utility that is currently using it.
To make sure that the problem is not at all with the antivirus, temporarily disable the camera protection functions in it. The name of the option, as well as the location of the section, differ depending on the type of antivirus. Let's look at the instructions using the Avast program as an example:
Update or install driver
The most common cause of camera problems is failure to update its drivers in a timely manner. We will describe how to make an update in the instructions:
Rollback to a previous driver version
If you notice that the web browser has begun to refuse to work after a recent driver update, roll back to the previous version. The following procedure may help you regain access to the camera:
Removing and Rediscovering a Webcam
If the usual update did not help you, do it a little differently: remove the video camera, and then immediately return it to its place. When you return, the system will immediately install the device with all the latest updates. We will describe how to do this below:
Troubleshooting issue code 0xA00F4246
After launching the “Camera” utility, a black window may open with a notification that the “web” cannot be launched. In this case, the system will ask you to check if new driver versions are available and update the latest ones if available. The error code in this case is 0xA00F4246. It occurs both with built-in devices and with removable (external) devices that are connected separately.
If you encounter this problem, most likely your camera will not work in other utilities that require it, for example, Skype. Unfortunately, the problem cannot be fixed by simply updating the drivers. The way out of this situation is a small procedure for editing the registry in a Windows system application:
Video: what to do if error number 0xA00F4246 appears when launching Camera
The Windows 10 system has a built-in special “Camera” utility that allows you to launch a “webcam”. In this program, PC users shoot videos and take photos. To enable the webcam in other standard and third-party programs, you need to allow them to use it in the privacy settings, which are available in the Windows Settings window. If your camera does not want to start in either standard or third-party utilities, try updating its drivers in Device Manager, and also check whether an antivirus is blocking its operation.
Source
Checking operation in Device Manager
A common reason for a camera not working is that, although the computer has a video device, it is disabled from working in the system. To check this assumption, you need to go to Device Manager. There are several ways to do this.
The first option is through the Start menu and the Settings window, as already done above. Enter the query “device manager” in the search bar. Next, select the one you need from the drop-down prompts, and a new window opens.
The second option is through “This Computer”. If there is a corresponding shortcut on the screen, you should move the cursor and press the right key. Otherwise, in open Explorer, right-click on “This PC”. In the list that appears, select “Properties”.
Next, the “System” window opens, where you should activate the “Device Manager” tab.
In the window that appears, you are interested in the “Cameras” item. The name "Image Processing Device" may also be used. All video cameras used on a laptop computer are shown here. Double-clicking the left mouse button on the selected video camera will open a window with properties.
In the “Driver” tab, the recording device can be either disabled or enabled.
The camcorder may not work correctly if the driver is not installed correctly. If this is the reason, then an unknown device may be indicated in the lists of devices for video recording. The problem may also be indicated by the fact that there will be an exclamation mark next to the device. In the properties, you can update the required utility or roll back the results to the previous version if the driver does not work correctly after updating.
There are times when the driver cannot be updated automatically. Then you need to find and download it on the official website of the laptop manufacturer. You can also use Google or Yandex search engines to search for utilities on third-party resources.
First stage of setup: turning on the laptop camera
Method #1: Turn on the camera in BIOS
Typically, this method is not required to turn on the laptop camera. But if, after turning on the camera through the second method, it does not work, then it’s worth checking the BIOS settings. BIOS is designed to control all peripherals, including the camera. This system opens and closes the operating system's access to the hardware. Therefore, if the webcam is built into the case but does not work, you need to check whether it is disabled in the BIOS.
You can get into the BIOS only until the operating system logo appears. To do this, immediately after pressing the laptop start button, you must press the key that sends the user to the BIOS. Most often this is “ Delete” , but on some models it can be any button from the range “F1” - “ F12” or a combination, for example “Ctrl” + “Alt” + “Esc” . To find out which command is responsible for launching the BIOS, look closely at the bottom of the screen during normal system boot. You will see a line telling you what to do for Setup. It might look like this: “Press Del to Setup” or “F2 to Setup” .
BIOS is noticeably different in graphics from the usual operating system. This is an English menu on a blue or gray background. Control, as a rule, is carried out from the keyboard: with the keys “Left” , “Right” , “Up” , “Down” , “Enter ” . “Advanced” – a tab where you can configure the camera on your laptop. You will see the built-in webcam in the “Onboard Device Configuration” , under the “Onboard Camera” . Pay attention to the value of the parameter related to the device - it should be “Enabled” , which means “On” . If you see “Disabled” , you need to use the arrow buttons and the Enter key to change the value.
All that remains is to save the changes made with the “F10” or highlight the line “Save and exit setup” using the arrows and press “ Enter” . A window will appear in front of you asking about the seriousness of your intentions; you need to answer by pressing “ Y” , which means “ Yes” , or “ N” , which means “No” . The system now requires a reboot, after which the changes will take effect and the camera will become active.
Procedure for turning on the video camera
Before turning on the camera on a PC with Windows 7, of course, you need to connect this equipment to it, if it is not built into the case. We have a separate article devoted to physical connection, so we will not focus on this procedure here. We will consider in detail the procedure within the operating system to activate the video camera.
Method 1: "Device Manager"
In most cases, when connected to a computer, the webcam should turn on automatically, but sometimes it needs to be enabled in Device Manager.
- Click "Start" and go to "Control Panel".
Next, in the “System” section, find the “Device Manager” item and click on it.
Go to the "Image Devices" or "Sound, Video and Gaming Devices" section (depending on the camera type).
In the list of devices that opens, find the name of the video camera you want to connect and right-click on its name. The presence of the “Enable” item in the menu that appears means that the camera is disabled. In this case, you need to click on it.
- After restarting the PC, the video camera will be turned on in the system and ready for its intended use.
If you do not find the name of the video camera in the “Device Manager”, and this sometimes happens, you will need to additionally update the device configuration.
- To do this, click on the “Action” item in the menu and select “Update configuration”.
In addition, it should be noted that for the camera to work correctly and display it correctly in the Device Manager, you must have up-to-date drivers. Therefore, you should definitely install the drivers that came with your video equipment, and also update them periodically.
Method 2: Turn on the camera on your laptop
Modern laptops, as a rule, have a built-in camera, and therefore the procedure for turning it on differs from the same procedure on a desktop PC. Often, this action is performed by pressing a certain combination of keys or a button on the case, depending on the laptop model.
The most common keyboard shortcuts to launch the camera on laptops:
As you can see, often to turn on the camera on a desktop computer you just need to connect it to the PC and, if necessary, install drivers. But in some cases you will also have to make additional settings in the “Device Manager”. Activating the built-in video camera on a laptop is most often done by pressing a certain combination of keys on the keyboard.
Thank the author and share the article on social networks.
Almost all modern laptops are equipped with built-in webcams that allow you to communicate with loved ones via video, take instant pictures, and can even replace a mirror. Usually these devices are turned on by default, but the webcam may stop functioning for various reasons.
Tips for setting up a camera on a laptop
Tip #1: Setting up the camera in Windows 7
If your laptop has Windows 7, then you probably already guessed that this operating system does not have built-in tools for testing the camera for suitability. This forces you to turn to third-party applications, or go to one of the online resources that work with video cameras. The most popular applications in this matter will tell you how to set up a camera on a Windows 7 laptop:
To communicate via video communication, one condition must be met - the subscribers’ computers must have the same program “able” to make calls. Most often, this is Skype. If you are interested in a camera solely for recording videos, then you will need a software package that will be equipped with the “Save” . Launching it will activate the camera automatically. If you launched the application, but there is no image from the camera in it, try turning it on using Windows tools:
The indicator that most laptops are equipped with will notify you that the camera is active.
Tip #2: How to check if the camera is turned on in Windows 10
Let's figure out how to set up a camera on a Windows 10 laptop. On the keyboard, press “ Win” + “R” and enter microsoft.windows.camera: .
If the camera is working, you will see yourself on the screen.
Tip #3: How to set up a camera in Skype
Skype has become a household name, because for many years it was with the help of this program that people learned to make video calls. Using this popular application, we will tell you where to find the camera settings on your laptop. For this, we have a separate article with all the intricacies of setting up the camera in Skype.
Tip #4: How to set up a camera in an Internet browser
When you access any online resource that uses a webcam, you may notice a lack of video signal. First of all, in such a situation, you must first check whether the device is working. To do this, use the tips described above.
Tip #5: Camera Software
We suggest that you familiarize yourself with the descriptions of the most popular software systems.
Standard Windows Camera app
You will find all the necessary minimum functions in the standard “Camera” from Microsoft. Here you can turn the webcam on and off, record a video or take a photo. The main advantage of the program is its simple and intuitive interface. Additionally, in the “Camera” you can:
ManyCam program
Setting up a webcam on a laptop via ManyCam will allow you to edit several frames from several devices at once, and transfer the results via Skype. Other features include:
WebcamXP program
WebcamXP is a program that will not only help you decide how to adjust the quality of the camera on your laptop, but also broadcast your footage to the Internet. WebcamXP can work in tandem with a TV tuner and transmit images to a smartphone. To enable the program to synchronize streams with your phone, install the application on your mobile device as well. Among the main functions of the software package:
CyberLink YouCam program
This program is created for those who know how to go into the camera settings on a laptop. The wide functionality will seem comfortable to you if you are an experienced PC user. With CyberLink YouCam you can create clips, record presentations, correct the movement of dynamic objects, apply filters and artistic frames. Other advantages of the program are:
The application works perfectly on Windows 8 and 10. You can separately configure the user recognition function.
Programs for working with a webcam
Let's look at the most popular options.
"Camera" (standard application)
A standard program from Microsoft - for those who do not require complex functionality. “Camera” allows you to check whether the webcam is turned on, take a photo and shoot a video. The main advantage of the application is its intuitive controls. Additional functions here include:
- ability to set a timer for a photo;
- manual brightness adjustment;
- multi-shot;
- framing grid;
- flicker suppression.
ManyCam
ManyCam captures video from one or several cameras, has an online image editing function - the Skype interlocutor will immediately see the superimposed effects. Program features:
- setting resolution, number of frames per second;
- adding titles;
- combining filters;
- replacing the audio track;
- integration with all popular instant messengers.
Official website - manycam.com
CyberLink YouCam
Cyberlink YouCam offers users advanced functionality to get the most out of their webcam. The program makes it possible to create clips, presentations, add dynamic effects, filters, colorful frames. Benefits of the application:
- screen capture function;
- use of special effects in real time;
- a large number of animated templates;
- built-in privacy protections;
- drawing tools.
The program is perfectly optimized for Windows 8 and 10. In addition, it has the function of remembering the user’s face.
Official website - cyberlink.com
WebcamXP
WebcamXP is a very convenient application for video surveillance, which is distinguished by its wide capabilities for transmitting broadcasts from a webcam to the Internet. The program is able to interact with TV tuners, and also allows you to access the webcam via a smartphone. To do this, you need to download WebcamXP to your phone.
Main features of the program:
- video recording over local network;
- manual selection of broadcast sources, setting speed and other parameters;
- sending notifications when motion is detected in the frame;
- Configuring the tracking sensor.
Official website - webcamxp.com
Movavi Video Suite
Movavi Video Suite offers a full range of tools for working with media files. The program allows you not only to record video from a webcam, but also to process it, edit it, and change the quality. Other app features:
- scaling individual video areas;
- color correction;
- frame-by-frame processing;
- applying filters;
- cutting video into separate fragments with the ability to save in different formats.
Official website - movavi.ru
Important: on the portal you can also download an application for working with images, which is not inferior in functionality to the best photo editors for a computer.
