The Android operating system is still imperfect, although it is getting better in quality and functionality with each new version. Google developers regularly release updates not only for the entire OS, but also for applications integrated into it. The latter include Google Play Services, the update of which will be discussed in this article.
How to update
We will look at two main ways to update services:
- using the application store;
- without using Play Market.
In other words, through specialized software and directly. We will also talk about errors that occur due to Google Play Services not working properly and how to solve problems with them.
Via Play Market
This method does not cause difficulties, because all the indicated actions are done quite simply. Most likely, you already have Google Play installed - it can be found on your desktop or in the application menu. To start downloading applications and installing/updating services, you will need to log in with your Google account - you can create a new profile there or use an existing one.
When you use your smartphone for the first time, the system automatically takes you to the appropriate page to activate your profile or create a new one. If for some reason this did not happen and you do not know how to log in, follow the instructions:
- Go to the device settings and find the “Accounts” item.
- Select the "Add Account" option.
- From the list, select the desired service, in our case, “Google”.
- Your device will be checked, after which the last step remains - filling out the profile data.
After logging in, you will be able to use all the functions described above and update the service software.
Updates from the app store can be divided into two types:
- automatic, carried out by the system and the Play Market itself;
- custom made by you personally.
In the first case, if you checked the “auto-update” function in the Market settings, new versions of installed applications will be downloaded and installed by the system automatically. Typically, the update process occurs immediately when a fast Internet connection is connected - Wi-Fi, or until the user himself enters the store.
In order to enable the auto-update function, you need to go to the Play Market and follow the instructions step by step:
- Open the side tab of the Market main menu by swiping to the right and go to “Settings”.
- In the window that opens, the general settings will first appear, where the “Auto-update” item is located.
- You need to configure the option by changing the value to “Always” or “Only via Wi-Fi”.
The “Always” option should be treated with caution, because the next time you connect to the mobile Internet, Google Play will start downloading resource-intensive application updates. Such automatic downloading can lead to the exhaustion of available Internet megabytes, excess traffic and, thus, unnecessary expenses.
Now, having configured the auto-update function, the system will immediately begin updating existing software, including service applications and Google Play Services, immediately after connecting to Wi-Fi. If you don’t have the desire or time to install all the available updates, you can independently command the Market to download the new version of Google. To do this, you need to install it manually:
- Enter “Google Services” in the Market search.
- On the application page, click on the “Update” button.
If this feature is not available and you only see the “Delete” and “Open” options, then you already have the latest version of the service software. In this case, no update is required.
In new versions of Android, services cannot be found manually - this is a decision of the developer himself. If you cannot find the software you need, you should use other methods or download special utilities for this in the application store. If new versions are available, the system can notify you about this with a corresponding notification in the status bar. When you click on it, you will be automatically taken to a download page and asked to upgrade.
Installation from a third party source
This is an extreme case and should be addressed if for some reason your standard Play Market does not work properly or your smartphone is left without the Internet and you were unable to update via the previous method. You can always solve the problem by downloading a free APK file and installing it. You can also download via a computer, after which the file should be transferred to your phone via Bluetooth or via a USB cable.
Before installing without the Play Market, you need to pay attention to the source from which you are going to install/update services. Some sites may offer APK files with a virus, so to ensure safety, it is better to check the installer for threats. After a successful check and a message that there are no pests, you can begin the installation process.
You will not be able to install the program if installation of applications from unverified sources is prohibited on your device. To continue you need:
- Go to the settings of your smartphone or tablet.
- Go to the “Applications” or “Security” tab.
- Check the box next to “Unknown sources”.
After this, you will be able to run the APK file without errors. Agree with all installation points and wait until the installation process comes to an end. Once completed, you will be able to see the Google Services icon in the application menu.
End of Support Dates
Google began preparations for a complete abandonment of Jelly Bean back in the fall of 2022. In early October 2022, it announced[/anchor] that it would no longer support its proprietary Chrome browser for this system. Updates and security patches stopped coming out for it, which forced some users to switch to another browser, and others to buy a new mobile phone with more recent firmware.
Android Jelly Bean sported a new interface for those times
On January 31, 2022, Google announced that Jelly Bean systems will no longer receive regular updates. She left them with only critical security updates.
The release of new versions of Google Play Services will stop at the end of summer 2022. The latest build for Jelly Bean will have an index of 21.30.99. At the time of publication of the material, version 21.24.18 was available.
If update fails
If you have problems with the installer on the Android system or an error occurred when receiving data from the server, we suggest that you clean the Google services program.
To do this you need:
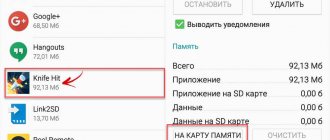
- Open application properties in “Settings” - “Applications”.
- Click on the “Stop” button.
- Go to the “Place Management” window.
- Select the “Delete all data” option.
After this action, all information that the program stored for its operation will be deleted from the device. To continue using the services, you will need to log in to Google again. This way you can recover deleted confidential data.
Also, before installation, check that the internal storage is sufficient for the update. If there is not enough memory on the device, the installation will fail.
Universal Android
For Google, the Android 4.1 Jelly Bean platform is an important part of the story for a number of reasons. One of them is related to the discovery of the tablet computer market.
Igor Yakimov, T Plus: We are at the beginning of large-scale robotization
Integration
Along with 4.1 Jelly Bean itself, Google announced its first tablet, the Nexus 7, in June 2012. The 7-inch computer went on sale in mid-July 2012 and received a lot of positive user reviews. The success of the “firstborn” prompted Google to further develop this line of business. The second tablet was not long in coming and was released along with Android 4.3 Jelly Bean in late July 2013. It was still the same Nexus 7, but its second generation received dramatic improvements and improvements compared to the first.
In general, the entire series of Android 4.x systems is important for Google, since it was it that defined a new vector for the development of the platform, which has not changed to this day. The first two generations of Android were aimed at smartphones, while the third (Android 3 Honeycomb) was released exclusively for tablets.
Android Honeycomb was not accepted by users
Google wanted to make two separate operating systems, just as Apple did with iOS not long ago, separating the iPad OS from it.
Honeycomb lasted less than a year and a half. It was released in February 2011, and Google released the latest update for it in February 2012. Before that, Android 4.0 Ice Cream Sandwich appeared in October 2011, which became Google's first universal OS for smartphones and tablets, and in June 2012 Android 4.1 Jelly Bean has been released.
Errors that occur in the Play Market
Inability to get to Play Market
The inability to access the Play Market often occurs due to problems with the user account. Perhaps you recently changed the password for the gmail.com mailbox to which your profile is linked, or there was a failure on the Google server and Android stopped recognizing you.
To restore access to your account, connect your tablet or phone to the Internet (via a SIM card or Wi-Fi), go to “Settings” and open the accounts section. The screenshot below shows what the Gmail sync issue looks like.
If you see the same picture, open the menu of this section and tap “Sync now”.
Error with code RPC:S-3
If a message with the code “RPC:S-3” appears when you try to update, you need to delete your existing Google account, create a new page and link it to your phone.
After deleting your account, all files, phone numbers, settings will remain unchanged:
- Open the application menu and click on “Settings”;
- In the window that opens, find the “Accounts...” field and click on it. Select the profile you are using that you want to delete;
- In the new window, click on the additional options button - it is located in the upper right corner. In the drop-down list, click on “Delete entry”.
To complete the action, confirm the deletion. We recommend rebooting your device for all settings to take effect and to avoid any crashes.
Other errors arising from problems with Google Play Services
Error 505 when updating Google Play Services
We install a third-party file manager (for example ES File Explorer) and give it root rights.
We go along the path system/priv-app/ and delete the folders: GmsCore, Phonesky.
Boot into recovery and install Gapps
If Error 506 pops up during the update and clearing the cache did not help
Go to Settings\Applications\All: for Google Play Store, Google Services Framework and Google Play Services do: stop, delete data, delete updates, clear cache.
Go to Settings\Accounts\Google: in the account synchronization settings, uncheck all the boxes.
Reboot your device.
Immediately after the reboot, go to Settings\Accounts\Google and put the checkboxes back (don’t pay attention when Synchronization Error appears).
Reboot your device.
Error 491
In order to fix this error, you need to do the following: go to the settings of your Android device, find your Google account and delete it, then restart your mobile gadget - smartphone or tablet computer. After rebooting, you need to add the account again. Open the Google Play Services Tool and click – clear data – stop.
Error 413
Open “Google Play Services” and click – clear data – stop. Next, clear your browser cache. The error should be resolved.
Error 492
Follow the same steps as we described in the previous paragraph.
Error 927
If this error occurs, all you need to do is wait until Google Play completes the update. Then, if the error does not disappear, you need to enter “Google Play Services” - execute - clear data - stop.
What are they needed for
This is the most important part of the system - an integral component of Android, necessary for everyone who has opened at least one application. You often receive a message indicating that you need to update Google Play services in order to launch the application. This is not the only possibility, there are others!
- Secure connection and password entry;
- Ensuring confidentiality when entering bank card data;
- Ensuring the operation of geolocation services and monitoring the location of the device;
- Interaction with smartphone software;
- Search engine authentication control;
- Synchronization of contacts within one account;
- Work with energy saving and rational distribution of battery and RAM resources.
This is just a brief list of functionality! You often see the notification “To run the application, please update Google Play Services”, what does it say? It is this program that ensures the stability and performance of your favorite instant messengers, games or desktop software.
Installing Google Play services via Recovery
The most important thing here is attentiveness. It is necessary to pay attention to the OS version, since the GApps released for each version are different. You can find out what OS is installed on your gadget in the settings by selecting the “About phone” menu. You also need to make a backup copy of your files so as not to lose important data in case of a problem.
Instructions:
- Install custom recovery.
- Then download the GApp archive for your OS, for example, here https://androidfilehost.com.
- We save an archive with services in the gadget’s memory.
- We reboot the tablet or smartphone, then press the appropriate combination of buttons. The combination depends on the brand of the device, often it is the volume button and the power button.
- Going to Recovery, select the “Install zip from SD Card” section, specify the path to the downloaded GApps file.
- We are waiting for the patch to be installed.
Despite some complexity, this method works in 99% of cases.
Android won't boot into Recovery mode
Protection Rules to Remember
Many users still create and use stupidly simple passwords like 123456. This password is only fractionally better than no password at all. Others choose a combination of birthdays, phone numbers, and so on. Your password must be random. Not affiliated with you in any way!
I like the random strings of alphanumeric text generated by password managers. Although they are difficult to remember, they are more secure and less susceptible to hacking. But, you will have to rely on a password manager, which is good. You will only need to remember one password. Make sure it's really reliable.
Here is a short list that help protect your password:
- Includes both letters and numbers
- Case sensitive
- Is random
- Supports 2FA or multi-factor authentication
- Stored offline (safely) or in a password manager
- Used VPN on an unsecured/public network
Custom installation of Google Play
If the Play Market is not installed on the gadget after a Hard Reset, you can try downloading it in a non-standard way. The GApps service may not be available on Chinese devices. In this situation, a conventional installation will not lead to the desired result.
The Mobile Go file manager should be used as the installer. We follow the instructions:
- Download the program to the PC.
- We find on the Internet and download the following files: Google Play.apk, GoogleLoginService.apk and GoogleServiceFramework.apk.
- On the mobile gadget we activate USB debugging.
- We connect the problematic device to the computer and activate drivers for it if necessary.
- Turn on Mobile Go. Then go to the My Device section, where we activate superuser rights.
- Select the File section in the left column, then open the internal memory of the Android device. There we look for the system directory.
- Go to the app folder, copy the previously downloaded APK files there by clicking on the Add button in the top panel. While Google Play is being installed, it is prohibited to disconnect the device from the PC, because this will affect its further functioning.
- We disconnect the gadget from the PC and restart it.
After completing the steps described above, the Play Market should work on Android.
Google Play Market is not working today - reasons and what to do


