02.09.2021 windows | for beginners | laptops
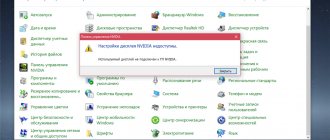
When you try to perform certain screen settings according to instructions on the Internet: adjust the screen resolution, refresh rate or other parameters using the NVIDIA Control Panel, you may find that the “Display” section or tab is missing - this most often happens on laptops, but Possible on desktop PCs as well.
This guide will detail why there is no Display section in the NVIDIA Control Panel and what you can do to make it appear, provided that you really need it. May also be useful: How to change the default video card for games and programs.
Hardware faults
If the user has recently opened the computer case, the problem may be with loosely connected cables or connectors.
It is recommended to check all connections for secure fastening; probably the cable to the video card has come loose and caused the problem. Also, if the connection points are too dusty or dirty, they need to be cleaned. Good day our dear readers. Today's article will be devoted to such a popular thing as NVIDIA drivers, or rather the NVIDIA video card control panel. If you have a problem with your NVIDIA panel and it somehow disappeared, then know that you can return it. In this article, we'll do just that—get your NVIDIA Control Panel back.
There are generally three options that can return your missing NVIDIA Control Panel. Of course, there are exceptions, for example, if you have virus software in your system, or when your operating system, on its last legs, behaves as it pleases. However, we will talk about the classic problems of missing NVIDIA Control Panel and how to get it back.
First of all, let's focus on the simplest point. Often, the NVIDIA control panel disappears after it is disabled from startup. This is the main reason that when you boot your operating system, the NVIDIA Control Panel does not load with it. In order to return the NVIDIA control panel, you need to open the utility built into the Windows operating system and write msconfig there, then press Enter and a window will open in front of you where we are interested in the Startup tab. Carefully study the list of available startup items and find the NVIDIA Control Panel there. You need to check the box next to the NVIDIA Control Panel item, which will allow you to launch the NVIDIA Control Panel immediately after loading the operating system. Of course, you must save the changes you have made and restart your computer for the changes to take effect.
Next, you need to make sure that the service responsible for the NVIDIA Control Panel is enabled. Go to the Control Panel and find the Administration section there. You need to pay attention to the Services item. Going there, we look for everything related to NVIDIA and make sure that the status of these services is not Disabled. If you see that something is disabled, simply enable it and set it to Automatic Start in the settings so that the service starts automatically after loading the operating system. Reboot the computer for the changes to take effect and check if the NVIDIA control panel appears.
If none of the above helped, then it’s time to reinstall and at the same time update your video card drivers. Go to the website of the manufacturer of your video card and enter its name to download and install the latest drivers. Restart your computer for the changes to take effect and check if your NVIDIA Control Panel appears.
Thus, we have become acquainted with the most likely reasons why the NVIDIA control panel does not load when your operating system boots. As we noted above, there are exceptions, but these are the most likely options for which such a paradox occurs. The most radical way to fix the problem is to reinstall the operating system. Alas, it is often better to reinstall everything from scratch than to understand an already dying operating system, teeming with viruses and all sorts of crooked programs and errors caused by them. In the Windows operating system, everything that you install is connected in one way or another, because to run certain programs, the same set of system libraries is used.
If the article helped you, then do not forget to return to our website. We publish articles every day and your visit to the site is gratitude for our work.
Good luck!
Fix 2 – Change Power Management Settings
If your graphics card is set to consume less power, setting it to the maximum value may solve your problem.
1. Click on the Windows icon and start writing “NVIDIA Control Panel”.
2. After that, just click on “NVIDIA Control Panel”.
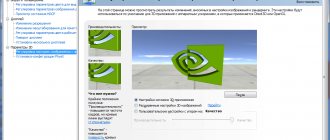
3. When the control panel appears, click "Manage 3D Settings" on the left side.
4. Now on the right side, go to the General Settings tab.
5. In the Global Settings section, find the “Power Management Mode” settings.
6. Simply click on it and select the “Prefer maximum performance” option from the drop-down list.
Now you need to disable Vsync.
7. In Global Settings, scroll down and find the “Vertical Sync” settings.
8. Now just select the “Off” option. in the drop-down menu.
9. To save these settings, click Apply.
Close the NVIDIA Control Panel. Open it again. Check to see if it crashes again.
How to open NVidia Control Panel on Windows 10 PC?
There are not many ways to open the NVidia control panel; let’s look at them in more detail.
Method No. 1. Via Control Panel
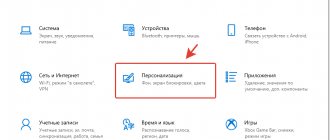
- Right-click on the Start icon and select Control Panel.
- A new window will open. Select "Hardware and Sound".
- Next, in Windows 10, you need to select “NVidia Control Panel”.
This is the standard way to access the utility.
Method No. 2. Via desktop
This method is the easiest. However, if you do not have drivers installed for your NVidia video card, the required item will not be in the list.
- Right-click on the desktop and select “NVidia Control Panel” from the drop-down menu.
- Afterwards the required settings window will open.
However, if the NVidia control panel does not open on Windows 10, there are a few simple steps you can take.
What to do if the NVidia Control Panel does not open?
If the settings window does not launch in Windows 10, and the item has disappeared from the list of desktop commands, we recommend checking whether the original drivers for the video card are installed or rolling back the Nvidia software to an older version. If a rollback does not help solve the problem, you should completely remove the drivers using the Display Driver Uninstaller program. The actions will be as follows:
- Reboot the PC in safe mode. Let's launch the program. Select the type of product. In this case, NVidia.
- Then click on the “Delete Reboot” button.
After uninstallation, you should go to the manufacturer’s official website, download and install the latest version drivers. The tool will work.
Also on the official NVidia website the following recommendations are provided for this problem:
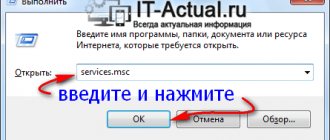
- Check if the NVIDIA Display Driver Service is enabled. To do this, press “Win + R” and enter “services.msc”.
- The services window will appear. Find "NVIDIA Display Driver Service".
- This service should start automatically when Windows starts. If it is disabled, you should activate it back.
IMPORTANT! This service is disabled when hardware acceleration is enabled. Therefore, turn off this function in the program settings.
The next recommendation concerns registry settings. If the video card control panel icon starts to disappear, you should do the following:
- Open the registry editor. Go to the branch “HKLM\SOFTWARE\NVIDIA Corporation\Global\NVTweak”. Find the parameters “NoMenus” and “NoPages” and set them to “0”.
- After the system reboots, the missing video card control will reappear.
Direct monitor control utilities such as MagicTune or ForteManager interfere with the operation of the NVIDIA Control Panel. Therefore, if necessary, they must be removed.
Also, the last tip that the developers recommend if the control panel does not want to open is to change the language settings. You should set the format and system language to “English (United States)” in the Windows Control Panel (“Regional and Language Options”).
To learn how else to solve this problem, watch the video:
Change resolution
In some cases, the panel may not launch due to the screen resolution being set too low. In this case, you need to change it:
- Right-click on the desktop and select “ Screen Resolution ” (or “Desktop Properties”, depending on the system version).
- Then in the window that opens, select the highest recommended resolution.
- Apply the settings, confirm the changes and click OK. Exactly in that order! If you click “ Apply ”, then in case of inappropriate resolution, after a few seconds the changes will be canceled if they have not been confirmed. If you click “ OK ”, the changes will be applied even if the resolution is inappropriate. This may cause the screen to go dark and you will need to edit the registry from safe mode to restore the settings.
Method #1 Reinstalling Nvidia drivers
First of all, you should try reinstalling the Nvidia drivers. To do this, do the following:
- Press Windows + R and enter devmgmt.msc.
- With Device Manager open, find the “Display Adapters” drop-down tab and open it.
- Right-click on your graphics accelerator and select “Uninstall.” Confirm your intentions by checking the box next to “Remove driver programs for this device” and clicking OK.
- Then go to the official Nvidia website to download the drivers needed for your video card. Note: We do not recommend that you select automatic driver search, as this sometimes leads to various failures, and it can also take a huge amount of time. It will be better if you use manual selection of drivers.
- After downloading the driver package from Nvidia's website, run the installer to begin the driver installation process. We have already removed the drivers for the video card through Device Manager, but it will still be better if you check the “Clean installation” option during installation.
- After installing the new drivers, restart your computer and then try accessing the Nvidia Control Panel again. Note: an alternative driver installation can be Device Manager, with the help of which you can also do this. However, under certain circumstances, various problems may arise. However, if you want to install drivers this way, then do the following: Press Windows + R and enter devmgmt.msc.
- Once you open Device Manager, find the “Display Adapters” drop-down tab and open it.
- Right-click on your video card and select “Update Driver...”, after which Device Manager will install everything itself.
What should I do if my NVIDIA display settings are unavailable?
Let's start with the simplest. If a similar message appeared at one “wonderful” moment when the system started, but everything worked before, perhaps this is somehow connected with failures in the OS itself. There is nothing easier than activating system recovery to the state when the problem did not exist.
The same applies to the situation when a notification appears that NVIDIA display settings are not available in Windows 10 or any other OS version after installing updates. It is quite possible that some of them were installed incorrectly or themselves cause problems with the operating system. In this case, in the programs and components section, you need to remove recently installed updates, sorting them by installation date. But you need to remove them one by one, rebooting the system and trying to access the settings. When a faulty update is found, you should set up a manual search, and then exclude the faulty package from the list, having first remembered or written down its number.
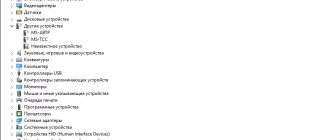
Another completely banal reason is associated with situations when two video cards are installed on the computer (discrete and integrated). You can correct the situation in the “Task Manager”, where the built-in adapter is disabled if it is currently in use, or the NVIDIA card is activated.
Exactly the same actions for cases where the “Device Manager” settings have no effect can be performed in the BIOS settings, where NVIDIA is selected as the main one from the list of installed video cards.
Method #5 Fixing the Windows Registry
If you were still unable to resolve the problem when launching the Nvidia Control Panel, now we will try to fix the entries in the Windows Registry. As always, be careful when changing entries. We recommend that you create a backup of your Windows Registry so that if something unexpected happens, you can quickly recover.
- Press Windows+R, type regedit and press Enter.
- Go to HKEY_CLASSES_ROOT\Directory\Background\ContextMenuHandler.
- Find NvCplDesktopContext, right-click on it and select “Delete”.
- Now go to HKEY_CLASSES_ROOT\Directory\Background\shell.
- Right-click Shell and select New→Partition and name it Nvidia Control Panel.
- Right-click on Nvidia Control Panel and select New→Partition. Name this section command.
- Double-click on command and enter the value C:\Windows\System32\nvcplui.exe in the line, and then click OK.
- Exit the Windows Registry and restart your computer.
After making small changes to your Windows Registry, try opening the Nvidia Control Panel again. She should definitely open up calmly this time.
Method #7 Disabling Quick Boot
UEFI-based firmwares have a fast startup feature that helps your computer start up faster. However, this function has one drawback - because of it, some third-party applications, drivers and services simply cannot start simultaneously with the system, i.e. their launch is skipped.
If you have this feature enabled and cannot launch the Nvidia Control Panel, then the above event may have occurred. You need to go to your BIOS settings and disable Quick Boot or Quick Startup.
Can't launch Nvidia Control Panel
Let's look at the main reasons for failures when launching the Nvidia Control Panel, there are several of them:
- Random operating system crash.
- Problems with the system services installed with the driver (“Nvidia Display Driver Service” and “Nvidia Display Container LS”).
- The installed version of Nvidia Panel is incompatible with the NET Framework utility.
- The video driver does not match the video card.
- Some third-party monitor control software may conflict with Nvidia software.
- Virus infection.
- Hardware reasons.
OS crash
Such problems occur quite often, especially among those users who experiment a lot with installing and uninstalling various programs. After uninstalling applications, “tails” may remain in the system in the form of library or driver files or registry keys.
These problems can be resolved by simply rebooting the working machine. If the problem occurs immediately after installing the driver, then the computer must be restarted, since some changes made to the system can only be applied after this action.
System Services
When installing software for a video card, the “Nvidia Display Driver Service” and “Nvidia Display ContainerLS” services (either both or just the first) are installed in the list of system services, which in turn can fail for a number of reasons.
If the suspicion falls on the incorrect operation of services, then it is necessary to restart each service. This is done like this:
- Open the Windows Control Panel and go to the Administrative Tools section.
- We look for “Services” in the list of snap-ins.
- We select the desired service and look at its status. If the “Running” status is displayed, then in the right block you need to click on the “Restart service” link. If there is no value in this line, then you need to start the service by clicking on the “Start service” link there.
After completing the steps, you can try to open the Nvidia Control Panel, and then restart the computer and check the functionality of the software again. If the problem is not solved, then move on to other options.
NET Framework
NET Framework is a software platform necessary for the operation of some software. Nvidia products are no exception. It is possible that a new software package installed on your computer requires a more recent edition of the .NET platform. In any case, you should always have the latest version.
The update occurs as follows:
- Go to the package download page on the Microsoft website and download the latest version. Today it is NET Framework 4.
- After launching the downloaded installer, you must run it and wait for the installation to complete, which occurs in the same way as installing any other program. After the process is completed, reboot the computer.
Invalid video driver
When choosing a driver for your new (or not so new) video card on the official Nvidia website, be more careful. It is necessary to correctly determine the series and family (model) of the device.
Read more: Determining the product series of Nvidia video cards How to find out the model of your video card on Windows 10
Driver search:
- Go to the driver download page of the official Nvidia website.
- Select the card series and family from the drop-down lists (read the articles linked above), as well as your operating system (don’t forget about the bit depth). After entering the values, click the “Search” button.
- On the next page, click “Download Now”.
- After another automatic transition, we accept the license agreement and the download will begin.
If you are not sure of your choice, then you can install the software automatically through the “Device Manager”, but first you need to completely remove the old video card driver. This is done using special software Display Driver Uninstaller. How to work with the program is described in this article.
- Call “Control Panel” and go to “Device Manager”.
- We find our video card in the “Video adapters” section, right-click on it and select the “Update drivers” link in the drop-down menu.
- A window will open asking you to choose how to search for software. We are interested in the first point. By selecting it, we allow the system to search for the driver itself. Don't forget to connect to the Internet.
Then Windows will do everything itself: it will find and install the latest software and prompt you to reboot.
Monitor control programs
If you use programs from third-party developers to adjust monitor parameters (brightness, gamma, etc.), such as MagicTune or Display Tuner, then they can cause conflicts in the system. To exclude this option, you need to uninstall the software you are using, reboot and check the functionality of the Nvidia Panel.
Viruses
The most “unpleasant” cause of failures and malfunctions in programs is viruses. The pest can either damage the driver files and the software supplied with it, or replace them with its own infected ones. The actions of viruses are very diverse, but the result is the same: incorrect operation of the software.
If you suspect the presence of malicious code, you need to scan the system with the antivirus you use, or use utilities from Kaspersky Lab, Dr.Web or similar.
Read more: Scan your computer for viruses without installing an antivirus
If you have doubts about the correct operation of programs or do not have experience in treating the system, then it is better to turn to specialized resources, for example, virusinfo.info or safezone.cc, where they will help you get rid of viruses completely free of charge.
Hardware problems
In some cases, proprietary software may not start due to the fact that the device is simply not connected to the motherboard or is connected but incorrectly. Open the computer case and check the tightness of the cable connections and the secure fit of the video card in the PCI-E slot.
Read more: How to install a video card in a computer
We have looked at several reasons why the Nvidia Control Panel may not work, most of which are not serious and can be resolved quite simply. It is important to remember that most problems are caused by simple carelessness or inexperience of the user. That is why, before taking active steps to remove and install software, check the equipment and try to reboot the machine.
We are glad that we were able to help you solve the problem. Thank the author and share the article on social networks. Describe what didn't work for you. Our specialists will try to answer as quickly as possible.
Fix 3 – Disable Fast Startup
1. Find the powercfg.cpl file in the Windows 10 search box. Click the powercfg.cpl file.
2. Now that the Power Options are open, select “Choose what the power buttons do” on the left side of the window (Options under Control Panel).
3. A new window called System Preferences will open. Click "Change Settings" which are currently unavailable;
4. This last category will have what you need. Simply uncheck the box in that category that says “Enable Fast Startup (Recommended).”
To enable Fast Startup, check it, and to disable it, simply uncheck the box.
NVIDIA Control Panel does not open - symptoms and causes
As mentioned above, the symptoms of this problem are the Nvidia Control Panel not launching when you try to activate it. When you click on the Control Panel icon, the program simply does not launch, and clicking it again does absolutely nothing.
Trying to launch the NVIDIA Control Panel
From time to time, this problem arises after installing some modern games, for which the video card driver in certain cases turns out to be “not ready”.
So, what are the main reasons for the situation in which the NVIDIA Control Panel does not open? They are as follows:
- Random computer failure;
- Problems with the Nvidia Display Driver Service and Nvidia Display Container LS system services (the second if available);
- Legacy versions of the NET Framework and Microsoft Visual C++ 2010 utilities;
- Incorrect Nvidia driver for your video card;
- For some reason, hardware acceleration is disabled in Windows settings;
- Monitor control programs (for example, MagicTune) conflict with the Nvidia Control Panel;
- Outdated version of the Windows installer 7, 8, 10 (Microsoft Windows Installer)
- The work of virus programs.
Problem with NVIDIA
Instructions on what to do if you are unable to connect to the NVIDIA GeForce Experience website.
Restart your computer
On a Windows 10 PC, the easiest way to fix most minor problems is to restart your PC. When you do this, many temporary items on your computer will be reset. This gives your programs a new ability to boot from scratch.
If you are experiencing minor glitches in Nvidia Control Panel, restarting your computer should resolve these issues:
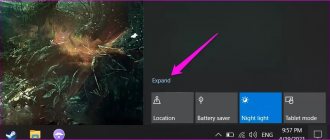
- Open the Start menu by pressing the Windows key.
- Select the power icon from the Start menu.
- Select Restart from the Power menu.
- Once your computer boots up, try launching the Nvidia Control Panel and see if it opens.
How to open NVIDIA Control Panel
I recommend following these steps if the NVIDIA Control Panel does not open.
- Restart your computer. If the problem is of a random nature, it will disappear;
- Try launching the Nvidia Control Panel from the Windows 7-10 Control Panel. Log in to the latter, go to “Hardware and Sound” and there click on “Nvidia Control Panel”;
Launch Nvidia Panel via Windows Control Panel
- Check the functionality of Nvidia Display Driver Service and Nvidia Display Container LS. Click on the “Start” button, enter services.msc in the search bar, and in the list of services that opens, look for the specified services (the second one may be missing). Double-click on the name of the specified service, and set the “Startup Type” to “Automatic”. After making changes, restart the specified services, and then restart your computer;
Driver service service
- Turn off and on your video card. Click the “Start” button, enter devmgmgt.msc in the search bar, and in the launched Device Manager, look for your video card (located in “Video Adapters”), right-click on it and select “Disable”. After disabling, re-enable it by right-clicking on it and selecting “Enable”;
- If the problem appeared after updating the drivers, roll back the video card driver to the previous version. Click the Start button and type devmgmt in the search bar. msc, find your video card in the list of devices, right-click on it, select “Properties”, go to the “Driver” tab and click on “Roll Back”;
Roll back driver
- Download the latest drivers for your video card from the developer’s website and install them on your computer, this can help in a situation where the Nvidia Control Panel does not work;
- Download and install the latest versions of Microsoft NET Framework and Microsoft Visual C++ 2010;
- If necessary, enable Windows hardware acceleration. Right-click on an empty area of the Windows desktop, select “Screen Resolution,” then click on “Advanced Settings.” In the menu that appears, go to the “Diagnostics” tab, click on “Change settings” and enable hardware acceleration (if possible);
- Change the system registry values. In the search bar of the Start button, enter regedit, and go to the route HKLM\SOFTWARE\NVIDIA Corporation\Global\NVTweak, where you find the NoMenus and NoPages keys and set their value to 0 (zero);
- Check your computer for virus programs (for example, using Dr.Web CureIt!, Malware Anti-Malware and other similar programs);
- Disable monitor management utilities (if available);
- Download and install the latest version of Windows Installer on your computer;
- Perform a system restore by rolling back to a previous restore point. Click Start, type rstrui in the search bar, select a working restore point and roll back to it.
Fix 1 - Change Output Dynamic Range
You should switch the output dynamic range settings to full rather than limited to resolve this issue.
1. In the search field, enter “NVIDIA Control Panel.”
2. Then you need to click on “NVIDIA Control Panel”.
3. When the Control Panel appears, in the left pane, click Change Resolution under the Display heading.
4. On the right side, scroll down to find 'Apply the following settings'.' chapter.
5. Then select the “Use NVIDIA Color Settings” option.
6. Next, click the Output Dynamic Range: settings drop-down list and select Full.
7. To save this change, click Apply.
Close the NVIDIA Control Panel window. Then run it again. Check if this helps.
The most effective method
The most effective method in a situation where the NVIDIA Control Panel does not open is to completely remove previous Nvidia drivers using the Display Driver Uninstaller program, which must be downloaded and installed on your computer. Then you should reboot the PC into safe mode, run this program and uninstall the drivers from Nvidia (select Nvidia and click on the “Reboot Uninstall” button).
Complete removal of previous Nvidia drivers
After the reboot, you should download the latest drivers for the video card from the developer’s website and install them on your computer (as an option, first download Geforce Experience, and then use this program to download the latest drivers for the video card). The problem will be solved in most cases.
Above, I analyzed the reasons for the dysfunction of the Nvidia Control Panel, and also listed a set of tips for solving this problem. If you cannot open the NVIDIA Control Panel, then most likely you have a problem with the operation of your computer’s video card drivers (they are outdated, or, conversely, new versions of drivers are unstable). Follow the entire set of tips I described above, this will help fix the problem with the Nvidia Control Panel on your PCs.
Specialized drivers
Another option to fix the problem of NVIDIA display settings being unavailable applies to non-standard laptop models.
First, call the “Run” menu and enter the msinfo32 command, then find the exact name of the laptop model. Then go to the manufacturer's official resource, search for drivers by model name and download the appropriate driver, then install it yourself.
Note: if the installer is presented as an EXE file, use normal run as administrator. If this is an INF file, select the “Install” line via RMB. If the system reports that the driver cannot be installed this way, go to Device Manager, select driver update, and specify the path to the saved INF file.
Some manufacturers offer users an online laptop check, after which they will be given a list of problems, as well as tips on how to fix them. And you don’t have to download the graphics adapter driver, but install it directly from the manufacturer’s website.