Almost every application on Android is installed in the internal memory of the device. But it’s not rubber, so it tends to fill up. So any user can face this situation. An SD card will come to the rescue, the volume of which can reach tens or even hundreds of GB. Now we will tell you in detail how to transfer the application and cache to an SD card.
It is also worth noting that not every card is suitable for replacing internal memory with external memory. It's all about the speed classes of SD cards, which vary from slow (C2 and C4) to fast (C10 and C16). If the procedures discussed below are performed on slow SD, then the data transfer will affect the overall performance of the device, therefore it is recommended to use only fast flash drives.
There are not so many ways to replace internal memory with external memory, so we will focus only on the most effective ones, and they will be described sequentially: from simple to more complex.
↑ Cache transfer for Android versions 4.0+
Google has added the ability to transfer the application and cache to an Android memory card for devices with version 4.0+ installed. This is done as follows:
- We go to the settings of the smartphone / tablet.
- Next, go to the Applications tab.
- In the window that appears, look for the desired program or game and click on it.
The description of the program/game should have a sub-item “Memory”, which indicates the amount of space it occupies. And just below there are 2 buttons: “Move to SD card” and “Erase data”.
Select the transfer key and wait for the process to complete.
If the operation is successful, the button should change to “Move to phone/tablet”. This means that the application was transferred to the Android memory card without errors.
It is worth noting that this method does not require ROOT rights, but is not suitable for all applications. So, if the application description does not contain the necessary buttons, you should not be upset, because this was the easiest way. For even greater ease, you can use the Apps 2 SD (Move app 2 sd) utility or something similar, where all applications are conveniently structured, which speeds up the search for the ones you need.
ATTENTION! The methods presented below can only be used on devices with RUT rights. All further operations are done at your own peril and risk; no one gives a 100% guarantee that in case of failure you will not receive a brick. We also do not accept any responsibility for the loss of personal data.
Results
Some Android devices combine internal and external storage in a simple way. As an alternative, we recommend using the Link2SD app to partition your microSD to transfer system apps there. Pairing memory on some devices requires downloading the ADB shell and working with the command line - a complex and dangerous process. Instead, it is better to use Link2SD, but you will need root rights.
Ratings: 15 , average: 4.67
↑ Transfer using third-party programs
If the application does not support standard data transfer, then you can do it forcibly using third-party utilities, such as:
- Link2SD
- AppMgr III Pro
- Apps2SD: All in One Tool[ROOT]
The principle of operation of these programs is very similar, so let’s consider the method using Link2SD as an example.
- Install the application from our website.
- Launch and grant Link2SD Superuser rights.
- Next we see a list of all applications installed on the device.
- Find what you need and click on it.
- In the window that opens, look for the “Android App2SD” sub-item and click the “Transfer to SD card” button.
If a warning (WARNING) appears, read it carefully and click OK.
All you have to do is wait for the process to complete.
This method, unlike the next one, does not require special knowledge from the user, except for basic concepts about Root rights.
Adviсe
- Format the SD card only as a last resort when the device does not recognize or connect the memory card. Keep in mind that formatting will destroy all data stored on the SD card, but will help resolve issues that are preventing the card from being recognized.
- If you mount the card manually every time you connect your Android device to your computer, download a third-party application that will do this automatically; such an application is, for example, Auto Mount Your SD Card or doubleTwist Player.[20]
↑ Complete transfer of Android applications to an SD memory card
An attentive user was able to notice that Link2SD and other similar utilities have an interesting “Send” function. With its help, not individual parts of the program are transferred, as in the previous paragraphs, but absolutely all data. In this case, the program will consider that it is working in the internal memory of the device, which for some of them is an important condition for normal operation.
To implement this method, the SD card must be “split” into two sections, after which all data will be deleted from it, so be careful and make a backup copy of important information.
Partitions on a memory card can be made as on a computer, using programs such as Paragon Hard Disk Manager 12 Server or MiniTool Partition Wizard Home Edition. But this is a rather labor-intensive process, and therefore we will do everything directly on the smartphone, using AParted (Sd card Partition).
- Download and install the utility.
- In the device settings we find the “Memory” section, where we click “Eject SD”.
↑ Transferring the cache to a flash drive
This method is useful for users who like games with a large cache. Nowadays, many large projects (for example, the Asphalt, FIFA, Grand Theft Auto series of games) occupy several gigabytes. The same goes for navigation maps. Not all devices can boast this amount of built-in memory, so FolderMount comes to the rescue. It allows you to create virtual folders so that the system still thinks that the application data is in the internal memory, although in fact all the files are located on the flash drive.
- Install FolderMount.
- Launch and grant Superuser rights.
- Open the pull-out menu on the left side of the screen.
Go to the “Application Analyzer”, look for the desired game and click on it.
Answer the question “Yes” and click the checkmark at the top of the screen, after which you must answer “Yes” again.
↑ Replacing internal memory with external
This method allows you to deceive the system, i.e. Android will consider the SD card to be the device’s memory. One of the main advantages is the fact that all applications will be automatically installed on the flash drive. Ideal for devices with very little internal memory. To implement this, you will need a file manager; it is best to use Total Commander. The point of the method is to swap the paths to the device memory and the flash drive.
- Install Total Commander.
- Launch and give Superuser rights.
- Go to “File System Root”.
Next is the “etc” folder, and in it find the “vold.fstab” file.
Click on the file, then “Edit”.
The file contains many lines that begin with # (the hash character). But we need a line that starts with the words "dev_mount" and without the hash (.) at the beginning. There should be 2 such lines: the first indicates internal memory, the second - external.
For example, if your lines are: dev_mount sdcard/mnt/ sdcard dev_mount extsd/mnt/ extsd
Then they should become: dev_mount sdcard/mnt/ extsd dev_mount extsd/mnt/ sdcard
That is, the most important thing is to swap the words after /mnt/.
If your phone or tablet running Android 6.0, 7 Nougat, 8.0 Oreo or 9.0 Pie has a memory card slot, then you can use a MicroSD memory card as the internal memory of your device, this feature first appeared in Android 6.0 Marshmallow.
This manual tells you about setting up an SD card as internal Android memory and what limitations and features there are. First, the process is shown for 7.0, then for the latest version of Android 9. Please note that some devices do not support this function, despite the required version of Android (Samsung Galaxy, LG, although there is a possible solution for them, which will be given in the material). See also: How to clear internal memory on an Android phone or tablet.
Note: When using a memory card in this way, it cannot be used in other devices - i.e. It will be possible to remove it and connect it via a card reader to the computer (more precisely, to read the data) only after complete formatting.
Further actions will look like this (instead of the first two points, you can click on “Configure” in the notification that a new SD card has been detected, if you have just installed it and such a notification is displayed):
- Go to Settings - Storage and USB drives and click on the “SD card” item (On some devices, the storage settings item may be located in the “Advanced” section, for example, on ZTE).
How to format an SD memory card as internal memory (example for Andro > On the latest version of Android, all the steps to turn a MicroSD memory card into internal memory are almost the same, but just in case, I will separately describe the steps and provide screenshots (do not forget that all data is from Memory cards will be deleted during the process, take care to save important files):
Formatting a memory card for use as internal storage in ADB
For Android devices where the function is not available, for example, on Samsung Galaxy S7-S9, Galaxy Note, it is possible to format the SD card as internal memory using ADB Shell.
Since this method can potentially lead to problems with the phone (and may not work on every device), I will skip the details on installing ADB, enabling USB debugging and running the command line in the adb folder (If you don’t know how to do this, then , perhaps it’s better not to take it. And if you take it, it’s at your own peril and risk).
The necessary commands themselves will look like this (the memory card must be connected):
- adb shell
- sm list-disks (as a result of executing this command, pay attention to the output disk identifier of the form disk:NNN,NN - it will be needed in the next command)
- sm partition disk:NNN,NN private
When formatting is complete, exit the adb shell, and on your phone, in the storage options, open the “SD card” item, click on the menu button at the top right and click “Transfer data” (this is required, otherwise the phone’s internal memory will continue to be used). Once the transfer is complete, the process can be considered complete.
Another option for such devices, if you have root access, is to use the Root Essentials application and enable Adoptable Storage in this application (a potentially dangerous operation, do not perform at your own risk on older versions of Android).
What's the catch?
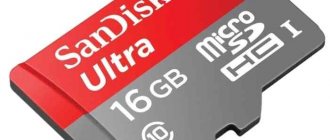
MicroSD cards are not as fast as the built-in memory of a smartphone. So don't waste your money on cheaper ones and instead buy yourself memory cards with reasonable read throughput. Extreme Pro and Extreme Plus MicroSD from Sandisk turned out to be, in our opinion, the best in terms of price/quality ratio. With 74MB/s write throughput, you shouldn't experience any lag. Such cards are best suited for installation as internal memory
Interestingly, only the LG G4 was able to read the extended memory correctly. Samsung showed an unnaturally large amount of occupied memory, and Sony's memory was even negative. However, we didn't have any complications, and even when we were connected to the computer, we were able to access all of our data properly, although we could only see a general part of the memory and not a specific part. Difficulties arose only when the system was updated (see above).
How to restore normal functioning of a memory card
If you decide to disconnect the memory card from the internal memory, it’s easy to do - transfer all important data from it to the computer, then go to the SD card settings, just like in the first method.
Then, in the memory card actions menu, select “Portable media” and follow the instructions to format the memory card.
If your device does not have enough internal storage, you can use an SD card as internal storage for your Android phone. This feature, called Adoptable Storage, allows the Android OS to format external storage media as permanent internal storage. The information on the installed SD card is encrypted and cannot be subsequently used on another device.
SD Card is a very convenient option for storing photos, songs and videos. Even if you have a large amount of internal memory on your Android smartphone, you may always need a large chunk of memory to store long videos captured by your phone's high-definition camera.
There is one drawback, the SD chip can lag when recording high-definition video.
Android by default installs applications in the internal memory and only occasionally uploads data to the SD card. This way, you are prevented from installing any additional applications if your phone is running low on internal storage space, for example, in the case of budget Android One devices.
Memory expansion: complete success
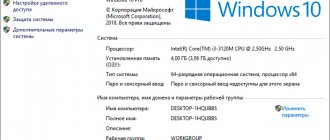
We subjected all the smartphones described above to the same endurance test. We have installed Final Fantasy IX on all devices. The game size is 1.8 GB. After installation, it is easy to see which of the two types of memory, internal or SD card, was used. In all cases, there is 1.8 GB less space once installed on the SD card. This degree of success cannot be achieved with SD cards formatted as external memory, as complete data migration is not possible.
Compare the internal memory and SD card memory values in the screenshot to confirm.
What is storage storage?
Storage storage is the main memory of your smartphone, but if necessary, it can be expanded using an SD card.
This one on Android is called Adoptable Storage. This will allow you to use the removable microSD card installed on your Android phone as your primary storage. This way, you can easily solve the problem of how to make an SD card the main memory on Android and overcome the lack of space if the phone has a small internal volume.
Notifications
Activation takes place after the MicroSD card is inserted into the smartphone. You need to connect it when the device is turned off. Next you will need to turn it on and follow the instructions below.
- Once the card is detected, a system notification will appear. In it, tap the “Customize” button;
- Select the "Internal Memory" type and click "Next". You can also use the "Portable media" option, but in this case some functions, such as moving applications, will not be available;
- Tap “Clean up and format”;
- Wait for the process to complete;
- After formatting is completed, you will be prompted to transfer the information available in the internal storage to external media. This is not necessary, but if it seems important, you should click “Transfer now” and “Next”;
- Confirm the actions by reading the description of the operation and using the “Transfer” button;
- Please wait while the information is transferred;
- Close the “Setup Wizard” by clicking “Finish”. Nothing more can be done here.
Features of using the card as the main storage
There are a number of important features that should be taken into account during this procedure.
When using a storage device, be it an SD flash drive or a USB drive, it is important to remember what format the device is in and whether the Android operating system supports it, and there are four main file formats: FAT32 or exFAT, ext4 or f2fs.
How to change phone memory to android memory card? The question is not entirely correct, it is impossible to completely replace it, you can only “increase” additional volume, as it were.
Using your SD card as your main storage can be a great solution for music lovers and those who like to watch TV shows on the way to work or on a long trip. But, as often happens, memory expansion always depends on the cost of the required device, because they differ both in speed and volume, as well as in the adaptable information storage function. Here are some nuances that can be viewed from different angles - both negative and positive:
- SD cards are slow. This is the painful reality of today's tiny memory chips. Even though they can store tons of data, they are slower than phone storage and have a limited number of read-write cycles.
Using SD cards as persistent storage will require more frequent read/write operations, which will degrade its performance over time, and in the worst case, may result in complete data loss. It will be especially offensive if there are important documents or treasured photographs or unique videos.
First, before you change the phone's memory to a memory card, your Android will do a performance test of the SD card to make sure that it is fast enough and can meet the parameters for use as a main drive.
Android will warn you about the presence of external storage and may even refuse to accept it if the SD card is very slow.
Permanent integration into the operating system. With the Adoptable Storage feature of the Andro operating system, however, you can remove the external removable storage from your device and revert it back to a simple flash drive mode. The device will remember information about the applications that are on this card in order to restore the settings when the accepted device is connected later. So you can also use another storage device.
Always make sure that you do not remove the default SD card during the unmount procedure, otherwise the storage media may be damaged.
How to use SD card as internal memory on Android?
How to replace the phone's internal memory with an external SD card on Android? Configuring your SD card to act as internal storage on Android is essentially a fairly simple process. There is nothing complicated about this and you will see for yourself later.
Please note that your SD card will be formatted during the process. Don't forget to back up your data by temporarily transferring it to the main unit of your phone, desktop computer, laptop or other smart device.
It is possible that the Adoptable Storage function is not supported by your device, even if the smartphone runs Android 6.0 and higher (this can happen, it all depends on the model and brand of the smartphone). The device manufacturer may have disabled this feature. However, there are command line methods that allow you to force the use of a flash drive to store data.
Below are the basic formatting steps.
- Place the SD card on your Andro phone >
On the next screen you have one last chance to decide for yourself if you want to change your mind
Don't forget to back up your data; after formatting, the information will disappear without a trace!
- Next, click “Erase and Format” if you want to format the SD drive as internal data storage. You will be notified later if Andro >
Once the formatting process is complete, you can use the removable SD card as a “temporary” or “removable” permanent location. But keep in mind that hot swapping and ejecting will no longer be available as you may have previously done. Therefore, do not remove the flash drive without using the Eject parameter.
In addition, you can practically delete the place accepted by the operating system, which, accordingly, is not recommended, since this can cause certain errors in the operation of the device. Now you know how to make a memory card the main memory on Android.
Settings
If the notification did not arrive or was accidentally closed, it’s okay: you can launch the “Setup Wizard” through the phone control panel.
- Find the “Settings” program in the list of applications and tap on its icon. Go to the “Storage” section;
- Find the connected memory in the list, click on its name (“SD card”);
- Tap the button with three dots located in the upper right corner;
- Select “Storage Settings”;
- Tap "Internal Memory". The further procedure is identical to that presented in the previous section of the text.
How to make the storage a regular flash drive again?
If you wish, you can undo changes made using the Adoptable Storage feature. Follow these steps:
- Follow the above method until the “Tap name...” step.
- Click on it.
- Click the three dots in the top right corner of the screen.
- Click "format as internal".
- Click Format. The process will take no more than a few minutes.
Now you can use the SD card as a portable storage device and mount it on any other Android device.
Easy way
If you're lucky, your smartphone will allow you to do this without connecting it to your PC. This method will most likely be your only hope if you are using a newer version of Android (7.0 Nougat or 8.0 Oreo). Here's how to check:
- Insert the SD card into your Android phone and wait for it to be recognized
- Open Settings > Storage
- Tap your SD card's name.
- Tap the three vertical dots in the top right corner of the screen.
- Click Settings .
- Select Format as internal memory .
- Click "Clean and Format"
- Android will then prompt you to transfer your data
If your smartphone doesn't allow you to do this, the process becomes more difficult. We'll get to it below.