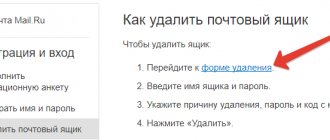
The media portal Rambler.ru is extremely popular both in Russia and in other CIS countries. Due to the fact that all kinds of sections and services are combined here on one page, using Rambler is absolutely easy and quite accessible even to people who are not versed in the world of computer technology and the IT industry. Today we will talk about such a simple procedure as setting up Rambler mail , namely, how to create a mailbox on the service, how to work with it, how to create letters and respond to emails, etc.
The Rambler portal is located at rambler.ru. Here you can find news and the latest events in the field of finance, real estate or travel. In addition, on Rambler you can watch thematic videos in a streaming service, a horoscope, weather forecast, online radio, a TV program, a TOP-100 catalog of web resources, where you can get acquainted with the best sites on any topic, and a lot of other stuff. All this is available directly on the portal home page. But we will only touch on working with mail, since each section of the portal requires special attention and time.
To enter the mail service, go to the Rambler home page and click on the “Mail” menu button, or follow this link.
We see a login form for the Rambler mail service. Right here, by entering the appropriate mailbox name and password, you can log in to your mail and start working with it right away. If you don't have a mailbox, we suggest you register first.
Registration on Rambler
On the mail login form, click the “Register” button at the bottom. This will start the process of creating a new rambler mailbox on the service.
You can access any of Rambler’s services either through the account of any social network (VK, Facebook, Odnoklassniki, Mail.ru, Google, Twitter, etc.), or through the account of Rambler itself. When you log into the service through a social network account, you thereby link your social network login to the Rambler&Co service. The login procedure is a little faster, but there are doubts about the security of this procedure. After all, the Rambler login data will be stored on the social network server, and if the authentication means fall into third-party hands, the security of the Rambler login data will also be a big question mark. Therefore, we will resort to the old-fashioned method of creating a regular Rambler&Co account, specifying the login and password to log in to your email. By the way, after completing the registration procedure, using the same credentials you can easily access any other Rambler service, which is very convenient, as it will save you from having to register multiple times. So, let's register. To do this, you need to enter the required data in the appropriate fields, namely: first name, last name, login, preferred domain, password, date of birth, gender and mobile phone. You will have to enter the correct phone number, since upon registration an SMS message confirming registration will be sent to the specified number.
When a valid phone number is entered, click the “Send code” button on the right and wait for an SMS with the password.
The message will include a confirmation number.
Enter it in the “SMS confirmation code” field and click the “Register” button.
If everything is done correctly, a small green text field appears on the screen with the inscription: “User registered,” after which you will immediately be taken to your personal profile page.
Now you can go to your mailbox and work with electronic correspondence. By the way, after registering, you should receive your first email confirming registration. You can read it directly on the server. Open the mailbox by clicking on the “Mail” button in the top menu, or by selecting the “Mail” button on the left side of the work area.
We get to the Rambler Mail server. By default, the Inbox folder opens. As you can see, there is one unread letter in it. Open it by selecting a message from the list.
The message opens literally instantly. Let's get acquainted with its contents. The initial setup of Rambler mail is complete.
Rambler
Application used
To set up email from Rambler, you do not need to install any third-party software on your device. To do this, the native “Mail” or “E-mail” program is sufficient; the name may differ depending on the model or version of Android.
Some other email services can be configured in the same way. These include, for example, Mail.Ru and Yandex. The only difference will be in the port number and domain name.
Select provider type Account type Data entry
Setup process
This process works as follows:
- We go into the program provided by the device developers.
- Select Rambler from the list and enter the data.
- If it is not there, then click on “Other” or “Other”.
- In the next tab you will need to enter your account information and click “Next”.
- In the window that appears, you need to enter the following parameters: protocol (POP or POP3), repeat the address and password for it, specify pop.rambler.ru as the server, protection type (security) – SSL/TLS, port – 995.
- In a new window, you need to enter your email address and password again, the server is smtp.rambler.ru, the protection is the same, port is 465.
- In the last window you will need to come up with a name, as well as a name to display in outgoing messages.
Server and incoming port Server and outgoing port
Mail.Ru mail differs in the entered values. For the first window it is:
- account type – IMAP or POP3;
- server – imap.mail.ru or pop.mail.ru;
- type of protection is the same;
- server port number – 993.
For the following:
- server – smtp.mail.ru;
- type of protection is the same;
- port number – 465.
For Yandex mail on Android, you need to change the domain to yandex in the last settings.
How to write a new letter in Rambler mail?
So, let's get started with the service itself. The first question that arises for the vast majority of users is how to create a new letter? The answer is simple - for this, use the “Write” button in the upper left corner of the main form of the Rambler mail service. Click on it.
We see a standard form for creating a new email message. In the “To” field, enter the name of the email recipient of the letter. In the “Subject” field we set the context of the message, i.e. the topic that our letter is devoted to. Finally, in the central text block we enter the body of the letter, writing the very essence of our message.
Rambler in comparison with competitors
If everything described above (including spam cutting) works perfectly in this mail service, then it can be recommended to undemanding network users who want to get the simplest and, most importantly, very understandable tool for working with mail .
However, this service cannot provide serious competition to Gmail, Yandex Mail and even Mail.ru. The functionality is insufficient, the security issue has not been addressed, and the settings for serious work with a large volume of correspondence are clearly not enough.
If we also take into account the mass of negative user reviews on the Internet (here, again, you need to be selective, because when everything is satisfactory, reviews are usually simply not written), then the prospects for Rambler mail in the fight against competitors for the market are quite illusory. Their main task now, it seems to me, will be to retain existing customers. IMHO.
Good luck to you! See you soon on the blog pages KtoNaNovenkogo.ru
How to add an attachment to a letter?
As we all know, you can add attachments to an email: pictures, videos, music and any other interactive content. To make an attachment, click the “Attach File” button located under the “Subject” field.
After this, you just need to specify the path to the attached file and click the “Open” button, which will serve as confirmation of your choice.
After completing all the specified steps to configure Rambler mail, the attachment will be added.
To delete an attachment, click the "Delete" button to the right of the attached file name.
Setting up mail on iPhone and iPad
Connect and set up your account
Adding and setting up an email account on Apple mobile devices is no more labor-intensive than on Android, but, in my opinion, it is less intuitive. And they are performed not in the mail section, but in “ Accounts and Passwords ”.
To use a different email account on your iPhone or iPad other than the one linked to your Apple ID, do the following:
- “ Add in the “ Accounts .
- Select the mail service where your mailbox is registered. If it is not in the list of suggestions, click " Other ".
- Next, select the “ Mail ” and “ New Account ” section.
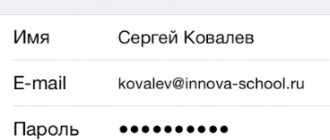
- Enter your account information: username (by default the email account login is entered), email address, password and description (the latter by default matches the mailbox address). Tap the Next .
- In the next window - IMAP , oh. the “ Notes ” checkbox. Save the setting.
- Next, if you think the settings are sufficient, click “ Finish ”. A new account will be added. If you want to edit options that don't appear in this window, click Advanced .
Advanced section contains the following options:
- Behavior of boxes. Allows you to assign or change the roles of some folders - drafts, sent, archived and deleted messages.
- The place to move unnecessary letters is to the trash or archive box.
- Frequency of emptying the recycle bin (complete destruction of deleted messages). The default is one week.
- Options for receiving incoming correspondence: use SSL encryption, select an authentication method, IMAP server port number, and IMAP path prefix.
- Whether to use S/MIME encryption. Disabled by default, supported by most but not all email services.
After closing the settings window, you will be taken to the newly created account section. By the way, there is also a button to delete it.
Now the mail program built into the system will receive letters, including from this mailbox.
Setting up the mail application
The parameters of the built-in mail program are configured, as you probably already guessed, through the “ Mail ” section.
The following is collected here:
- Application integration with Siri and search system.
- Ways to notify about incoming correspondence (ringtone and sticker). You can assign individual notification settings to each mailbox.
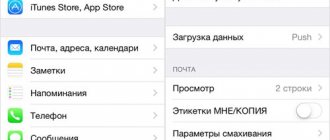
- Message list display: number of rows to display when viewed, labels, swipe options (right, left, adding a flag, etc.), flag style and color.
- Actions when reading a message (request confirmation for deleting a message, uploading pictures).
- Sorting and processing of correspondence: grouping by topic, collapsing read letters, location of the last message (top or bottom), ending topics (showing a chain of letters that make up one topic, even if they have been moved to other folders).
- Options for the message being created: sending a copy of the letter to yourself, marking addresses, indentation when inserting a quote, signatures - general or separate for each account, and the default account from which new letters will be sent.
As you can see, the email program on Apple phones and tablets allows you to completely configure it to suit your own needs. Not every third-party application can boast such functionality. Another plus in the collection of mailers built into the system - both on Android and Apple - is the absence of advertising, which almost all free analogues are stuffed with. So both programs are quite good.
Enjoy it for your health!
How to set up email on a phone for Android and iOS updated: September 13, 2022 by:
Sources used:
- https://etu.ru/ru/upravlenie-informacionnyh-tehnologiy/chasto-zadavaemye-voprosy/podklyuchenie-korporativnoj-pochty-na-mobilnom-ustrojstve/podklyuchenie-k-mobilnym-ustrojstvam-na-os-android
- https://lifehacker.ru/kak-nastroit-dostup-k-outlook-com-na-android/
- https://androidster.ru/instructions/kak-nastroit-pochtu-na-androide-8997/
- https://v-androide.com/instruktsii/obsluzhivanie/pochta-outlook.html
- https://f1comp.ru/prgrammy/kak-nastroit-elektronnuyu-pochtu-na-telefone-pod-android-i-ios/
SHARE Facebook
- tweet
Previous articleHow to forward to another Android number. How to set up call forwarding on Asus ZenFone
Next articleHow to bypass Telegram blocking on Android for free
How to format a letter in Rambler mail?
To design messages in Rambler, there is a whole panel with which you can change the font, set its size, highlight a fragment in italics or bold, make alignment or add a numbered/unnumbered list or a smiley. It is worth saying that such panels are present in all email services without exception, but in Rambler it is especially convenient and practical.
All actions performed using the design panel are carried out intuitively and incredibly simply. With its help, you can add grace and creativity to your writing.
Video "Mail Exchange"
You can see how to set up another type of account in this video.
X
In the vastness of the Internet, there are a huge number of email services and each has its own fans and detractors. This also applies to one of the oldest email representatives - Outlook. This is not such a well-publicized service, but due to the fact that it is available in every Microsoft system, everyone knows about it and many people use it. Therefore, the company quickly realized that it would not hurt users to have this email client for Android.
The main advantages of mail are ease of use and security of transferred files and information. And if not everyone shares the first criterion, since this is a rather subjective evaluation criterion, then one cannot argue with the second. The company is very careful about the security of its clients, which is why the majority of Outlook users are business people.
How to reply to a letter?
If you receive an email, it is logical to write a response (unless the email was sent by one of the robots, and such an email does not require a response). Replying to a message couldn't be easier. We scroll with the mouse to the very bottom of the message, and find the “Reply” button under the body of the letter. If you receive a letter from a group of respondents, you can send a response to them all at once by selecting the “Reply all” option.
Click on one of these buttons.
A subform appears asking you to enter the content of your response. When the response letter is written, click the graphic “Send” button with the arrow located at the top.
Nearby is the “Send to everyone” button. If there is only one recipient, it is inactive. If you previously selected the Reply All option, you can use that as an alternative.
Mozilla Thunderbird
1. Launch Mozilla Thunderbird . In the main program window, select Create an account: Email :
2. In the window that opens, select the Skip this and use my existing email .
3. In the Mail Account Settings , enter your name, mailbox address, and password. Click the Continue .
4. The program will attempt to automatically set up your account. You must click the Manual Configuration to specify the correct parameters.
5. Adjust your account settings:
- In the Inbox , select the mail protocol: IMAP - all mail is stored on the server. Select IMAP if you plan to work with mail from multiple devices and through the web interface.
- POP3 – mail is downloaded from the mail server. Select POP3 if you plan to work with mail from only one device.
In case your ISP blocks any ports, you can use alternative ones.
- The following ports are available for working with the mail server: IMAP: SSL encrypted connection – 993, without encryption – 143
- SMTP: SSL encrypted connection – 465, without encryption – 587
- POP3: SSL encrypted connection – 995, without encryption – 110
.
How to forward a letter to another recipient (forward)?
If you want to share the contents of the letter not with the sender, but with a completely different person, you can forward the letter using the “Forward” button below, under the body of the received message. In the form that appears, enter the recipient and click the “Send” icon. The function works similar to a redirect.
Outlook on Android: Video
Our man won’t go into his pocket for words, but for mail he will. No, we are not talking about an envelope with a letter taken out of a box and stuffed into a pocket, but about a smartphone, which is our personal “postman” in a modern version.
Many people think that Android phones only allow you to receive Gmail, which is linked to a Google account, and iPhones only work with a mailbox that is associated with an Apple ID. And that other email accounts require additional programs. In fact, gadgets have enough capabilities for everything. Let's talk about how to set up email on your phone to receive emails from all your accounts in one mailbox - built into the system.
[NEW] F1 ratings for early 2022: laptops
, routers for home, MFPs, Power bank, SSD, Smart TV set-top boxes with 4K UHD support, gaming video cards, processors for PCs, Wi-Fi amplifiers, smartphones up to 10,000 rubles, tablets for Internet surfing, antiviruses Contents
How to change the password on your Rambler mailbox?
Sometimes it becomes necessary to change your account password to a more suitable one. This may be your own decision if you become concerned about the security of your work information, or you find out that your account has been hacked and correspondence has fallen into third hands. The developers themselves strongly recommend making passwords strong, including service characters, and their length must be at least 12-16 characters. We join these recommendations. But let's say the mailbox hasn't been hacked and you simply want to change the password ahead of time to prevent a potential hack in the future. How to do it?
We log into our account, as usual, by entering the name of the Rambler account and its password.
If the login was successful, go to your account settings and select “Password”.
To the right of it is the “Change” button - let’s use it.
A standard form for changing your password opens. Here we are asked to enter the current password, come up with a new one and confirm it, as well as enter characters from the pattern key (captcha). Let's heed this advice. When everything is ready, click the “Save” button.
At this point, the Rambler mail setup is complete, and you can again work with the mail service as normal.
Possible mistakes
Most errors when setting up Rambler Mail are associated with incorrectly entering the username or password. First of all, you need to make sure that they are indicated correctly.
If an error occurs when trying to send a message, you should check whether the feature is activated through the settings menu of the Rambler-Mail web interface. You also need to make sure that authentication is enabled in your email client when sending messages. In some cases, the provider may block standard port 25 in order to combat SPAM. In this case, it recommends using a secure connection for sending mail or changing the port to 587 in the client settings.
How to change your password if you cannot access your Rambler mailbox?
Sometimes, as a result of your email account being hacked, it is not possible to log into your mailbox. This can also happen if you simply forgot your password and cannot remember it. How then? Let's use the password recovery procedure.
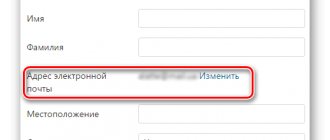
We go to the mailbox login form, write its name in the appropriate field, select the desired domain, and click the “Remember password” button at the bottom.
We get to the recovery form. As a first step, enter the exact name of the mailbox and the security pattern. Click “Next”.
On the next form, enter your current phone number and a new password you created. When everything is ready, click the “Send code” button.
After a few seconds, your phone should receive a confirmation code for the operation you have chosen. Paste it from the SMS into the appropriate field and click the “Save” button.
Now everything is ready - the password has been changed.
Outlook
Application used
- Gmail.
- Microsoft Outlook.
The latter can be downloaded from the Play Market, and absolutely free.
Selecting a connection type Logging in to a Microsoft account Setting up a Google account
Setup process
If you configure through a native Android program, a prerequisite is that the addresses do not match, i.e. Your Microsoft account cannot be registered to an address that is a Google account. If the condition is met, it will be enough to simply enter your data, i.e. address and password from it and you can start using it.
When using a special utility, the algorithm of actions is as follows:
- Go to Settings and find the “Add email account” item.
- We write down the full address.
- Now you need to enter a password, after which you can click “Login”.
- Allow synchronization.
- We can use it.
Initially, this service is configured for instant synchronization, which is why a notification will be sent to your phone immediately when new messages arrive. This and many other parameters can be configured in the “Options” item of the program.
Rambler client settings
Now a few words about the client settings (where would we be without them). Although the number of Rambler mail settings is not amazing in its variety and range, at worst the parameters should be enough to make working with the client more pleasant and relaxed. All settings are hidden behind the gear button in the lower right corner of the folder selection panel.
On the main tab, you can set a personalized name for correspondence sent from Rambler. If you use an alias, you can enter it here and the recipient will see your alias in the “From” field. You can also specify another mailbox to which you want to receive replies to outgoing messages. This can be not only a mailbox on Rambler, but also on Gmail, Yandex Mail, Outlook or any other mail server. Read below about how to attach mailboxes of other services to Rambler.
You can also specify a message in the signature field, which will be automatically placed at the end of each letter if you want to end the text concisely and respectably.
Just below you can activate or disable hotkeys (you can find a set of prepared hotkeys here). Proven fact: if you get used to working with a keyboard, then all operations will be performed much more quickly and accurately. Therefore, if you work a lot with mail, hotkeys will come in handy.
On the right side of the first tab, you can change the client’s color scheme to a more preferable one. There are about a dozen different colors to choose from to suit every taste: from pastel tones to azure and marble.
Here you can see how much of the mailbox is being used, and how much space is still free. By the way, the maximum volume of a Rambler box is 2 GB. Before the client interface changed in 2012, the box size could be increased manually, but with rebranding this option disappeared, and the maximum box size became strictly 2 gigabytes. Now, if the volume of your correspondence is approaching the maximum, you should worry about clearing your mailbox in a timely manner, otherwise the mail will simply stop arriving.
On the next tab “Folders” you can manage directories, both those present in the client by default, and new ones added manually. If the folders already in the system are not enough for you, you can easily add a few more just on this tab.
The next tab is responsible for adding other mailboxes to the service. In fact. you can connect the mailbox of any other service to Rambler. All you need to know is the address of the IMAP/POP3 server to receive correspondence, as well as the port number for it (in other words, the gateway). You can get this information from the support page for the service you want to use, but you'll have to dig a little deeper into the reference manual.
The next section of settings is filter tuning. Thanks to its flexibility and ease of use, you can easily place selected categories of emails in spam, mark them as read, or delete them altogether. To prevent your mailbox from becoming overcrowded, you should play a little with setting up the filters, and you will save yourself from headaches later. Very convenient interface and the filtering mechanism itself.
Another section involves setting up an answering machine. If you're going on vacation or want to take time off from work, compose an automatically sent email with a specific subject and content. This will not mislead your manager about your absence and will help maintain work connections and good relationships with colleagues.
The next option, located in the “Email programs” category, gives you access to the Rambler service for other email applications (The Bat!, Thunderbird, Outlook, etc.). Here are all the necessary settings that need to be specified in a third-party email client to access mail on Rambler. If you want to use one of the third-party applications to access your emails, check the “I want access” checkbox at the top.
The last section of the settings will allow you to enable sound alerts for the most common actions in the application, namely receiving a new letter, sending it and crashing. The sounds are all standard, you can’t change them. You can only disable or enable each individual alert individually, which essentially makes our already meager selection completely minimalist.
Which email to choose
To ensure that using email brings only positive emotions, it is recommended to carefully monitor the design of your mailings. Unsolicited emails should be sent to the Spam folder so that they do not interfere with the reading of important messages.
At the dawn of the Internet, people did not have a serious choice about which resource to open their mail on. There were only a few services that allowed you to create a virtual mailbox. By 2022, the situation has changed dramatically. Nowadays it is much more difficult to choose a resource than to find at least one.
The choice of mail is influenced by several components:
Yandex. PochtaService company of the same name. It features a built-in Dr. antivirus. Web, organizer and endless drawer capacity. Automatically synchronizes with all Yandex services. Outlook.com Free mail, which was created by Microsoft. Pleases with a wide range of functions and deep integration of branded services. Rambler.ru Quite a popular service, which is often chosen by residents of Russia. It is not as functional as its main competitors, but it can boast of quick registration, ease of management and synchronization with other email resources.- Livejournal.
- RNS.
- Okko.
- Poster.
- Flow.
- Cash register.
- Horoscopes, etc.
All mail resources are similar to each other, except for what additional services they provide to users. After all, not everyone wants to constantly register on the website to order food, issue tickets and transfer money. In this regard, mail from Yandex looks the best. It is used by about the same number as Gmail.
However, the final choice depends on the individual user. You should not choose mail for yourself based solely on the brand name. It is necessary to review all the options presented and study the process of setting up the service.
The address book
It's time to talk a little about the Contacts feature. Rambler has an address book where you can add your recipients so that you always have a database of addresses with whom you often contact at your fingertips. To access your contacts, click the person icon to the right of the button to write a new letter.
All email addresses with which you corresponded on Rambler are collected here. Contacts that occurred, but which you did not manually enter into your address book, fall into the “Automatic” section. The remaining recipients are added to the “Your contacts” category. To add a contact to the list, click the “New Contact” button.
You can also import addresses from several mail services into the Rambler address book: Yandex, Mail.ru and Qip.ru. This minimizes the time spent manually adding addresses.
Spam filtering
The Rambler client has an anti-spam function built into it. Although it does not work very efficiently, the developers periodically add new addresses to the blacklist database, which helps the service filter. Also, if you yourself want to mark one of the letters as spam, you can easily move it to the appropriate folder using the top menu.
In addition, you can mark the letter as unclaimed and without moving, as a result of which the sender's address will be added to the spammers list after verification.
Setting up Outlook mail for Android
Setting up Outlook on your Android device is quite simple. You are given two, already familiar, methods - manually or using a third-party program. Both options won't cost you a penny, so the choice should be made according to your tastes.
Manually
- Go to the Email menu on your Android device.
- Select “Add an account” and enter your Outlook email address and password.
- Next, “Manual setup” and “Account type” – “Exchange”.
- In the “Username” field, enter your email address (if instead of the name there is a “Domain” field, then leave it blank).
- Enter your password.
- Server name – s.outlook.com
- Put o(SSL).
- Select additional parameters and, after that, start working.
This method is universal for setting up any email service. And Outlook is no exception.
Easy way
An easier way is the official Microsoft Outlook application for Android:
- Download and install the program from Google Play. This can be done using the link provided above.
- Launch it, enter your Outlook email address and password.
- Next, select additional parameters, such as the frequency of mail synchronization, alias, etc.
- Set up synchronization of your contact list and calendar with the application.
- You start work.
It should be noted that compared to their first version and what can now be seen on Google Play, the developers have made a huge step forward, turning an inconspicuous application into a completely multifunctional email client. Now the work with the transfer and grouping of letters, spam, and push notifications has been adjusted. Although many users still note periodic failures in the program and a lack of certain functions. But, as the developers assure, work is ongoing, and the application will gradually improve.
Account page interface
So, after Rambler mail registration is completed and you have logged into your account, you need to familiarize yourself with the structure of this service.
On the left you will see the names of the folders used - these are the standard “Inbox”, “Sent Items”, “Drafts” (to save unsent letters), “Trash”, and “Spam” (where would we be without it).
And at the very end of the list is a useful link with which you can link third-party mailboxes to my Rambler page.
Click “Add other mailboxes” and automatically find yourself in the mail settings. Both the most popular services and, in principle, any other email address that you already use are available.
It is possible to download into this mailbox all the letters that are in the new connected one, as well as leave copies of the letters on the server.
If we already went to “Settings”, let’s see what additional features are present here:
"Basic". Here the data is corrected independently - that is, there are no preparations, you choose what the name will be in the letters you send, enter your return address (you can set up forwarding), come up with your signature, adjust the need for auto-saving of outgoing ones.
You edit hotkeys, design themes, and also monitor the fullness of the mailbox memory as a percentage - up to 2000 MB in total.
"Folders". Here you can find information about the folders already presented; in addition, you can create an unlimited number of additional ones, naming them at your discretion.
Data about letter storages contains the spent size of each of them, as well as the quantity.
Filters for incoming messages are configured right away. To do this, you need to enter a condition - this could be a specific address of the sender, recipient, the subject of the letter, its size, or the possibility that it is a copy.
Next is the action that will need to be taken if the condition is met, for example, mark as read or move to a specific folder.
If necessary, leave a note below and save the result.
"Answering machine." You can turn this function on and off at your own discretion, using the text that is entered in the corresponding field.
You can customize the subject line for the letter as desired, as well as send an automatic reply only to recipients from your contact book.
One of the conditions is that if you send more than one letter, such a response will come with a certain frequency until you are able to respond personally.
"Forwarding letters." If, for example, it is more convenient for you to receive incoming messages to your work address or somewhere else for various reasons, you can set up forwarding to one of the mailboxes.
You yourself choose the additional function of saving copies of letters and addresses of all recipients.
"Mail programs." If it is more convenient for you to view your mail not on the site itself, but through mail agents, this option is provided.
For this purpose, POP3 and IMAP protocols are provided, general settings of which can be made on the page help.rambler.ru/mail/mail-pochtovye-klienty/1275, more detailed information can be found here - help.rambler.ru/mail/mail-pochtovye- clienty.
"Sounds". If you like sound notifications, you will like this item - however, there is no choice, but there are preparations for incoming and sent letters, as well as in case of a failure.
Access to “Settings” is located at the bottom of the list of available folders, and there are also options for the appearance of messages – in a list or table.
At the top of the interface you will see the main control buttons - on the left are creating a new letter and accessing the address book.
Contacts can be imported from other email services you use. In this folder, under the categories, there are addresses of “Group contacts”, “Your contacts”, as well as those that are saved automatically.
There is a convenient search for contacts and a button for creating new ones.
So, they sent you a letter. You'll see it in your Inbox as a list with the sender, subject, size, and date received.
What’s convenient is that you can mark any letter unread (the blue dot next to it will indicate this), if there is such a need, and the alert signal will not keep you waiting.
Open the letter - click on the line and get it in expanded form. In the upper part - from whom, to whom, the exact date of receipt, on the right there are icons - quick printing of the letter and additional information in the form of a code.
At the very end of the letter there is a line for a quick reply, or select the necessary icons on the top panel.
The first icon is a return to the general view of mail, the next one is necessary if you do not want to receive such letters and consider them spam, and then the trash can to delete unnecessary ones.
The next icon is for moving the message to a folder (or create an appropriate filter for the received message, this will simplify interaction in the future).
What else can you do? Mark a letter as read or unread, important - there is also an asterisk on the left for this. Well, and standard controls with which you will scroll through messages.
In the line on the right there is “search by letters” - a convenient tool, although considering that the available space is only 2 GB, such a function may not be useful.
Emails placed in the Trash and Spam folders are automatically deleted within 30 days.
You can see all the account features in detail in the video above.