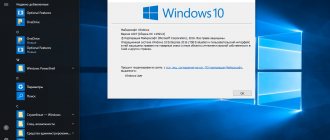
Several months have already passed since the release of the test version of the new Windows 10, in Russian which we would like to download immediately. Let us remind you that the software giant Microsoft has made the package available for free download on its official website completely free of charge, honestly warning that you should not expect stable operation from it yet.
Russian Windows 10 was not posted on the above resource. At the same time, users were given the opportunity to participate in the process of creating and improving the final product.
Despite the possibility of some incorrect moments in the work of the Technical Preview, a huge number of Russian-speaking users expressed their desire to try the new long-awaited product in practice. And, judging by the numerous reviews about Windows 10, many work quite successfully with the test version installed as the main one on various technical means.
Russian localization of windows 10
During operation, some instabilities in its operation have already been identified, but they did not pose a particular global problem for the operation process. Our consumers are much more concerned about the Russian localization of Windows 10 Technical Preview. Let us remind you that on the official Microsoft website it can be downloaded in English, Chinese and Portuguese versions.
Even for users who know English at a high level, but are accustomed to working with Russian versions of Windows, using “ten” in English causes significant inconvenience, but what about those who speak it at a school level or do not speak it at all?
The situation in this matter is complicated by somewhat pessimistic assumptions that the Russian Windows 10 is a big question mark. According to rumors, the Russian version will feature a Consumer Preview, which should be released in early 2015, however, this information has not yet been officially confirmed.
But, to the delight of our users, domestic developers took care of the small details that were not taken into account by Microsoft, creating unofficial Russifiers that are already successfully used in practice.
Download Windows 10 crack
One of the effective products is the cracker from Tihiy and PainteR. But when using it, you need to take into account the fact that it is only suitable for builds 9879 and 9841. In the event that you are using build 9879, a necessary condition under which Russification of Windows 10 will become possible is the installation of the KB3016725 update.
Russifier for Windows 10 from Tihiy and PainteR is a regular language pack that does not replace the existing language in the system. Its installation and removal are very simple and are carried out according to the common scheme of conventional programs. At the final stage of installation, do not forget to restart your computer. You can download the Windows 10 cracker from Yandex Disk using this link: download.
Changing the interface language
Installing a new language does not guarantee that the system language will change. Typically, this requires entering the appropriate command, which will change the interface language. Follow these steps:
- How to install a language pack for Windows 10 from a *.cab file
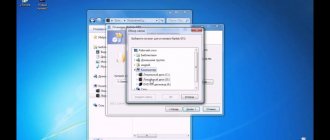
- While in Control Panel, expand Regional Options. If you can't find it in the main menu, use the built-in search bar. Go to the "Regional Options" section of the control panel
- In the first tab “Formats”, select the interface language that suits you, and then save the new values. You may have to log out and log in again for the changed settings to take effect. Select the appropriate interface language and save changes
Video: working with language packs in Windows 10
How to Russify Windows 10
Now let's look at some details that you may encounter while using the product. So, it is possible that in the Russifier interface, instead of the usual Cyrillic alphabet, you will find a set of “krakozyabr”. This situation is not a significant problem. You just need to add the Russian language to the Windows 10 system and change the necessary regional settings.
The program does not threaten changing or deleting system files. There is only one small nuance to consider, which may annoy you later. The developer has integrated some third-party programs into it, which, after installation, will be integrated into your browser and detect themselves. If you want to avoid their annoying presence, simply uncheck the necessary boxes during the installation process.
Be sure to accept the program's request to restart the computer. After which you can enjoy the new Windows 10 in Russian.
By the way, attentive users, when installing the package, will definitely notice the presence of several themes here. Nothing particularly remarkable was noticed in them, so feel free to uncheck the necessary boxes when choosing components for installation.
There is also a small fly in the ointment in this whole, by and large, pleasant situation for us: unfortunately, 10% of the system will still remain untranslated into Russian, at least that’s what the developers of the Russifier say. According to them, this will appear in Modern UI applications and some minor elements.
We checked the situation in practice: indeed, the calendar and other Modern UI applications remained in English. But, if the situation really annoys you, there is a way out in this case too. You just need to remove the calendar application from the system, and then install it again using the Windows Store. The same should be done with other applications that have not received a translation into Russian. For example, you will not be able to view news in your native language until you uninstall the “News” application and then install it from the store as “News”.
You won't find apps like Search or Windows Feedback in the store, so it's not possible to update them.
Installation of the language
Windows 10 has several built-in methods that allow you to work with the language. Thanks to them, you can select a language from already downloaded packages, as well as install new languages.
If you need to change the language on one computer, then the easiest way is to use autoload, that is, let the system itself download and install the necessary package. If you need to change the language on several PCs, then it is more convenient to download the language file once, and then transfer it using a flash drive to each of the computers, thereby saving Internet traffic. PL files have the extension .cab. You can download them from third-party resources, since Microsoft does not distribute the language in the form of separate files on its official website.
Installing a language using Windows settings settings
Windows 10 has a built-in Settings utility that allows you to manage system settings. If the OS on your computer has already been updated to version 1803 April Update, then using this utility you can download additional language. If you have an older version of Windows installed, then use any of the methods described below - the result will be the same. To load a language using the “Options” utility, do the following:
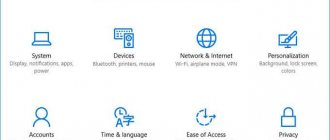
- Once in the Windows Settings console, expand the Time and Language block. Open Time & Language settings
- Expand the “Region and language” sub-item, then click on the “Add language” button and select the appropriate option from the list that appears. The download of the language from the network will begin. After clicking on the “Add language” button, a list of languages that can be added will open
As soon as the download is complete, a new language will appear in the list of languages - select it to translate the system into the desired language.
Installing a language from the Windows Control Panel
Users who have not yet updated their Windows to version 1803 or later can change the language through the control panel. To do this, do the following:
- Once in the control panel, go to the “Language” section. The control panel can be found using the system search bar. Open the Language section in the Windows Control Panel
- Click on the “Add language” button to select the desired language. A list of languages available for adding will appear. Select the one you want to add. Click the "Add Language" button and select the desired language pack
- Go to the properties of the selected language. Click the Properties button for the language you want to add
- In the language properties window that opens, click the “Download and install language pack” button, after which the download of the language will begin. By clicking on the “Download and install language pack” button, start downloading the language of the selected language
- After completing the language installation process, go to the language properties again and assign it as the main system language. Set the selected language as your default Windows interface language
Ready. The new language has been downloaded and applied. You may be asked to log out to apply the changed settings. Agree, then log in to your account again and check the result.
Adding a language from a cab file
If you have a separately downloaded language in cab format, then follow these steps to install it:
- Press the Win + R key combination to open the Run window. Enter the lpksetupe command in it and start its execution by clicking OK. Type and run the lpksetup command
- The YAP installation window will appear. Indicate that you want to download a new language and not delete the existing one. To do this, click on the line “Set interface language”. Specify that you need to install a new language pack
- Open the cab file by clicking the Browse button and finding it on the disk. The line next to the button will display the path to the file. If the file contains several languages at once, select the ones you want to install. Start the installation procedure by clicking Next and wait for it to finish. Then go to the “Settings” window or to the Windows control panel, select the new language as the main one (how to do this is described in the two previous paragraphs). Specify the path to the file and select the desired languages
How to remove Russian language on Windows 10
If you don’t know how to remove the Russian language on Windows 10, we inform you that to remove the Russian language, you just need to go to the “Programs and Features” window and simply remove it. At the same time, all updated applications will not change the language, remaining in the Russian version.
Its creators do not promise updates to the Russifier with the advent of new system builds, but they assure that its localization is still expected to the extent possible.
If you are interested in the product, you can download it absolutely free on the official website of the project before the release of Windows 10 in Russian.
There is not much time left before the release date of Windows 10 in its final version is announced. The developers assured us that their main task at the moment is to improve the product with full consideration of the wishes and requirements of users. Let's hope that the wish of Russian-speaking consumers of the product to have a version of Windows 10 in Russian will also find a response in the final implementation!
How to install language pack?
In fact, there is absolutely nothing complicated about this. Translating Windows 10 into Russian is a piece of cake. We will assume that your computer has an OS installed in any localization, with the exception of Russian. Your task is to install the Russian language into the system so that it immediately replaces the foreign language in all places on the interface where possible.
First you need to make sure that your computer is connected to the Internet. Without access to the network, we will not be able to download the necessary data from Microsoft servers.
We must say right away that we don’t need to go to the site; to access the language pack on the server, we use the friendly menus of Windows itself.
So, we offer step-by-step instructions:
Today I would like to talk about how to Russify Windows 10. For a precise understanding, let's look at the meaning of the word Russification - this is the transition of the program interface to Russian. Nothing special, but there are misconceptions associated with this concept. In fact, many users who know English at a high level have expressed a desire to use the Russian version of Windows; this is a matter of habit, based on previous versions of Windows.
Russification of Windows 10, like many other software, is not difficult, even moreover, if you have not installed the system yet, you can simply find the Russian version on the website.
But this option is not always suitable, for example: you have purchased Windows 10 Pro for a long time, and at the time of release there were only a few languages, to which Russian does not apply, and you decided to use your distribution.