Are your friends coming over to watch a movie or do you need to show your family some cool YouTube video? Or maybe you want to show your photos to your friends? In any case, it will look more impressive and interesting on a large TV than on a small computer or laptop monitor. This means that you need to think about how to display the image from the computer on the television screen.
We have compiled for you a list of seven of the simplest solutions with minimal cost. Let's immediately note that most of these solutions will require an additional TV application or additional equipment. For example, a set-top box, a media player, or something as simple as an HDMI cable.
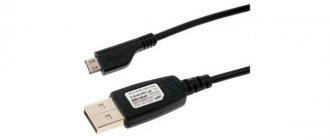
HDMI cable
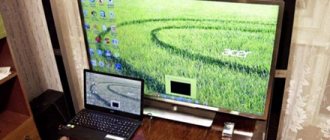
The first solution may be the easiest for most of you: just act like Wi-Fi never existed. Therefore, try to connect your laptop directly to the TV. All you need is a few suitable ports and cables (and a furniture arrangement that allows you to place your computer next to your TV). In addition, this method guarantees the fastest and most stable connection.
Well, if your laptop and TV both have an HDMI port, and you have an HDMI cable lying around somewhere in your apartment, then you are a winner. Just connect them to each other using a video card and enjoy the result.
Windows and macOS operating systems are smart enough to allow you to choose between two options: simply cast your screen to your TV, or use the latter to extend your desktop by using the TV as a second monitor.
In Windows, go to system settings, click on the “Display” button and change the second screen settings as you wish. The same can be done in macOS if you go to System Preferences.
However, be careful because many light and thin laptops do not have an HDMI port. So in this case you need to use an adapter that plugs into the video output. This method is an excellent choice for watching movies and anything else where low latency is required.
By cable
Connecting a laptop to a TV via cable is easy:
- Determine what video ports your PC and TV have.
- Select your connection type.
- Buy a cable that matches it and connect the devices.
- Set up image transfer.
In the same way, you can connect a TV to a stationary PC system unit, but then the devices must be located close enough to each other so that the cord is long enough.
Defining ports
First, inspect the laptop connectors. Find one of the video outputs:
- HDMI is a modern interface that allows you to transmit high-resolution video and audio. Not available in budget and older models. The TV may have several ports of this type, in this case, remember the number of the hole into which you insert the wire.
- DVI – digital video output. The signal from it can be easily converted into analog form through an inexpensive adapter. This type of cord will help connect devices that have DVI or VGA ports on one of them.
- VGA is a common connector, transmits only analog video signal, no sound, maximum resolution 1600x1200 pixels. This type of port on a TV is often labeled as PC; a standard computer monitor cable can be used for the connection. To transmit audio you will need an additional cord.
- S-video is an outdated port and does not provide the best picture quality. Suitable for connecting to old TVs, VHS video players.
You should find one of these ports on both your laptop and your TV. They do not have to be of the same type; in case of different connectors, adapters will come to the rescue.
Connecting and setting up
To set up the connection, you will need to run a cord from the laptop to the TV, having first disconnected both devices. Once turned on, in an ideal situation, you will see the picture from the laptop on the TV screen. To switch between displays, use one of the function keys with the dual monitor icon - usually F4 or F5. On your TV, open the list of signal sources, instead of TV, select the name of the port to which you connected the cable. If there is no image or it is distorted, go to detailed settings.
How to connect a computer with a wire to a TV: right-click on the desktop and launch “Display Settings”; in Windows 8 and earlier, the item is called “Resolution”.
For each monitor, set the correct resolution, set the sharing mode:
- Hdmi bluetooth adapter
- duplication - the same picture on both screens, suitable for running games, distortions may appear if there is a large difference in extensions;
- display on only one - the second display will turn off;
- screen expansion - the TV will become a second monitor, expanding the desktop to the left or right (the order depends on the location of displays 1 and 2 in the settings, they can be swapped by dragging). Move any applications to the second monitor, dragging them beyond the edge of the table - launch a movie in the video player on the TV while continuing to work on the laptop.
Chromecast
You can transfer images using the Chromecast set-top box (costs 4,000 rubles). If one of these devices is connected to your TV (or Android TV, which has the same capabilities, is installed on your TV), you can transfer a picture from your computer to it using the Windows or macOS operating system. However, only open tabs in the Chrome browser are transferred.
Just open the menu in the Chrome browser (click on the three dots in the upper right corner of the screen), and then click on the “Broadcast” item. After that, all you have to do is select the desired Chromecast device from the list, and your browser tab will appear on the TV screen. On a computer, you can switch to other tabs, but Chromecast will continue to cast the first open tab.
Due to the presence of slight delays, it is better to stream regular websites or pictures, but not videos. Although some sites, for example Youtube, work fine. You will be able to go to Youtube and see the Chromecast icon on every video. It works the same way as broadcasting the screen from a phone (that is, the video is taken directly from the Internet, and not from a laptop).
Among the settings there is only volume control, but in general everything is simple and clear. To disable screen sharing, click on the broadcast button and click “Stop”.
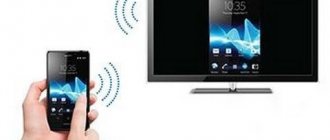
Transferring images from laptop to TV via Wi-Fi
In this case, we consider direct broadcasting of the image from the laptop screen to the TV. In practice, in this case, the computer receives another display.
Important! In this case, there is no need to use a router for a wireless connection. You can send data between devices using Wi-Fi Direct.
WiDi technology
To transmit this way, you need a computer that uses an Intel processor. It must correspond to the third generation or older. You must have a built-in wireless adapter from this company. You will need to install the Intel Wireless Display program from the official Intel website.
To connect, you need to do the following:
- Enable WiDi support.
- You need to run the Intel Wireless Display application on your laptop. All devices that were on the network will be displayed. You need to find a wireless monitor. A security key may be required during the connection process.
After completing these steps, the image from the computer display can be duplicated on the screen.
Miracast technology
Previously, there was a need to separately purchase a Miracast wireless adapter. Now most TVs are equipped with this communication protocol initially or receive it when updating the firmware. This solves the problem of how to display an image from a computer to a TV via Wi-Fi.
The computer must be equipped with a wireless adapter that supports Miracast.
The connection procedure is as follows:
- You need to enable Miracast support in your TV settings. On Samsung TVs this feature is called Screen Mirroring. If it is not possible to set the necessary settings, then in this case you need to make sure that Wi-Fi is turned on.
- On your laptop you need to open the Charms panel. In Windows 8.1 it is located on the right side of the screen. Next, go to “Devices”, then to “Projector (Transfer to Screen)”. After this, you need to click on the “Transfer to wireless display” item.
Note! If you cannot find the last item, it means that your computer does not support this communication method. In some cases it will be possible if you upgrade the wireless adapter driver to a new version.
Miracast support is built-in in Windows 7 and higher versions. For example, in this operating room, in order to use the TV as a monitor via Wi-Fi, you need to do the following:
- Press the key combination Win+P. Do not press it for too long, as this may cause the screen to go dark.
- After this, the menu related to the design will be shown on the screen. In it you need to click on the line “Connection”.
- The operating system will provide a list of devices connected to the wireless network.
After this, the broadcast process will begin.
How to cast video from your computer to your TV using Google's Chromecast
This device is a minicomputer running on the Android operating system. It is connected to the HDMI input of the TV. It can receive one of the Chrome browser tabs from a laptop and duplicate it on the screen. In addition, it can work directly with the youtube.com service. In this case, the laptop can be turned off, and the device will broadcast video directly from this site or transmit television programs.
How to connect a regular TV to a laptop via Wi-Fi
To do this, the TV must have a built-in wireless adapter. To watch TV this way, you first need to set it up correctly. In this case, you need to do the following:
- Open settings.
- Go to the section related to network connections.
- Select a connection to a wireless network.
- Open settings options. A list of available connections will be shown. You need to select the one you need and connect.
To configure, you can use the free program “Home Media Server” (you can download it from the link. When you start it, you will be prompted to add it.
How to transfer images to your TV via Wi-Fi depends on the brand. Usually you need to go to settings and select a DLNA server from the available connections.
After this, you can play video files located on the laptop on the screen.
Roku
Chromecast isn't the only media player that streams your computer's image to your TV. The Roku box also does the job, but it doesn't play well with macOS. It works based on the built-in Miracast protocol, which is integrated into Windows and all the latest Roku devices. It costs quite a bit - about 2000 rubles.
Just click on the notification icon in the lower right corner, and then click on the “Connect” button. If your Roku is connected to the same Wi-Fi network, you'll see it in the list of devices - click on its name to start streaming.
Accept the request to connect to Roku (you can also check here to automatically agree to all future requests from the same device). To manage connected and blocked apps, go to Settings from the main menu and then select Image Broadcast.
We haven't personally tested Roku's interaction with Apple computers, but for this you'll definitely need to come up with some other way - for example, AirBeamTV for Mac. This is the best solution available, although it has a freezing problem. The service costs $10, but a free trial is also available.
Why might you need to connect your computer to your TV?
When connected to a computer, the TV acts as a monitor.
This is very convenient for realizing the multimedia capabilities of a PC. The user has the opportunity to view photos, videos, films on the big screen. Often the screen characteristics significantly exceed those of the monitor. Therefore, anyone who prefers to watch something on a big screen can connect to the TV and then return the monitor to its original place.
A similar operation is relevant when conducting business meetings, training events, when it is necessary to demonstrate presentations. To avoid spending money on a projector and auxiliary equipment, it is recommended to connect your computer to a TV and display the necessary information on a wide screen.
Fans of computer games do this too. There are a number of ways to display game images on a TV via a computer. Obviously, acting on screen is much more interesting and enjoyable, and the overall atmosphere of the process is deeper.
AirPlay
If you are the owner of a Mac computer and you have a gadget that supports AirPlay (for example, Apple TV), then transferring images from your computer will be easier than ever. This is probably the simplest solution for all Apple devices.
When turned on and configured correctly, AirPlay will automatically appear in the list of devices on your TV. Select your model and the picture will automatically be transferred to your TV.
If the icon is not displayed or you want to configure something, follow this path: Apple Menu → System Preferences → Displays. Here you can start broadcasting the image to the TV or use it as an additional desktop (to do this, go to the “Location” tab). Select the "Show options in menu bar when available" checkbox to permanently display the AirPlay icon in the panel.
The broadcast works quite quickly and copes with videos from Youtube. But you can also enable image display in some other applications, such as QuickTime and iTunes. When you want to finish, just click on the AirPlay icon and turn off the broadcast.
Options for connecting a laptop to a TV via Wi-Fi
Ways to solve problems connecting Samsung TVs to Wi-Fi
To be able to receive data from a computer and display it on the screen, the following methods can be used:
- If you have a router in your house, and your TV and computer have wireless adapters, then you can send files between them via a local wireless network. In this situation, you access media files located on your computer and play them on your screen.
- Many modern TVs (for example, LG, Samsung) are equipped with devices that use Wi-Fi Direct technology. Its peculiarity is that you can create a wireless local network without using a router. In this case, the connection to the PC occurs directly. This technology is similar to Bluetooth, but has a longer range - up to 200 meters.
- Miracast technology is a wireless communication protocol that is supported by the latest versions of Windows and most models, such as LG, Panasonic, Samsung.
- Intel WD is another Wi-Fi protocol for communication between devices. It is used by computers that have an Intel processor.
- Macbook can be connected using an AirPlay set-top box.
- It is possible to use a mini PC. They are computers the size of a flash drive. They have one of the modern operating systems installed. Connection to the TV is made via the HDMI input.
Note! Using any of the above options makes it possible to display video and images from a computer on the screen.
Plex
The Plex media server does not output images from your computer to your TV, but it transfers almost any files there: video, music and photos, which can be broadcast on the big screen.
One of the advantages of Plex is its support for a large number of gadgets, from Apple TV to Android TV. If you have any media player or TV set-top box, then most likely there is an official version of the Plex application for it.
To get started, install the official Plex program on your computer. It will find multimedia files on your hard drive and prepare them for broadcast. The application on any device connects to your computer via your home Wi-Fi network and broadcasts whatever you want to your TV.
You can sign up for a premium Plex subscription, which gives you access to advanced functionality - the ability to stream to mobile devices, as well as devices outside your home. But you don’t need to pay anything to display images using your home network.
TV requirements
To be able to transmit images from your laptop wirelessly, your TV must have a wireless adapter. During operation, it will be connected to the home router and will receive video from it.
Modern models from Sony Bravia, Samsung and others may use Wi-Fi Direct technology. In this case, the TV itself creates a wireless network. In this case, a router is not required to organize communication between devices.
Important! You can even transfer video to a TV that does not have a wireless adapter or Wi-Fi Direct. An HDMI input is sufficient for this. In this case, a mini PC the size of a flash drive can be connected to it.
AirParrot
In general, AirParrot repeats the methods that we have already described above. He still needs an Apple TV or Chromecast connected to his TV. But it is universal, functional and has a number of capabilities that are not available in the standard Google Cast and AirPlay protocols.
The app costs $13, but a free trial is also available. So you don’t have to pay in advance for unknown reasons. Works with both Windows and macOS operating systems.
As soon as the application is installed, it will immediately detect compatible devices connected to your home network, after which you can immediately begin outputting images from your laptop directly to your TV. You can also stream music, videos and photos directly if you don't want to display the entire screen on your TV.
So what advantages does AirParrot have over Google Cast and AirPlay?
- It can broadcast a picture to several devices at once.
- Supports higher quality connections (including 5.1 surround sound).
- Connects to gadgets that Apple TV and Windows would not interact with.
Connection options
How to connect a computer to a TV? Conventionally, all existing methods can be divided into two large groups - wireless and using cable. When choosing one method or another, take into account the technique used. See which computer and TV inputs can be used for synchronization.
First, we will briefly list the methods that ensure broadcasting of TV images on a large screen without loss of quality. If none of these options work for you, then you can use less popular connectors.
As mentioned earlier, it is likely that you will have to purchase a specific cable additionally. The cost of such wires is minimal. If you plan to use adapters, then you should go to an electronics store. This scenario is relevant in cases where an old PC or TV is used.
All kinds of additional coverings for cords are advertising tinsel. This aspect does not in any way affect the quality of the transmitted image. Think carefully about how long the cable should be for your convenience. It is important not only to set up the connection, but also to maintain the aesthetic appearance of the room.
The easiest way to connect an LCD TV to a computer is an HDMI cable. Firstly, absolutely all modern technology is equipped with this interface. Secondly, it transmits audio and video simultaneously. Alternatively, you can use one of the following options:
- VGA;
- DVI;
- S-Video;
- RCA.
All these connectors are obsolete. Therefore, they should only be used if you are using old equipment. HDMI remains the priority.
Let's say a few words about wireless synchronization. This option assumes that your TV will have a built-in Wi-Fi module. Mostly they are equipped with models that support Smart TV. Today you can purchase an adapter for a wireless Internet connection and insert it into a regular TV.
HDMI
An HDMI cable is not included in the basic package of your computer or TV. Therefore, this cable will have to be purchased separately. In electronics supermarkets they are presented in a wide range. Wire length from 1 to 20 meters. There will be no problems with the choice. Once the cord is purchased, find the corresponding ports on the TV and PC.
How to connect a TV through a computer via HDMI? Follow the step by step instructions:
- Insert one end of the cable into the TV connector, it is located on the back panel or side.
- Connect the second plug to the computer system unit.
- Open the TV menu.
- Select “HDMI” as the signal source.
- Configure settings for displaying images on a large screen.
Old computers do not have an HDMI connector. The problem is solved by purchasing an adapter. For example, a USB to HDMI adapter will work for you.
Mostly, the default settings set the picture to be displayed only on the second display, which is the TV screen. Due to the difference in resolution between TV and PC, the image may not be displayed correctly. Therefore, you need to open the Windows operating system settings and make changes to some parameters.
Open the “Display” menu and select “Multiple Monitors” from it. You should definitely activate the display duplication function. After this, the problem should disappear. The computer desktop will appear on the TV screen.
How to improve picture quality? Go to personalization and then change the resolution. However, it is possible that the resolution will be selected automatically. If not, then set your TV resolution. The image quality will increase noticeably.
WiFi
Wireless networks can also be thought of as a way to connect your TV to your computer. What is needed for such synchronization? First, you need to study the specifications of your LCD or plasma TV. Unfortunately, only modern models support data transfer by setting up a Wi-Fi connection. If your model does not support a wireless Internet connection, then buy a special adapter. It is connected via a USB connector.
Connecting your PC to your TV wirelessly has obvious advantages:
- Internet access;
- viewing content saved on the PC hard drive;
- simple connection process;
- free arrangement of devices;
- no wires.
To configure such synchronization, you need to use a special utility. The software comes with the TV. If the disk with the software was not included in the basic package, then download the program from the official website of the equipment manufacturer.
The main function of the software is to quickly connect a PC to a TV via a home Wi-Fi network. The utility's interface is extremely simple and clear. You will need to create a special directory on your computer’s hard drive through which content for TV will be sent.
Many users solve such problems using another router. A single wireless network will cover absolutely all devices, including the TV. Therefore, you can play all kinds of files on the big screen.
S-Video
Another way to synchronize TV and PC is to use the S-Video interface. This option is good because absolutely all equipment is equipped with such a connector. An exception may be computers with extremely old GPU modules. Another strength of this synchronization is its simplicity. The user just needs to connect the S-Video connectors on the PC and TV using a cable
Before connecting the TV to the computer via the S-Video interface, you need to turn off the equipment. One end of the cable is inserted into the connector on the PC video card - a round black socket. The other plug is connected to the corresponding TV input; it is located mainly on the rear panel of the device.
Turn on the TV first, and then the PC. As the operating system loads, the TV screen will begin to flash - this is a sign that a new signal source has been identified. Now the user's task is to configure the GPU module. Right-click on the desktop, select “Properties” from the context menu, go to the “Options” section.
Open the "Advanced" item. In the dialog box that appears, opposite the name of the GPU, check the “Clone” box. When the parameter is applied, click on the “Display” section. From the list that opens, you need to select the name of the TV. Take the TV remote control and set the appropriate signal source. In our case, this is the S-Video connector. When the image appears on the big screen, you can proceed to adjust it. Now you know how to connect a computer or laptop to an old TV.
Miracast
Many users confuse this technology with DLNA. In fact, it differs in that it significantly simplifies the playback of not only files stored on the PC hard drive, but also allows you to play content online. For example, you can turn on your favorite movie or a new episode of a popular show using a regular browser.
To use Miracast technology, you need to have a powerful computer. This is because it is a resource-intensive application. Therefore, synchronization via Miracast is relevant among owners of PCs, laptops and tablets with powerful hardware.
How to set up a TV if it supports the technology in question optionally? You need to purchase a special adapter. It connects to the device via HDMI. The wireless monitor technology is characterized by maximum ease of use. The image displayed on the large screen will be broadcast using a special algorithm. The image is mirrored via Wi-Fi to a large TV screen.
The user does not need to connect the TV to one of the local networks using a router. With the help of routers, a mini-network is created, which greatly simplifies synchronization with a PC. You will need a program to connect a wireless monitor - the Wireless Display utility. When the add-on is installed, you can start broadcasting.
Make sure that the Miracast option is enabled in the TV menu. You can activate this feature in the settings. Open the “Networks” tab, and then go to the “Intel WiDi” subsection.
VGA and DVI
How to connect an old TV to a computer? DVI and VGA connectors are ideal for this task. Let's look at each of them to determine the features and rules of such synchronization. Let's start with VGA. Almost all equipment is equipped with this interface. The exception is inexpensive laptops and netbooks. The VGA connector is standard and also the oldest method of analog connection of TV to system units.
Why is VGA considered obsolete, and in what ways is it inferior to HDMI? Firstly, image transmission is carried out through analog signals. Secondly, by today's standards, the speed of information transfer is extremely low.
If the equipment you use is equipped with this interface, and you also have a VGA cable, then there should be no problems with connection and subsequent setup. Step-by-step instruction:
- Insert the wire plugs into the corresponding connectors.
- Turn on the equipment.
- Select VGA interface as the main signal source.
- Make the appropriate settings in the Windows operating system.
The connection process itself should not cause any difficulties. Mostly users have questions regarding the setup. If you ignore this stage, then the user will absolutely not be able to achieve the transmission of a high-quality image.
If the picture is not transmitted to the TV screen, and certain problems, interference, and defects are visible, it means that the user has specified incorrect settings. Particular attention should be paid to the picture broadcast mode. There are two modes - “Only on TV”, “Display and TV at the same time”.
Before connecting your TV to your PC using the VGA interface, you need to configure the operating system accordingly:
- Right-click on the free space on your desktop.
- From the context menu, select the “Screen Resolution” section.
- Open the Screen menu.
- Select one of the available image broadcast modes.
- Save your changes.
As you can see, connecting a PC and TV via VGA is as simple as possible. The main thing is to set the necessary parameters.
The DVI interface is considered more modern and advanced when compared to VGA. Firstly, both analog and digital signals are transmitted. Secondly, there is a gradation of the interface into groups with a specific, narrow focus:
- DVI-D – designed for digital connection;
- DVI-A – suitable for analog signals;
- DVI-I is a universal option.
As for the connection process itself, it is carried out in the same way as in the case of other interfaces. First, the user connects the cable plugs to the connectors of the TV and computer, and then selects the appropriate signal source.
Miracast on Windows 10
Above, we discussed how to connect a computer running Windows 10 to a media player or Roku set-top box using the Miracast standard. This standard is also found in many other devices - for example, in Amazon Fire TV, although not all models in the Fire TV line support this technology. For example, the newest of them no longer support it.
If you don't have any other options for wireless connectivity within Windows 10, you may want to consider purchasing a dedicated media player that supports Miracast. Microsoft will offer you this option for $50, although you can easily find cheaper models (the main thing is to carefully read the comments on the devices you like before purchasing).
This adapter will also help you with image broadcasts from Android-based gadgets. So you shouldn’t forget about this bonus either. The range of the standard model from Microsoft is about 7 meters, which is more than enough in most cases.
Once your wireless adapter is plugged in and turned on (it will need USB and HDMI ports for power), the connection process is much the same as with Roku devices. Go to Windows settings, then open the System tab, and in it select the line “Connect to a wireless screen”.
Setting up Windows Media to stream files via DLNA.
So, I have already said that it is better to broadcast high-definition video files over a wire, since a wireless Wi-Fi network may not be able to handle the transfer of large files and you risk experiencing discomfort in the form of interruptions in the stream while watching. The computer and TV must be on the same network. That is, digital devices must be connected to the same Wi-Fi router (in the section of the same name, you will find information on this network device).
If you have a Samsung TV, then here you will find information about connecting to the network via Wi-Fi, and here via a LAN cable. I will continue taking into account the fact that you have set up a home network between digital devices.
Click "Start" - "All Programs" - "Windows Media Player" - "Stream". If a “Home Group” has already been created on the computer and shared access to libraries (music, images, videos) has been opened, then shared access between devices will open automatically.
If streaming in the player is not activated, then after launching on the “Stream” tab in the drop-down list, you need to click on the “Enable media streaming ...” item and confirm the action again by clicking on the button with the same name.
A window will open with options for streaming between your devices. Here you can give your media library a name and block or allow access to media for a specific device. The default is set to All - Allow.
There is also a link to configure HomeGroup settings (image above), where you can set up shared access to libraries. Click the "Ok" button and return to the player menu. Click on the “Stream” tab again and check the following items in the drop-down menu:
- Allow remote control of the player...
- Automatically allow devices to play my media...
The action will need to be confirmed. The image shows the items you need to select.
After this, you can go to the TV panel and play multimedia from the Video, Music and Picture folder. Depending on the manufacturer and model of the TV, the interface will differ. For example, in LG you will find the Windows Media Player icon in the Smart Share menu, and in Samsung through the Source button or the application of the same name Link.
As you understand, by default the program has standard folders with attached files, but you can also copy other multimedia data here, and delete unnecessary ones. How can you add your own folder? Very simple. You can add it to your player library.
In Windows Media, click on the “Arrange” button, and in the drop-down menu on the “Manage Libraries” - “Video” (or “Gallery”) item. A window will open - click the “Add” button in it. Select the directory with your multimedia data and click the “Add Folder” button.
For example, if you want to add video files, then select the “Video” library. All catalogs that you add to the library are synchronized with the TV. That's all. Bye!
Connection via wires
Without using wireless technologies and a router, you can broadcast media content using several interfaces: DVI, VGA, HDMI. It is recommended to use the latter so that the picture and sound are transmitted without delays and with good quality.
Connecting a computer to a TV is as follows:
- Connect devices via cable. If the required interface is not on the TV, you can use an adapter.
- Take the TV remote control and click on the “Input” button (may be called “Source”). Select the desired port on the screen (“HDMI”, “VGA”, etc.).
- Switch to your computer desktop. Right-click on the free space and select “Display Settings”.
- Scroll below and click the Discover button.
- Under Advanced Display Settings, select your TV screen.