After you turn on two-factor authentication, you'll need to enter a verification code to sign in with your Apple ID on a new device or browser.
Every time you sign in with your Apple ID on a new device or browser, you'll be asked to verify your identity with a six-digit code. There are several ways to obtain a verification code. You can use a code that appears on your trusted device, request a text message or phone call, or generate a code using your trusted device.
If your iPhone is running iOS 11.3 or later, you won't have to keep entering the verification code. In some cases, your trusted phone number will be verified on your iPhone automatically in the background. You won't have to take any additional steps, and your account will still be protected with two-factor authentication.
Still unable to sign in to account
If you can't sign in, reset your password, or receive verification codes, you can request account recovery to gain access to your account. It may take several days for your account to be restored. The waiting time depends on what information you can provide to verify your identity.
If you don’t know where to enter the Apple ID verification code, then this material will be useful to you. It contains information about this procedure and provides special instructions that can be useful to everyone.
And the first thing you should do is figure out why you should use something like this at all and what it is
Still unable to sign in to account
If you can't sign in, reset your password, or receive verification codes, you can request account recovery to gain access to your account. It may take several days for your account to be restored. The waiting time depends on what information you can provide to verify your identity.
After you turn on two-factor authentication, you'll need to enter a verification code to sign in with your Apple ID on a new device or browser.
Every time you sign in with your Apple ID on a new device or browser, you'll be asked to verify your identity with a six-digit code. There are several ways to obtain a verification code. You can use a code that appears on your trusted device, request a text message or phone call, or generate a code using your trusted device.
If your iPhone is running iOS 11.3 or later, you won't have to keep entering the verification code. In some cases, your trusted phone number will be verified on your iPhone automatically in the background. You won't have to take any additional steps, and your account will still be protected with two-factor authentication.
Checking previously made purchases in iTunes
If you are the happy owner of one or more Apple devices, then you have probably bought an application from the iTunes Store at least once. And without an account it is impossible to do this. If the ID number has changed since then, the name in the information section will be invalid.
But you can try to check, for this:
- Open the iTunes utility.
- Click on the name of one of the previously purchased products (you can find a list of them in the media library).
- Select the edits and information section.
- Proceed to the file tab.
- Go to the purchased software item. The ID from which the purchase was made will be indicated in brackets.
If the number is successfully identified, the password is again not remembered - reset it. If you need to change your ID after this operation, update it in the settings window for all Apple services.
Do not forget that there should be only one account for all Apple devices. Using multiple numbers can cause difficulties when accessing Apple services.
Also keep in mind that the FaceTime application is not available in all regions and countries, so if you cannot log into it, the issue may not be an account issue at all.
How to get parameters via SMS text
There are situations when you don’t have a trusted device at hand, and you need to log into your account urgently. In this case, you can request data via message. The “Didn’t receive code” button is selected on the screen. Next, you should press a button that will send the data to a trusted cell phone number. A message with login parameters will be sent to the specified contact. A call can also be made to this number, and the voice assistant will dictate the code characters. All that remains is to enter this data on the device and enter your profile.
Two-step verification and two-factor authentication: is there a difference?
The attentive reader could not help but ask a question: if the operation of the above Apple ID security systems is so similar, then what are their differences and why authentication is declared a more advanced mechanism for ensuring user security. Frankly speaking, there is no direct answer to this question.
Apple itself on its official support page says something like the following. Supposedly, two-factor authentication is an updated security service that uses more advanced ways of specifying verified devices and sending verification codes, and the overall experience has been optimized.
That is, as you can see, the differences seem to be indicated, but nothing is clearly understood. So all you have to do is trust the company and, if your device supports two-factor authentication, choose this type of protection. At the same time, it is important to note that before activating this type of protection, you must first disable two-step verification, if it was enabled.
If you are already logged in...
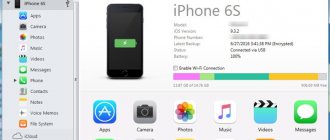
It happens that the user has already logged in to one of the Apple devices. You can check the number in such a situation using the following methods.
On iPhone and iPad:
- Click on settings and go to the AppStore section.
- Go to iCloud settings.
- Select the messages section, and then select the sending point.
- Proceed to FaceTime.
- Select mail section...
On Mac devices or gadgets running on the Windows operating system, we find what we are looking for through the following steps:
- Let's go to the Apple menu, and then to setting up the system, click on the iCloud icon.
- Open the mailer and select the appropriate item, then go to your account.
- Open the calendar and go to your account again.
- Select FaceTime and go to settings.
- Let's move on to messages and accounts.
So, if the ID is found out, but you can’t remember the password characters, just reset them and set a new one.
iCloud for Windows
It’s worth making a reservation right away: there is no password recovery procedure for owners of iPhones, iPads and other Apple products. The user can only reset the forgotten access code and come up with a new one - preferably one that is easier to remember.
Important: although there is no limit on the number of resets, you should not abuse this procedure: sooner or later the developer will consider the actions of the account owner suspicious and block him until clarification is received.
Restoring access to iCloud if you forgot your password is only a little more difficult than setting a ringtone on your iPhone. The user will need:
- Find the application icon - it is usually hidden in the “Hidden Icons” of the quick access panel.
- Click on it with the left or right mouse button and click on the “Login” button.
- In the new window, use the “Forgot your Apple ID or password” link located under the login and password fields.
- As a result, the user will be redirected to the page of the official Apple website. As already mentioned, you won’t be able to find out your access code here; In addition, with some degree of probability the user will have to deal with the English interface. To switch to Russian, click on the round flag icon in the lower right part of the browser window.
- And choose your region and your country.
- Now, to restore access to iCloud, you need to enter your login in the Apple ID field - if the owner of the iPhone has forgotten it, you will have to use the corresponding link.
- And click on the “Continue” button.
- Having selected the “I want to reset my password” option on the new page (recovering the access code is impossible), click the “Continue” button again.
Update iOS
Updating iOS can fix many problems with software bugs, so make a backup before you start.
- Click Settings, then click General.
- Select Software Update.
- Then, click "Install Now".
What to do if iPhone does not see iOS update?
While restoring a backup, if you are asked to enter your previous Apple ID password, skip the prompt. Once your device is restored, sign in to your iCloud.
All about Apple ID verification
It also allows you to access iTunes , purchase music, and use the AppStore to download applications. Also a big plus will be the ability to synchronize device data with iCloud. For recovery, iForgot will help us, the link to which is provided in the article above.
- First, a browser is opened on the computer;
- then enter the link https://appleid.apple.com into the address bar;
- after that, you should log into your account and find the “Security” item;
- in this section there will be a “Two-step verification” button;
- next to it is the “Change” button;
- when the client clicks on the item, he will be able to select the "Disable" key.
Using a code displayed on a trusted device
If you have a trusted device running iOS 9 or later, OS X El Capitan or later, iPadOS 13 or later, or watchOS 6 or later, the verification code appears on your trusted devices automatically.
- Sign in with your Apple ID and password on your new device or browser.
- A login notification will be sent to trusted devices.
- Click "Allow" to receive a verification code.
- Enter the verification code on the device you signed in from to complete the sign-in process.
Verification code is the main data protection measure
If your device requires a verification code, it means two-step verification . This is quite normal, since such login confirmation is the most convenient means of protecting data.
There are, of course, similar options with trusted devices, but the verification code is the most optimal and popular among users. Therefore, if you are faced with a similar situation and do not know where to get it, then further instructions will help you understand this issue.
Receiving a verification code
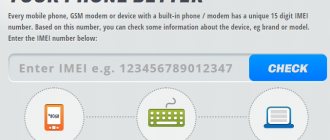
If you don’t know how to get a verification code, then you don’t need to worry, because when you activate two-factor authentication, you need to enter your mobile phone number, to which information will subsequently be sent.
Therefore, if you have activated this function yourself, you can proceed to the next step
If you didn’t do this, then you will have to look for the person who did it so that he can correct the situation. Or, in extreme cases, you will have to contact support.
Let's sum it up
It is impossible to find out the old iCloud password and restore it if the phone owner has forgotten the data; the only way out is to reset the access code and create a new one. You can do this in the iCloud application for your computer, iTunes, icloud.com and apple.com. In addition, the user will be able to set a new password for iCloud by visiting the Apple store and providing their settings.
Thank the author and share the article on social networks.
Good time! There is simply a huge number of questions received both by email and in comments to articles on the topic of a forgotten (lost, changed by someone, etc.) iCloud email account and password for it. To be more precise, we are talking about the Apple ID, but this does not change the essence of the matter. In order to somehow systematize all this information, it was decided to write this article. So, if you don’t remember (don’t know) the password or email to which your (or “someone else’s”) iPhone or iPad is registered, but you really want to activate it, then these instructions are for you!
A little history. With the release of the iOS 7 operating system, Apple introduced additional protection for all device owners against theft, loss, etc. Now no one will be able to access the phone, as well as the data that is on it, if he does not know the Apple ID and password for it.
Whatever action you take:
- Hard Reset (full reset).
- Recovery using iTunes.
- Firmware update (upgrade or downgrade).
- Entering DFU mode and then trying to flash.
- Disassembly into small parts and replacement of certain parts of the phone.
NOTHING will help! You shouldn’t trust people who promise to “hack” it for money (usually quite a lot!). Remember - it is impossible to delete an Apple ID without a password. An iPhone or iPad is strictly bound to registration data and can only be removed from this link by:
- The direct owner of the device who owns this information.
- Apple employee.
Speaking of bindings, there are two types:
So, we have the first scenario and there is no question of any kind of lost mode, but you simply forgot the password for iCloud (Apple ID) and the phone (tablet) was blocked after updating the firmware or resetting the settings to factory settings.
What to do? How to remove the activation message? There are two ways:
- We go to the recovery page and try to do something there: indicate the email to which the Apple ID is registered, enter an additional e-mail address, answer security questions. If you know at least something, then the chances of unlocking your iPhone increase!
- For those who don't remember anything at all. We write (or better yet, call) Apple support - here is a link to the contact page. We describe your situation as accurately and thoroughly as possible. Remember, there are people sitting there and most often they are not stupid! Most likely, after a short conversation, you will be asked to prove the fact that the device belongs and has always belonged to you. How? Provide a photo of the box (of course, not just the packaging, but the place where the serial number is indicated), the serial number of the gadget itself, plus a purchase document (receipts). If everything is in order and Apple employees trust you, the iCloud Lock will be removed.
However, it may also happen that this does not happen. Why? The fact is that simply a huge number of people began to falsify purchase documents and thus deceive the company. I don’t presume to judge whether this is good or bad, but the fact is clear: the number of devices unlocked using this method has decreased and each new application initially causes distrust.
This means that the following situation may happen - the iPhone or iPad really belongs to you, you have provided all the documents, but Apple employees refuse to remove Activation Lock. What should I do? Write to English-language support (the last subheading in this article will help you figure out how to do this) and tell them the whole story, about how you forgot your iCloud password and want to unlock it.
If they don’t help, then unfortunately there is nothing left to do but:
- Return the device for spare parts.
- Put it on the shelf until better times.
This is a slightly sad ending to the article, but I think that in your case everything will be “ok” and the block will be lifted.
Requesting a code from the Settings menu on a trusted device
If you are unable to receive a verification code automatically on trusted devices, you can request it from the Settings menu, even if the device is offline.
On an iPhone, iPad, or iPod touch:
On iOS 10.3 or later:
- Go to Settings > [your name].
- Click Password & Security > Get Verification Code.
In iOS 10.3 or later, if the device is offline:
- Go to Settings > [your name].
- Click Password & Security.
- The message “Account information is not available” appears. Click "Get Verification Code".
On iOS 10.2 or earlier:
- Go to Settings > iCloud.
- Click your Apple ID username.
- If your device is offline, click "Get Verification Code." If your device is online, select Password & Security > Get Verification Code.
On a Mac:
- Choose Apple menu > System Preferences and click Apple ID.
- Click Password & Security > Get Verification Code.