Author of the article
Kristina Gorbunova
Higher education in the specialty “Information Systems”. In the field for more than 7 years, he develops websites on WordPress and Tilda.
Ask a Question
If the network connection is unstable, data is transmitted poorly or the Internet stops working altogether. You can cope with this problem without the help of a technical service or calling an engineer to your home. Let's figure out why the Internet doesn't work and ways to solve problems.
A specific site is not working
Users often encounter a situation where an Internet connection is established, but the desired web resource does not work.
This problem occurs for the following reasons:
- local blocking of the site by Roskomnadzor;
- temporary unavailability of the web resource for all users;
- blocking a specific visitor by the site administration by IP address;
- errors when obtaining the site's IP address.
VPNs can help you cope with local blocking. When blocking a user by IP address, if it is dynamic, just turn off the router for 3-5 minutes and then turn it on again. The user will reconnect to the network, and the provider will assign him a different IP.
An error in obtaining a site's IP address is most often associated with a poorly functioning DNS server. You can register DNS manually. The DNS server from Google is considered the most universal and accessible. His address is 8.8.8.8.
The procedure for installing a DNS server on Windows 7, 8, 10:
- Open the Network and Sharing Center by clicking on the network connection or Wi-Fi icon and selecting Network and Internet settings.
- Click on “Change adapter settings”. Select the desired network connection and open properties.
- In the settings window that opens, find “Internet Protocol version 4 (TCP/IPv4).” Open its properties.
- Move the slider from automatically obtaining a DNS address to using the specified one. Specify 8.8.8.8 as your preferred DNS server and 8.8.4.4 as your alternate.
Some providers provide users with their DNS addresses. One of them can be specified as an alternative, but the main one must be the Google server.
Why there is no network access: hardware and software reasons
The Internet is a two-way connection, and the reason for its loss can occur both on your side and on the side of the provider. Lack of access to the network due to the “fault” of the provider is possible due to technical work, emergency situations or subscriber blocking. The latter can be voluntary - at the request of the user, and involuntary, for example, due to the generation of excessive traffic by client devices or the sending of spam. And also when the client’s account runs out of funds.
If you have a cable connection, it is quite easy to determine that Internet access is closed by your provider. The majority of computers and routers have a connection indication function - an LED in the area of the network cable socket. When there is a connection with the provider, it blinks, and when there is no connection, it goes out.
It is not always possible to recognize the scam of an Internet provider when connecting via 3G/4G or Wi-Fi. To find out for sure, the easiest way is to call its support hotline. However, you will have to call in any case, because you yourself will not solve this problem, unless, of course, the issue is a late payment.
The reasons for the loss of the Internet on the user’s side are much more extensive and varied (when viewed from our “bell tower”). Let's divide them into groups.
Related equipment and transmission media:
- Damage to the cable inside the apartment - kinks, broken connector, etc.
- Lack of contact in the connector connecting the cable to the router or PC.
- The router (if used) is not plugged in, is not connected to the computer, is faulty, or is not configured.
- The PC's network adapter is disabled, faulty, or missing.
- With a wireless connection – insufficient signal level, interference.
Software:
- The network driver is not installed or does not work correctly.
- Network services are not running.
- The basic connection parameters are incorrectly specified: IP address, gateway on the local network (if access to the Internet occurs through a router or another computer), DNS servers, connection components, etc.
- The network structures of the operating system are damaged.
- Internet access is blocked by an incorrectly configured firewall or Windows Firewall.
- To access the network, a proxy server or VPN is used, which is currently unavailable.
The problem is on the provider's side
After the user has made sure that the wires, router and computer are in order, they need to contact the service provider and try to find out why there is no Internet. Providers usually warn about planned technical work, but during unscheduled breakdowns the network may suddenly disappear.
Phone numbers of major Internet providers in Russia:
| Rostelecom | 8 800 100 0 800 |
| Beeline | 8 |
| HOME RU | 8 |
| TTK | 8 |
| Skylink | 8 |
| Wifire | 8 |
| Megaphone | 8 or 500 |
| MTS | 8 |
Check the Internet on other devices
If the Internet does not work on your computer at all via the cable from the router, try connecting to the network on another device. You can use a laptop, smartphone or tablet. If Wi-Fi works but the wired connection is not established, carefully inspect the LAN cable. The connector should not have cracks or other damage.
To check the availability of the Internet on your smartphone or tablet, open the “Settings” section.
Tap on the “Wi-Fi” item. Make sure the connection is active.
Open any browser on your mobile device and try to load a website. If the Internet works stably, then the problem is in the computer or network cable. For more accurate diagnostics, it is recommended to connect the router to another computer: laptop, netbook or desktop PC.
Checking the router
If you have checked the integrity of the cable and everything is in order, proceed to checking the router. Many users regularly experience network equipment freezes and slowdowns. In such situations, a reboot can help. It is done quite simply. You need to unplug and then plug in the power cord again.
Experts recommend restarting your computer immediately. If the router constantly slows down and reboots do not help fix the problem, you need to purchase a new device. You can also connect the Internet cable directly to the computer. If the Internet works directly from the cable on the computer, there is definitely a problem with the router.
Switch to a wired connection
If your wireless internet stops working, try connecting to the network via cable. This is especially true for laptop owners when the Wi-Fi signal suddenly disappears. Almost all laptops (with the exception of ultra-thin ones) have a connector for connecting a network cable. You need to connect the wire from the router to it.
There is no additional need to reconfigure the router. If the Internet appears on the laptop with a cable connection, then the problem lies in the functioning of Wi-Fi on the router.
Ways to solve it:
- Check that your Wi-Fi connection settings are correct.
- Make sure your router's antennas are working properly.
- Update the router firmware.
You need to check your Wi-Fi connection settings in the router’s web interface. You can access it at 192.168.0.1. or 192.168.1.1. Authorization data in the web interface is usually indicated on the bottom of the router case. Some devices are supplied configured by default. In this case, the sticker contains the name of the wireless network and the authorization key.
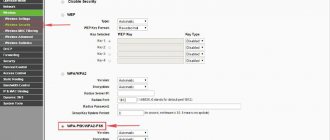
After logging into the web interface, go to the “Wireless Mode” section. Make sure the network name is in English. In the “WPA Key” field, enter the password that you will use to connect mobile devices to the Internet. Save the settings and restart the device.
If you still can't connect to the Internet, check the encryption type. AES must be specified in this paragraph. The encryption key version must be WPA2.
Let’s take a closer look at the “Cannot connect to this network” error. This problem occurs if the user changed the wireless connection settings or forgot to specify a new password for the Wi-Fi network. The problem is solved by checking the settings in the router’s web interface and re-entering the Wi-Fi password in the wireless connection settings.
Poor Wi-Fi coverage
If you live in a large country house or use the Internet in a large office, you may experience signal difficulties, especially if your computer or laptop is located a long distance from the wireless router. This is especially true if there are many objects in the room that can interrupt the signal: televisions, telephones and other sources of radio frequency noise.
An example when the laptop is at a great distance from the wireless router and does not receive a Wi-Fi signal
You can track the signal level through a special wireless connection icon on the taskbar. Left-click on the icon, then move the cursor over your connection and wait a second. After this, a footnote will appear that will provide brief information about your connection. Pay attention to the “Signal level” . If it is missing, then the problem lies in poor coverage.
Click on the wireless connection icon in the taskbar with the left mouse button
Move the mouse cursor over your connection, look at the “Signal Level” parameter
If you do not have the opportunity to keep your PC closer to the router, then purchasing a special Wi-Fi repeater can solve the problem of a weak signal. It is designed to relay the Wi-Fi signal. Connect the repeater to an outlet in the place where the border of a stable Wi-Fi network signal is observed. After connecting, the range of good coverage will be significantly increased, and you should not have problems with the Internet.
Wi-Fi repeater perfectly increases the range of good coverage
Network connection disabled
This happens if the network adapter is disabled due to a system error. You can activate it in the “Network and Sharing Center” located in the Control Panel. Click on change adapter settings.
Check if the network card is enabled. If the device icon is gray, it means it is disabled. Right-click on the board icon and select “Enable”.
Important point ! If the network adapter icon is missing, it means the drivers are damaged or the device is disabled in the BIOS. If the connection is configured via a USB modem, you need to check whether its software works correctly. If the device malfunctions, the driver must be reinstalled.
Without internet access
The situation when the connection is established, but there is no Internet, is caused by various reasons:
- The WAN cable does not fit tightly into the router port;
- The router settings have changed;
- problems with the provider;
- incorrect network connection parameters.
Make sure that the twisted pair fits tightly into the router connector. When testing, you can directly connect the WAN cable to the built-in network adapter, and then configure the connection. If the connection is established, then there is a problem with the router port.
Router settings can change for various reasons: due to a software failure, a sudden power outage, or the action of malware downloaded to the PC. It is recommended to check them through the web interface.
By default, when you configure a connection to a DHCP network, your computer automatically receives other settings. But if the provider has issued the user a static IP address, you need to register it in the connection properties. If the computer does not connect to the router, you may also need to specify the IP address in the settings.
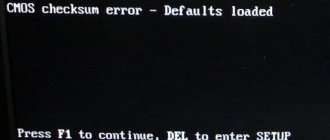
Why does the error occur?
Microsoft operating systems, starting with Windows 7, constantly monitor network connections, and as soon as the global network is unavailable, they immediately report it. There are many reasons why your computer may not have an Internet connection. These could be problems with the provider, incorrect equipment configuration on the part of the user, or failures in the operation of network protocols. Today, the new IPv6 protocol is becoming increasingly widespread, but its percentage is still very small, especially in home networks, so the main attention will be paid to the old version - IPv4.
Connecting via a router via a network cable without access to the Internet
TCP/IPv4 network settings
Connection problems due to failure to obtain an IP address and other parameters can be resolved by configuring TCP/IPv4. All procedures are carried out in the Network and Sharing Center. Click on “Change adapter settings”.
Open the local network connection properties.
Find the TCP/IPv4 protocol in the settings that open. Select it and click on “Properties”.
The protocol properties will open. By default, it automatically obtains an IP address and DNS server.
To register settings from your provider, select “Use the following DNS server addresses” and “Use the following IP address.”
Please enter your IP address carefully. The subnet mask is determined automatically. The “Default Gateway” item specifies the IP address of the device through which the computer will connect to the Internet. For most routers this is 192.168.1.1. But be sure to check the IP address in the instructions for your device.
After entering all the parameters, click “Ok”. For the settings to work correctly, restart your computer.
Checking PC Settings
If the problem occurred suddenly, then there should be no problems with the settings on the PC. More often, difficulties arise during initial settings or after making changes to network settings. First, you should check the correctness of the PC's IP address. Press the Win+R keys on the keyboard at the same time. The “Run” window will appear in front of you.
Write ncpa.cpl in the line and click OK. The Network Connections window appears. We move the cursor over the desired connection and call the “Properties” menu. Check the box next to IPv6. Be sure to specify automatic retrieval of settings and do not forget to save the new settings.
MAC Address Binding
If the new router does not distribute the Internet via cable, contact your provider. Some companies tie network access to one device. For example, if the Internet is tied to the modem's MAC address, it will not work with a direct connection via cable. This is due to the fact that the network card and the router have a different address.
There are three options to solve this problem:
- Clone the device's MAC address. The identifier registered with the provider is registered in the settings of the new router.
- Find out the MAC address of the new router, call your provider and ask to change it in your personal account settings. Some companies provide this option to clients in their personal account.
- Change provider. Most modern companies have abandoned MAC address binding because it does not provide protection against password theft and unauthorized access to the Internet. The network simply does not start when changing the router.
The router's MAC address is indicated on a sticker located on the bottom of the router case. The data for accessing the web interface is also indicated there. These numbers and letters must be entered in your personal account or reported to the provider.
Changing the MAC address is also a relatively simple procedure. You need to log into the router's web interface. Open the “Network” section and go to the “MAC Address Cloning” tab. In the “MAC address on the WAN” section, you can manually enter the required numbers and letters or click on the “Clone” button to copy the identifier from your computer.
Be sure to save the changes and reboot the router.
Wi-Fi router freezes
Unfortunately, nothing is ideal in the world, and technology is no exception to this rule. It tends to break down and periodically freeze, not performing its basic functions. If your Internet worked stably, and then stopped working, then perhaps your router was simply frozen. The fix is quite simple - you just need to take the following steps:
- Turn off your Wi-Fi router by pressing the power button.
This button is marked with a corresponding icon and sometimes with the words “Power On/Off”. Turn off the Wi-Fi router by clicking on the button labeled “Power On/Off” - Unplug your router from the electrical outlet.
Disconnect the router from the electrical network - Wait 2-5 minutes, then re-enable your Wi-Fi router by repeating the steps in reverse order. Usually this time is enough for the router to stop freezing.
Hosts file
Viruses often change the contents of the hosts file when downloaded to a computer. This manifests itself in the fact that when opening social networks through a browser, the user sees a message about account blocking and a request to provide current contact information. And you shouldn’t do this if the Internet does not work on a specific site. It is necessary to restore the default values in the hosts file.
Procedure:
- Go to C:\Windows\System32\drivers\etc and open hosts using Notepad.
- Find the line localhost name resolution is handled within DNS itself and delete all values except 127.0.0.1 localhost and ::1 localhost.
If there are no entries in the file, then there is no need to add them there. This means the Internet is not working for another reason.
The free AVZ utility is suitable for restoring the host file by default. After downloading the program to your computer, go to the "File" section and select "System Restore."
A window will appear asking you to select settings. Check the box next to “Clean up Hosts file”. Click Perform Operations.
Restart your computer after restoring hosts.
Viruses
Malware is one of the reasons why your computer does not have an Internet connection. Network problems occur after loading a website or installing a program from unverified sources. The only way to fight viruses is to run a comprehensive program (antivirus) to remove them.
If your computer does not have an antivirus by default, download and run Kaspersky Virus Removal Tool or Dr.Web CureIt. The program will quickly scan your PC and remove malware. When checking the system, requests to disinfect or erase files will periodically appear. Track them.
If, due to viruses, the operating system does not start or freezes when you turn on the PC, you can use Kaspersky Rescue Disk.
Procedure:
- Save the program to a USB flash drive and restart your computer.
- Select boot from USB drive in BIOS.
- Wait for the database update to complete.
- Run a system check. Carefully read requests to delete and disinfect files.
The duration of the verification procedure depends on the size of the SSD or HDD and the number of files stored on the physical media. In the program, you can select which drives, folders and files you want to scan. But you should use this option if you have 100% knowledge of the location of malware in the system. If the type of virus is unknown, check all files on all hard drives connected to the PC at the time of infection.
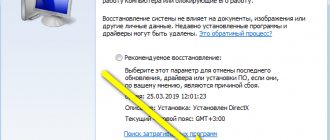
Another way to solve Internet connection problems is to restore the system from a checkpoint. It will help not only if a virus is accidentally downloaded to your computer, but also if drivers or some software cause errors in the operation of components. The recovery procedures are slightly different in Windows 7 and Windows 10.
Running System Restore in Windows 7:
- Open System and Security in Control Panel.
- Open the System application.
- In the window that appears, go to the “System Protection” tab.
- Click on the “Restore” button.
- In the window that appears, click “Next”.
- A window will open with available restore points. You can check the box next to “Show other restore points.” Then, in addition to the last created point, the previously created points will also appear.
- Confirm the action.
- Please read the warning. After the reboot, system recovery will begin.
Starting the recovery procedure in Windows 10:
- Open Control Panel. Find the "Recovery" item. Click on it.
- In the window that opens, select “Run System Restore.”
- Select a restore point. View other restore points.
- A window will open with a brief description of the restore point. Click Next. The computer will restart and the system state will be rolled back to the selected date.
You can launch System Restore in Windows 10 from a special boot screen. In order to launch it, you need to hold Shift and click on the “Restart” item in the Start menu. A window will open with a choice of actions.
Go to the Troubleshooting or Advanced Options tab. There you will find the System Restore application.
After system recovery is complete, it is recommended to download comprehensive antivirus software and scan your computer. It is advisable that the selected program includes a firewall and a traffic filter to protect against hacker attacks.
How to find the culprit
Here, we primarily discuss ways to restore Internet access with a cable connection, although most of the recommendations are suitable for various types of networks.
If you have a problem connecting via Wi-Fi, we also recommend that you study the material at the link.
Equipment check
The search for the causes of network problems begins with checking the hardware:
- Is the Internet cable damaged and is it securely crimped and connected?
- Whether the computer or router receives the ISP signal.
- If the Internet is distributed through a router, does it work? If via a USB modem, is there a SIM card installed in it and is it receiving a signal from the base station?
Temporary spontaneous errors in the router software that lead to a loss of communication can be easily eliminated by rebooting it (turning it off and on). Incorrect settings - reset using the Reset button or according to the instructions.
Also, to prevent the connection from being affected by improper operation of the router, if possible, connect the Internet cable directly to the network connector of the computer.
If you are using a USB modem, install it in a different port and check your Internet connection in a different location in your home.
Some providers allow their subscribers to access the network only through one single device (usually a router that they provide themselves). That is, they tie the physical address (MAC) of this device to the user account, which is why all attempts to connect from another device will fail. However, this situation is not hopeless, because the MAC address can be changed programmatically - copied from the linked device and assigned to the desired one. Let's look at how to do this on a Windows computer next.
Once you have verified that the hardware is working, you can proceed to checking the software.
Diagnose Windows network problems
Most software glitches that cause the Internet to not work on a computer can be fixed even by a user who knows absolutely nothing about it. After all, Windows has a built-in tool for self-diagnosis and correction of network errors. It’s called “Problem Diagnostics”. To launch it, right-click on the network icon in the system tray (notification area of the taskbar) and click the menu item of the same name. The scan will begin without additional requests.
During diagnostics, the utility may ask you to indicate the network adapter that is causing the problem. If this adapter is not in the list of found ones, the problem is most likely in it or its driver. We’ll figure out what to do with this further.
The culprit of the problem is almost always determined quite quickly. In my example, the wireless network is simply disabled, and to get it back online, all you have to do is “Make this fix,” as the diagnostic tool suggests.
The next window informs you about success or failure in fixing the error. If the problem goes away, you can close the utility, but if not, you will have to look for another solution. But at least you already know the reason.
Checking the network adapter
If the diagnostic tool was unable to determine the network adapter involved in the connection, then the system does not see it. To verify this and at the same time fix the error, launch Device Manager. In Windows 10, this is easiest to do through the context menu of the Start button; in Windows 7, through the context menu of the “Computer” icon on the desktop. Select the “Manage” element in the last one and in the “Computer Management” window that opens, click “Device Manager”.
Expand the list of network adapters in the Manager. If what you are looking for is not among them, open the top menu “View” and o. This will give you the ability to see hardware that Windows is not using - it can be recognized by its dimmer icons. The reason why these devices are hidden is indicated in their properties, the window of which opens by double-clicking on the device name.
Also make sure that there are no network adapters marked with a circle with a black arrow (the device is disabled) or a yellow triangle with an exclamation mark (the device is not working correctly), and among all the equipment there are no unknown devices.
To enable a disabled adapter, right-click on it and select “Enable device.”
Items with a yellow triangle are hardware that Windows is not using due to missing or corrupt drivers. To solve the problem, the driver of such a device should be reinstalled, updated, or rolled back.
The update and rollback functions are available in the adapter properties on the “Driver” tab:
In the example in the screenshot above, the rollback button is inactive, since the system does not have a previous version of the driver. There may also not be a fresh update. In such a situation, all that remains is to find a suitable network driver on the website of the laptop or computer motherboard manufacturer and install it manually.
Unfortunately, manipulating drivers does not always give the result that the user hopes for. This, for example, happens when the network adapter malfunctions, as indicated by the following symptoms:
- the adapter is not visible not only in the Windows Device Manager, but also in the computer’s BIOS/UEFI;
- it periodically disappears from the list of equipment without apparent reason or connection with user actions;
- the network driver crashes every time you restart the PC or at random times, reinstalling and rolling back do not help;
- attempts to connect to the Internet lead to critical errors (BSoD), reboots or emergency shutdown of the computer; reinstalling the driver also does not help.
A solution to such problems can be connecting to the Internet via an external network adapter. Or via built-in, but of a different type: if the cable connection does not work, use wireless and vice versa.
How to change the MAC address of a device in case of provider binding
There are two ways to change the physical address of a computer that does not connect to the network to the address of a device that does:
- via Device Manager;
- through the Windows registry.
The first option is easier, but some equipment, especially old ones, do not support this function. And then only the register remains.
Let's start with something simple:
- Find out the MAC of the device connected to the Internet. Copy or write it down.
On routers, the physical address is usually printed on a label glued to the bottom of the case and is indicated in the settings (shown in the screenshot below).
On a computer, you can view it in the connection properties by clicking on the button of the same name next to the name of the latter.
- Open Device Manager on the computer you want to connect to the network. Find the required network adapter in the equipment list and double-click on it to open the properties window.
- Open the “Advanced” tab in the properties, find “Network Address” and enter or paste into the “Value” field the MAC of the associated device without hyphens and spaces.
- Restart your computer.
Now let's look at how to change a physical address through the registry.
- Launch the Windows Registry Editor: press the Win + R key combination, enter the regedit and click OK.
- Locate the registry key HKEY_LOCAL_MACHINE\SYSTEM\CurrentControlSet\Control\Class\{4d36e972-e325-11ce-bfc1-08002be10318}. Inside it there are folders with names like 0000, 0001, 0002, etc. Each of them contains parameters of one of the network adapters - physical and virtual. To find what you need, open these folders and look at the value of the “DriverDect” parameter - it stores the name of the adapter.
- Once you find the partition you need (in my example it's folder 0007), create a string parameter "NetworkAddress" in it and assign it as the MAC value of the associated device.
To create a new registry value, right-click inside a free area of the editor window and select “New – String Value” from the menu. Rename the created “New Parameter #1” to “NetworkAddress” without quotes (if the input field is closed, press F2).
Then double-click on the “NetworkAddress” line and specify the value in the “Change string parameter” window that opens.
Checking services
Connecting to the World Wide Web is impossible without the correct operation of system services. There are many of the latter, one way or another related to networks, in Windows, and some of them directly affect Internet access. For example, the following:
- DNS client is a domain name service. Required to determine the IP addresses of web resources by their names.
- DHCP client is a dynamic host configuration service. Used to automatically assign an IP address to a computer.
- WLAN auto-configuration service – required for wireless networks to work.
- IP Ancillary Service – Required when connecting using IP version 6.
- Internet Connection Sharing (ICS). It must be launched if the computer is used as a gateway for distributing the Internet to other devices on the local network.
These services, except for the last one, which is used as needed, should start automatically with Windows. To check this, do the following:
- Open Task Manager and go to the Services tab. Click on the “Description” column header to sort service names alphabetically.
- Check if the above services are running. If any of them have the “Stopped” status, right-click on it and select “Run”.
- Then click at the bottom of the “Open Services” window. Find the problematic service in the service management application that will launch next, and double-click on it to open the properties window. Select Automatic from the Startup Type drop-down list.
Windows Firewall/Firewall Check
To quickly eliminate the impact of Windows Firewall or a separately installed firewall on network access, it is enough to temporarily shut down these applications.
To disable the Windows 10 firewall, open Settings, go to Updates & Security, then Windows Security. Click on the “Firewall and network protection” element on the right, in the next window select your connection and move the firewall slider to the inactive position.
Disable the third-party firewall according to its instructions.
If you confirm that the firewall is at fault, edit or delete the custom rule that is preventing you from accessing the network. Or reset your protection settings to default.
To reset the settings, go to the “Windows Security” - “Firewall and Network Protection” section and click “Restore firewalls to default settings.”
Disabling and resetting the firewall settings on Windows 7 is done through the Control Panel - section "System and Security" - "Windows Defender Firewall".
Proxy and VPN
To check whether a VPN or Proxy server is involved in your Internet connection, open the Windows 10 “Settings” utility, go to the “Network and Internet” section and look through the entries in the subsections of the same name one by one.
The connection name and address in the VPN section, the "Use setup script" or "Use proxy server" options active in the Proxy section, and the completed Address, Port, and Script Address fields definitely indicate that the computer's traffic is directed to global network through an intermediary node. However, the absence of any entries here does not mean that VPNs and Proxies are not used, because they can be configured in separate applications - their own clients or, for example, browsers.
The screenshot below is an example of a browser extension for the Browsec VPN service.
If the extension is enabled and the server through which the traffic passes is down, this browser will not be able to connect to the Internet. Although other programs can.
To prevent access to the global network from being affected by VPNs and proxy servers, disable these technologies or, if possible, configure the connection through another, known-to-be-available intermediary node.
Checking basic connection settings
Through the context menu of the connection icon in the system tray (the place from where you launched Windows network diagnostics), open “Network and Internet settings”. In Windows 7, select Network and Sharing Center. In the next window, click “Configure (change) adapter settings” - a section will open where all the computer’s network connections are stored.
Further:
- Double-click the shortcut for the connection you want to configure, or open its context menu and select “Status” if this item is active.
- In the “Status” window, click the “Details” button and pay attention to the following settings:
- DHCP is enabled.
- IPv4 address.
- Default gateway.
- DNS server.
DHCP is enabled . The correct value for this parameter is Yes . If DHCP is disabled, the computer will not automatically obtain an IP address and will not be able to register on the Internet. You will have to assign it manually, but it would be more correct to start the DHCP service - both on the PC and on the device that it uses as a gateway (router or other computer).
IPv4 address is the address of a computer on a local network. It usually starts with the numbers 10.0 - 255 or 192.168 , less often with 172.16 - 31 .
If the IP begins with the numbers 169.254 , the PC will also not be able to access the Internet, since this group of addresses is allocated for use within one local segment. Windows assigns such addresses to network interfaces if the computer is not connected to a DHCP server and the user has not manually entered an IP. Permanent assignment of such an address in the absence of problems with DHCP usually indicates damage to the system registry keys responsible for the network.
Default gateway. This is an intermediary node between your computer and the Internet that routes traffic. This could be your home router, another computer, or equipment installed by your provider.
The gateway's IP address must begin with the same numbers as the computer's IP, that is, these devices must be on the same subnet. For example, if the default gateway has IP 192.168.0.1 , then the local network devices connected to it can be assigned addresses in the range 192.168.0.2 - 192.168.0.255.
DNS server . This is a node on the Internet that matches domain names of web resources to their IP addresses. Without DNS, your browser won't be able to open any site you request because it won't find anything.
The IP address of the DNS server in the connection settings may coincide with the default gateway address, belong to the Internet provider’s network or special services - Yandex.DNS, Google Public DNS, etc.
Some users specify others instead of default DNS addresses, which are not always working. Malicious programs can also change this setting to redirect infected machines to phishing resources. But it happens that for this reason the Internet disappears completely.
For information about other ways access to individual sites can be blocked, read the article at the link.
When checking your DNS settings, it is always important to clarify who owns the addresses. If they are unfamiliar to you or cause doubts, write instead any ones that are known to be available - for example, public ones from Google: 8.8.8.8 preferred and 8.8.4.4 backup. You will learn where exactly to enter them in the next paragraph.
The remaining parameters of the “Information” section - the physical address of the network adapter (you already know how to change it), subnet mask, IP lease and others are determined automatically.
Antivirus and Firewall
Often problems with network access arise when the antivirus or firewall is configured incorrectly. They can be fixed very simply by disabling installed third-party security programs. If the Internet is working after deactivating your antivirus, firewall, and Windows Defender, you need to understand their settings.
To disable Windows Firewall:
- Open Control Panel. Type “firewall” into the search bar.
- In settings, go to the “Turn on and off” section.
- Disable it for the network you are using.
After the built-in firewall is disabled, check the internet status. If network access works again, then the problem was in this software.
To disable the antivirus, you need to find its icon in the tray, next to the clock and right-click on it. Next, find the shutdown item and select the time period.
Drivers
The reason why there is no Internet on a PC may be that the drivers are not working properly. The network adapter or modem appears in Device Manager, but does not work correctly. To fix the problem, you need to remove the old driver and then install a new one by downloading it from the manufacturer’s website.
To remove the driver:
- Open Device Manager.
- Right-click on the network adapter or modem. Go to device properties.
- Select "Remove device".
- Restart your computer.
- Install the driver downloaded from the manufacturer's website.
Resetting network settings
If there is no Internet on your computer, try resetting the network settings. Windows 10 has a special option for this. To reset network settings:
- Open Windows Settings. To do this, click on start and click on the gear.
- Go to the “Network and Internet” section.
- In the “Status” subsection, find the “Network reset” item. Click on it.
- Click on "Reset Now". Confirm the action.
- After resetting the network settings, the computer will reboot.
In Windows 7 and earlier versions of the OS, you can reset settings through the command line.
For this:
- Type “cmd” into the Start menu search bar.
- Run Command Prompt as Administrator.
- Enter two commands – netsh winsock reset and netsh int ip reset c:\resetlog.txt. After entering each command, press Enter.
- Restart your computer. Network settings will be reset.
If the network works fine when you turn on the computer, but the Internet disappears after a while, try resetting the DNS cache. To do this, you need to run the command line again as an administrator and enter the command ipconfig /flushdns.
Resetting the router
The procedure can be carried out manually or through the technology’s web interface. There is a special Reset button on the back of the case. For most devices, it is recessed into the body and can only be pressed with a pin. This arrangement protects the user from accidentally pressing the button.
To reset the router settings, hold this button for 10-15 seconds. The reset can be considered complete when all indicator lights on the device blink.
If the Wi-Fi connection is working properly, you can connect to the router using Android and iOS devices. Open your browser and go to 192.168.1.1. Go to the "System Tools" section.
Click on the “Factory settings” item. To reset the settings, click on the “Restore” button.
Problems with the router or adapter
If the router does not connect to the Internet via cable, this may be caused by problems with the PC's network adapter. To check, connect the provider's ethernet cable to this computer and try setting up the connection. If the network connection is established, then the problem is with the router. If the connection does not work, then the problem is in the network adapter.
Inexpensive routers have poor cooling. When used for a long time, they heat up, which leads to hardware errors. In this case, it is recommended to reboot the router manually. After the device turns off, you need to wait 5 minutes and then turn it on again.
Contact the provider's technical support
So, the router has been rebooted, the computer is connected to it via Ethernet or Wi-Fi, but there is still no connection to the Internet. It's time to call your provider's technical support.
Contact him and tell him about the problems with the Network. If the provider tells you that not only you, but the whole region is experiencing technical problems, you will just have to wait until everything is fixed.
Is it just you who has the problem? Follow the instructions of the technical support representative. If they do not produce results, ask for repairmen to be sent. Maybe the Internet cable in your house is broken - let them fix it.
And check if you paid for the Internet this month.
BIOS
The network card and built-in Wi-Fi module can be enabled/disabled in the BIOS (UEFI). A component can be deactivated without user intervention due to an unscheduled computer restart, a driver error, or an incorrectly installed OS update.
Before starting the BIOS, make sure that the network adapter is not listed in Device Manager. If a component is displayed there, but the “Disabled” icon next to it is lit, then you just need to enable it. If the network adapter is not listed in Device Manager, check its status in the BIOS. Information about the required component can be found in the following sections:
- Integrated Peripherals;
- On-board device configuration;
- Advanced - Hardware.
Some BIOS versions have separate sections called Ethernet, NIC. You need to find the Lan Controller item and make sure its status is Enabled.
How to quickly determine that everything is acceptable
The author uses the universal metric “Ping per 1000 kilometers”. It is calculated as follows:
- Determine where the server is located.
- On Yandex.maps you measure the distance from you to the server.
Execute the ping command to the host you need. If it turns out to be no more than 20 milliseconds per 1000 kilometers, then you should not have any problems with input lag.
The author is located ~1000 km from Moscow. His pings look like this:
At distances of up to 200 km, this rule, by the way, will not be followed, due to the fact that the operating speed of the equipment makes a greater contribution. At such distances, the ping should be within 5-6 milliseconds. If more, you have a problem.