Gesture or button to answer and end a call?
Thanks to the new technologies that came to us along with touch screens, even the expression “smartphone finger” appeared. This is when one finger, usually the index finger, must always be clean and dry in order to be able to work with a smartphone or tablet.
The standard way to answer a call on Android is to lightly swipe your finger horizontally from right to left from the green button in the other direction, as if casually “wiping off dust” from the screen. To end a call, you need to swipe from the red button to the opposite edge of the screen. These swipe-type gestures are set up by default on every phone.
However, you can slightly change the settings in order to make answering a call with a button in Android, as well as using the button to end a call. To do this, you don’t have to install a new application; everything is already in the operating system itself.
The settings below are for Android version 5.0.2. Depending on the phone manufacturer, the names of the settings may differ slightly.
What to do if you are using an earlier version of Android
How to choose what action to perform when you press the Power and Volume Up buttons at the same time
- Open your phone settings.
- Tap Sound Quickly mute a call.
- Press the Power and Volume Up buttons (simultaneously).
- Select:
- Vibrate: Set vibration for calls and notifications.
- Mute: mute calls and notifications;
- Do not change settings.
How to turn the volume down or up
- Press the volume button.
- To the right of the slider, click the down arrow.
- Select type:
- Multimedia: music, videos, games, etc.;
- Ringtone: calls, notifications;
- Alarm .
To change the volume, you can also open the Settings Sound app.
How to turn on vibration
You can turn off all sounds on your phone and leave only vibration. To do this, press and hold the Volume Down button until the device vibrates.
If you adjust the music volume instead of a ringtone:
- To the right of the slider, click the down arrow.
- Move the ringtone volume slider all the way to the left.
When your phone is in vibrate mode, the icon appears on the screen.
Changing settings from gestures to working with a button
- Open Applications
- then Settings in Android.
- Next we move on to “Special Features”:
In “Accessibility” we are interested in “Answering and ending calls”:
Rice. 2. Answer and end calls with the button
Having opened the “Answer and end calls” option, all that remains is to check the necessary boxes (either both at once, or one of the suggested ones):
- opposite the option “Press the Home key”, if you want to answer calls using the Home button (located at the bottom center of the screen - Figure 4),
- opposite the option “Press the power key” if you end calls using the power button:
Rice. 3. Home key to answer call and Power key to end
Figure 4 below shows where the necessary keys are typically located:
- Home button (you can use it to answer calls) and
- Power key (to end call):
Rice. 4. Where are the Home button and Power key usually located?
If the default settings are not suitable
If you don’t like the new settings, you can repeat the steps described above (Figures 1, 2, 3) and return to gestures for calls. To do this you need to remove
- or both green checkmarks opposite “Pressing the Home key” and “Pressing the Power key”,
- or refuse only one of these options if desired.
You can also install an application on your smartphone (or tablet) to automate work with calls. The paid Tasker application from the official Google Play store will allow you to make the appropriate settings to answer calls, for example, by simply shaking the phone. True, you may need root rights; this depends on the specific smartphone model.
October 9 – Comss.ru, Operating systems. With the Your Phone app for Windows 10, Android users can use their computer to send SMS messages, receive and respond to notifications instantly, and wirelessly transfer photos between devices without ever having to remove their smartphone from their pocket. Screen mirroring function is also available.
Windows Insiders testing builds of Windows 10 19H2 and 20H1 can now try out the new Calling feature, which lets you make and receive calls from Android to PC.
Key features of the Calls feature
- Answer incoming phone calls on your computer.
- Make phone calls from your computer using the built-in dialer or contacts list.
- Reject incoming phone calls on your PC by sending an SMS message, or forward calls directly to your phone's voicemail.
- Access your call log on your PC. Clicking on a specific call will automatically populate the number in the dialer window.
- "Seamless experience" for transferring calls between your computer and phone.
Requirements for the Calls feature
- Android phone > Note . The Calls feature will gradually roll out to Insiders on builds 19H2 or later, so it could be coming to the Your Phone app within a few days.
How to Make and Receive Phone Calls on PC
- Set up a link between the Your Phone app for Windows 10 and Your Phone Manager for Android. Users of the latest Samsung smartphones can use the built-in Link to Windows feature.
- the Calls (preview) feature is available to you in the Your Phone app , go to the appropriate tab and perform additional settings - you need to connect your phone to your computer via Bluetooth.
- If the connection does not occur automatically, create a Bluetooth connection between your computer and phone manually, following the on-screen instructions.
- Once connected, you can use your computer to make and receive calls from your Android smartphone.
Do you use the Your Phone app? Would you find the Calls feature useful?
You should know that Megafon offers four types of forwarding:
- To all calls (unconditional forwarding: convenient in the case of 2-SIM phones);
- If there is no response from the subscriber;
- When the subscriber's number is busy;
- If the number is unavailable (the phone is turned off or there is no network signal).
Megafon company provides forwarding service free of charge
After all, it is important for a mobile operator that you always stay in touch
All other operators have a similar type of service. Connections are made by entering a special code. The same goes for disconnecting.
Many people have heard the concept of call forwarding, but not everyone understands why it is needed. Let's imagine this situation: you changed your mobile phone number, notified your family and friends about it, but many continue to call your old number. This is where the question arises: how to ensure that calls are routed to a new number? This is the meaning of call forwarding - redirecting incoming calls to another SIM card. But there is one limitation: SMS messages are not forwarded to the new number; they will remain unread if there is no access to the old SIM card. The redirection function is supported by all operating systems, but we will look at setting up call forwarding on Android OS.
As with all instructions, there are several ways. Some of them may require you to install third-party software. Below are some of the simplest options, which will not be difficult to cope with if you carefully follow the instructions.
Filling the gaps - expanding horizons!
How to remove screen lock on Android
To prevent the gadget from ringing on its own, it is usually blocked. Blocking means that the gadget does not respond to any presses, touches or other external signals. This was done so that the gadget itself does not start calling where it is not asked, causing anxiety to other subscribers and unnecessary expenses for its owner.
You can usually remove the screen lock on Android by pressing the main button so that the screen starts to light up. And then you need to slide your finger across the screen diagonally (diagonally) from right to left.
Some users also set a password so that no one but them can use the device. In this case, in addition to unlocking the screen by moving your finger diagonally across the screen, you also need to enter the password correctly without errors from the on-screen keyboard.
Others install a screen lock that can be unlocked using a fingerprint. For such a blocking, download the appropriate Android application.
After unlocking, the standard home screen usually appears on the screen (Fig. 1).
If this initial screen does not appear after unlocking the device, you need to press the main button of the gadget. Usually this button is located at the bottom under the gadget screen. By pressing it, the user removes all open windows of active programs from the screen and returns to the home screen of the device, as shown in Fig. 1.
You can call someone using one of two icons
- “Phone” (1 in Fig. 1),
- “Contacts” (2 in Fig. 1).
Let's look at both options in more detail below.
Why is a second line needed?
The most striking example is waiting for an urgent call from work or from relatives. Let's say you're talking on the phone and someone else calls you. If the second line option (or “Call Waiting”) is disabled, the person will receive short “Busy” beeps. If call waiting is enabled in the settings, you will receive a second call and you can switch between them. In simple words:
The second line is the ability to switch to an incoming call during an active conversation on the phone. On smartphones this option is called “Call Waiting”.
How to make the first call on Android
Now, to make a call from the device, you need to tap (lightly touch with your finger) the icon with the image of a green handset on the main screen (1 in Fig. 1).
A window for calls from the device will open (Fig. 2).
This picture shows the Call window opened on the Keyboard tab. This tab allows you to make calls by dialing a number on the keypad, much like we do on a regular landline telephone. To open this tab, you need to tap on the “Keyboard” inscription located in the top menu of tabs (1 in Fig. 2).
conclusions
As you can see, turning on the second line on the device is quite simple. In the comments, write if these instructions helped you and ask any questions about using phones. Our portal has a lot of tips on setting up and solving errors for Android and IOS smartphones. Explore other articles about using and protecting your smartphone. We try to cover the most relevant and useful topics in simple words. We accept requests for solving errors in smartphones, household appliances, fixing crashes and bugs when working on personal computers, programs and games.
Android phone number dialing rules
On a landline telephone, we usually dial a number as a sequence of numbers. The subscriber's landline phone number is usually 5-6-7 digits. In Moscow, for some time now it has become 10-digit with the obligatory addition of the number 8 at the beginning, before the number.
Calls to mobile phones are also made to a 10-digit number with an eight added at the beginning of the number.
But this rule of dialing a number from a keyboard only works if we ourselves are in our own country. When you are abroad, instead of the number 8 at the beginning of the number, you need to enter a sequence of the “+” sign and the number “7”. That is, if in Russia we call a subscriber at number 8 000 00000000, then from abroad we can only call the same subscriber at +7 000 00000000.
This is due to the fact that in the international telephone number system Russia has a +7 code. Let’s say that Ukraine has this code +44, the USA +1, etc. Therefore, if we often use Android to make calls within Russia, then it is advisable to dial ALL numbers of our subscribers on the keyboard and save them in the phone book of contacts in the international format +7 000 00000000.
For example, our subscriber, whom we are calling, lives in Saratov and has a telephone number 2-00-00-00. Then in the phone book of our Android, the number of this subscriber should be written as +78452000000, where +7 is the code of Russia, 845 is the code of Saratov, and then the subscriber number. It is advisable to dial the number on the Android keyboard in the same sequence.
In the example given, you can simply dial subscriber number 2000000 from Android while in Saratov. The connection will be established. But, if you write this number in the phone book, then drive away from Saratov to a neighboring area (not even outside the region) and try to call the specified number, there will be problems. The connection to the subscriber may not succeed. But by calling +78452000000 the connection will be established even if you go not only to a neighboring area, but also fly overseas, say to the USA.
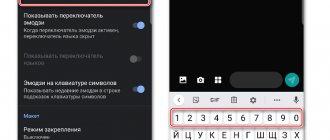
How to dial 0 and plus on Android?
Now a legitimate question is how to type the “+” icon on the Android keyboard when entering a phone number. After all, the “+” sign appears together with the number “0” (Fig. 2). And if you tap on the number “0”, the number “0” will be entered, not the “+” sign.
So, to enter “+”, you need to slightly hold your finger on the number “0”. Don’t just tap and “bounce” off the key, but touch the key and hold your finger. Then “+” will appear.
Regular call or video call?
Having dialed our subscriber’s number (with prefix 8, or with +7, or just a number without any “prefixes”), you then need to tap on the green icon with the image of the phone off-hook (2 in Fig. 2).
While we are entering the number, correcting the entered numbers and icons using the “Cancel” key (3 in Fig. 2) - we are not yet establishing any connections. All our actions are recorded only on the Android screen, but Android itself does not call anyone anywhere.
But clicking on the green handset (2 in Fig. 2) just completes our work of dialing the number, and Android starts calling the entered number, the specified number.
Attention, we DO NOT click on the image of a green handset with a photo of the subscriber to the left of the image of a regular off-hook telephone (4 in Fig. 2). Otherwise, we will not have a regular phone call, but a video call with the called party. We will not only hear, but also see the subscriber. This, of course, is cool and interesting, but it is paid at completely different rates!
Video communication is expensive; its alternative is communication via the Internet, where the same thing can be very cheap or even free, not counting the fee for using the Internet.
Call via Phone using Android Contacts
To call a subscriber from Android, it is not at all necessary to dial the subscriber’s number from the keyboard every time. It's not entirely convenient. Firstly, you need to know and remember the subscriber’s number, and secondly, you need to dial it without errors, which is also not easy to do, say, while being outside in bad weather.
To dial a number from the phone book, you need to tap on the name of the “Contacts” tab (5 in Fig. 2).
And then the Android phone book, called “Contacts”, will open (Fig. 3). Of course, this phone book does not appear on its own. You must first enter your subscriber numbers into it. But this, as they say, is a completely different story.
Let's assume that we have Contacts, and our subscribers are included in them, with whom we want to periodically talk by phone.
Subscribers in Contacts are arranged in alphabetical order.
- We find the subscriber we need,
- tap on his name (last name, patronymic, if they were also entered in the phone book in order to remember them if necessary) and
- we select his phone from the list - after all, our subscriber may have not only a cell phone, but also a work, home, extension (if we call at work), etc. The choice is also made by clicking on the selected subscriber’s phone number (Fig. 4).
Let's say we select a subscriber's cellular (mobile) number. Then we click on the number called “Mobile” in the proposed list of telephone numbers for our subscriber (1 in Fig. 4).
After this, Android switches from the subscriber number selection mode to the dialing mode. The call to the subscriber begins, after which the call will ring at the “other end of the line”, and the subscriber will answer us “Hello!”
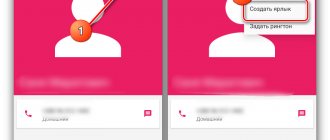
Another option is how to make a call on Android through “Contacts”
There is another way to call our subscriber using his data included in the Contacts list. To do this, on the main Android screen you need to tap not on the image of the handset, that is, not on the “Phone” icon, but on the Contacts image - on the “Contacts” icon (1 in Fig. 5)
By clicking on the “Contacts” icon, we will find ourselves in Contacts, select the subscriber there again, tap on his name, select one of his numbers, and Android will regularly call him at the selected number.
Only in this case, when selecting a subscriber’s number from the list of his phone numbers, we will be asked to make him
- a regular phone call (1 in Fig. 6),
- video call (2 in Fig. 6) or
- send SMS (3 in Fig. 6)
– intuitive icons next to each available number of our subscriber.
Rice. 6. Selecting the subscriber number and communication method in Contacts: telephone call, video call, sending SMS messages
Answer a call Android: answer or hang up
It's one thing when we call. We only call people we know, and, as they say, on business. What if they call us? What if strangers call or are not entirely on business? For example, an advertising agent offers us another “buy-buy”. Or, God forbid, a bailiff. Or there is simply no desire or opportunity to talk to the person who is calling us now. After all, you can call back if necessary.
So, we received an incoming call. A beep sounds and we hear that they are calling us. And on the Android screen we see who is calling us (Fig. 7).
If the subscriber is listed in the phone book, then Android will show us his name and even show his photo if the person calling has one. Here you go, this is who is calling you, think about whether you will connect with him or not!
And if the subscriber is not included in the phone book, in Android Contacts, then only the caller’s number will be displayed on the screen, his full number with the prefix +7 if the call is made from Russia. If the call comes from abroad, the prefix will be different, for example, +49 when calling from Germany.
To refuse a subscriber and not connect with him, just touch the red image of the handset, and at the same time lightly swipe your finger to the left in the direction indicated by the red arrows (2 in Fig. 7), as if to brush away the dust to the left. The call will be interrupted, and the caller will be given a message that you refused to receive his call - you dropped the call.
To connect with the subscriber, you need to touch the green image of the handset and easily slide your finger to the right in the direction indicated by the green arrows (1 in Fig. 7), as if to carefully brush away dust from the screen in the indicated direction - to the right. It is important not to touch the red telephone button, otherwise the call will be dropped.
Why swipe right to accept or left to reject a call?
You may ask why you need to not only tap, but also move your finger in the indicated direction? Firstly, this is due to copyright laws. If someone in other devices, for example, in the iPhone, before Android, would have made calls with one tap, and then patented this method, then other manufacturers cannot make the same tap without the permission of the author.
Secondly, a simple tap can be erroneous. Let's say they wanted to tap on the red tube, but they tapped on the green one and missed! And here you need to make some kind of confirmation of your actions. Yes, I understand that I want to talk with the person calling me - for this I also move my finger in the indicated direction.
Still, why confirm? Why say, “Yes, I understand what I’m doing!” The fact is that when you are in roaming, and especially when you are in international roaming, incoming calls may also be charged. And not just paid, but very heavily paid.
By agreeing to talk with the subscriber, we thereby mentally agree to pay for the upcoming conversation, say 50-100 rubles for every minute, or even more if we are somewhere in New Zealand at the time of receiving the call, for example! This is why, among other things, confirmation of the call is made by not only tapping on the image of the handset, but also by additionally moving your finger in the indicated direction. Like, let's connect, while understanding that it may cost us some money.
Acceptable actions during a call
Unlike a regular phone, you can do additional actions during a call on Android. Honestly, during a call you can do everything that Android allows. But the problem is that, while doing something during a call, you need to not stop the call itself, the conversation with the subscriber at the other end of the “wire”, which is replaced by a radio signal.
So, in order to do something additional on Android during a call, you must first transfer the conversation to the speaker - to speakerphone. Of course, everyone around you can also hear your entire conversation.
Usually we speak by putting the phone to our ear, but in this case we won’t be able to do anything on Android. Therefore, for any additional actions you need to switch the conversation to speakerphone. This is done by clicking on the button with the image of a speaker labeled “Speaker” (1 in Fig. 8). In order for this picture to appear on the Android screen, you need to briefly interrupt the conversation with the subscriber and tear the Android away from your ear. The picture is as in fig. 8 will appear immediately. And immediately tap on the “Speaker” button, the conversation goes into speakerphone mode, you no longer need to put Android to your ear.
Next, you can, for example, turn off the Android microphone - the “Off” button. micro." (2 in Fig. 8). In this mode, you can hear what your caller is saying, but the caller will not hear you.
The red button with the image of a telephone handset and the caption “End” (3 in the figure) ends the conversation with the subscriber; it is a prototype of the “Hang up phone” action.
If during such a conversation on the speakerphone you press the main Android button, the main Android screen will appear on the screen, as shown above in Fig. 1. And now you can call any Android program, for example, you can open Contacts and see the phone number of any other subscriber, in addition to the one with whom you are currently talking. This is necessary, for example, to dictate to your subscriber the phone number of another mutual friend.
It is any other program that can be called directly during a conversation with an interlocutor on the phone. That is, our gadget is not just a phone, it is a computer that allows you to do many different actions at the same time (multitasking mode).
And making a phone call is one of the possible actions, by no means the most basic, which does not cancel out other Android capabilities, and without even interrupting the conversation with your interlocutor. This is especially useful for those who know how to do several things at once.
How to dial additional numbers when calling
If, when dialing a number, you are required to enter additional numbers, for example, when calling an organization where many different employees are on the same number. And if the answering machine prompts you to enter one or another number to contact them, then you need to tap the “Dial” button (4 in Fig. 8). A keyboard will appear on the screen for entering numbers, as well as the signs “*” (asterisk) and “#” (hash), with which you can call the desired subscriber already in the process of “broadcasting” the answering machine.
And most importantly, Android allows you to switch to another subscriber right during a conversation with one subscriber. Let’s immediately make a reservation that this opportunity should also be provided by the mobile operator.
Two calls at the same time
If your mobile operator allows you to make 2 calls at once, then to do this, right during a conversation you need to click (tap) or on the “Add” button. call" (5 in Fig. 8), and then it will be possible to dial a number using the numeric keypad; or select another subscriber from the Contacts list and call him, while simultaneously maintaining contact with the first subscriber with whom you are currently talking.
After clicking on the “Add. call” on the Android screen, the picture with our current conversation will become small, under it the “time” will tick, measuring the duration of our conversation (1 in Fig. 9). And a keyboard will appear to enter the phone number of the second subscriber, as well as a menu to enter Contacts to select the second subscriber from the Android Contacts book (2 in Fig. 9).
In general, there are plenty of opportunities provided by Android during a conversation with a subscriber on the phone.
The only thing you need to remember when using all the capabilities of Android during a conversation with a subscriber is that outgoing calls are usually paid for us (just as incoming calls in international or even national roaming can also be paid), and We pay for the entire connection time with the subscriber.
Even if at this time we do not talk to this subscriber, but keep him in touch, while we ourselves talk to another subscriber (also paid), or launch some other programs on Android - it still costs money.
Perhaps this is the only thing that can keep us from doing many other useful actions that are permissible using Android during a conversation with another subscriber.
Ring volume on Android
You can adjust the ringer volume as follows. You need to unlock your smartphone screen. Then press the button located on the narrow left side panel of the smartphone. True, for different smartphone models such a button may be located in a different place.
After clicking on the corresponding button, a scale for adjusting the volume will appear.
By moving your finger along this scale (Fig. 10) to the left or right, the slider (you can also call it a slider) will simultaneously move along the scale.
If you move the slider to the left (towards the handset), the volume will be lower. To completely turn off the volume, you need to move the slider to the edge of the left border.
To make the ringer volume as high as possible, you need to move the slider with your finger to the edge of the right border of the scale.
Ringer volume settings
If you click on the gear (circled in red in Fig. 10), the standard volume settings will open. As can be seen in Fig. 11, you can set different volumes on your smartphone for calls, for media, notifications and for messages from the Android operating system.
Rice. 11. Ringer volume settings
Call log
By opening “Phone” or “Contacts” (Fig. 1), you will see the “Journal” tab there (Fig. 2). The log records all calls and your actions in relation to these calls: answered, dropped, missed, etc.
In Fig. Figure 12 shows what a regular incoming call (not a video call) looks like in the “Journal”, which was answered and talked. By the way, in this case, a call from the subscriber was received using a second SIM card for Android with 2 SIM cards (as evidenced by the green number 2):
Rice. 12. This is what the information looks like in the Log when an incoming call is answered
If a regular outgoing call was made, then the arrow is directed in the opposite direction (compared to an incoming call) and it is red, the color of a reminder of the fact that you paid for the call (Fig. 13):
Rice. 13. Recording in the Event Log that an outgoing call was made using the second SIM card
If a video call was made, then in the log such a call will be with a small image, which is circled in a red frame in Fig. 14:
But a decisive action, when the red button was pressed during a call and the call was reset, is indicated by a crossed out circle like a traffic prohibition sign (circled in a red frame in Fig. 15):
Rice. 15. Information in the Log that the incoming call was rejected using the red button
Call forwarding Megafon
What it is? Unconditional forwarding to Megafon has a service code - No. 21. The combination of numbers is indicated in international format. When redirecting to your new card (or another SIM card), dial without spaces: +7 “network code” phone number. And forwarding to another Megafon number: +7922хххххххх.
The standard service can also be installed or disabled. In this case, you need to call from your mobile phone (yours) to No. 0500. Or from a landline phone number to No. 507-7777.
There is one more command: ** (forwarding service code) * (telephone number) # call. If you want to cancel some type of forwarding: ## (forwarding service code) # call. To completely refuse the offer: ## 002 # call. You can view all the teams on the official Megafon website.
What are permissions for?
Permissions are the actions that an application will be able to perform after installation.
What is written
In-app purchases
Some of the functions of this application are paid, it is better not to let children play with it
The application will be able to determine the coordinates of the device at any time, even when it is not in use
The app will be able to open, edit, add and use photos and other files on your device at any time, even when not in use
The application will be able to take photos and shoot videos at any time, even when not in use
The app will be able to record ambient sounds at any time, even when not in use.
Wi-Fi connection information
The application will be able to check which network the device is connected to at any time, even when it is not in use
The application will be able to read all SMS and send them in unlimited quantities at any time, even when they are not using it
Most permissions are quite serious, so look through the list carefully and think - do you trust the authors and are you ready to allow these actions? Often developers request redundant access:
● the flashlight must only have access to the camera to turn on the flash, and for some reason this application also wants to know your location, look at photos, turn on the microphone and check the Internet connection;
● a simple notepad does not require any special permissions, but its counterpart, which wants to view contacts, determine location, access contacts, files and view phone numbers;
● the game “Farm” warns about paid functions, wants to view a list of your accounts (the game works over the Internet, that’s why accounts are needed) and use photos and other files (most likely this is a cache), but this is not enough for anyone else.
Of course, installing applications only without permissions is unrealistic. The main thing is to pay attention to what the application wants to receive and understand why it is needed.
The same notes may request Internet access in order to synchronize with your account, or the flashlight also has a compass, so it requests access to the device’s sensors.
But it may also be that, at first glance, an innocent calculator will write off all the money from the SIM card because it was given access to SMS, or it will steal personal photos because it was given access to the Internet and files.
Select Mobile data.
Below you will find instructions for different versions of Android.
Click here if your device is Android 10.9
Select SIM Card Manager.
Select Mobile data.
Select a SIM card for the Internet.
Click here if your device is Android 8, 7, 6, 5
Open the device menu.
Select Settings.
Select Connections. If there is no such item, go to the next step.
Select SIM Card Manager.
Select Mobile data (Data network).
Select a SIM card for the Internet.
Placing a call on hold is charged within the limits. When using the Conference Call service, all calls made are paid for.