Exporting/importing passwords to Google Chrome is a useful option that you should use to save or download login information for frequently visited sites. Such manipulations are needed to transfer browser settings to another computer, when reinstalling the browser, and also as a backup option.
There are several ways to export or import data to access sites.
The simplest is to create a separate Excel file, which you save to a folder on your hard drive or flash drive, and then load it in your browser. Other options for moving: through experimental settings and account settings, and synchronization also helps with this. Check the password requirements that you consider mandatory?
Export options
Save to file: export from Google Chrome
Enable the feature in experimental settings
The order is:
- In the browser address bar, enter chrome://flags/#password-export and click Enter.
- You will enter the experimental settings menu. In the search bar write Password import. When this option appears, select Enabled from the list to the right of it.
- Then click on the big blue Relaunch button to restart Chrome.
The screenshots show how import is enabled. It's not a mistake. My browser no longer has an export setting. This is true for older versions of the program.
Instructions for saving
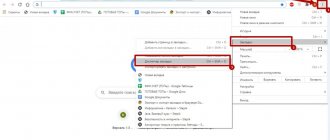
- After restarting the browser, call the main menu by clicking on the ellipsis. You are interested in the “Settings” category.
- Click on the "Passwords" category. In it you will see a list of sites with saved login data. Click on the ellipsis to the right of the table of contents, and there configure the “Export” option.
- A window will appear. In it, select “Export”.
- Name the file as you wish and determine where it will be stored.
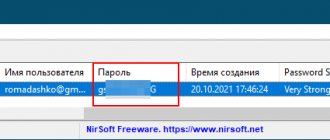
Subsequently, you can easily open this document using Excel. And if you don’t use Google data in your browser in the future, it’s better to delete it from Chrome for security reasons.
Export from passwords.google.com service
Another option for transferring data involves logging into your account settings. For this:
- Go to Google and click on the purple circle at the top. Select the "Account Management" option.
- In the box on the left, click “Security.” Scroll the slider all the way down on the right until you see the “Password Manager” tab. Click on it.
- You can get here in another way. Just enter passwords.google.com in your browser. After that, click on the gear icon.
- Click on the “Export” button next to the corresponding line.
- A warning window will pop up. In it, select “Export” again.
- The Google Passwords CSV file will begin saving. When it is completed, a check mark will appear next to the “Export passwords” line.
Options to transfer bookmarks from Google Chrome to another PC.
Internet Explorer
This browser does not allow you to export passwords to other surfers and does not support importing from them. Such operations are only possible with Internet Explorer itself, for example, if the data is lost when reinstalling the system or you have another PC with the same browser. So, if you have Internet Explorer versions 4-6, then:
- Press Win+R and open the Run window.
- Type “regedit” (without quotes) there and press Enter.
- This way you will open the Registry Editor.
- Find the HKEY_CURRENT_USER folder on the right.
- Next you need to sequentially expand: Software-Microsoft-InternetExplorer-IntelliForms-SPW.
- Right-click on the file and export passwords following the prompts.
For versions 7-9, do the same, only in the last folder you need the Storage2 element. For newer versions of the browser, the procedure is slightly different:
- Open Control Panel (select the desktop app if you have Windows 8 or 10).
- Here we are interested in “Accounts” and their administration.
- Open Windows Credentials and Backup.
- Start data recovery using a special option.
After this, the browser will save all the passwords that its predecessor remembered. When switching from Internet Explorer to another surfer, all data will have to be entered manually.
Import methods
Transfer from other browsers through Chrome settings: import from Opera, Firefox, IE, Yandex
You can use one of the other web browsers installed on your computer for this task. The transfer algorithm is as follows:
- Go to the already familiar Chrome main menu, click “Settings”.
- You will immediately see the “Me and Google” section. Left-click on the “Import bookmarks and settings” option.
- A window will pop up. First, select your desired browser from the list above. In the “Items to import” field, there are usually checkboxes next to each item by default. You can remove the ones you don't need. But remember: opposite the line “Sites with saved passwords” there must be a checkbox. When you have selected everything, click “Import”.
- After a short time, the system will notify you that the transfer has been successfully completed. Click "Done" to exit the menu.
Load from CSV file
Enabling the feature
If the proposed method does not work, then try transferring the data to Chrome from the saved CSV file. The algorithm of actions is similar to the one during export:
- Enter chrome://flags in the address bar.
- Select Enabled in the list next to the Password import function.
This will enable the option, but you will need to restart Chrome to continue working.
Procedure in Chrome settings
- After restarting the browser, go to the main menu, to the “Settings” category. There, go to the “Passwords” tab.
- If you enabled the option correctly, when you click on the three dots at the top of the list of sites with saved login data, there will be 2 positions - “Import” and “Export”. Choose the first one.
- Through the window that appears, find the saved CSV file. After a short time, all your login data for sites will be imported into Chrome.
If necessary, you can easily deactivate this option. Follow the familiar path chrome://flags, and next to Password import select the Default item.
Mozilla Firefox
Simple ways to save data in the Mozilla Firefox browser.
Method No. 1
Read also: Top 15 plugins for FireFox for every day: What is worth installing
- Showing hidden folders and files.
Displaying hidden system elements
- Next, we need to follow the path to the folder where all the data we need is stored: C:\Users\Username\AppData\Local\Mozilla\Firefox\Profiles\Profile Name\
or use the search command:
Finding the path to where passwords are stored in Mozilla
- The files with password data are located in this folder and there are several of them, so you need to copy everything. But if you want to save bookmarks and other important information, then feel free to copy the entire folder.
Password files required
- After reinstalling and downloading the browser, just return these files to the original folder, and all your passwords will be restored in the browser.
Method No. 2
Synchronization: a way to “copy” your passwords to Google servers
There is a reliable option for transferring input data to other devices that use Chrome. We are, of course, talking about synchronization. When it is enabled, you will not need to re-enter your login information on sites each time. In addition, using synchronization, you can set up automatic transfer and change of passwords in another browser. This option is not always useful. If necessary, you can disable it through the settings of the browser where you import data from Chrome.
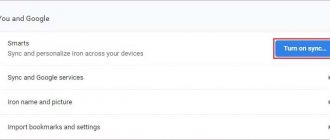
To enable the option, go to settings, then to the “Me and Google” section and click the “Enable synchronization” button.
Similarly, through the settings section, synchronization is enabled on a mobile phone with Android.
How to enable “remembering” passwords in the browser
Via PC
This option will allow you not to bother with remembering passwords for logging into the site from your smartphone. To set up synchronization:
- Log into your browser from your computer.
- By default, this option is always enabled. To check this, click on the circle to the right of the address bar with your account parameters. There, click on the key-shaped icon, the leftmost of the three.
- Next to the “Offer to save passwords” function, the slider should be in the on position. This is indicated by the color blue. Move the slider to the right if it is inactive.
- In addition, you can configure automatic saving of data for authorization on sites. Go to the same account menu – “Passwords”, and move the slider next to the “Automatic login” column to the “ON” position. This way you will save yourself from having to log in to the site every time.


