Wednesday, 27 March 2022 12:09
Hi all. In this article, I will show you what needs to be done if your computer or laptop does not see photos on your Android phone.
Modern smartphones are equipped with fairly good cameras, so most of the photos are taken from the phone, and it’s always at hand.
From time to time, all photographs and videos taken must be transferred to the computer.
So as not to clog up the phone's memory and keep the data safe and sound. I described in detail how to do this here.
However, when copying files, many users encounter a certain problem: the computer simply does not see the photos on the phone, or some of the photos are missing.
At one time, I also encountered this problem on the old Xiaomi Redmi 3S, after scouring the Internet and searching through a bunch of methods, I found the best option, I hope it will help you too.
The computer does not see the photo on the Android phone - solution to the problem
This situation arises due to the fact that Windows 7, 8, 10 and Android have problems with access rights, since these are completely different systems.
The solution is actually very simple, in order for the computer or laptop to see all the photos and videos, we need to rename the root folder with the Camera .
1. Launch the file manager on the phone, then find the DCIM (Digital Camera Images) folder through it and open it. This folder can be located in the phone’s internal memory (by default), or on the SD card.
2. In the DCIM Camera folder is located in it and all our photos and videos are stored. In order to rename it, select the Camera with a long press, in the menu that appears at the bottom, click the “More” button.
3. In the window that opens, select the “Rename” item.
4. Assign the folder any new name, let’s say Camera1, then click “OK”.
After completing these steps, copy the resulting photos to your computer. Then we give the folder the previous name Camera
If you do not do this, the Android system will automatically create a new Camera the first time you take a photo.
Owners of smartphones from other manufacturers, such as iPhone, Samsung, LG, Huawei, Lenovo, Meizu, Sony, Fly, ASUS can also use this method.
If this article helped you, be sure to write the brand of your phone in the comments, that’s all for me, I wish you success.
Posted inAndroid
Add a comment
To the top all questions Murmur15 November 7, 2013
Because of this problem, I can’t transfer photos from my phone to my computer, or music from my computer to my phone.
Nokia Lumia 620
To answer a question, you must log in or register.
Best answer Rudi Ruslanenko November 7, 2013
In Explorer, in the settings, find “View and folder options”, and then go to the “View” tab. In that tab, activate the items “Hide protected system files”, “Hide empty disks” and “Show hidden files and folders”. If you can see the files on your smartphone, then try turning off these items one by one to determine which one allows you to see the files and, accordingly, leave one active.
- Liked answer: 1
mrsrg November 20, 2015
If you have a Nokia/lumia, try this: 1. Connect your phone via a USB cable to your computer 2. Unlock the screen on your phone. All. Files from the phone must be read by the computer.
- No one has liked the answer yet
mrsrg November 20, 2015
If you have a Nokia/lumia, try this: 1. Connect your phone via a USB cable to your computer 2. Unlock the screen on your phone. All. Files from the phone must be read by the computer.
- No one has liked the answer yet
mrsrg November 20, 2015
If you have a Nokia/lumia, try this: 1. Connect your phone via a USB cable to your computer 2. Unlock the screen on your phone. All. Files from the phone must be read by the computer.
- No one has liked the answer yet
Close We recommend reading
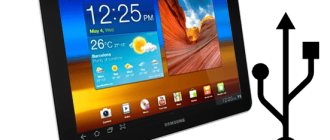
Does your PC not see your Android phone or tablet via USB? This is a fairly common problem, but it can be fixed on your own. In this article you will find useful recommendations on how to do this. In addition to the solutions given below, there are several more that we have already talked about on our website! If your phone does not connect to your computer via USB, try via Wi-Fi: method 1.
Also pay attention to applications for transferring files over the Internet: Pushbullet and AirDroid. In general, there are decent alternatives to connecting via USB (unless, of course, you are interested in other features like debugging).
As for the problem with connecting mobile devices via USB to a computer, there are only two types:
- The phone is not recognized by the computer, but is charged from it;
- The PC (or laptop) does not completely recognize the smartphone.
We will consider both options in detail and try to help you fix everything!
The PC does not see the Android phone via USB. What to do?
1. First, use a different USB cable. If there is no effect, the problem is not there.
2. Check the functionality of the USB port: to do this, connect the mobile device to another connector. If the PC still does not see Android, the problem lies somewhere else.
3. Try connecting your phone to another computer. If you fail here too, there may be a problem with the microUSB or other components of the smartphone. In this case, only repair will help you.
4. If you connect an Android smartphone to a laptop or PC running Windows XP and the computer does not see the phone, you need to install the MTP (Media Transfer Protocol) protocol for Windows XP. You can download it from the official Microsoft website: https://www.microsoft.com
5. Now regarding devices protected with a graphic key or password. For your computer to see your files and folders, you must first unlock your phone or tablet. Tested on Nexus 7 2013 with Android 5.1.1.
6. Install (or update) the USB driver on your computer: go to “ Device Manager ” and if there is a yellow triangle with an exclamation mark inside, you need to right-click on the desired item and select “ Update... ”. Select either " Search automatically for updated drivers " or " Browse this computer for driver software ." In the second case, you must first download the driver from the official website. You will find more detailed information in the instructions for installing ADB and Fastboot.
If the downloaded drivers come immediately with the installer (.exe file), then you just need to run its installation. Also, drivers will be installed when downloading and running programs from various manufacturers to synchronize devices with a PC (HTC Sync, Samsung Kies, etc.).
7. Enable USB debugging. May I help.
8. Try to completely remove the old driver, then restart the computer and reinstall the driver as described in step 6.
9. Make sure that your smartphone or tablet is not connected to the computer in “ Charge Only ” mode.
10. Also make sure that the “ USB modem ” item is not activated. In this case, the phone will not be visible to the PC. You can disable it in “ Settings ” → “ Wireless networks ” → “ More ” → “ Modem mode ”.
11. When connecting Android to computer, you can select the connection mode. As you can see, I only have 2 available (Nexus 7 2013 with Android 5.1.1). But on other devices, versions of Android, firmware, there are other modes like “ USB Mass Storage ”.
You can also select the connection mode from the notification panel.
12. Restart your phone and computer (yes, it happens that this helps too).
13. If everything was fine before, but now for some reason the computer does not recognize the device, you can reset the settings on it. How to do this is described in detail in another instruction, but keep in mind that all your applications, accounts, contacts and other data from the internal memory will be deleted, so first make a BACKUP.
14. You can also flash your device without using a computer. For example, using ROM Manager, although you need root rights.
These are all the ways I know to solve the problem of connecting mobile devices via USB to a PC.
We offer a general overview of possible options, and then discuss all solutions to problems.
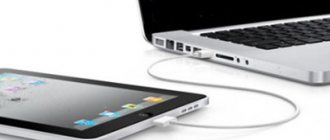
Can't copy photos and videos from iPhone to computer? Solution to the problem.
Today I urgently needed to transfer videos and photos from my iPhone to my computer.
And then a problem arose! I connect the iPhone to the computer using a wire, on the phone I click “Allow device access to photos and videos”, select the necessary files, copy them to the folder I need and... This is where troubles begin for which life has not yet prepared me. In short, this is what happens - everything freezes, files are not copied, and the Windows 10 operating system shows a “red cross” and the “Device unreachable” error.
Well, okay, I think maybe Windows 10 is “buggy” -
I take out a laptop with a “seven” and try to upload photos there.
I connect my iPhone to a laptop with Windows 7, start copying files and history repeats itself! However, the error text has become slightly different: “The device connected to the system is not working.” But the meaning, as you understand, does not change much from this.
Time passes, and photos and videos need to be uploaded.
1. I take another wire - everything is the same.
2. I transfer files via AirDrop to the iPad and try to copy photos and videos through it. But with the iPad everything is the same - either “The device is unreachable” (Win 10), or “The device attached to the system is not working” (Win 7).
I went online to look for the reason...
And here I got very, as modern teenagers say, “burnt.”
There is one article for the entire Internet (only written in different words on different sites). In which it is assumed that everything is to blame:
1. “Curve” version of iOS (!).
2. Compatibility of Windows and iOS versions (!!).
3. Incorrect selection of data transfer function (. ).
I’ll say right away that none of the above, of course, is the cause of the “Device unreachable” error.
The whole problem is in the new file format that Apple introduced along with iOS 11 and which, accordingly, smoothly flowed into the next firmware versions.
So, we are interested in two options on the iPhone or iPad:
What happens in this case?
iPhone (iPad) shoots photos and videos in the new HEIF/HEVC formats (for high efficiency), and converts them to a compatible format when transferred to a computer. But if the file size is large, then at the stage of this conversion there is a slight freeze and, as a result, the error “Device unreachable” appears.
What need to do? Change just one setting:
- Open “Settings – Photos – Transfer to PC and Mac”. Select “Transfer originals”.
All. After this, there will be no problems when copying photos and videos from iPhone.
You ask: “What about the second option, the one called “Camera – Formats”?” Here, proceed as you wish.
1. If you want “standard” JPEG/H.264, then select “Most compatible”.
2. If you want “newfangled” HEIF/HEVC, then leave “High efficiency”.
Just in case, I chose “Most Compatible”. Still, not all programs work with HEIF/HEVC formats, so it’s better if my iPhone shoots “the old fashioned way.” It will be calmer that way :)
Source
What is BMP format
BMP (from the English BitMap Picture) is an image format developed by Microsoft Corporation.
In fact, this file extension represents an image, the information about which is contained bit by bit.
The disadvantage of this format is that it lacks compression.
Therefore, the size of pictures saved in a standard format (jpeg, png and others) can be tens of times smaller than the size of the same picture, but with the bmp extension. In addition, a distinctive characteristic of a BMP file is data reading: the image is loaded from bottom to top, and not from top to bottom, like other formats.
Why can't my computer see video from my iPhone?
It's possible that your computer doesn't have a player that supports the codec that your iPhone uses.
Try installing VLC Media Player. It is free and supports most formats and codecs.
Hello. I installed this player. I also open my iPhone on the computer and only photos open in folders, but I don’t see videos.
How to sync iPhone with computer via iTunes?
First, download and install iTunes on your computer. Turn on your phone and connect to your computer using the cable. Open iTunes, sign in to your account. There will be a phone icon at the top left, click on it. You will see the phone menu, as well as the “Synchronize” button. By clicking the button, you will start the synchronization process.
1 1 · Good answer
Tell me, I connected my iPhone, the computer sees it, but when I open it, the folder is empty. How to synchronize photo stream?
You may have enabled the photo/video storage function in iCloud. In this case, these files are stored in the “cloud” and will not appear in the iPhone folder on the computer.
Why did the computer (PC) stop seeing my mobile phone connected via a USB cable? Previously it recognized it as an external drive with folders available.?
Go to Device Manager
There you will most likely see an Unknown device - this is your phone
Click on it and select Update driver – Select from the list of available ones – uncheck Only compatible devices – select USB device – Install
Why is there almost no sound when I record a video from my iPhone screen using the Screen Recording function (the microphone is on)?
Same situation. Everything is included, everything is clean. But on a particular site, the video is recorded with very low sound (and the sound is barely audible during recording). But as soon as you stop the recording by locking your phone, the sound becomes loud again. It’s as if the site has some kind of blocking from screen recording. How to get around it?
Source
Troubleshooting solutions
Specific ways to resolve problems with the photo viewer depend on the nature of the problem and the cause of its occurrence. The main factors that can cause the malfunction under study include the following:
- File association changes or extension identification failure;
- Virus infection of the system;
- Damage to system files;
- Registry errors.
If the tool does not start at all, there is a high probability that its files are damaged due to a virus infection or other failure. Therefore, first of all, check your system for viruses using an antivirus utility. By the way, there is also a possibility that the malicious code simply replaced the extension of image files (PNG, JPG, etc.) with EXE and that is why photo viewing applications cannot open them.
Lesson: Checking your computer for viruses without an antivirus
Then be sure to scan your system for file corruption using the built-in utility.
Lesson: Checking the integrity of system files in Windows 7
If none of these general scanning methods reveal problems, move on to the specific photo viewer troubleshooting options below.
Method 1: Set up file associations
There is a possibility that the cause of the problem lies in a failure in the file association settings. That is, the system simply does not understand which objects the photo viewer should open. This situation could arise when you installed a third-party image viewer, but then uninstalled it. In this case, during installation it rewrote the associations of the image files to itself, and after deleting they simply were not returned to their original state. Then you need to make a manual adjustment.
- Click the Start button in the lower left corner of the screen and select Control Panel.
Next, open the “Programs” section.
Click on "Match File Types...".
A list of all file types registered in the system will be loaded. Find in it the name of the extension of the type of image that you want to open using the viewer, select it and click “Change program...”.
In the window that appears, in the “Recommended programs” block, highlight the name “View photos...” and click “OK”.
After this the mapping will change. Now this type of image will be opened by default using the Windows photo viewer. Similarly, change the associations of all those types of images that you want to open through a standard tool. After completing the necessary actions, you can exit the mapping management window by clicking “Close”.
Method 2: Editing the Registry
If you are using a 64-bit version of Windows 7, the problem with the photo viewer can be solved by editing the system registry.
Lesson: How to create a system restore point in Windows 7
- Type Win+R and enter the command in the window that opens:
Click on the "OK" button.
In the window that appears, open the “HKEY_CLASSES_ROOT” branch.
First make settings for files with the JPG extension. Move sequentially to the sections:
Then look for the “Default” option on the right side of the interface. Click on it.
In the only field of the window that opens, instead of the current entry, enter the following expression:
Click OK.
Next, you should do a similar procedure for images with the PNG extension. In the “HKEY_CLASSES_ROOT” directory, go through the sections:
Open the "Default" object again in the "command" section.
Change the parameter value to the following:
Click "OK".
Finally, you should follow the procedure for specifying a collation for images with a JPEG extension. Go to the “HKEY_CLASSES_ROOT” directory by sections:
Open the “Default” object in the last named section.
Change its value to this:
Click OK.
Then close the Editor window and reboot the system. After a restart, images with the above extensions will be opened through a standard photo viewer using the second version of the shimgvw.dll library. This should solve the problem with the functionality of this program on Windows 7 64-bit version.
Problems with the built-in photo viewer not working can be caused by a number of different reasons. Each of them has its own solution algorithm. In addition, the specific method depends on the bitness of the operating system. But in most cases, problems can be resolved by updating the file type associations.
Describe what didn't work for you. Our specialists will try to answer as quickly as possible.
How to open photos and videos from iPhone on computer
Users often encounter a technical problem: after downloading photos or videos from an iPhone, it is not always possible to process them (and sometimes even open them).
Sometimes photos and videos simply cannot be transferred from the smartphone (a crash occurs).
Or this message appears on the screen (when, for example, you have downloaded pictures and want to process them in Photoshop):
In fact, the problem can be solved in an elementary way. Many people advise downloading an application or program for processing, but in fact, just one step is enough. Go to your phone settings -> “Photos” -> check the “Automatic” box (transfer to MAC or PC).
After that, calmly transfer the pictures. They open in my viewer and are processed in Photoshop without any problems.
Now attention! To download a video for processing, we perform the opposite operation: “Settings -> “Photo” -> “Transfer originals”.
Most likely, after this you will no longer need to find out # how to convert HEIC to another format, there will be no need to ask questions: “Why # video from iPhone does not open?” and “Why doesn’t my #computer see photos from my iPhone?” You will already receive a photo in jpg format and a readable video - mov.
By the way, sometimes there are glitches when you connect your iPhone to a computer or laptop (especially if you transferred a lot of files). In this case, I advise you to restart your smartphone.
And here you can read how to use two SIM cards in an iPhone.
Source
Recommendations from Microsoft
Windows 7 developers offer another tool that allows you to resolve problems with playing slide shows and displaying pictures, even if they do not open. This is Launch FixIt. You will need it to fix the following problems:
- it is impossible to set a picture as a screensaver;
- The photo preview function does not turn on;
- in thumbnails and the preview window, the colors of pictures are visualized in inverse order;
- artifacts and interruptions when flipping through slides.
This concludes the search for problems with displaying pixel images on a computer.
Windows 7 does not see photos and videos on iPhone
If, when you connect your iPhone to your computer, the phone is detected, but the directory inside is empty (although there should be photos or videos), you need to remove the device from the system and add it again. To do this: 1) connect the iPhone to the computer, trust on the iPhone 2) on the computer go to: Start - Control Panel - System and Security - Device Manager - USB Controllers 3) Right-click on the iPhone in this list and delete the device 4) Right-click on the iPhone in this list and delete the device 4) disconnect the iPhone from the computer (remove the usb cable) 5) connect the iPhone back to the computer, it will reinstall the firewood itself and everything will work.
If it doesn't work: 1) Remove the device this way a second time. Sometimes it only works the second time for me. 2) Check if there is not enough power on the USB port; push it to another 3) Try deleting iTunes (don't forget to backup the device in a separate folder)
I hope this helps you and I really look forward to your comments!