Here you need to know exactly which item is responsible for installing the file from memory
Before you start installing Android on your smartphone from scratch, you need to decide for yourself why you need it. If none of the reasons on the list apply, then it’s better not to. Practice shows that the lion's share of problems in topics on specialized forums comes from those who, just out of interest or boredom, decided to “tinker” with the firmware. If you want to experiment, you need to be aware that the consequences can be very different. So, in what cases may you need to reinstall Android:
First, we need to install ROOT rights. You may ask, what is this and why do we need it?
When do you need to install Android from scratch?
Flashing the Android operating system may be necessary for the following reasons:
- The need to obtain the latest version of the OS for the correct operation of certain software.
- Updating the security system and encryption algorithms to preserve confidential data.
- Getting rid of software preinstalled by the manufacturer - firmware.
- Interface update. Often this is a desire to get a new proprietary shell on the device, but, for example, in the 10th version of Android an internal dark theme appeared.
- Solving hardware problems that have arisen with hardware.
- It is not possible to unlock your smartphone for certain reasons.
Reinstalling Android from scratch is necessary in cases where the problems were not solved either by a simple system update or by resetting the system to factory settings, that is, resetting all information stored in memory, including all pre-installed software. In this case, the system must be completely reinstalled.
The best way to reinstall the operating system on a smartphone is to contact a professional service center with this problem. In the event of this kind of independent manipulation, the owner of the device loses the warranty on the electronics and also risks making it inoperable without the possibility of repair under warranty.
It is recommended to carry out all the actions described later in the article only if you have full confidence in your skills.
Easy update
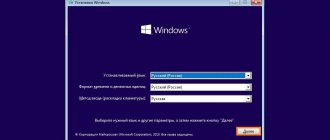
To check for available updates, go to your smartphone’s settings and enter “update” in the search field, then click “System update” in the search results.
- A page for checking for updates will open, which will begin immediately and will not take long to arrive.
- If there is a more recent OS build available specifically for this phone, you will be prompted to download and install it.
- After agreeing, the download of the update package will begin, upon completion of which you will be asked to restart the device and begin installation. If the OS version is up to date, the update check page will simply notify you of this.
If for certain reasons there is no “Check for updates” item in the settings (which is unlikely), many programs from the Play Store will help with this, which can be found by the very obvious request “Android update”.
In case of updating to a brand new version (for example, 9.x->10.x), you should log out of your Google account on the device in the “Settings” - “Accounts” section, and then reset the system settings. This is an optional item, but if you ignore it, you may encounter difficulties such as emergency shutdown of “heavy” applications such as Instagram.
Possible problems
The procedure described above will seem complicated to most users, and therefore it is possible that after the installation is complete, you may encounter a number of problems, including the “bricking” of the smartphone. To prevent this from happening, take note of a few recommendations:
- download software designed for your model;
- do not use pirated versions of Android;
- If you encounter problems with the installation, roll back the settings through recovery.
If all requirements are met, the operation will not cause you any difficulties. It is only important to allocate enough free time to manually reinstall the OS.
What you need to install Android
- First of all, you need to make sure of the phone brand and model. It may seem to the average user that operating systems are universal and a desktop operating system is suitable for installation on any PC or laptop, and a mobile OS can be installed on almost any smartphone, but this is far from the case. The main problem that does not allow such a simple solution to be realized is the difference in the physical modules on the devices and, as a result, the driver programs necessary for interaction between the computer hardware and the control program installed on it.
- After establishing the exact model of your smartphone, you need to go to the manufacturer’s official website and find the operating system of the required version for this specific phone model. If there is one, download it and save it on your computer’s disk, since flashing will be done through it.
- You should connect the device to your computer or laptop in advance via a USB cable to make sure that data is transferred freely and that the drivers for interaction between your pocket and desktop computers are installed successfully. For example, for Huawei and Honor devices you will need to install the HiSuite utility for secure data transfer, and it will not be possible to simply open the contents of the smartphone on your computer as a folder.
- Important points before installing new firmware are creating a backup copy of the data if there is important information on the gadget, and then resetting the system, which will delete all data, applications and any system settings, applying the default settings.
How to update using Smart Switch
To install the new Android on Samsung tablets and smartphones, use the Smart Switch and Samsung Kies applications.
To update to 7.0, 8.0 or 9.0 using Smart Switch, you need:
- Click “Continue” after the notification dialog box appears on the screen.
- Wait until the program completes the process.
Note: if a notification about the ability to download a new version of Android does not appear on the screen, this means that the latest updates are installed on the device.
Install via PC
The key feature of installing firmware via a computer is that there is no need for root rights.
Before installing new firmware, you must also unlock the bootloader and install the Android tools. To do this, scroll down the link and in the SDK Tools Only field select the appropriate option depending on the platform and preferred type - archive or installer.
From the installed folder, launch SDK Manager, check the box as in the screenshot below and click on the install button.
The next step is to enable USB debugging:
- Open settings.
- Open the “About phone” section located at the very bottom.
- Click on the “Build number” field 5-10 times until a message appears about activating developer mode.
- Return to the main menu and open the “For Developers” section.
- Check the box next to “USB Debugging”
Unlocking the bootloader:
- Disable the gadget.
- Press the power button and the "Volume Down" key
- Connect your smartphone using a USB cable.
- Open the Android tools folder, hold Shift and right-click. In the menu that appears, select “Open a command prompt window.”
In the console type:
- fastboot oem unlock unlock_code unlock_code.bin – HTC
- fastboot flash unlock unlock.bin – LG
- For Sony Xperia, the required command is listed on the website in the section for the required model
unlock.bin and unclock_code.bin must be obtained from HTC and LG, respectively, as follows: enter the command fastboot oem device-id (LG) or fastboot oem get_identifier_token (for HTC). A long device-id will be displayed on the screen, which must be specified in the form on the website to receive the above files by mail.
Obtaining the unlock code on devices is described in more detail at the following links: , Huawei, HTC, Sony Xperia.
Back up your data
The first thing you should do before performing any manipulations on the device, especially something as risky as flashing the system, is a backup. The device may be expensive, but the data can be priceless.
There are many ways to make a backup of your data:
- No installation of third party software. Connect your phone to your computer, select “Open folder to transfer files” and transfer important photos/videos/music to your PC.
- Using a file manager. Many modern smartphones do not allow you to simply connect to your smartphone via USB. This requires two-way installation of a utility that ensures transmission security and additional functionality. Thus, the HiSuite program for Honor and Huawei allows you to make a complete backup of all media files, as well as messages, contacts and call history to your computer.
- Using third party programs. Programs like Titanium Back-up and Google Back-up allow you to back up your data to the cloud.
Install and get ROOT rights
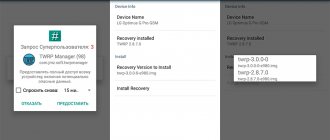
To obtain super-user rights (if possible), you need to connect the gadget to a computer on which one of the following utilities is installed:
- Z4root
- Universal and Root
- Kingo Android Root
- Unlock Root Pro
The user only needs to launch his existing program and click “Root device”. The utility will do everything itself.
It is worth checking in advance whether root permissions are available on the device. For example, Honor phones with Kirin line processors do not have this feature.
Update Recovery on your device
By default, any mobile device has the factory version of the recovery mode program installed - Android Recovery. To update the recovery on Android, you should download the .img file of the required custom recovery from the official website. The most popular are CWM and TWRP.
It will be most convenient to place the downloaded file in the Androud SDK Platform-tools folder. Now follows:
- Disable the gadget.
- Press and hold the lock button and the "Volume Down" key
- Connect your smartphone using a USB cable.
- Go to the Android tools folder on your computer, hold down the Shift key and click on the right mouse button. In the menu that appears, select “Open a command prompt window.”
- Enter the command fastboot flash recovery *.img (where *.img is the file with the recovery firmware)
- After the message about the completion of the operation, disconnect the USB cable
Ready! Custom recovery installed.
Download and install Android
After completing all the points described above, flashing the Android system will not be difficult.
- Go to fastboost mode on your smartphone.
- On your computer, go to the platform-tools folder and right-click in an empty space while holding down the Shift key.
- Select Command Prompt Window from the context menu
- Type fastboost erase command
- Type the command fastboost flash *partition name* *firmware file name*
- At the end of the flashing process, a finished notification will be displayed along with the time it took.
- Reboot the gadget and use it.
Video material
So, this was a short guide on how to install Android on your phone via a computer. We hope you got it right the first time without any problems, and now you are satisfied with all the capabilities of this operating system!
Content
There are several ways to install third-party applications on Android. The first of them is the well-known Play Market, and the second is through special Apk files. Installing via APK files is a less reliable and secure method, but for experienced users it opens up great opportunities.
Installing Android via custom recovery
Recovery for Android is a kind of analogue of the BIOS installed on the motherboards of desktop computers. This is a program that allows you to operate the basic functionality of the device without the mediation of the operating system, directly accessing the modules. Thus, recovery allows you to operate the operating system, updating it, reinstalling it and creating backup copies. Let's consider installing the firmware using the most popular custom recovery modes - CWM and TWRP.
- You need to download from the network, be it the official website of the developer/manufacturer or the w3bsit3-dns.com forum, a ZIP archive with ROM (firmware) and transfer it to your smartphone in the standard way using a USB cable connection.
- Now you should restart the gadget in Recovery mode - to do this, turn it off and hold down a specific (each model has its own) combination of physical keys. Most often this is one of the volume buttons + the screen lock button.
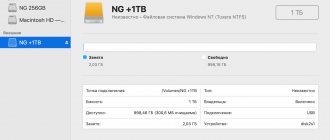
- At the next stage, the contents of the phone are cleaned using the “Wipe data/Factory reset” functions. You can skip the process, since the recovery will automatically delete system data, cache files and all installed applications. Or manually select files to delete through the Advanced wipe tab:
- You need to continue formatting by swiping the slider to the right.
When you select files to delete manually, as indicated in the picture above, the recovery will free up system data and cache, but leave user data. This way you can reinstall the firmware without deleting your own data. This method will not work if the installed firmware is very different from the existing one - for example, it has a different interface shell and file manager. It is good practice to keep a backup copy of your data and completely delete it before installing.
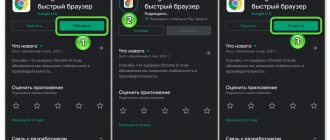
After clearing the memory, all that remains is to switch to the “Install” tab, find the previously downloaded archive in the directory in which it was added,
Where is it safe to download applications on Android?
Before installing applications, of course, you need to decide where to download them from. The most important criterion, of course, is security, because applications must be free of viruses and not clogged with advertising. The safest way, of course, is the official installation from the Play Market. In 99% of cases there will be no viruses or other malicious code in the applications. But for various reasons, people install via the .apk file. To do this, you need to decide where, with the least risk to yourself, download this file.
Flashing via ROM Manager
ROM Manager is a program that is a visual interface for custom recovery, developed by the same company as CWM Recovery. The key feature of the firmware flashing method through this manager is the need for root rights to access system directories and files on the device. Also, as follows from the definition of the program, for its operation you will need to have the custom recovery mode ClockworkMod installed.
Just like with flashing via recovery, you need to download the firmware image in a zip archive and transfer it to the device’s memory via a computer, or download the required type of firmware for the device directly from the utility. Open ROM Manager and select the option to install ROM from SD card. Find the directory with the zip archive and select it. In the new menu that opens, select reboot with installation. If you wish, check the box next to “Save current ROM” to be able to later restore the previous system.
How to return to the previous version of Android
If after flashing the device began to work slower, a new unpleasant bug appeared and in general the update was not pleasing, the Android version can be restored without any problems. This procedure is called rollback.
The easiest way is to perform a rollback in the same way as the backup was made according to the instructions in this article - through custom recovery. To do this, you need to enter recovery mode by turning off the phone and holding down the volume button along with the unlock button. In the menu, select Wipe data/Factory reset and start the factory reset process. You can also download another ROM, which will clear the currently available firmware.
Useful tips
Here are some more useful tips to remember when working with the Android installation:
- Always fully charge your device before starting the process, as the final reboot may take a very long time. Therefore, it is always better to insure yourself.
- If you have already reinstalled the OS before, then updating the recovery will no longer be required.
- If the firmware is unsuccessful, it is best to roll back the version to the previous one, or restore the software using the official update package.
If something went wrong
As electronics become more complex, as well as the software that controls those complex electronics, the number of possible ways that things can go wrong increases. Based on this, it is physically impossible to predict in advance all possible errors that may occur when reinstalling firmware on a device. Let's look at the most common problems that arise when flashing:
- It is not possible to format all partitions. Increasingly, manufacturers are cutting back on the functionality available to the user - it is becoming impossible in principle to obtain super-user rights on some models, and even to operate the device via adb it is necessary to unlock the bootloader. In such cases, you should go to a forum like 4PDA in the section intended for the device in question.
- Dead battery. It seems trivial, but this is a fairly common problem, especially with worn-out devices whose battery charge has decreased and the speed of operation has slowed down, as a result of which the installation takes longer than expected. Therefore, you should fully charge the gadget before starting flashing.
- The SIM card is not detected after flashing. This is due to the deletion of information about the IMEI of the device, which can be restored using the data on the packaging or in the phone documentation and a special IMEI recovery program.
Depending on the case, the problem should be formulated and the question raised in the appropriate forum. In most cases, reinstalling it again according to the instructions will solve the problem. Otherwise, you should roll back the system to the previous version as described in the previous paragraph. To do this, it is always worth keeping a backup copy.
0 0 Votes
Article rating
A couple of words
Let us once again recall a couple of important points that can save several thousand nerve cells from certain death:
- Before installing the firmware on Android from a computer, you must make a backup copy of your data. This can be done using special utilities from both the official and unofficial developers. This will help restore the system if the flashing fails.
- After flashing, you need to hold the power button for 15-20 seconds. If it doesn't turn on, you can try removing and inserting the battery and try turning it on again.
- Rather, the flash card will have to be formatted. Even if there is a lot of information there, a new Android can create new sections on top of the old ones, completely ignoring the latter. Therefore, before connecting a flash drive, it is best to reset all its contents to the computer.