How to install TWRP Recovery? - this question is asked by every Android user who dares to install unofficial firmware.
On some devices you cannot do without it even when obtaining root rights. Also, TWRP Recovery or CWM Recovery will allow you to make a high-quality backup of the system, which will save absolutely all application data.
You can download a suitable recovery simply by writing in the comment “I want to download TWRP Recovery for Samsung Galaxy S7,” or “Where can I download CWM Recovery for Xiaomi Redmi 3S?”
How to install TWRP Recovery via TWRP Manager
First, get Root rights and download TWRP Manager from Google Play. Open the application and provide superuser rights, the menu is very simple, so the likelihood of errors during installation is minimal.
Next, follow the instructions exactly:
- Enter your device in the “Device Name” line and click “Recovery Version To Install”
- In the window that opens there will be a list from which you can download TWRP Recovery, select the latest available version of TWRP Recovery
- Click “Install Recovery”.
Method 1: flashing firmware via Fastboot mode
Fastboot mode allows you to interact directly with the boot partition. Therefore, for most Android devices, the main method of installing TWRP recovery is flashing the firmware via Fastboot.
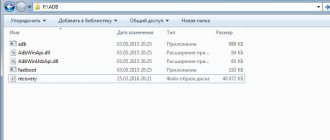
1) Place the TWRP file in the folder with ADB and Fastboot.
2) Next, connect the device in the appropriate mode to the PC.
3) In the command line, check that the connection is correct using the fastboot devices command.
4) If the serial number is displayed, then enter fastboot flash recovery recovery.img
5) One second, and the modified recovery is flashed.
Among the disadvantages of this method, it is important to note that an unlocked bootloader is required. While the lock is active, you will not be able to install TWRP. It is also necessary to clarify the availability of such recovery for your model and the preferred installation method. Perhaps in your case, other, more convenient installation methods are available.
How to download CWM Recovery and install it using ROM Manager
- Install the application from Google Play and provide root rights.
- Open the application and click Recovery Setup.
- In the window that opens, click “ClockworkMod Recovery” and confirm the model of your device. At this step, you can click on the three dots in the upper right corner and open advanced mode, this will allow you to download CWM Recovery exactly the version you need.
- In the last window, click “Install ClockworkMod” and the program will begin downloading and installing.
- After installation, boot into CWM Recovery to check the installation result.
MobileUncle Tools and recovery
To install CWM Recovery using MobileUncle Tools you need to follow just a few steps:
- Download TWRP Recovery or CWM Recovery for your device
- Download MobileUncle Tools, aka ToolHero.
- Launch the application and click “Recovery Update”
- Select the downloaded file and click OK.
- Done, recovery is installed, enjoy full functionality.
Anyone who takes the first steps in learning the procedure for flashing Android devices initially pays attention to the most common way to carry out the process - flashing firmware through recovery. Android Recovery is a recovery environment that almost all users of Android devices have access to, regardless of the type and model of the latter. Therefore, the method of flashing firmware through recovery can be considered as the easiest way to update, change, restore or completely replace the device’s software.
How to flash an Android device using factory recovery
Almost every device running the Android OS is equipped by the manufacturer with a special recovery environment, which provides, to some extent, including ordinary users, the ability to manipulate the internal memory of the device, or more precisely, its partitions.
It should be noted that the list of operations that are available through the “native” recovery installed in devices by the manufacturer is very limited. As for the firmware, only official firmware and/or updates are available for installation.
In some cases, through factory recovery, you can install a modified recovery environment (custom recovery), which in turn will expand the ability to work with firmware.
At the same time, it is quite possible to carry out the main actions for restoring functionality and updating the software through factory recovery. To install official firmware or updates distributed in *.zip
, perform the following steps.
1. To install the firmware, you will need an installation zip package. Download the required file and copy it to the device’s memory card, preferably to the root. You may also need to rename the file before manipulation. In almost all cases, the appropriate name is update.zip
2. Boot into the factory recovery environment. Methods to access recovery vary for different device models, but they all involve using combinations of hardware keys on the device. In most cases, the desired combination is “ Volume-
» + «
Nutrition
» .
Press and hold the " Volume"
"And, holding it, press the "
Power
" key.
After the device screen turns on, you need to release the “ Power
” button and continue to hold down “
Volume-Up
” until the recovery environment screen appears.
3. To install the software or its individual components into memory partitions, you will need the main recovery menu item – “ apply update from external SD card”
", select it.
4. In the list of files and folders that opens, we find the update.zip
and press the selection confirmation key. The installation will begin automatically.
5. Once the files are copied, reboot into Android by selecting “ reboot system now”
» .
How to flash a device through a modified recovery
Modified (custom) recovery environments have a much wider range of capabilities for working with Android devices. One of the first to appear, and today a very common solution, is the recovery from the ClockworkMod team - .
Installing CWM Recovery
Since CWM recovery is an unofficial solution, you will need to install a custom recovery environment on your device before use.
1. The official way to install recovery from the ClockworkMod developers is the ROM Manager Android application. Using the program requires root rights on the device.
Download ROM Manager from the Play Store or from our website
- Download, install, launch.
- On the main screen, tap the item “ Recovery Setup
”, then under the inscription “
Install or update recovery
” - the item “
ClockworkMod Recovery
”. Scroll through the list of device models that opens and find your device.
- The next screen after selecting the model is the screen with the “ Install ClockworkMod
”
- After a short time, the required file will be downloaded completely and the installation process of CWM Recovery will begin. Before you start copying data to the device’s memory section, the program will ask you to grant it root rights. After permission is received, the process of recording the recovery will continue, and upon completion, the message “ Successfully flashed ClockworkMod recovery
” will appear confirming the success of the procedure.
- The installation process of the modified recovery is completed, click the “ OK
” button and exit the program.
2. If the device is not supported by the ROM Manager application or the installation does not proceed correctly, you must use other methods for installing CWM Recovery. Methods applicable to various devices are described in the articles listed below.
- For Samsung devices, in most cases the Odin application is used. More details here - (Firmware for Samsung Android devices via the Odin program)
- For devices built on the MTK hardware platform, the application Firmware for Android devices based on MTK via SP FlashTool is used)
- The most universal method, but at the same time the most dangerous and complex, is flashing the recovery via Fastboot. The steps taken to install recovery using this method are described in detail at the link:
Firmware via CWM
Using a modified recovery environment, you can flash not only official updates, but also custom firmware, as well as various system components represented by cracks, add-ons, improvements, kernels, radios, etc.
It is worth noting that there are a large number of versions of CWM Recovery, so after logging in on different devices you can see a slightly different interface - background, design, touch controls may be present, etc. In addition, some menu items may or may not be present.
The examples below use the most standard version of the modified CWM recovery. At the same time, in other modifications of the environment, when flashing the firmware, items are selected that have the same names as in the instructions below, i.e. A slightly different design should not cause concern to the user.
In addition to design, the management of CWM actions differs in different devices. Most devices use the following scheme:
- Hardware key “ Volume+
” – move one item up; - Hardware key " Volume -
" - move one item down; - Hardware key “ Power
” and/or “
Home
” - confirmation of choice.
So, the firmware.
1. Prepare the zip packages necessary for installation into the device. We download them from the Global Network and copy them to a memory card. Some versions of CWM can also use the device's internal memory. Ideally, the files are placed in the root of the memory card and renamed using short, clear names.
2. Enter CWM Recovery. In most cases, the same scheme is used as for entering the factory recovery - pressing a combination of hardware buttons on a switched off device. You can also reboot into the recovery environment from ROM Manager.
3. Before us is the main recovery screen. Before you start installing packages, in most cases, you need to wipe
"sections "
Cache
" and "
Data
", - this allows you to avoid many errors and problems in the future.
- If you plan to clean only the “ Cache
” partition, select the “
wipe cache partition
” item, confirm the deletion of data - the “
Yes
–
Wipe Cache
” item.
We wait for the process to complete - the following message will appear at the bottom of the screen: “ Cache wipe complete
”.
- The “ Data
” section is erased in the same way.
Select the item “ wipe data/factory reset
”, then confirm “
Yes – Wipe all user data
”.
Next, the process of cleaning the partitions will follow and a confirmation message will appear at the bottom of the screen: “ Data wipe complete
”.
4. Let's move on to the firmware. To install the zip package, select “ install zip from sdcard”
» and confirm your choice by pressing the corresponding hardware key.
Then select the item “ choose zip from sdcard
”.
5. A list of folders and files available on the memory card opens. We find the package we need and select it. If the installation files were copied to the root of the memory card, you will have to scroll to the bottom of the list to display them.
6. Before starting the firmware procedure, recovery again requires confirmation of awareness of your own actions and understanding of the irreversibility of the procedure. Select “ Yes”
–
Install ***
.zip", where *** is the name of the package to be flashed.
7. The firmware procedure will begin, accompanied by the appearance of log lines at the bottom of the screen and the filling of the progress bar.
8. After the message “ Install from sdcard complete”
"The firmware can be considered complete.
Reboot into Android by selecting “ reboot system now
” on the main screen.
Firmware via TWRP Recovery
In addition to the solution from the ClockworkMod developers, there are other modified recovery environments. One of the most functional solutions of this kind is TeamWin Recovery (TWRP). How to flash devices using TWRP is described in the article:
This is how Android devices are flashed through recovery environments. It is necessary to take a balanced approach to the choice of recovery and the method of installing them, and also flash only the appropriate packages obtained from reliable sources into the device. In this case, the process proceeds very quickly and does not cause any problems later.
Despite the high level of reliability of Android devices produced by one of the leaders in the world market of smartphones and tablet computers - Samsung - users are often puzzled by the possibility or need to flash the device. For Android devices manufactured by Samsung, the best solution for manipulating and restoring software is the program.
It doesn’t matter for what purpose the procedure for flashing a Samsung Android device is carried out. Having resorted to using the powerful and functional Odin software, it turns out that working with a smartphone or tablet is not as difficult as it might seem at first glance. Let's take a step-by-step look at the installation procedure for various types of firmware and their components.
Important! The Odin application can damage the device if the user performs incorrect actions! The user performs all actions in the program at his own peril and risk. The site administration and the author of the article are not responsible for possible negative consequences of following the instructions below!
To ensure interaction between Odin and the device, you will need to install drivers. Fortunately, Samsung has taken care of its users and the installation process usually does not cause any problems. The only inconvenience is the fact that the drivers are included with Samsung proprietary software for servicing mobile devices - Kies (for older models) or Smart Switch (for new models). It should be noted that when flashing firmware via Odin with Kies simultaneously installed on the system, various failures and critical errors may occur. Therefore, after installing the Kies drivers, you must remove them.
How to install TWRP Recovery on Samsung? Odin!
Everything is approximately the same as in the smartphone firmware. The main thing here is that you don’t need root rights!
- Download Odin and drivers for your device, as well as a recovery archive, for example TWRP Recovery, install the whole thing and launch Odin.
- Uncheck “Auto Reboot” and click “AP”, select the downloaded archive from TWRP Recovery and press start.
- Put your phone into flash mode, usually the volume down, home and power buttons, and connect it to your computer. Odin will pick up your phone and flash a custom recovery.
- When finished, you need to immediately boot into CWM or TWRP Recovery, otherwise the system will restore the original one. You can find out the combination to enter TWRP Recovery in the comments by writing the model of your device.
Instructions
- Download CWM Recovery files here. Save recovery.tar.tar on your computer's desktop.
- Download the archive from Odin 3 v1.85 here.
- Turn off your tablet.
- Download it in Download Mode. To do this, you need to press and hold the volume up button and the power button at the same time. When you see the android warning, you need to press the volume down button and the device will be in download mode.
- Run the Odin executable file.
- Connect your Galaxy Tab 2 7.0 tablet to your computer via a USB cable.
- In Odin you will notice a message saying that it has added a device. This means that the USB drivers are installed correctly and you are ready to proceed to the next step.
- Click the "PDA" button and then select the recovery.tar.tar file.
- Click the “Start” button and Odin will begin installing CWM Recovery.
- When the installation is complete, you will see the Odin screen turn green and your Tab 2 device will reboot.
- Disconnect your tablet from your computer.
That's it, you have successfully installed ClockworkMod Recovery on your Samsung Galaxy Tab 2 7.0 GT P3100. In case Odin gets stuck at any stage or does not complete the installation by displaying another message, then you should re-read the entire article and make sure that you have followed all the instructional steps and preparation steps that are listed above.
Also, you can ask us for help in the comments and we will try to give you a solution. After installing CWM Recovery, you can root your Galaxy Tab 2 7.0 3G P3100.
Update from 08/09/2012:
CWM differs depending on the Android version: Cwm for Android v4.0.3: download here Cwm for Android ICS v4.0.4: download here
In this article we will provide detailed instructions for installing TWRP recovery, because it has significant advantages when compared with other versions. The developers offer a fairly simple and comfortable installation method, for which you will need to use a special Odin volute. You don't need to install new firmware, which becomes a big problem for many users. The instructions we offered were suitable for absolutely all devices of the company.
You should be aware that after downloading a custom recovery, you will no longer accept official company updates that are installed over the air. Before you start flashing the firmware, you should make a backup copy of the system so that you can restore to it if necessary. After flashing the firmware, the data stored in the device’s memory will be deleted, so make a copy in advance. Contacts can be saved in the cloud from Google, and photos can be copied to a flash drive or moved to a computer.
Preparing to install custom recovery on Samsung Galaxy using the Odin program:
1. You need to fully charge the device so that it does not turn off during the installation of new firmware; 2. Download from the official website to connect your phone to your computer, and then install them; 3. ; 4. Go to where you need to find the custom firmware image in img.tar format. To do this, enter the name of your gadget into the search bar, and then select the firmware from the results displayed;
5. Now go to the “Download Links” section, where we click on the Primary (Recommended) link and download the file. This is a special image for the Odin program. First, you need to make sure that the file you select is created specifically for your smartphone model, otherwise difficulties may arise during the installation process;
6. If you are the owner of an older device running on Android 4.4, then go to settings - security, and then uncheck the box next to "Activation Lock". If this item is not available in the menu, simply skip this step.
Before you start installing the firmware, check everything again, it is important to complete each of the steps described above.
Installing TWRP recovery on a Samsung Galaxy smartphone or tablet:
1. Turn on the Odin program on your computer. 2. Start the device, and then switch it to Odin Mode. In other words, download mode. To do this, turn off the device and hold down the “Home”, “Volume Down”, and also “Power” keys. After that, press the volume up once to continue the download process. If your device does not have a Home key, then press only Volume Down and Power. 3. Connect the smartphone to the computer and wait until the Odin program recognizes it. When this happens, a blue signal will appear on the screen located in the upper left corner.
4. Now you need to select the recovery file that you downloaded earlier. It must be in img.tar format, otherwise the program will not be able to recognize it. Press the “AP” key.
How to install TWRP Recovery? - this question is asked by every Android user who dares to install unofficial firmware. On some devices you cannot do without it even when obtaining root rights. Also, TWRP Recovery or CWM Recovery will allow you to make a high-quality backup of the system, which will save absolutely all application data.
TWRP Recovery differs from CWM Recovery primarily in touch controls, but there are also quite a few invisible differences; some firmware cannot be installed due to incorrect recovery. So, first of all, find out what kind of recovery you need.
You can download a suitable recovery simply by writing in the comment “I want to download TWRP Recovery for Samsung Galaxy S7,” or “Where can I download CWM Recovery for Xiaomi Redmi 3S?”
SP Flash Tool as a recovery installer
If you know how to flash a phone using the SP Flash Tool, then there won’t be much new information for you here. Download and install SP Flash Tool and drivers for your phone. Now you need to download TWRP Recovery, or CWM Recovery for your device, after downloading, save your new recovery in a convenient place.
- Launch the Flash Tool and immediately check the “DA DL ALL With Check Sum” box in the settings.
- Next, click on “Scatter Loading” and select the Scatter file from the archive with the downloaded recovery, or take the Scatter from the official firmware.
- After that, you can click on start and connect the phone in firmware mode.
- Ready.
What do we need
- Samsung Galaxy Tab 2 7.0 tablet with model number GT-P3100. Do not try to install CWM Recovery on other devices using these instructions.
- Samsung USB drivers must be installed. You can use Samsung KIES to install them, but make sure that KIES is completely disabled when you go into the CWM Recovery installation process.
- Disable all antivirus programs running on the computer.
- Fully charge your tablet to ensure it doesn't turn off during the installation process.
- Back up all your important data to your SD card or computer using a USB cable.
- If you want to backup apps, SMS, call log and APN settings, then you can use one of these programs: AppBAK for Android apps backups | SMS backup & restore | Call Logs backup & restore | APN Backup & Restore.
- Sync your contacts with your Gmail account.
Please remember that you install these files at your own risk and we cannot be held responsible if you damage your tablet. Also, use the comment section to get our help. Read all the steps in the instructions and make sure you understand the steps you are about to take.
Preparing to reinstall the system
First you need to download the Odin program, which is used to flash Samsung devices. Then you need to download the firmware itself: official Samsung firmware or any custom firmware (single-file in .tar format or multi-file in .md5 formats). It is necessary to install ADB drivers on the computer so that the device can seamlessly connect to the computer via USB (usually such drivers are installed themselves upon connection, but if this does not happen, download them from the Samsung website or install universal ADB drivers from Google). And prepare a whole, undamaged, original USB cable.
Possible errors: what to do if the device does not turn on
During the firmware installation, a variety of errors can occur. Odin may stop seeing the device, the process may freeze, some random malfunction may occur, or the process may terminate unexpectedly. All these problems lead to errors in the firmware of the device, which can cause the smartphone to stop turning on.
In this case, you need to do a Hard Reset - reset the settings to factory settings - and re-flash the device. To do this, enable Recovery Mode (hold down the volume down button, the Home button and the device power button). In Recovery mode, find the wipe data/factory reset item and open it. Check the box for Wipe Data and click OK. After a few seconds, all settings will be reset, and the “premature” firmware files will be erased. Reflash your device.
We found out how to flash a Samsung mobile device on Android. For this purpose, a special Odin program is used, intended for service centers. There is nothing difficult about this, the main thing is to follow the rules so as not to break the device. But don't worry too much. No firmware can lead to a fatal failure that would turn a smartphone into a useless piece of hardware. All these errors can be corrected by resetting the settings to factory defaults and re-flashing the device.
Option #2. Official TWRP App
Of course, the creators of this wonderful and convenient menu also made their own application for installing recovery.
But the problem is that often the operating system itself blocks its bootloader.
Therefore, you have to use the above-mentioned manager or other programs, which we will talk about later.
However, you should not try to understand why this happens. You won't succeed. Also, do not be afraid of unofficial applications for installing TWRP.
All of them are absolutely safe, at least those described in this article.
So, to use the Official App, do this:
Rice. 5. “TWRP FLASH” button in the first window of the Official App
Rice. 6. Main menu for installing TWRP via the Official App
As you can see, in this case everything is also quite simple. We recommend trying to use the Official App first. But this does not always work out.
Then you need to take one of the managers mentioned in this article.
And if neither the Official App nor GooManager wants to cope with the task we are considering, then there is also ROM Manager.
Hint: Also, in cases when something doesn’t work out for you, write about it in the comments. We will definitely help you solve the problem and install TWRP.
Contact us!
Method 4: using the QFIL program
The QFIL utility, which is included in the QPTS toolkit, is designed for flashing devices on the Snapdragon platform. In some devices, together with the system image, QFIL allows you to flash TWRP.
- Copy TWRP recovery to the firmware folder. Agree to replace the file.
- Launch QFIL and configure the connection.
- Select the firmware file, specify the location of additional files.
- To install the image, click on the “Download” button.
The firmware will be installed, and with it TWRP recovery.
Types of custom recovery
There is always a choice and this case is no exception. However, everything here is quite obvious: there are two options, but only one of them is relevant.
CWM Recovery
One of the first custom recovery environments for Android from the ClockworkMod development team. Now the project is closed and is supported only by individual enthusiasts for a very small number of devices. So, if CWM is the only option for your gadget, below you will find out how you can install it.
TWRP Recovery
The most popular custom Recovery from the TeamWin team, which completely replaced CWM. The list of devices that support this tool is truly impressive, and if there is no official version for your gadget, there is most likely a custom modification available that is adapted accordingly.
Method 2: Install TWRP via Flashify or Rashr
You can do without a computer and the long procedure of unlocking the bootloader if root rights are available on the device.
To get root, you should use Framaroot or 360 root programs. If there is a vulnerability in the firmware, the program will take advantage of the security hole and install root. More often, devices with Android version no higher than 4.4-5.0 are susceptible to hacking.
After obtaining root rights, you need to install the Superuser or SuperSU program to grant rights to the Flashify or Rashr programs. Both tools allow you to flash recovery, as well as make a system backup.
- Download and place TWRP in the device memory.
- Open Flashify or Rashr, provide root if required.
- Make backup copies of all available partitions. The Rashr utility offers more backup options.
- Choose to install TWRP locally.
- Agree to the terms and confirm the action.
Unlocking the bootloader
Unlocking the bootloader deletes all data from the phone and SD card
Also, unlocking the bootloader without Magisk installed may break Android Pay.
To unlock:
- In the “For Developers” settings, enable “USB Debugging”, “Factory Unlock” and “Reboot Options”
- Boot into fastboot mode. To do this, hold down the power button, select “Reboot” and then “Bootloader.” The second method is to turn off the phone, hold down the volume up key and the power key. After a few seconds, fastboot mode will appear
- We connect the phone via a USB cable. And we check that the device is available in the system. To do this we do:
$ fastboot devices fa______d fastboot Phone must be in the list
- AFTER THIS COMMAND THE PHONE WILL REBOOT AND ALL DATA WILL BE DELETED. Make backups of all data before this step.
$ fastboot oem unlock
On the phone, select Yes with the volume rocker and confirm with the Power key. When loading, a menu will appear with a choice of mode, simply select Start with the rocker and confirm with the power key. The phone will take a long time to reboot and will boot back to its factory state.
The bootloader is now unlocked.