Are you using Windows and urgently need to take a screenshot? And the PrtScn key, as luck would have it, doesn’t work? Do you need a screenshot of the active window, not the entire screen? Or should I take a free-form screenshot? Or did you urgently need to capture your achievements in a computer game? All this can be done using many free programs for Windows. But before installing the next application, make sure that you have tried all the standard ways to take a screenshot, available in Windows by default:
Important: These tips work for all modern versions of Windows, including 10, 7 and 8.1. If one of the proposed methods works only in one of the versions, then we will definitely mention it.
How to take a screenshot on a Windows 8 laptop
Screenshot is a very useful function that allows you to take a screenshot of the entire screen, just a selected area or the active window.
There are various ways that will help you take a screenshot on a laptop with the Windows 8 operating system installed. In the article I will tell you some of them. As in previous versions of Windows, you can take a screenshot on a computer with Windows 8 installed using the PrtSc key. It is also present on laptops and performs the same function. But if on the button PrtSc is highlighted in blue, and above it there is some other white inscription, for example, Insert, then to take a screenshot, you need to press the Fn button together with PrtSc.
If you want to take a snapshot of only the active window, press the combination Alt+PrtSc, or, if your PrtSc is highlighted in blue, Fn+Alt+PrtSc.
In both the first and second cases, the screenshot will be saved to the clipboard. Now you need to open any graphic editor: Paint, Photoshop or another, and press the Ctrl+V combination - the screenshot will be added to it and you can edit it as you need. You can insert a screenshot using the same combination in Word, but there will be fewer editing options there, and you won’t be able to save it as an image on your computer.
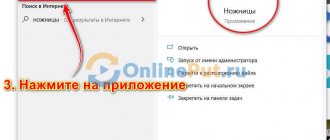
You can also take a screenshot in Windows 8 using standard Scissors. You can find them either through “Search”, or by expanding the Metro screen and looking for the application there. If you're not used to working with the Metro tiled interface, read how to get the Start button back in Windows 8.
Launch the application and select the desired area of the screen. You can then perform basic image editing and save it to your computer.
In addition, in the Windows 8 operating system, the developers have provided another, very convenient method that will allow you to take an instant screenshot and automatically save it on your computer.
To do this, you will need to press the combination Win+PrtSc or Fn+Win+PrtSc - if you have a laptop and there is more than one PrtSc inscription on the button. The screen will darken a little and everything will be ready.
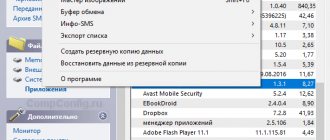
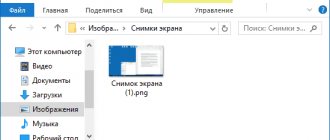
You can find the picture: “Library” – “Images” – in the “Screenshots” folder. They are saved in .png format and numbered in order. Even if you delete all the pictures from this folder, the next screenshot taken will still be numbered other than (1).
If you want to make the numbering of screenshots start from (1) again, you need to make some changes to the registry. To do this, press the combination Win + R - the “Run” window will appear. In the “Open” line, enter regedit and click “OK”.
The “Registry Editor” will open, in it find the registry branch along the path that is underlined at the bottom in the figure below. Then double-click on the “ScreenshotIndex” parameter. In the window that opens, you need to change the number in the “Value” field. I have 5 written there, which means the next screenshot will automatically be named “Screenshot (5)”. Change the value to 1, and the numbering of screenshots will start over again.
These methods will help you take screenshots for both owners of a laptop and a computer with the Windows 8 operating system installed.
Where are screenshots saved?
By default, screenshots taken with the Windows key and Print Screen are located along the path Computer - Images - “Screenshots”. In other cases, the print screen is kept on the clipboard for a short time. The user independently saves the captured image through a graphic editor to a convenient folder on disk.
In the Windows 8 operating system, working with screenshots is simplified. Built-in functions are often used. With new options, you can take a series of pictures without first saving.
How to screenshot the screen in Windows 8
In Windows 8 and 8.1, there are several ways in which you can save an image from the screen: creating a snapshot using system tools, as well as using additional software. Each method depends on what you plan to do with the picture next. After all, if you plan to continue working with the screenshot, then you should use one method, and if you just want to save the image for memory, then a completely different one.
Method 1: Lightshot
Lightshot is one of the most convenient programs of this kind. With it, you can not only take screenshots, but also edit them before saving. Also, this particular utility has the ability to search the Internet for other similar images.
The only thing you need to do before working with the program is to set up a hotkey with which you will take pictures. It is most convenient to install a standard button for creating screenshots Print Screen (PrtSc or PrntScn).
Now you can save images of the entire screen or only part of it. Simply press the key of your choice and highlight the area you want to save.
Method 2: Screenshot
The next product we will look at is Screenshot. This is one of the simplest and easiest to use programs, the name of which speaks for itself. Its advantage over similar system software is that using Screenshoter, you can take pictures with one click - the image will be immediately saved in the previously specified path.
Before using the program, you need to set a hotkey, for example PrtSc, and you can take screenshots. You can also save an image from the entire screen or only a user-selected part.
Method 3: QIP Shot
QIP Shot also has several interesting features that distinguish this program from other similar ones. For example, with its help you can broadcast a selected area of the screen to the Internet. Also very convenient is the ability to send the screenshot you take by mail or share it on social networks.
Taking a photo in Quip Shot is very simple - use the same PrtSc button. The image will then appear in the editor, where you can crop the image, add text, highlight an area with a frame, and much more.
Method 4: Taking a screenshot using system tools
- A method by which you can take a snapshot of not the entire screen, but only a specific element of it. In standard Windows applications, find “Scissors”. Using this utility, you can manually select the saving area, as well as immediately edit the image.
Saving a picture to the clipboard is a method that is used in all previous versions of Windows. It is convenient to use if you plan to continue working with the screenshot in some graphic editor.
When might you need a screenshot?
Taking a quick photo of the screen may be necessary in different cases. For example, if the system fails, the user is notified about it in the form of an error message. The screen made in this case will be able to help the technician repairing the device, significantly simplifying his task. Also, the ability to photograph the contents of the monitor is useful when drawing up instructions to explain the operation of a program, if you want to capture as a memory the results achieved in a computer game, etc.
The first method is the “Print Screen” button
Any keyboard has a special button for taking screenshots. It is called "Print Screen", and sometimes "PrntScrn", "PrtScn", "PrtScr" or "PrtSc".
How to do
If you have a computer , click the "Print Screen" button.
If you have a laptop , press two buttons at the same time: “Print Screen” and “Fn”.
If you want to take a screenshot of only the active window (program) , press “Alt” and “Print Screen” on the computer at the same time; “Alt”, “Print Screen” and “Fn” - on a laptop.
The screenshot will be saved to the clipboard. Now you can paste it into a letter, photo editor or Word (press the “Ctrl” and “V” buttons simultaneously).
How to save a screenshot as a separate file
After taking a screenshot, click the Start button > All Programs > Accessories > Paint.
Press two buttons at the same time: “Ctrl” and “V”. Your screenshot will appear on the screen.
Press two buttons at the same time: “Ctrl” and “S”.
A window for saving will appear. Write a name for the file and select a location to save it. The file type is better to use JPEG.
Windows key combination + Alt + PrtScn (only works for Windows 10 Creators Update)
In Windows 10, developers introduced the Game Bar. With its help, you can take screenshots of the gameplay by pressing the Windows keys + Alt + PrtScn. The screenshot will be automatically saved to the device's hard drive. You can also call up the game bar using the Windows + G combination, and then click the “Take screenshot” button. It is circled in the picture below.
How to take a screenshot using Game Bar in Windows 10
The screenshot will be saved in the Video folder. In it you will find a special folder called Pictures. The screenshot will be there. The file name will include the name of the game you played and the time the snapshot was taken.
Method two - the “Scissors” program
This program is available in Windows 7, 8, 8.1, 10.
How to do
Click Start > All Programs > Accessories > Snipping Tool.
The program will start and a cross will appear instead of the mouse cursor. Select the desired portion of the screen.
The screenshot will be saved to the clipboard. Now you can paste it into a letter, photo editor or Word (press the “Ctrl” and “V” buttons simultaneously). You can also write or draw something on the screenshot (pencil and felt-tip pen icons).
How to save a screenshot as a separate file
Click on the floppy disk icon.
A window for saving will appear. Write a name for the file and select a location to save it. The file type is better to use JPEG.
Screenshot of the selected area
Selecting a frame and saving the desired part of the Windows screen is available only in the familiar “Scissors”. Detailed instructions are described above.
Some users like to download special services for convenient work and improved pictures. The Snagit, PicPick and Lightshot programs are popular and suitable for experienced and inexperienced network users.
How to take a screenshot on a Windows 8 laptop
All methods can be divided into several groups:
- via hotkeys;
- through built-in functions;
- through third party programs.
The area saved may also vary. You can photograph the entire screen, or an arbitrary part or active area.
Method 1: Hotkeys
The screen photography feature appeared in the first Windows-based computers. This feature is still available on Windows 8. To take a photo, you need to press the PrtSc
.
Depending on the laptop model, this button may also perform other functions. This can be understood by the inscriptions on the key. PrtSc is highlighted in color; to create a screenshot, you also need to hold the Fn button. A screenshot of the active window is taken using the combination Alt + PrtSc
(
Alt + PrtSc + Fn)
while highlighting the inscription on the key in color).
The picture will be saved to the clipboard. To see it, you need to open a graphic editor and paste the image into it by pressing Ctrl + V
. You can edit the resulting photo in an editor (Photoshop, Paint). You can also paste the screenshot into a Word document.
Attention! Windows 8 provides another option for creating screenshots.
To do this, press Win+PrtSc
or
Win+PrtSc+Fn
.
You can also take a screenshot of the selected area; to do this, press Win+Shift+S simultaneously. The screen will darken and you can select the area you want to save.
Method 2: Built-in functions
On Windows 7, 8, 10 laptops, a new tool has appeared to save an area - scissors.
How to take a screenshot using scissors:
- open " Start
"; - find “ scissors
” in the list of programs; - click on the tool;
- Click on the “ create
” button.
Next to the " Create"
"There is a triangle, when you click on it, an additional menu pops up. The list offers various options for creating a screenshot:
- free form;
- rectangle;
- window;
- whole screen.
You can select any appropriate option and take a screenshot
. Next, the user can edit the photographed part in the editor that opens and save it on the device.
Method 3: Third Party Programs
To photograph the work area, various programs have been developed that are suitable for Windows 8 laptops. These include Lightshot, Screenshot, QIP Shot and others. You can also edit the resulting image using additional applications.
To get started, you need to first configure hotkeys for ease of use. It is recommended to set the main hotkey to PrtSc . The configured settings should be saved, after which you can use the application. When you click on the specified hot buttons, a photo of the screen will be taken and opened in the editor, in which the photo can be edited or saved.
Conclusion
These are the main ways to take screenshots on a laptop that are most often used. Each user decides for himself which method to take a screenshot.
Snapshots in games
As a rule, many people want to share their achievements or some events in games. The aforementioned Snagit copes with this task perfectly. Especially if you need to shoot a video.
Every time you launch any toy, you will see this message.
In addition, in the settings you can specify buttons to start and stop video recording.
Microsoft Word
If you need screenshots to insert into a Word document, then this can be done right while you work.
- Go to the "Insert" tab.
- Click on the "Illustrations" section.
- Select the “Snapshot” item.
- Immediately after this you will be presented with two options:
- select something from the available windows;
- screen clipping.
When you click on “clip”, you will need to specify the area of the future picture. Exactly the same principle as with “Scissors”.