July 14, 2018
If you are interested in the topic of iPhone repair at home, you must remember that you are doing this at your own risk. Not only does your phone, if disassembled outside of an Apple service center, lose its warranty, but you may accidentally damage or incorrectly install one of the gadget’s components. Finally, Apple devices are quite difficult to disassemble on your own; manufacturers assume that you will only service them at company centers.
If this warning doesn’t scare you, and you are firmly convinced that you want to learn how to disassemble an iPhone at home, let’s move on.
In this text we will look at how to disassemble iPhone 4s, 5, 6.
Why open
Before learning how to open an iPhone, you need to decide why it is needed. Similar actions are required for the following purposes:
- It is necessary to open the cover of some models to install a SIM card. In this case, it is better to open the cover in the mobile device store where the phone is purchased.
- The back cover must be removed to change the battery. This is required after the battery has been fully charged - after several years of using the phone, the battery no longer holds a charge and does not give full charge, so it can be replaced.
- The cover should be removed during repairs and cleaning of internal parts, which will extend the life of the phone.
Open iPhone
Important! It is prohibited to break the cover with a screwdriver. In this way, you can break the device and lose your phone completely. For independent disassembly, you need to use special tools that can be purchased at service centers.
How to disassemble an iPhone 5s using a suction cup?
For those owners who do not have an iSclack vacuum device, we can recommend using a regular suction cup. You need to press it firmly to the surface of the iPhone. Next, while holding the gadget, you should lift the panel of the device. At this stage, hold it down with a screwdriver. It is worth noting that due to the strong fastening of the parts, it will not be so easy to separate the screen. You will have to put in physical effort. However, there is no need to rush. After completing the work, you need to pull the Velcro up to let the air out, and then remove it.
Necessary tools for analysis
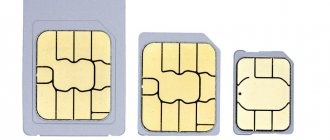
How to insert a SIM card into an iPhone and iPad - open the slot and remove it
iPhones cannot be removed with standard screwdrivers. Special tools are used for the work. In fact, they are presented in the form of a set of various small-section screwdrivers, as well as those with shaped tips.
At the moment, we can distinguish the following types of screwdrivers intended for disassembly:
- Slotted - the screwdriver is presented in the form of a flat slot and a sharp tip. Its masters simply call it “minus”.
- Philips – the tip is cross-shaped, like a standard screwdriver. But its dimensions are much smaller, since this tool is designed for unscrewing and tightening screws.
- Torx is a six-pointed tip designed to unscrew the removable cover of some types of iPhone.
- Torx Plus is a screwdriver with a five-point tip.
- Tri-Wing is a patented model by US craftsmen, presented with a three-lobe tip.
Screwdrivers for iPhone
Using the presented types of screwdrivers, you can solve most problems - change the battery, clean all parts from dust and moisture, change the disk to a type of larger capacity, etc.
The installation of a SIM card is discussed separately. Often the connector is located on the side of the device. To replace it, you will need a special key, which can be purchased additionally when purchasing an iPhone. If the owner of the mobile device does not have it, use a thin needle. It is carefully inserted into the hole so as not to damage the outer contour.
Second step
At this stage, you need to lift the screen of the gadget using a vacuum suction cup of a plastic spatula. Judging by the reviews, some owners use a regular screwdriver rather than a spatula for this purpose. However, experts do not recommend doing this, since this can damage the iPhone case and screen.
It is worth noting that it is also possible to raise the screen using a needle. It is enough to carefully pick up the top panel with it. If you have an iSclack vacuum suction cup, then your work will be much easier. You need to bring the suction cup to the iPhone and press the handles of the device against each other, as a result of which the Velcro will open.
Now all you have to do is place your phone between them and unhook the handles. This way the suction cups will close together. Next, firmly squeeze the handles to lift the top panel of the gadget.
How to open the cover of iPhone varieties
How to delete a page from VK from an iPhone - step-by-step instructions
The procedure for removing the cover from an iPhone is simple. First you need to free the device from the case and select a screwdriver suitable for the cross-section of the screw. There are slight differences in operation depending on the model.
Today, iPhone models are presented in a wide range - from the first series to 10 and above. All of them must be disassembled for repair or installation of a SIM card.
Models 5, 5s and se
At the moment, the 5, 5s and se models are considered the most common. Therefore, it is important to know how to remove the cover from iPhone 5s and se so as not to provoke new problems with the device.
In the question presented, you need to perform the following sequence of actions:
- Turn off the device and move the volume lever to minus.
- The screws in the presented models are located on both sides of the charging hole. They need to be turned with a suitable screwdriver, and then removed onto a white piece of paper. This is important because otherwise it will be difficult to find them.
- Next, pick up the phone with the display facing down and press slightly on the cover with two thumbs. At the same time push it up.
Unscrewing the screws
If all actions on how to open the cover of iPhone 5, 5s and se are performed in accordance with the instructions, there will be no problems. The cover can easily be removed from the mobile phone.
Models 6 and 7 series
In the presented models, the SIM card is inserted into a separate side compartment. Therefore, before opening the cover, you should remove it and turn off the mobile device completely. Unlike the fifth series, you will need a five-point screwdriver here. It is noted that the iPhone 6 and 7 series have some glued elements. The owner should not have any difficulties during disassembly. If the lid is difficult to open, it means that the work is proceeding with errors.
Important! You can additionally purchase a ring with suction cups, which can be used to remove the lid. The suction cup is attached to the phone cover and after unscrewing all the screws, the ring is pulled. The lid comes off the base easily.
Suction cup ring
Gadget 8 series
To disassemble the presented model, you need to use a five-point screwdriver. Home standard screwdrivers cannot be used, as the threads will be damaged, which will cause inconvenience in the future use of screws.
After the screws are removed, you must use any plastic card. Use it to pry up the lid and lift it, removing it from the base.
10 series device
On the iPhone 10 series, the screws are located on the two smaller sides. A torx screwdriver is also used to unscrew them. The case opens like a book, for which a plastic card or a special vice with suction cups is used.
Attention! There is no need to disassemble the phone if the owner has forgotten the password and wants to recover it.
You cannot remove the battery and thereby reload the software. In this case, you need to contact a service center, where restoration will be carried out using special programs. In other words, the device’s firmware changes, which is almost impossible to do at home.
How to remove the display
- Turn off your smartphone. Disassembling a phone that is turned on is dangerous; one of the elements may burn out.
- Unscrew the screws at the bottom of the device. For this task you need a 0.8 mm torx screwdriver.
- Use a pick or card to hook the display. Carefully detach the screen around the perimeter, but do not separate it immediately.
- Use tweezers to remove the cable and open the device.
- Remove the protective plate, disconnect the second cable.
To replace the display, repeat the above steps in reverse order. Display modules are available in mobile spare parts stores; all small-sized spare parts are included in the kit; you only need to dismantle the old module and install a new one. If the screen is broken, this approach is convenient.
Possible errors when opening
How to permanently delete an Instagram account from an iPhone
Owners who open iPhones themselves risk making mistakes. First of all, there is a violation of the terms of the warranty. You cannot begin repairs yourself if the warranty period for the phone has not yet expired. Otherwise, you will have to forget about free service and possible replacement.
The second mistake the owner makes is disassembling the device in vain. If you have no experience in repairs, you should not start disassembling it yourself.
You should also highlight possible damage to the threads of the screws, which will complicate further assembly and disassembly of the device.
Recommendations from experts
It is noteworthy that the iPhone 5s has a 64-bit processor. In this model, the “home” button is listed as “Touch ID”. For those who are interested in how to disassemble an iPhone 5s, experts advise to refrain from any independent intervention in the design. This recommendation applies to those owners who do not understand the device and do not have experience.
Otherwise, your iPhone can be seriously damaged. As a result, you will have to pay more for the repair itself, or in the worst case scenario, buy a new phone. Do not also forget that problems with the iPhone 5s can be corrected using the official warranty from the manufacturer, which will be void due to amateurish efforts.
The fact is that after disassembly, the user himself becomes responsible for the safety and integrity of the device. If you are determined, then when disassembling, follow the instructions. Read on to learn how to disassemble an iPhone 5s.
What's hidden under the lid?
Under the cover of the iPhone there are all the elements of the device designed to work. There is a battery, SIM card, display and other parts. Their replacement is possible in case of repair, but should not be done independently. If there is a need to replace parts, you should contact the service center.
What's hidden under the cover of an iPhone?
You can open the iPhone yourself in extreme cases - when changing the SIM card and battery if it is completely depleted. In other situations, it is better to contact the experts. You should not start work if you do not have the appropriate tools.
Preparing the iPhone 5s for disassembly
If you decide to disassemble your device, for example, to replace the case, then you need to acquire some tools. A simple set of small screwdrivers will not work for this procedure, since the developers took care that replacing parts can only be done with the help of special tools. Suitable kits can be easily found on the Internet , and they are not very expensive.
Required tools:
- screwdriver with five blades;
- Phillips screwdriver;
- a special suction cup (a very important element, without which it is impossible to change the smartphone case);
- a small spatula made of soft but dense material (not metal).
About detaching the screen
Now, from the Home button side, lift up the screen. In the fifth model, the front panel, judging by the reviews, is easier to dismantle. It will rise and form a right angle with the body. In the iPhone 5s, the screen is connected to the motherboard via a cable. For this reason, do not lift the panel suddenly. First, disconnect the cable with a plastic spatula, and then open the screen, as in the iPhone 5.
After completing these steps, you will see two screws holding the screen in place. To completely dismantle it, carefully unscrew these screws using a Phillips screwdriver. Next, pry it off with a spatula. As a result, your gadget will be divided into two parts.
What do the experts advise?
It may be that due to careless use, several cracks have formed on the screen of your iPhone. It is worth paying attention to the fact that during disassembly, that is, when you remove the screen using a device with Velcro, they may increase.
Therefore, to prevent cracks from spreading across the entire front surface of the screen, cover it with adhesive tape before dismantling it. Moreover, this measure will protect you from pieces of glass that may fly apart. To prevent them from accidentally getting into your eyes, wear special safety glasses.
The main components of an iPhone
To correctly disassemble an expensive device, you need not to confuse anything in its “stuffing” and know exactly what is being removed and how, and also do not forget about the sequence of actions. Below is a list of iPhone components that will have to be dismantled in the future, or at least not damaged:
- 4-inch diagonal display with a resolution of 1136×640 pixels;
- single-chip system from Apple A6;
- 8 megapixel camera;
- eight pin connector;
- device to support 4G LTE wireless communications.
Removing the display module
Below the display there are many parts and screws that need to be worked on. Next we perform the following steps:
- We unscrew the 3 screws that secure the screen of the display module cables and remove it.
- Use a spatula to unclip the connector of the upper module and the sensor connector located under it.
- We unscrew the 3 screws and remove the screen that secures the battery connector, carefully unclip its connector and remove the battery itself.
- Remove the screen securing the connector of the lower module. To do this, unscrew the two screws holding it in place. Unsnap the connector.
- Remove the SIM tray from the side panel.
- We unclip the connector of the lower button cable and its cables.
- Unscrew the screws in the phone case and the two end screws.
- Disconnect the cable and lift the board. Use tweezers to disconnect another cable.
- At the top of the board there is a screen that secures the camera module. We're filming that too.
- Unscrew the screws securing the lower module.
- Peel off the cable with the contacts of the “Home” button and remove its block.
- We remove the bottom cable, which has a digital connector, a headset connector and a microphone.
- Unscrew the Home button screen and remove the button itself.
- We remove the screen of the upper loop, the auditory speaker and the upper loop.
- We unscrew the screws that secure the display module screen and remove the metal panel.
About disassembling the front panel
Now you can work on the display panel. First unscrew the Home button on it. Next, remove the mounting plate, and then proceed to the attached camera, proximity sensor and hearing speaker, which is fixed with two screws and spring contacts. The front camera is attached via a cable and, judging by the reviews of the owners, can be easily removed. Remove metal protection last.