Previously, I wrote a material about how Magic Trackpad 2 performs on Windows 10. Now it’s time to share my impressions of using the trackpad on Mac OS Mojave. It took me about a week to superficially study the issue of installing Hackintosh on regular computers (computers that usually only have Windows installed). I admit, I don’t know everything yet, but my knowledge allowed me to carry out a number of actions and get a working solution as a result. My computer is equipped with an AMD Ryzen 1600 processor and an AMD Radeon RX560 graphics card. It is imperative that you have an AMD video card, because Apple does not support Nvidia video cards in the latest versions of its OS. Another option is a graphics card built into the motherboard, but this solution will be more difficult to set up and slower to operate.
How to install hackintosh on a computer with AMD Ryzen?
Let's define what Hackintosh actually is. This is the work of a group of programmers - or you can call them hackers - who disassembled the bootloader created by Apple and were able to emulate it on regular hardware. Why is Apple hardware unusual, you ask? Let's answer: the company itself produces motherboards for its iMac, MacBook, Mac Mini - these motherboards have a built-in bootloader (chip) that is responsible for the operation of the computer (consider it an analogue of the BIOS). It checks that the equipment is definitely from Apple, and only then allows MacOS to be loaded. So, the guys with the right hands were able to write an emulator of this chip that runs on regular motherboards, and thus, deceiving Apple, they can run MacOS on regular computers.
There are several bootloaders, the most famous are Clover or Open Core (there are others), but the most popular is Clover.
Meet Clover
Let's be clear right away: real Mac computers only work with Intel processors. Until recently, Hackintosh could only be installed on computers with Intel processors. But literally over the last year there has been a small revolution and the guys working on Hackintosh have made it possible to install MacOS on AMD processors.
Installing MacOS Mojave on PC
Preparation
Let's clarify one important point - Mac OS is designed for Apple hardware. Yes, the operating system will work on a PC, but be prepared for possible errors. Install the OS at your own risk. If you are sure that everything will be fine, we proceed with the installation.
First you need to download the official image of Mac OS Mojave. It is advisable to do this from the official Apple digital store, which can be accessed using a virtual machine - a program that emulates the operation of one OS inside another. In this tutorial we will use the free VMWare Workstation Player.
Video card
Integrations from Intel almost always start up with varying degrees of success, but artifacts and a buggy interface are not uncommon even when using the newest and seemingly native copies, for example the UHD630.
Often it is necessary to replace the video card ID with a fake one in the bootloader (there is no need to be afraid, everything will be explained in detail below). I do not recommend using nVidia graphics for hacking. Apple hasn’t installed it for many years, there’s no talk of any nativeness. There are no drivers for them under Mojave 10.14 and Catalina 10.15. There are also well-known easy-to-start cards, for example, GT210 and 630, but they are no longer on sale.
If you buy a video card for Hackintosh, then only from AMD. The RX4xx and RX5xx series work great, with the exception of the RX550, which may have problems. From the professional segment - Vega 56 and 64, which are used in the original iMac Pro.
Installing a virtual machine with MacOS
So, to install VMWare Workstation Player, do the following:
- Go to the official VMWare website and download the installation file.
- Install the program.
- Unpack the archive with Unlocker and run win-install.cmd as an administrator. This action will add support for Mac OS to the virtual machine.
- Launch VMWare Workstation Player and select "Create a new Virtual Machine".
- Check the box next to “I will install the operating system later.”
- Next, select Apple Mac OS X and click Next.
- Specify the path to install the virtual operating system.
- In the VM window, right-click on the virtual OS and click “Settings”.
- Now create a virtual hard disk. To do this, repeat the following sequence: Add > Hard Disk > Sata.
- Select “Use an Existing Virtual Disk” and specify the path to the image with Mac OS Mojave. The image is a large file with the vmdk extension.
- Next, set the size of the virtual hard disk to be used (at least 40 GB) and select “Store virtual disk as a single file” in the parameters.
- Now go back to the VM settings and set the size of RAM used. We recommend installing at least 50% of the total amount of RAM installed on the PC.
- Click OK and close VMWare. However, that's not all.
- Go to the VMWare folder and use Notepad to open the macOS 10.14 file. In the last line, paste the following text: smc.version = "0". Save your changes.
- Now start the VM again and start installing Mac OS Mojave. To do this, select the virtual OS and click on the green play icon in the top panel.
- The system will prompt you to sign in to your Apple account, click on “Set Up Later” instead.
- After installation, connect VMWare Tools. To do this, click on “Player” in the top panel. In the drop-down menu, select “Manage”, and then click “Install VMWare Tools”. Now an image of the patch with the installer will appear on the desktop of the virtual Mac OS.
- In the VM window, launch VMWare Tools.
- The VM security system will attempt to block VMWare Tools, but this can be avoided. Go to the OS settings (the gear icon in the bottom panel of Mac OS), select the “Security and Privacy” section and unlock the patch by clicking on the “Allow” button.
- Restart VMWare.
You now have a virtual Mac OS on your computer. To just see what Apple's operating system looks like, this is enough, but for full-fledged work, it is not.
What has changed today
Now that I have a good laptop with suitable hardware, I decided to return to the hackintosh topic again. Before this, I worked on a MacBook Pro and Mac mini for more than five years, studied macOS well and already know how the system should ideally work.
Today, assembling a system unit for a Hackintosh is not a problem at all. There are dozens of suitable components for each position, and you can even find the perfect components that Apple uses in the Mac mini, iMac and Mac Pro.
Enthusiasts from all over the world have long been assembling desktop computers for Hackintosh and getting greater performance for the cost of a Mac or a similar computer several times cheaper.
Things are a little different with laptops.
Preparing a Mac OS Mojave image
As mentioned earlier, to download the Mojave image, you need to use a virtual machine:
- Open VMWare and launch virtual Mac OS Mojave.
- Go to the App Store, find the image of the desired OS there and download it. The file will have to weigh at least 5 GB.
You have an image of Mac OS Mojave, now let's create a bootable USB flash drive:
- Insert the flash drive into the computer.
- In virtual Mac OS, open "Finder", then go to "Programs", then to "Utilities" and select "Disk Utility". Click on your flash drive, which will be located in the left column of the window.
- Click "Erase".
- Give the bootable USB flash drive a name. The name can be anything, but it is important that it consists exclusively of Latin letters.
- In the second line, select “OS X Extended”.
- In the third - GUID Partition Map.
- Click "Erase" and click "Done".
- and launch UniBeast.
- Click Continue until you reach “Destination Select.”
- Select the flash drive and click “Continue” again.
- When you reach the “Select OS Installation” stage, select Mojave and click “Continue”.
- In Bootloader Options, select either UEFI Boot Mode or Legacy Boot Mode. “UEFI Boot Mode” is recommended for use for 7, 8, 9, 100, 200 and 300 series Intel processors and all chipsets that support UEFI. “Legacy Boot Mode” is suitable for 5 and 6 series chips, as well as for other systems based on traditional BIOS.
- Click Continue.
- Move the archive from UniBeast to the created drive.
All. The bootable USB flash drive is ready. Now let's start setting up the BIOS on the computer.
efi drivers for Hackintosh
In addition to kext, you also need to see if all drivers64UEFI drivers !
Minimum set:
- ApfsDriverLoader (for High Sierra, Mojave and newer)
- AptioMemoryFix
- HFSPlus or VboxHFS
- SMCHelper (if you selected the FakeSMC )
BIOS/UEFI setup
If your motherboard uses UEFI, there should be no special problems with the installation, but in the case of the BIOS, some important manipulations will have to be carried out. First you need to make general settings:
- Reset all BIOS settings.
- Turn off VT-d.
- Deactivate Secure Boot Mode.
- Disable CFG-Lock.
- In the OS Type option, select Other OS.
- Turn off IO SrialPort.
- Activate XHCI Handoff.
- If your system has an Intel 6-series processor, or an Intel x58 with AWARD BIOS, disable the USB 3.0 ports.
- Save your changes and restart your computer.
In addition, when installing Mac OS Mojave, you should adhere to a number of rules:
- Use only one video card with one monitor connected.
- Disconnect all hard drives except the empty one, on which the OS will be installed.
- Disconnect all USB peripherals except the mouse and keyboard.
- Disable all PCI cards except the video card, as they may not be compatible with Apple's OS.
Done, now let's proceed directly to installing Mac OS Mojave on PC.
Hackintosh impression
Mojave on a 4K monitor shows all its advantages
I'm absolutely delighted! This is probably the only system that looks this cool on a 4K monitor. After Windows, where half the interface is blurry and programs are not adapted for high resolution, MacOS looks simply fabulous. I didn't have to bother with scaling; the system itself perfectly adjusted to my screen size and resolution. There were no problems with sound, graphics or the Internet - everything worked like a clock!
Installing Mac OS
The next steps are very similar to a standard Windows installation:
- Turn on your PC and boot from USB (USB 2.0 is recommended).
- In the Clover interface that opens, start installing Mac OS from a bootable USB flash drive.
Ready. Now you are the owner of a PC with Mac OS. All that remains is to configure the equipment.
Intel UHD 630 Compatibility Fix on Coffee Lake
After installation, I added the -disablegfxfirmware parameter to the Boot - Arguments section in config.plist.
The resulting flickering of the image on the built-in graphics of the Coffee Lake generation processor can be corrected using simple instructions. Open a terminal and enter:
sudo nano /System/Library/Extensions/AppleIntelKBLGraphics.kext/Contents/Info.plist
In the opened file, in the terminal, find at the bottom of the file:
IOPCIPrimaryMatch
At the end of the next line - , find 0x3E928086 and add 0x3E918086 in front of it.
Save the file changes with the combination Ctrl + X, agree to the changes Y and press Enter. Next, open the file in the terminal:
sudo nano /System/Library/Extensions/AppleIntelKBLGraphicsFramebuffer.kext/Contents/Info.plist
In which we look for IOPCIPrimaryMatch, where we add 0x3E918086 0x3E928086 to the end of the line.
Clear the cache with the command:
sudo kextcache -i / sudo touch /System/Library/Extensions && sudo kextcache -u /
Equipment setup
The easiest way to do the initial setup is with MultiBeast. The utility will allow you to install all the necessary drivers for your equipment without unnecessary difficulties. However, even MultiBeast cannot load absolutely all drivers, so you will have to install some manually. So, to configure the equipment, do the following:
- Launch MultiBeast.
- Select UEFI Boot Mode or Legacy Boot Mode. We wrote about their differences at the stage “Preparing the Mac OS Mojave image”.
- On the Audio tab, it is best to check the AppleALC option.
- The “Disc” tab contains settings for third-party SATA hard drive controllers.
- The next tab “Misc” contains the FakeSMC driver, which is extremely important for the operation of Mac OS, which is designed to emulate the operation of a proprietary SMC chip. The driver you need will be checked by default. Also at this point there are two more settings: VoodooTSCSync and FakeSMC HWMonitor. The first is intended only for processors with an LGA2011 socket, while FakeSMC HWMonitor is necessary to obtain data on the temperatures of cooling systems.
- Going to the “Network” tab, mark your network card.
- The “USB” tab is intended for setting up and correct operation of USB ports. Mark the items you will use.
- In the top panel of the window, click on “Bootloaders”. The required item should already be checked by default.
- Now go to “Customize”. Here you will see 3 sections, the first of which is “Graphics Configuration”. If you have an NVIDIA 9xx series or higher video card installed, check the “NVIDIA Web Drivers Boot Flag” option.
- In the "SSDT" section, mark your processor.
- There is no need to change anything in “System Definitions”, since the entire section is already configured.
- Go to the "Build" tab and click "Install".
The computer is almost ready for full use, all that remains is to install the drivers for the video card:
- Install the latest version of Alternate NVIDIA Graphics Drivers utility that is suitable for your Mac OS.
- Now remove the bootable USB flash drive and restart your PC.
If all the steps were performed correctly, you will have a stable working hackintosh.
Second option: Clover (Recommended for advanced users only)
Clover is a new EFI-type OS bootloader (moreover, opensource). Developed over two years by a small group of enthusiasts at Project OS X (run by Slice), Clover is designed to help eliminate any problems that are common when installing OS X using other methods and boot loaders. Clover offers a completely different system of settings, which may be a little confusing at first, especially if, like me, you are used to using the more traditional Chameleon or Chimera downloaders. Clover is in beta testing, so installing OS X Yosemite through it is not guaranteed to be successful. The development was fast, there were constantly some changes when writing the program code. Clover is difficult to perceive by design. Recent updates have stabilized the program, but development is still far from complete completion.
But if you are looking for an alternative to Chameleon or Chimera downloaders, then Clover can be a good alternative. If you want to try installing OSX Yosemite using Clover, take a look here.
Step 3: Installing Drivers
One way or another, you have installed OS X Yosemite, now you need the system to work correctly, that is, you need to install drivers.
This is where MultiBeast comes in handy, as it can install all the necessary drivers (graphics, network and sound) directly from the flash drive to your Hackintosh in one go. The program also contains System Utilities to bypass installation permissions and a collection of drivers with different configuration options.
Launch MultiBeast from the flash drive and follow these instructions:
- If this initial driver installation is through MultiBeast, select QuickStart, then EasyBeast, UserDSDT or DSDT-Free. Most likely, you will need to choose DSDT-free, but if you have an old Hackintosh build, then DSDT.
- Click Drivers to select options in the Audio, Graphics and Network categories. Depending on the Hackintosh build, you may or may not find the required audio driver (the latter is most likely). Find out the chipset of your motherboard and select the appropriate Apple HDA driver for it. You may also need additional network drivers (Ethernet). The program will offer to install everything else; you just need to select the appropriate GPU. Some GPUs require special drivers, but most work with the ones the program offers by default.
- Next select Customize. To set sleep mode on a PC (you can’t do this on a laptop), select Generate CPU States, and then Use Kernel Cache. Then look at the settings yourself, if you are not sure what and how to configure, leave everything as it is.
- Then click on Print or Save to make a backup of the selected configuration.
- Then click Build, then Install. Now wait until MultiBeast installs all the selected drivers.
- Restart your PC to complete the installation process.
MultiBeast should only be selected for post-installation of drivers after using UniBeast to install MacOS. If you used the Clover bootloader to install OS X Yosemite, you will need to manually install kexts to the /EFI/Clover/kexts folder and configure /EFI/Clover/config.plist to match your Hackintosh hardware settings.
Alternative graphics drivers from NVIDIA
For each version of OS X, NVIDIA releases new graphics drivers. They differ from standard Apple drivers, and installing them on a Hackintosh. Previously, installing NVIDIA drivers solved the problem with OpenCL in some applications, and also made it possible to use a more powerful GPU configuration on some builds. These drivers also allow you to use the latest Maxwell graphics cards with full acceleration, including NVIDIA GeForce GTX 750, GTX 750 Ti, GTX 970 and GTX 980. You can download them here.
Step 4: Updating Hackintosh
Based on my experience with previous versions of OS X, every update to OS X requires you to reinstall all graphics, networking, and sound drivers again through MultiBeast (which you installed in step 3). Stay tuned to this site (Updateposts), where new instructions for installing updates and drivers on Hackintoshes running OS X Yosemite will be published according to Apple's update protocols.
Installing Windows on Mac
The easiest way to install Windows on Apple computers is to use the Boot Camp tool. The utility will allow you not to “demolish” Mac OS, but to use both operating systems. First, create a bootable USB flash drive with a Windows ISO image:
- from the official Microsoft website an image of the version of Windows you need and insert the USB drive into the Mac.
- Enter “Boot Camp” in the Spotlight search, or launch “Boot Camp Assistant” from “Programs” - “Utilities”.
- In the window that opens, select “Create a Windows installation disk” and click “Continue.”
- Specify the path to the image saved on your computer and set your flash drive as “Destination Disk”.
- Click Continue.
The bootable USB flash drive is ready, now let's proceed directly to installing Windows on Mac. Fortunately, this process is much simpler than installing Mac OS on a PC:
- Launch Boot Camp Assistant again.
- Check the box next to “Install Windows” and click “Continue”.
- Boot Camp will now prompt you to “partition” your hard drive so that the new OS will be installed on a new sector. If you are going to install Windows 10, you need to allocate at least 55 GB for it. Click continue.
- Now the Window installation window will open in front of you. Follow all instructions.
- Wait for the installation to complete.
Windows installation on Mac is complete. Now your computer has 2 operating systems, and you can use any of them. The only downside is that you have to constantly restart your Mac to switch to the OS you need.
Kext
Or “kernel extension”, you can call them a kind of drivers for hackintosh.
- FakeSMC - emulates the operation of an SMC controller that transmits information to the operating system about the computer, processor temperature, etc. Required to run hackintosh. (bitbucket.org)
- FakePCIID - Intercepts PCI-ID requests, and returns the value specified via FakeID in Clover. Needed for some wi-fi kexts and built-in graphics to work. (bitbucket.org)
- BrcmPatchRAM - Kexts for the Broadcom Wi-Fi module. (bitbucket.org)
- VoodooHD - Universal kext for audio. (sourceforge.net)
- AppleALC - Alternative kext audio. (github.com)
- IntelMausiEthernet - Kext for running Intel ethernet. (bitbucket.org)
- IntelGraphicsFixup - Fix for various integrated video cards from Intel. (github.com)
- Shiki - Fixes possible problems with video playback. (github.com)
- Lilu - Extension to support various kexts. (github.com)
Computer requirements
It is worth noting that not every device can handle this system. The best option is to ensure that your computer is identical to your MacBook. Here are the basic minimum requirements:
- Intel processor 2 cores or more.
- Availability of a separate internal drive that supports AHCI.
- RAM 2 GB or more.
If you doubt whether there will be negative consequences for your device from installing Mac OS on it, then don’t worry: this is a completely simple and harmless procedure.
What you need for installation:
- PC with suitable specifications.
- Flash drive for downloading.
- Unibeast program.
- Mac OS distribution.
Photo: MacOS X distribution
What will work
Everything else will work without problems.
The keyboard starts up (even with a numeric keypad), the buttons clearly work to adjust the brightness and volume. You can even turn on the backlight and smoothly adjust it using the function buttons.
On my ASUS in Windows with proprietary drivers there are only 4 gradations of key backlighting, but in a Hackintosh the glow can be changed within 10 positions.
The system can correctly fall asleep and wake up, and reliably display the battery charge (there are problems with this on some models).
The display, processor and storage work great. On the latter, you need to enable TRIM.
Software features include iCloud, iMessage, FaceTime, Handoff. AirDrop works with minor interruptions (but who really uses it?). Of course, there are no problems downloading applications from the Mac App Store and exchanging program data via the cloud.
Even system updates can be installed without problems. It is recommended that you take your time with security updates only. It’s better to wait a couple of days after the release for a reaction on thematic forums.
The main thing I was afraid of from my past experience was poor system performance. It turns out that all this is far in the past.
Now my ASUS perfectly passes itself off as a MacBook; in everyday tasks, the difference with the original Apple laptop is not visible at all. The only serious drawback is the lack of a great Apple touchpad.
A collection of nuances/methods for solving errors
- When installing systems 10.13, 10.14, 10.15, the apfs.efi driver in the Drivers64UEFI folder is required. If it is missing, then after completing the first stage of installation, you will not be able to continue it - Clover will not see the disk with the system.
- Be sure to use text mode boot (the -v argument) until you are sure the system is working properly.
- It is better not to check boxes next to unknown parameters in Clover.
- The error I encountered is the following: when installing the hack itself on the hard drive, the system freezes with a few minutes left before completion. I struggled with this for a long time until I tried using an older version of Clover.
- It is not necessary to install a hack on an SSD; the system works very quickly on 7200 rpm regular hard drives.
With this, your humble servant takes his leave. If there were any inaccuracies in the article, please write about it in the comments. Thank you!
All information is presented for informational purposes only and does not encourage anyone to take action.
"Hardware" Computer components
Your future Hackintosh should have the following computer components:
- Processor – Intel Core i3, Core i5, Core i7
Intel Pentium, Celeron, and AMD processors are not suitable !
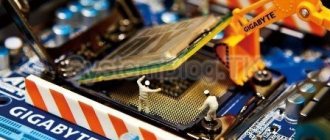
- Motherboard preferably Z-series, from Gigabyte
- Video cards:
- Intel HD3000 and later
- Nvidia 750, 1050, 1050Ti, 1060, 1070, 1080 (not suitable for 10.14 Mojave and later)
- AMD 560, 570, 580, 590, Vega 56, Vega 64
There may be other cards, but it will be more difficult to “get” them into Hackintosh.
If you plan to install the system on an SSD, then it is highly recommended to do this on Samsung drives.
