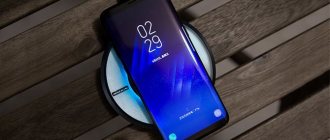
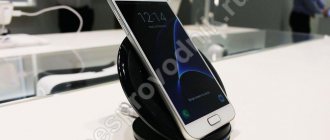
Mobile devices have long become an integral part of the life of a modern person. But for them to work, you must constantly use the power supply to replenish the battery life. The cord often becomes a hindrance when using the gadget during charging. To effectively solve this problem, all you need to do is learn how to make wireless charging yourself.
Something new? No, the long-known “old”
When I first saw wireless charging, I thought that manufacturers had made a breakthrough by discovering some new technology. Fortunately, there is the Internet, which told me the truth. In fact, the advent of wireless energy transmission was made possible by the discovery of André Marie Ampere's law, which proved that electric current produces a magnetic field.
And this happened, for a moment, almost 200 years ago. In subsequent years, a number of scientists confirmed the existence of electromagnetic waves, and Nikola Tesla devoted years of his life to studying the possibility of transmitting energy over a distance. Using electromagnetic induction, the physicist was able to light an incandescent lamp from a distance.
Qi standard
Wireless energy transfer was of interest to many areas of human life, but for a long time did not go beyond the walls of laboratories. Already in this century, companies that develop consumer electronics (tablets, smartphones) began to take initiatives to create wireless chargers. A huge contribution was made by the Wireless Power Consortium, which developed the Qi standard for low currents.
The standard specification was free and accessible, so it very soon began to be used in portable equipment. Three years later, Qi acquired a specification for medium currents. There are other standards, but they are more complex than Qi and less widespread. More recently, in 2015, scientists at the University of Washington discovered that energy can be transmitted via Wi-Fi networks. We are waiting for the smartphone to charge by connecting to the router.
How wireless charging works
The operating principle of this wireless charging scheme is quite simple. The role of the charger is played by the transmitting circuit; the device itself consists of two circuits - a transmitter and a receiver.
The receiving circuit (flat coil) is located in the phone itself, the transmitter is made in the form of a small stand, inside of which the transmitting coil is hidden.
Wireless charging circuit
Electricity is transferred from one circuit to another by induction; the current generated in the second circuit is first rectified and supplied to the battery. Literally any low-power Schottky diode can be used as a rectifier.
Let's start assembling wireless charging with our own hands from the transmitter.
Transmitter
The transmitter circuit is simple and clear. A typical blocking oscillator circuit using one transistor. The frame for winding the transmitting coil is at your discretion. It is advisable to take a frame with a diameter of 7-10 cm. We wind 40 turns of copper wire with a diameter of 0.5 mm onto the frame. The winding has a tap from the middle. First, we carefully wind 20 turns, then we twist the wire, make a branch, and wind the remaining 20 turns in the same direction. Is everything clear with the coil? Let's move on.
Absolutely any transistor, I tried both field-effect and bipolar ones, with field-effect ones it charges a little faster. You can use field keys of the IRFZ44/48, IRL3705, IRF3205 series (I indicate only those that I used myself), but you can use literally any. Of the bipolar ones, you can use domestic ones: KT819, 805, 817, 815, 829. The choice is not critical. You can also use direct conduction transistors, but in this case you will have to change the polarity of the power supply.
The value of the base resistor is not critical (22 Ohm-830 Ohm).
Receiver
The receiving circuit was running for half an hour. The coil is flat, consists of 25 turns of wire 0.3-0.4 mm. It is convenient to wind the circuit on a small piece of plastic; the coils need to be gradually strengthened with superglue; the work is quite dirty and time-consuming. After winding, we separate the circuit from the plastic stand on which it was wound. This is convenient to do with a mounting knife or blade.
Tips for choosing components
The richness of the existing elemental base
Many elements of the inductive current transmitter and receiver circuit have both Russian and foreign analogues. For example, the NE555 timer can be painlessly replaced with its full analogs (for some you will need to check the calibration of the legs and operating voltage) - 1006VI1, 1006VI2, AN1555(N), GL555, LB8555(D|P), LM555(CN|N), MC1455(P|P1), NJM555D, RC555, TA7555P, UPC1555(C), UPC617C, KP1006VI1(A), KF1006VI1, 142EH6, ICM7555(CBA-T|IPA)), LM555(CM|N), MC1455(D| U|G|P1), NE555(D|M|P|N), TA7555(F|S), UA555(TC(-8)|PC), ECG955M, M51841P.
Its variants MTP50N05, KP723A, MTP50N06V, STP45NE06, STP50N06, MTB50N06V, STB45NF06T4, HUF75329(P3|S3(S)), STP45NF06, STP60NF06, STB60NF06(T4|L|LT4) or similar are suitable as a field effect transistor e according to the characteristics.
Diode M4 in the receiving circuit - can be replaced with any one with permissible currents of 1A/400V. It can be a little less powerful, since the power of the incoming power is much less.
The voltage stabilizer can also be replaced with any one with an output current of 5V. Full analogues: L7805CV, MC7805CTG, Russian KR142EN5A.
Review of ready-made chargers for those who do not want to assemble them with their own hands
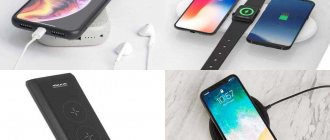
Making your own phone charger is not that difficult, but few people will want to mess with it. It’s much easier to buy it than to design it yourself if you have the opportunity and don’t have a particular desire to make something. For that category of users who did not want to build everything with their own hands, we offer an overview of popular wireless chargers.
Before choosing a gadget, check whether there is a connection between it and your phone.
- RAVPower Wireless Charging Pad. The battery of this device has a capacity of 5000 mAh, thanks to which it can simultaneously charge two smartphones. But they must support the Qi standard.
- Anker Wireless Charger PowerPort Qi Wireless Charging Pad. It has a temperature sensor to monitor overheating, overcharge protection. When this charger is not in use, it enters sleep mode. Costs about $17.
- Woodpuck FAST Edition Bamboo Qi Wireless Charging Pad. This charger is more powerful and more stylish. It is made of bamboo, which in itself is a big advantage. At the same time, it charges the phone 40% faster. Price about $40.
- Samsung Fast Charge Qi Wireless Charging Pad. This option has support for fast charging, but it costs about $50. Naturally, this is the best option for the same smartphones and tablets from Samsung, if you want to spend no more than an hour on charging.
- Tylt Vü. What makes this wireless phone charger different from the rest is its unusual shape, which causes the phone to charge in an unusual position. It looks like a regular stand. The phone or tablet is placed on it in a semi-tilt, so it becomes much more convenient to use them while charging.
- Nokia DT-903. The Nokia phone charger has a backlight that changes color to match the case. Especially for the native Nokia Lumia, a missed call and SMS indicator is built-in.
About the charging mode
The battery in any gadget is charged under the control of a special controller, which first determines how discharged the battery is. If it is more than 75%, then an increased fast (boosted) charge current is immediately supplied, equal to approximately the 3-hour discharge current, if the charger provides it. No - the charging takes the current that it can provide when the output voltage drops to 5 V. Therefore, many devices from USB ports take a long time to charge, because standard USB power output 5 V 350 mA.
After the battery has been charged for approx. up to 25% capacity, the charging current gradually decreases to the value of a small forming (recharging) current until the battery is “pumped” for approx. by 75%. Forming the battery with a small current avoids electrodegradation of the electrolyte, which also reduces the battery life. The forming current is approx. current of 12-hour battery discharge.
Finally, when the battery is fully charged, the controller passes a very tiny current through it for the minimum required time to prevent chemical degradation of the electrolyte, and only then gives a signal about the end of the charge. Therefore, keeping a gadget with a working and properly designed controller on charge for more time is not at all harmful, on the contrary. The author has an old Motorola W220 phone. For the sake of experience, it is on charge all the time, except when you need to leave the house with it. Over more than 10 years of use, the battery has not noticeably lost its capacity: the 4 days of “hibernation” and 4 hours of continuous conversation specified in the phone’s passport have not decreased. And other users of the same model had to change the completely depleted battery.
Which phones support wireless charging?
In the previous paragraph, we described the principle of wireless phone charging. After reading it, we understand that according to the Qi standard, such charging will work if a receiver-receiver is built into the smartphone. This receiver will be able to receive energy from the magnetic field that is created in the charger coil. Which phones support wireless charging? Almost all modern smartphones and tablets are created taking into account this technology. These are companies such as Yota, Sony, Nokia, Samsung, Kyosera, Motorola, LG, Asus, Google, HTC and Blackerry.
Why is such development needed?
- Power unit. A link capable of generating and converting energy from a standard power source.
- Transistor IRL3705.
- Resistor 100 Ohm.
- Diode SS14.
- Copper wire 0.3 and 0.5 mm. This component is a connecting element that will allow you to use your new invention.
Let us immediately note that the listed set is minimally basic, therefore, during the design process, additional needs for tools or material may arise, but this already depends on the specifics of the process itself.
Expert opinion
Viktor Pavlovich Strebizh, lighting and electrical expert
Any questions ask me, I will help!
Upon arrival of the holder, it turned out that my Xiaomi Redmi 6A in a serious shockproof case did not fit into this gadget, I had to modify the holder with a soldering iron and a file, heated and bent the plastic so that my phone in the case would fit there. If there is something you don’t understand, write to me!
How to make wireless charging with your own hands?
Below are instructions for making the simplest wireless charger at home. It will be designed to work with only one device, is practically not customizable and poses a certain danger to the performance of the mobile device. If the described process does not satisfy the owner of the phone or seems overly complicated to him, the most reasonable solution would be to purchase a factory model - or continue to use “wires”.
Before you begin, you should carefully read the step-by-step instructions for each technological block.
Principle of operation
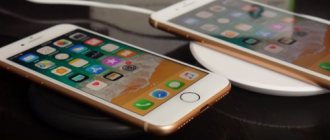
A wireless charger allows you to charge your phone's battery without connecting it to wires. The mobile phone is placed on a special stand, where the whole process takes place.
The presence of a built-in receiver can be seen in the specifications; if the manufacturer indicated support for the Qi standard, then everything is in order.
The operating principle of this wireless charging scheme is quite simple.
ATTENTION. The lack of a built-in receiver in a gadget is not a reason to abandon the idea
In this case, the smartphone owner simply needs to put in a little more effort and make the receiver himself.
A simple technology for modifying a push-button mobile phone
To improve your mobile phone, you need to perform a number of simple steps. After updating the gadget, problems such as failure of the charging socket, tangled wires, etc., will become insignificant.
To implement wireless charging, you will need a couple of meters of thin copper wire. The conductor must be wound into a coil. The optimal number of turns is 15 pcs. It is advisable to secure the spiral with glue or double-sided tape to maintain its shape. In this case, a few centimeters of wire are left for soldering the contacts. To connect to the charger socket, a pulse diode and a capacitor are used, attached to different ends.
In order to create a wireless charging transmission circuit, turns of 1.5 cm in size are formed. The diameter of the coil after twisting should be 10 cm. Both ends should be free. The rest of the structure is held together using electrical tape or adhesive tape.
Next, 30 turns of thinner copper conductor are wound for the transmitter. A transistor and a capacitor are used to close the circuit. By placing the device equipped under the receiver cover in the area of the transmitting ring with the display facing up, you can achieve wireless charging of the phone.
If the gadget is without WPC
There are only 2 mandatory requirements for the WPC receiving coil: the number of turns is 25 and the wire diameter is designed for a current of 0.35 A, taking into account the skin effect at frequencies up to 30 MHz. Practically - from 0.35 mm for copper (without insulation). Thicker, when there is enough free space in the case, will only be better. Configuration – any according to location. Special care in manufacturing is not required (item 1 in the figure), but it is necessary that the ratio of the largest transverse dimension to the smallest does not exceed 1.5, otherwise the efficiency of the receiver will drop and the charge will be delayed.
WPC wireless chargers
If charging is done for an old plump phone or for a tablet without WPC, the coil is placed in the body of the gadget. A slight bend in place (item 2) will not affect the properties of the receiver. Suddenly there is not enough space inside (you still need to tuck the electronic components of the receiver somewhere), you will have to make a flat coil “like a branded one”, pos. 4. It is convenient to lay the wire in a flat spiral using tape placed on the substrate with the adhesive side up. To ensure that the Velcro does not wrap up and does not creep, it is fixed at the edges with strips of the same tape, applied with glue down. A round boss with a diameter of approx. is placed on the tape. 1 cm and lay turns around it, pressing the wire against the Velcro. When as many turns as necessary are laid, the boss is peeled off, the finished coil is dug to fix the turns with superglue or nitro varnish, pos. 3, and remove together with tape; its excess is trimmed off.
Advantages and disadvantages of wireless chargers
Pros:
- there is no need to connect the wire to the smartphone;
- practicality in use;
- the ability to charge several phones at once;
- no wires that get tangled and fray over time.
The following factors are considered disadvantages of wireless charging:
- relatively high cost;
- low speed of the process of replenishing the battery with energy;
- part of the supplied power is consumed in the form of heat;
- not compatible with all smartphones, for example, additional devices will be needed to charge the iPhone;
- impossibility or inconvenience of using the device being charged (when moving away from the charger, the charging process is interrupted).
