We don't have to work with Excel spreadsheets often enough to know every useful tool inside and out. However, if we happen to edit tables, it often becomes necessary to insert a new row or column. Although such a simple function is available after the first two clicks, it still causes some difficulties for novice users. Let's look at how this option works - how to add a row in Excel to quickly edit a table.
| How to insert a new line ↓ | How to delete a line ↓ | |
How to insert a new line
The procedure for adding new lines to the original table is identical for all versions of the table editor. Of course, there are small differences, but they are not significant. The detailed instructions look like this:
- First, we open or create a sign. We select the cell of the line above which we plan to place the new line. Right-click on the selected cell. A small context menu has appeared in which you should find the “Insert...” element and click on it with the left mouse button. An alternative option is to use the “Ctrl” and “+” key combination.
1
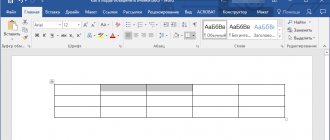
- The program displayed a window called “Insert”. Through this window you can add a line, column or cell. We put a point next to the inscription “Line”. Click on the “OK” element to save the changes made.
2
- Ready! A new line has been added to the plate. Please note that when adding a new line, it takes all the formatting settings from the line above.
3
Important! There is an additional method that allows you to add a new line. Right-click on the line number, and then in the context menu that opens, click on “Insert.”
4
Method 3: Paste using ribbon tools
There is a special button on the main Excel ribbon that allows you to insert an additional column into the table.
- As in the previous method, select the desired cell. A new column will appear to the left of it after completing the steps below.
- Click on the icon with the image of an inverted triangle next to the “Insert” button while in the “Home” tab. In the drop-down list, click on the “Insert columns in sheet” option.
- All is ready. A new column is added to the left side of the selected cell, as required.
How to insert a new row at the end of a table
It often happens that the user needs to implement adding a line at the end of tabular data. The detailed instructions look like this:
- Initially, we select the entire outer line of the plate by clicking the left mouse button on the serial number. Move the pointer to the lower right part of the line. The cursor should look like a small dark plus sign.
5
- We hold down this plus sign using the left mouse button and drag it lower, by the number of lines that we plan to insert. Finally, release the LMB.
6
- We notice that all added lines were independently filled with information from the selected cell. The original formatting is also left. To clear filled cells, you need to perform the procedure of selecting new lines, and then click on “Delete” on the keyboard. An alternative option is to right-click on the selected fields, and then select the “Clear Contents” item in the special context menu that opens.
7
- Ready! We have ensured that the newly added lines are cleared of unnecessary information. Now we can add the necessary data there ourselves.
8
Important! This method is suitable only in those moments when the bottom line is not used in the form of “Total”, and also does not add up the lines above.
How to create a smart table
“Smart” tables are used to enable the user to work effectively with large amounts of information. A plate of this type can be easily enlarged, which means new lines can be inserted at any convenient time. The detailed instructions look like this:
- We select the work area that we plan to convert into a “smart” sign. We move to the “Home” section, and then find an element called “Format as table”. We reveal the long list of proposed plates. Select the style that you like best and click on it with the left mouse button.
9
- The “Format Table” window appeared on the screen. The address of the originally allocated sign is hammered in here. If the coordinates are not satisfactory, they can be edited in this dialog box. Click on “OK” to confirm all the settings made. It is worth noting that next to the inscription “Table with headings” you must put a check mark.
10
- Ready! We have created a “smart” sign and can now perform further manipulations with it.
11
How to insert a new row in a smart table
In order to implement the procedure for adding a new line to a “smart” sign, you can use the above methods. The detailed instructions look like this:
- Right-click on any cell. In the special menu that opens, find the “Insert” element and expand it. In the list that appears, click on “Table rows above”.
12
- An alternative option for adding a new line is to use a combination of special hotkeys “Ctrl” and “+”. The use of hot keys significantly reduces the time spent on adding new lines to the table.
13
How to insert a new row at the end of a smart table
There are three methods that allow you to add a new line to the end of a smart sign. Detailed instructions for adding a new line to the end of the “smart” sign look like this:
- Drag the lower right part of the sign using the left mouse button. After this action, the sign will increase on its own. Exactly as many lines as the user needs will be added.
14
- Here, the added cells will not be automatically filled with the original information. Only the formulas will remain in their places. Therefore, there is no need to clear the contents of the cells, since they are already empty.
15
- An alternative option is to write new data in the line located under the original “smart” sign. If you implement this procedure, the new line will automatically turn into an element of a “smart” sign.
16
- The third method is to move to the lower right edge of the smart sign cell and click on the “Tab” button located on the keyboard.
17
- After implementing this action, the inserted line will be automatically added to the “smart” sign, preserving the original formatting.
18
additional information
You can always contact the Excel Tech Community, ask for help in the Answers community, or suggest a new feature or improvement on the Excel User Voice website.
Note: This page has been automatically translated and may contain inaccuracies and grammatical errors. It is important to us that this article is useful to you. Was the information useful? For convenience, we also provide a link to the original (in English).
Anyone who starts working in Excel, first of all, must learn how to add additional columns to an edited table. Without this knowledge, it will be extremely difficult or even impossible to continue working with tabular data and adding new information to the book.
Adding multiple blank rows to an Excel table
In order to implement the procedure for adding two or more empty rows to tabular data, you need to perform a few simple steps. Detailed instructions for adding empty lines look like this:
- Using the left mouse button, we select the line over which we plan to add new ones, and then, without releasing the LMB, select the number of lines that we want to add to the spreadsheet document.
- All required lines were selected successfully. Now you need to right-click anywhere in the selected work area.
- A small special context menu has opened, in which you need to find an element called “Insert” and click on it with the left mouse button. An alternative option is to use the tools located on a special ribbon located at the top of the table editor interface.
- Ready! We have implemented a procedure for adding several blank lines to the original table.
19
Selecting cells
To select a single cell in Excel, you need to click on that cell.
To select multiple cells , hold down the Ctrl and click on all the required cells.
To select several cells located in a row , you need to select the first one (upper left) and hold down the Shift and click on the last one (lower right).
In this video tutorial we talked about selecting data ranges in Excel:
Inserting varying numbers of blank lines
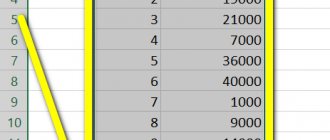
For example, we have the following sign with the necessary information:
20
Detailed instructions for inserting different numbers of empty rows look like this:
- We move to the dialog box called “Insert blank rows by default.”
- In the “Column number with number of rows” field, indicate the value we need.
- It is worth noting that if we check the box next to the inscription “Different number of empty rows for insertion,” then the line with the number of rows for insertion will change to the serial number of the column in which the numeric type data is specified.
21
- Ultimately, the function will independently determine the line number that matches the criteria specified by the user. Exactly as many empty lines will be inserted as were specified in the given line of the specified column.
22
Alternative options
For some users, other methods of insertion and selection, which are described below, seem more convenient.
Selecting a full line of a sheet in Excel
The implementation of all the above options began with highlighting the desired line of the completed table. There is another option for the first stage - select the entire line of the sheet, including the unfilled cells on the right side. You just need to click on the line number (or numbers).
Then an empty line will immediately appear between lines No. 4 and No. 5. The program already knows the total selection of a line on a sheet. Therefore, there is no need for a menu to appear asking what exactly should be added (step 3).
Using the “Home” tab
- Having selected a line or lines, there is an alternative to calling up the menu by right-clicking on it.
- On the tab called “Home”, go to the “Cells” section, open the “insert” list, and then select the desired item - “Insert lines into sheet”.
So, we looked at the methods of How to add a row in an excel table and the order of inserting rows in the most common version of 2010. However, it is worth noting that in more modern editions, the sequence remains the same.
Source: bezkompa.ru
Removing blank lines
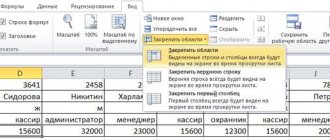
There are several methods to remove blank lines. Let's look at this issue in more detail by looking at specific examples. Let's say we have the following table displaying student grades in various subjects:
23
The first option for removing empty lines looks like this:
- This implies the use of information sorting. We select absolutely the entire plate. Move to the “Data” section and in the “Sorting and Filter” command block, click on “Sorting”. An alternative option is to right-click on the selected area and click on the element “from minimum to maximum”.
- As a result of the actions taken, the empty lines we needed moved to the very bottom of the original plate. Now we can conveniently delete these empty lines using the “Delete” key, having previously selected them on the work area using LMB.
24
The second option for removing empty lines looks like this:
- This assumes the use of a filter. We select the “header” of the sign.
- Move to the “Data” section, and then left-click on the “Filter” element, which is located in the “Sorting and Filter” tool block.
- Now, to the right of the name of each column, a small arrow pointing down is displayed. Click on it to open the filtering window.
- Uncheck the box next to “(Empty)”.
25
- Ready! This method allowed us to remove every unfilled cell from the line.
The third option for removing empty lines looks like this:
- Implies the use of selecting a group of cells. First, we select the entire plate.
- Move to the “Editing” option and click on the “Find and Select” element. In the list that opens, click on “Select a group of cells.”
26
- In the window that appears under the name “Selecting a group of cells”, put a checkmark next to the inscription “empty cells” using the left mouse button.
27
- The table editor has implemented marking of empty fields. In the main menu of the program, click on the “Cells” option with the left mouse button, and then select the “Delete” element.
28
- Ready! This method allowed us to remove every unfilled cell from the line.
After the lines are deleted, some cells will move up. This can create confusion, especially when working with large amounts of information. Therefore, this method is not suitable for tables that have a huge number of rows and columns.
Recommendation! Using the key combination “CTRL” + “-”, which allows you to delete the selected line, will significantly speed up the process of working with information in the Excel spreadsheet editor. You can select the required line using the hotkey combination “SHIFT+SPACEBAR”.
Method 4: Keyboard shortcuts for inserting a new column
Another method that is very popular, especially among experienced users, is pressing hot keys. In this case, this method has two application options:
- Click on the column name in the coordinate panel. As always, you need to remember that the new column will be inserted to the left of the selected one. Next, press the key combination “Ctrl” + “+”. After this, the new column will be immediately added to the table.
- Click on any cell, not forgetting the fact that a new column will appear to the left of it. After that, press the key combination “Ctrl” + “+”.
A familiar window will appear where you need to select the insert type (cell, row or column). As in the second method, you need to select the “column” item and then confirm the action by clicking on the OK button.