How to expand your screen using resolution settings
Those who have often reinstalled the operating system know that when you first start the monitor displays standard settings and screen resolution - 800x600 pixels. This happens for all versions of Windows OS. Thus, the developers offer us to independently configure the desired screen resolution for comfortable further work. For older computers, this resolution may be sufficient to work primarily with text information. But for modern digital machines, such a resolution is, of course, unacceptable.
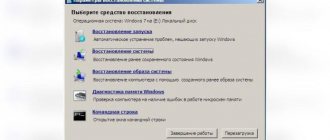
Instructions on how to change resolution in Windows OS.
| Right-click anywhere on your screen where there are no icons in Windows 10, 8.1. For Windows 7, you need to click additionally “display settings” | |
| Select "screen resolution". In this window you will see a button with the size of your screen in pixels. Click the drop-down list and select the permission you need |
The system often advises you to select the maximum value for your screen. You can follow her recommendation. It is advisable not to touch other settings here. Click "Apply" and "OK".
Is it possible to narrow the screen by accidentally pressing a button?
Most often, this problem is caused by pressing a certain key combination. Even if you don’t remember which buttons were pressed, you can still deal with the situation without contacting a specialist. Information on changing graphics and resolution settings can always be found in the corresponding section of the instructions included with the monitor or on the manufacturer’s website.
Since the most common reason for changing settings is that you accidentally sat down or lay down on the remote control, you should be especially careful about the location of this “constantly disappearing somewhere” monitor control device. If we are talking about a computer monitor, then it is also possible that buttons are suddenly pressed - when, for example, you accidentally touched the keyboard or, say, dropped it.
It is impossible to give universal advice for eliminating this problem for all possible cases, since each of them depends on the specific situation. Therefore, you will have to try everything that can be done in this case. So, your monitor screen has narrowed, what should you do? First of all, do not panic - this situation can always be solved. Now:
- You should carefully study all sections of the menu and try to find a possible solution.
- If you have tried all the options, but none of the menu items helped, take the instructions and study the item that corresponds to the situation that has arisen. As a rule, manufacturers try to describe in detail the most frequently occurring faults, while indicating several possible ways to solve the problem.
- If the instructions did not help, try going to the manufacturer’s website and looking for the necessary information there.
- You can also try contacting a service center for advice. If in the process of communicating with a specialist a suspicion arises that the cause of the malfunction is not just a press of a button, but a more serious breakdown in the form of a burned out microboard or a faulty video card, then you will not be able to do without his help.
If the picture has narrowed, we restore the size using the monitor buttons
If you are worried about how to expand the monitor screen if the entire image has narrowed, how to restore it, for these purposes it is useless to touch the settings of the system itself. If there are black parts of the screen at the edges of the narrowed image, you need to adjust the picture on the monitor itself. As you might guess, it doesn’t matter what version of Windows 7 or 10 you have installed.
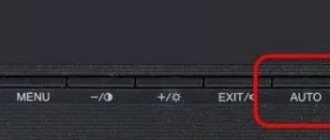
Buttons for settings on monitors from different manufacturers may differ in location and name.
The principle of operation is the same:
- The first thing you need to do is get to your monitor's menu - usually this is the largest button on the monitor panel and is located in the middle.
- Then select image settings - this item may also have a different name.
- When the settings are displayed, select the screen orientation and use the arrows (buttons on the monitor panel) to select the desired size so that the picture is positioned correctly, without running beyond the boundaries of the monitor and without leaving black bars.
- After that, confirm the settings and exit the menu.
These options should be saved and not lost throughout all subsequent computer starts. If after rebooting the monitor settings are not saved, your device is not working properly and needs technical inspection by specialists.
Good to know: when you turn on the computer, it asks you to press F1 - how can I remove it?
Connecting an additional monitor or TV to a computer/laptop
This situation is less common than the previous two, but it also occurs. If you connected any additional image output devices to the video card of your computer or laptop, such as an additional monitor or TV, then try turning them off.
If the image has been corrected and the monitor has expanded to normal values, then the reason is in the connected device and when connecting it to the computer, the resolution adjustment, which is described above, is required. The only difference is that before changing the value in the “Resolution” line. you need to select the desired monitor in the “Screen” line.
Selecting a monitor in screen resolution settings
Image scaling
Changing the resolution
- Call the context menu by right-clicking on an empty space on the desktop.
- Click on the “Screen Resolution” line.
Right-click on the desktop and select the “Screen Resolution” option. - Select the appropriate resolution.
Use the slider to set the appropriate resolution - Save the changes.
Click “Apply”, then “OK”
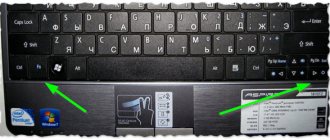
Using Hot Keys
- Hold down the “Ctrl” button and use the “+” and “-” buttons until we get the required scale. The method is effective, but rather crude, since such scaling has a certain step. The previous state may seem not large enough, and the next one may seem too large.
To change the scale size on the desktop, hold down the “Ctrl” button and use the “+” and “-” buttons - Change using the mouse wheel. Also hold down “Ctrl”, but now adjust the scale with the mouse wheel. The method is more subtle, but less reliable, since it does not have a fixed step and you can skip the comfortable scale.
Press the “Ctrl” key and scroll the mouse wheel to zoom in or out
Options
- Open the Start menu. Click on the “Options” menu (the button with a gear).
Click on the “Start” button, then on the “Settings” icon - Click on the “System” parameter.
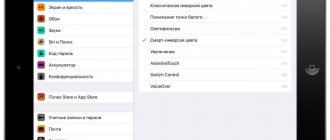
Click on the “System” parameter - Open the “Display” tab.
Open the “Display” tab - Select the desired scale in percentage. Save the changes.
Select the desired scale in percentage, configure other parameters if desired
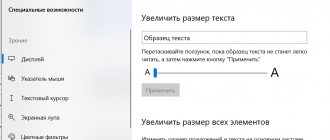
Changing system fonts
System fonts are a collection of desktop icons, their labels and design elements. In other words, what is responsible for displaying the workspace on the “desk” or windows like “Explorer”.
These elements are interconnected, so when you change one parameter, the rest are automatically adjusted to it. How to change the font size for more convenient reading?
Through the settings of the OS itself
- Call the desktop context menu and go to the “Personalization” section.
Call the desktop context menu by right-clicking the mouse, go to the “Personalization” section - Find the tab called “Window Color” and open it.
Find and click on the “Window Color” icon - In it, click on the “Advanced options” link.
Click on the link “Additional design options” - Expand the list in the “Element” parameter.
Expand the list in the “Element” section - After selecting the elements, use the controls to set the desired font size and type, etc.
Select an element and configure the necessary parameters - Save settings.
Click “Apply” and confirm “OK”
Changing the font without changing other parameters
Sometimes it happens that the user is satisfied with the size of the icons and other interface elements, but the font seems inconvenient. On the “seven” and later versions, it became possible to directly change the font size and type without affecting other design:
- Call the desktop context menu and go to the “Personalization” section. Call the desktop context menu by right-clicking the mouse, go to the “Personalization” section
- Open the “Screen” tab.
Open the “Screen” tab - Mark the required scale parameter, adjust the font size until the display is as convenient as possible.
Mark the required value and click “Apply”
In Windows 8, select the appropriate scale and select the required font size - Save changes.
How to change scale in Word and Excel
To change the scale in Word or Excel, click on the + and - icons in the lower right window.
You can also click on the % icon in the same window - there are many options to change.
You can also zoom out or zoom in through the “View” tab in the top panel.
To adjust, use the tools in the middle of the menu:
- Zoom – opens settings similar to clicking on the % icon in the lower right corner.
- 100% – returns the document to its default value.
- One Page – fits the dimensions to the view for editing one page.
- Multiple pages – divides the document into two-page mode for the convenience of checking text in two windows at once.
- Fit to Page Width – fits the document to the full width of the window.