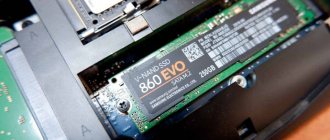
When using SSD drives, the TRIM function is of particular importance. It is not needed for ordinary hard drives, so many people don’t even know about its presence. This is due to the different design of these drives. When a regular hard drive deletes a file, it actually just deletes data from the MFT table about the location of this file. The very bytes of this file continue to remain on the disk. Only in the table does this area become unoccupied, where information can be written down again. That is why it is possible to recover deleted files, because they are not physically deleted. The hard drive will write information with equal ease both to completely clean sectors and to those where something has already been recorded. When new data is written, the old ones are simply erased. But SSD drives are based on flash memory, not magnetic recording. Quick recording of information in them is possible only in empty memory cells. Of course, such a drive can first erase old information and then write new information there, but it will spend much more time on this, which means that the main advantage of SSD drives – speed – will be lost. This is where a special function comes in, which ensures the performance of SSD drives at the proper level.
Setting the TRIM function.
What is TRIM
The TRIM function is designed for a simple but important job for a solid-state drive - clearing bytes marked as free. This ensures that new information is written to them as quickly as possible, since the flash memory is prepared in advance for this process. This work takes place using the operating system and is supported in Windows starting from version 7. The program runs in the background and is always enabled by default, so connecting and recognizing solid-state drives usually does not cause problems.
How TRIM works
The design of SSD drives is radically different from conventional hard drives. Their memory is organized in pages that can only be erased entirely. But the SSD drive itself cannot distribute information most efficiently, because the operating system does not give it information about which pages need to be physically cleared. Therefore, the drive operates at peak performance as long as it has free pages to write to. Once the empty pages run out, the drive will be forced to perform a cleanup operation before writing, which will greatly reduce its speed. The TRIM feature for SSDs was added to the operating system to communicate with the drive, telling it which pages can be cleared. This happens in the background, and overall computer performance remains high for a long time. In addition, flash memory has a limited number of write cycles, and this is also taken into account. Therefore, there is no repeated operation of some cells while others are idle, which is why the service life of the drive and its reliability are significantly increased.
Seven troubles - one deallocate
Many have heard about the TRIM team. Those same cherished four letters that raise many questions among the average user. TRIM is one of the ATA commands sent by the operating system to notify the solid-state drive that data from the disk has been deleted by the user and occupied physical cells can be freed. It is worth mentioning separately about SSDs with an NVMe interface - these drives have a different set of commands for operation, but an analogue of the ATA TRIM command also exists there - it is called Deallocate and, accordingly, is identical. Therefore, further when we mention TRIM we will also mean Deallocate. Why are we talking about all this? It is precisely the problems with executing these commands that in the vast majority of cases are the reason for the low performance of drives. Of course, we will not leave other problems aside either, but everything has its time. The moment you delete data from your drive, an entry in the main table of the file system is actually deleted. That is, the data itself remains in place, but the area is marked for deletion. The “cleaning of cells” itself occurs at a certain time, for example, when the drive is idle while you go for tea. In this way, manufacturers achieve reduced memory wear and increase the performance of their drives in certain scenarios. The controller is responsible for cleaning these cells by executing the TRIM command. By the way, after its execution, data recovery is almost impossible. Most recently, we talked about Secure Erase technology, which is similar to TRIM, but affects not only the main cells, but also service areas, returning the drive to its completely original state. Let us remind you that Secure Erase can be performed on a drive only without a file system and under certain conditions. And TRIM technology precisely requires an operating system with all the attendant requirements.
How to check if the TRIM command is enabled
For TRIM to work correctly, you usually do not need to do anything. However, there are many drive manufacturers, and the system can also be configured differently, so it doesn’t hurt to see if TRIM is enabled. It must be remembered that support for the TRIM function for SSDs will be disabled if the drive is used in a RAID array or recovery is enabled in the system. In this case, you will not be able to enable it. Checking if TRIM is working on Windows 10, 8 or 7 is quite simple. To do this, just run the command line as an administrator and enter the following command:
fsutil behavior query DisableDeleteNotify
If the result is 0, then the function works, and if the result is 1, then it is disabled. It is always useful to check the operation of TRIM, since this function may not work with some settings in the BIOS. Using this method, you can find out whether it is enabled on a running system. If it does not work, system recovery is disabled and the drive is not included in the RAID array, then it is useful to look into the BIOS and see the disk operating mode - AHCI mode should be selected.
Optimizing the operation of an SSD drive under Windows 7, 8 and 10
Let's look at the main methods for optimizing an SSD drive.
AHCI SATA
Technology that allows the TRIM function to be used for various SSDs. It is enabled at the BIOS level of your PC or laptop.
Enable AHCI SATA:
- Open the command line with the key combination win + R.
- Enter the command: “regedit” (access to the registry).
- Go to the following path: HKEY_LOCAL_MACHINE → SYSTEM → CurrentControlSet → Services → storahci.
- Change the value of the ErrorControl subkey to 0 (default 3) by calling the context menu and clicking the “Modify” option.
- Go to the branch called “StartOverride” and change its value to 0 (default 3).
- Restart your PC (laptop), go to BIOS/UEFI (how to enter BIOS, see separately for the model of your laptop or PC motherboard). In the “storage configuration” section, and in the “SATA port” subsection, set AHCI, or in the “SATA RAID/AHCI Mode” section, set AHCI (For different BIOS versions, their own sections and subsections).
- Check if the function works in Windows. Go to the following path: Control Panel → Device Manager → IDE ATA/ATAPI controllers. The device should appear in the last subsection: “Standard SATA AHCI Controller”.
TRIM function
By default, this feature is enabled on Windows 7 and higher, however, it is better to manually check whether this feature works.
The meaning of TRIM is that after deleting files, Windows transmits information to the SSD drive that a certain area of the disk is not used and can be cleared for writing.
(the data remains in the HDD and recording is done “on top” of the existing one). Over time, if the function is disabled, the drive's performance will drop.
Checking TRIM on Windows:
- Launch the command prompt by pressing the key combination win + R.
- Enter the command: “fsutil behavior query disabledeletenotify”.
- If after entering the message “DisableDeleteNotify = 0” is displayed, then the TRIM function is enabled, if “DisableDeleteNotify = 1”, then TRIM does not function. If TRIM does not work, enter the command: “fsutil behavior set DisableDeleteNotify 0”, then repeat steps 2 and 3.
Defragmentation
This function helps optimize and speed up the operation of the HDD, but for SSDs, it has a detrimental effect. For SSDs, the “automatic defragmentation” feature is disabled by default. To check if it works:
- Press the win + R combination.
- In the command line window, enter the command: “dfrgui” and click “OK”.
- In the window that opens, select your SSD and look at the “Schedule optimization” item. For our SSD it should be disabled.
Indexing
A Windows feature that helps you quickly search for files on a disk with large amounts of information, however, it increases the write load on the SSD. To disable it:
- Go to the section “This computer”, “My computer”, “Computer” (it’s different for each OS).
- Select your SSD and select “Properties” in the context menu.
- In the window that opens, uncheck the box next to the option: “Allow the contents of files on this disk to be indexed in addition to file properties.”
Search service
Its function creates a file index, thanks to which finding various files and folders is faster. However, the speed of the SSD is quite enough to abandon it. To disable it you must:
- Go to the following address: Control Panel → System and Security → Administrative Tools → Computer Management.
- Go to the tab: “Services”.
- Find the “Windows search” service and select “Disabled” in the “Startup type” tab.
Hibernation
A mode that allows you to save the contents of RAM on the hard drive, so that the next time you turn it on, information and open applications from the previous session are saved.
When using an SSD, the meaning of this function is lost, since the drive starts up quickly anyway. And “Hibernation”, creating “write-overwrite” cycles, reduces the lifespan of an SSD disk.
Disabling hibernation:
- Launch cmd.exe again using the key combination win + R.
- Enter the command: “powercfg -h off”.
Write caching
This feature improves the performance of your SSD. When enabled, NCQ writing and reading technology is used. NCQ - accepts multiple requests simultaneously and then arranges their execution order in such a way as to achieve maximum performance.
To connect you need:
- Open the command line with the combination win + R
- Enter the command: “devmgmt.msc”.
- Open "Disk Devices", select SSD and select "Properties" from the context menu.
- Go to the “Policies” tab.
- Check the box next to the option: “Allow recording caching for this device.”
Prefetch and Superfetch
Prefetch
– a technology with which frequently used programs are loaded into memory in advance, thereby speeding up their subsequent launch. In this case, a file of the same name is created on disk space.
Superfetch
– a technology similar to Prefetch with the difference that the PC predicts which applications will be launched by loading them into memory in advance.
Both features are of no use when using an SSD. Therefore, it is best to turn them off. For this:
- Open the command line using the key combination win + R.
- Execute the command: “regedit” (go to the registry).
- Follow the path: HKEY_LOCAL_MACHINE → SYSTEM → CurrentControlSet → Control → Session Manager → Memory Management → PrefetchParameters.
- Find several parameters in the registry subkey: “EnablePrefetcher” and “EnableSuperfetch”, set their value to 0 (default 3).
SSD Mini Tweaker utility
All of the above actions can be performed manually, but programmers have created programs called tweakers, the purpose of which is to customize the Windows OS, as well as its individual components, with a few clicks. One such program is SSD Mini Tweaker.
SSD Mini Tweaker
– a program, a type of tweaker, that allows you to optimize your SSD without much effort.
Advantages:
- Complete Russification.
- Works on all OS starting from Windows 7.
- Free.
- Clear interface.
- No installation required.
other methods
Manipulations such as transferring browser caches, paging files, temporary Windows folders, system backup from an SSD to an HDD (or disabling this feature) are useless, since although they increase the lifespan of the SSD, they limit the potential of its use.
Thus, by performing the simple manipulations listed above with your OS, you can extend the life of your drive, as well as configure it to maximum performance mode.
Source: https://arprime.ru/optimizacia/ssd-disk
How to enable TRIM on Windows
If the test says that TRIM is not working, then you can try to enable this feature manually. However, this will not work for SSD drives connected via USB. For all other models, enabling TRIM in Windows 10 and earlier is very easy. To do this, enter one of the commands on the command line:
fsutil behavior set disabledeletenotify NTFS 0 – if the NTFS file system is used.
fsutil behavior set disabledeletenotify ReFS 0 – if the ReFS file system is used.
Before entering them, it is useful to look at the disk properties and make sure that there it is displayed as a “solid state drive” and not just a “hard drive”. In case of problems in this place, you need to enter the winsat diskformal command in the command line - this will help the system correctly determine the disk type. It is also useful to defragment it before turning it on, especially if the disk has been in use for some time and a lot of files have accumulated on it.
An easy way to configure Windows 7 to work with an SSD
SSD drives are increasingly found in computers at home and in offices. And this is not surprising, because they have a number of positive features that make work so comfortable that you no longer want to go back to a simple HDD.
With the advent of such devices, which are radically different in their structure and operating principles from conventional hard drives, there is a need to adapt the operating system to work with them in order to ensure maximum performance and maximize their service life. Windows began to adequately accept SSDs quite recently - starting with Windows 7. All previous versions of the operating system required effort and additional software for adaptation.
Introduction
Buying an SSD drive for your computer turns it into a real athlete. Reading and writing speeds are so high that working with a computer becomes incredibly comfortable.
To make the difference clear, you can show the boot time of the system from an SSD and from a regular HDD. The average boot time for Windows 7 from a regular HDD is approximately 25-30 seconds. A similar process from an SSD drive takes only 8-15 seconds.
But it's not that simple. The capacity of modern SSDs is quite small compared to modern HDDs. Typically there are models with 60 – 120 GB of memory. There are more, but their cost is too high.
SSDs also have a limited number of disk write cycles.
This is why it is important for the operating system to reduce the consumption of used disk space and reduce the number of disk accesses in order to increase the service life of the media in the long term.
With normal computer use, SSD storage will last for 7-10 years. With very active use, the service life will be shortened, in some cases to a couple of years. Therefore, it is recommended to transfer frequent file operations to the HDD or abandon them altogether.
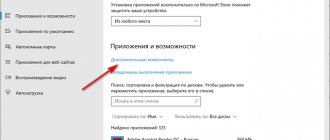
Using a small free utility called SSD Mini Tweaker, you can easily check how ready your system is to work with an SSD drive. Even though Windows 7 itself is adapted to work with SSDs, a number of settings can be changed to either increase free disk space or reduce the number of write cycles and increase the service life of the disk.
In addition, as a result of independent settings, you can “knock down” the optimal settings of the operating system, starting to “kill” the SSD drive. With this small program you can easily check if everything is ok with the settings.
Windows 7 itself adapts to work with an SSD drive. There is no need to blindly activate all the SSD Mini Tweaker checkboxes. Be sure to read the text below first to understand how much you need it and whether it is necessary.
Let's look at the basic settings and why they are needed, indicating important points that you should definitely pay attention to.
Essential elements
This is the most important command for SSD operation and should always be enabled when used. If you disable this command, the device's write speed will steadily decrease over time due to the internal workings of the device.
Enabling this command makes it impossible to recover deleted data, so it is recommended to use backup or work in the cloud. Windows 7 automatically enables this command when it detects an SSD.
Enabling this command makes it impossible to recover deleted data, so it is recommended to use backup or work in the cloud. Windows 7 automatically enables this command when it detects an SSD.
Disabling defragmentation
For SSD media, defragmentation not only does not bring any benefit, but also reduces the service life of the media.
The time to access data on the SSD is the same at all points and the defragmentation process will not bring any benefit. At the same time, these are multiple read and write cycles.
In essence, this is simply “killing” the host. That is why it is recommended to disable defragmentation for SSD media.
Windows 7 does not defragment the SSD on a schedule, but it can do so if you have changed the defragmentation settings yourself.
SuperFetch/Prefetcher
Prefetcher/SuperFetch are designed to allow the system to launch frequently used applications and files faster. These operating system modules keep track of what data is most frequently requested and reserve this data in special files to speed up their reading and loading. Since the reading speed of SSDs is simply enormous, the need for this functionality completely disappears.
Windows 7 disables Superfetch and Prefetcher automatically when installing the system. If you changed the settings manually, you should check if they have changed.
Additionally
An indexing system is necessary for quick access to the most important files, letters and other user information. To do this, the disk is scanned periodically and a database of such files is created.
Disabling indexing in general can reduce the number of disk write cycles and increase disk life, but it will also increase the time it takes to find data on your computer.
System protection
The protection system automatically creates shadow copies of changed files and system restore points. All this can be used to roll back the system to a working state due to a failure or restore an old/deleted version of a document from a shadow copy. A very useful functionality that has saved me from big problems more than once.
The problem is that saving backups requires free space, which in the case of an SSD is worth its weight in gold. Plus, creating such backups also means writing data to the disk, which reduces its resource. This is why some users strongly recommend disabling system protection to free up space and increase disk life.
If you use an external drive to store backups and the process is automated, then disabling system protection may be reasonable. If backups and recovery points are the only mechanism that can help in case of failure, it is better not to leave the protection active.
Disabling hibernation
Hibernation serves to quickly restore the system to a working state with all applications that were open when entering hibernation or sleep mode. A useful thing for laptops, because it allows you not to close applications and always work with them. In this case, energy consumption will be zero.
When using hibernation mode, a file is created on the hard drive where all content from the computer’s memory is placed, so that after recovery it can be restored to the system state “as before shutdown.” Accordingly, this requires disk space, which is quite limited on an SSD drive. And the size of this file is equal to the amount of RAM. For example, in my case it is as much as 8GB.
When you disable hibernation, the system does not save the memory state to disk and does not take up as much important space.
If you do not use hibernation mode, you can disable it. The read and write speed of SSD media can be a worthy compensation in this case.
Removing memory usage limits for NTFS
If you have enough RAM installed on your computer, you can remove the limit on memory usage by the NTFS file system. In this case, it will use all free memory at its discretion, which, with large amounts of memory, greatly helps speed up the file system and reduce the number of disk accesses.
It is best to activate if you have 6 or more gigabytes of RAM.
Store the system kernel in memory
A large amount of RAM opens up another useful opportunity - storing the kernel in RAM without dumping it into the swap file. With sufficient memory, this can have a positive effect on the operation of the system as a whole, even without an SSD drive. Well, in the case of an SSD, this will also reduce the number of disk accesses.
It is better to activate this option if you have more than 2-3 gigabytes of RAM.
Conclusion
For most computers running Windows 7, using an SSD drive will not be much different than usual. Unless you may need to manually disable some options. In general, the system itself adapts perfectly to working with an SSD and no special movements are required from the user.
Another thing is when the system has been installed for a long time, you have tried many optimization and configuration programs that could change the system settings and throw off the optimal parameters for the SSD.
In this case, just run SSD Mini Tweaker and make sure that all the necessary options are enabled or disabled.
The main thing you should pay attention to is Superfetch/Prefetcher and defragmentation.
If your PC has a large amount of memory, then you can get a double bonus: optimize its operation and increase the service life of the media in the long run.
Source: https://club.dns-shop.ru/blog/t-101-ssd-nakopiteli/3935-legkii-sposob-nastroit-windows-7-dlya-rabotyi-s-ssd/
How to disable TRIM
Disabling TRIM is as easy as turning it on. This can also be done through the command line - you need to enter the command disabledeletenotify 1. The message NTFS DisableDeleteNotify = 1 should appear, which means that the function is disabled.
However, it is difficult to imagine a situation where such an operation would be required. After all, this function is designed to optimize and speed up the operation of the SSD drive. In addition, it greatly prolongs his life. Therefore, when disabling it, be prepared that the computer’s performance will noticeably decrease and the life of the drive will be greatly reduced.
The methods listed here to enable and disable TRIM work on Windows versions 7, 8, and 10. However, many computers use older XP and Vista. They do not have built-in tools for correctly connecting an SSD, but the situation is not hopeless. You just have to find and install additional software, for example, Intel SSD Toolbox. Share in the comments if you had problems identifying the SSD disk, and whether the TRIM function turned on immediately after connection. Indicate the Windows version and disk model - this information will probably be interesting and useful to many readers.
Additional Information
Finally, some additional information that you may find useful.
- Today, external solid-state drives have appeared and the question of enabling TRIM sometimes concerns them too. In most cases, TRIM cannot be enabled for external SSDs connected via USB, because This is a SATA command that is not transmitted over USB (but there is information online about separate USB controllers for external drives that support TRIM). For SSDs connected via Thunderbolt, TRIM support is possible (depending on the specific drive).
- Windows XP and Windows Vista do not have built-in support for TRIM, but it can be enabled using Intel SSD Toolbox (older versions, specifically for these operating systems), older versions of Samsung Magician (you need to manually enable performance optimization in the program) with XP/Vista support, also There is a way to enable TRIM using the 0&0 Defrag program (search the Internet specifically in the context of your OS version).
When using SSD drives, the TRIM function is of particular importance. It is not needed for ordinary hard drives, so many people don’t even know about its presence. This is due to the different design of these drives. When a regular hard drive deletes a file, it actually just deletes data from the MFT table about the location of this file. The very bytes of this file continue to remain on the disk. Only in the table does this area become unoccupied, where information can be written down again. That is why it is possible to recover deleted files, because they are not physically deleted. The hard drive will write information with equal ease both to completely clean sectors and to those where something has already been recorded. When new data is written, the old ones are simply erased. But SSD drives are based on flash memory, not magnetic recording. Quick recording of information in them is possible only in empty memory cells. Of course, such a drive can first erase old information and then write new information there, but it will spend much more time on this, which means that the main advantage of SSD drives – speed – will be lost. This is where a special function comes in, which ensures the performance of SSD drives at the proper level.
Setting the TRIM function.