AirPods Pro have already broken the record for the popularity of wireless earbuds. The modern generation has active noise reduction, their surface is protected from water. And they sound like a revelation that shakes the soul. Knowing the tricks of using AirPods headphones, you can even use them for recording in the studio. Below are 12 tips to help you avoid common mistakes when using AirPods.
Note: Wired and wireless headphones - which of the 2 options to choose?
Use the sensor to control
The new AirPods 3 have a force sensor, just like the AirPods Pro. You can control it using compressions: rewind the song, pause, answer calls, or drop them.
How to control AirPods 3 | AirPods Pro:
- Squeeze the leg once to pause the song, answer a call;
- Squeeze twice if you want to switch songs;
- Triple compression, will return the previous song;
- Long squeeze to call Siri. Or use “Hey Siri.”
Setting up AirPods Pro modes
In addition to the well-known function that allows you to choose a name for your headphones, you can now use an option that allows you to customize their response to pressing.
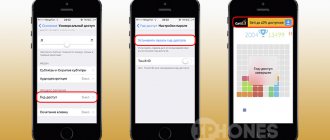
- Select Settings on a device running iOS 13.2.
- Select Bluetooth.
- Click the "i" next to AirPods.
- Select Left or Right
- Select Noise Control .
- Determine the modes between which you will switch AipPods:
- Noise Cancellation: Allows you to block extraneous sounds coming from outside.
- Transparent mode: It is recommended to turn it on when using headphones outdoors; it allows you to hear extraneous sounds when music is turned on.
- Off: The function turns off both modes.
Setting up AirPods Pro modes
We looked at the new tap-activated features of the headphones. To avoid confusion, configure the activation of the Siri assistant by pressing the left earphone, and the right one will be responsible for switching modes.
In addition to the above features, the new Apple product boasts not only excellent sound, but also protection from water and sweat. Cost - 20,990 rubles , in the kit you will find earbuds that will fit any ear; a test in the Bluetooth settings will help you choose the right one. More detailed information can be found in the technical specifications.
How to turn off automatic ear detection
With Auto Ear Detection turned on, the headphones will automatically recognize when you put them on and start a sound playing on your iPhone. If you remove one earphone, the playback will immediately stop and the sound will switch to the iPhone speaker. After disabling the function, music will play in the connected headphones even when you remove them.
To turn off automatic ear detection:
- Open Settings in iPhone.
- Find the “Bluetooth” item and go to it.
- Tap "AirPods" to open the menu.
- Drag the Auto Ear Detection slider until it becomes inactive.
After this, the function will be disabled.
Why do you need an indicator?
Looking at the case for the airpods headphones, you might notice only one indicator. It can be used to determine the state of the device.
The indicator type can be as follows:
- Orange without a picture - there is not enough charge in the case to recharge the headphones.
- Orange with headphones - the case is charged along with the headphones.
- Flashing orange - There was an error connecting the airpods. You need to reconnect by pressing the back button on the case.
- Green without a picture - the case is charged and this is enough for one or several recharges of the headphones.
- Green with headphones - charging headphones from the case.
- Flashing green—the headphones are being removed or inserted into the case.
- Flashing white - waiting to connect to the phone.
If the indicator is not lit, then the airpods are completely discharged and need to be connected to the network.
How to use headphones
Using Apple headphones involves connecting the device to a smartphone, smartwatch or laptop running Mac OS.
System requirements
The system requirements of external devices that different versions of AirPods work with differ.
| AirPods 1 | AirPods 2 |
|
|
Preparation
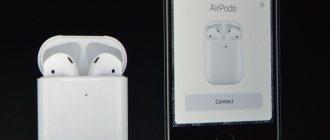
When setting up an iPhone accessory for the first time, you must do the following: – Open the home window by clicking on the “Home” button. – Place the open case with headphones near the smartphone. – Wait for the animation asking you to pair to appear on the iPhone display. – Select “Connect” and click “Finish”.
Listening to audio recordings
After successfully connecting the headphones to your smartphone, you can start playing music. It will start automatically when the user inserts the gadget into the ears. When one earphone is removed, the music is paused, and if two accessories are removed at once, playback will be stopped. If you put the headphones back into your ears within 15 seconds, your favorite track will play again.
Connects to your smartphone and smartwatch running Apple watch OS 3 or later at the same time. To play music on a third-party device or switch between speakers and headphones, just follow the following instructions.
iOS device
- Enable settings menu.
- Activate the audio settings item.
- Click on the corresponding icon and select the appropriate playback device.
Mac computer
When connecting the device to computers based on Mac OS version 8 or later, the headphones are activated in the “Output Device” section.
Hidden settings
For Airpods Pro wireless headphones, you can change additional settings that are responsible for the speed and delay time between pressing the sensor. To access these settings:
- Go to Settings.
- Open the Accessibility tab.
- Find the “PhysicalandMotor” section and click on “AirPods”.
You can now change the following settings:
- “PressSpeed” is the speed at which you press the sensor. You can choose from three options: “Default”, “Slow”, “Slowest”.
- “Noise Cancellation with One AirPod” - noise reduction with one Airpod. If you activate this function, noise reduction will work even with one earphone inserted.
- “Press and hold Duration” - duration of pressing. You can choose between “Default”, “Short”, “Shorter”.
How Airpods work
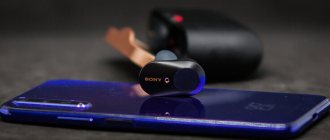
The headphones repeat the corporate style of the classic EarPods. They fit perfectly in the ears and do not cause discomfort during prolonged listening to music. The device is equipped with a sensitive microphone and an IR sensor. The model is built on the proprietary Apple W1 chipset, which instantly finds third-party devices and offers pairing with them.
A second after you turn on the headphones, a notification about your wireless accessory appears on your iPhone screen. The user does not need to carry out complex manipulations to find the device, but simply turn on Bluetooth and press the “Connect” lever.
The sound quality of Airpods differs from the wired version. The frequency range is perfectly balanced so that people of different ages can enjoy music without distortion.
How to set up Airpods on Android
In addition to iOS devices, Airpods are compatible with other mobile platforms. To connect them to Android, you need to follow the instructions:
–Place the accessory in the case. – Go to the settings of your Android gadget. – Open the section “Bluetooth. – Open the lid of the case with headphones. – Press the key on the housing and wait until the white indication appears. – Wait until the “Pairings” item appears in the “Bluetooth” section. – Close “Settings”
However, Android users should note that a number of Airpods features are only available on Apple products. First of all, this is the Siri voice assistant. The automatic pause option is also disabled.
How to clean AirPods - care
Cleaning the headphones
1. Only use a soft cloth when cleaning to avoid scratching or leaving marks. It's really very easy to do with simple gentle movements.
2. The fabric should not be very wet so that water cannot get into the holes.
3. If you use cotton swabs, do not clean the microphone with them, only the speakers.
4. The mesh is cleaned with a brush, for example, from a drawing set.
5. There is no need to poke the headphones with sharp objects at all.
6. Don’t take them apart, you’ll break them and then you won’t be able to put them back together at all.
Cleaning the cover
1. Use a bamboo or microfiber cloth. They clean well and absorb moisture and dirt. Do not use wet wipes.
2. The Lightning connector can be cleaned with the same napkin, cotton swabs or a hard brush if the dirt persists.
3. It’s better not to put anything into the charging ports for cleaning; be careful, clean with the same cotton swabs. The main thing is that there is nothing left in them, otherwise charging will not proceed.
Microphone settings
The headphones need a microphone to make calls and use the Siri voice assistant. Microphone settings are set automatically. It works on both headphones. If you use only one of the headphones, then only it needs to be turned into a microphone. For this:
- Go to Settings on your iPhone.
- Open the "Bluetooth" item.
- Find your headphones in the list of connected devices.
- Click on the "i" next to the name.
- Tap on "Microphone".
- Choose one option out of 3.
If you select “automatic”, then the microphone will be any of the headphones. To make one of your AirPods the microphone, choose Always Right or Always Left.
Possible connection problems
Sometimes users have some difficulties connecting wireless headphones. Especially when trying to pair with new devices from other manufacturers, after successfully connecting with gadgets from Apple earlier.
If for some reason the headset does not automatically start, it is recommended to take the following steps.
- During initial setup, try placing the case closer to the device. Since sometimes problems arise with the stability of the Bluetooth connection. The optimal distance is about 5 cm. You can also disable and re-enable Bluetooth on the device paired with the headphones.
- Having slightly opened the case with the headphones, press and hold the service key built into the case. It is located on the back of the case - in the center.
Keep it pressed until the status indicator on the top panel inside the case (between the two headphones) starts flashing white. This resets the previous settings and the headset is again ready for the initial connection to a new gadget.
- The third possible reason for connection failure is a discharged battery, both the headphones themselves and the battery built into the case. Connect the case (via the connector located at the bottom) with a Lightning cable to the charger (or USB port), and try pairing again later. Typically, the full charging process takes a couple of hours.
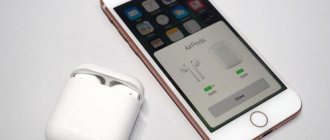
If the connection is successful, the charge level will be displayed on the iPhone screen - separately for the headphones, and separately for the case. In the future, this information will be displayed in the battery widgets on the smartphone.
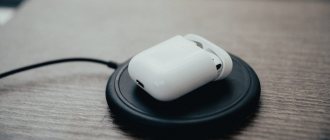
Moreover, the battery of the case itself can be recharged even without headphones inside, plug it in and calmly go about your business. Then it is enough to place the AirPods “on the base” for 15 minutes to provide them with several hours of full operation.
This is what the manufacturer promises us, knowingly warning us about possible deviations - up or down - due to different settings and intensity of use of the headset by different owners. Users who have tried it confirm that the headphones do withstand the promised day of broadcasting (of course, with fast charging cycles).
So that the user has an idea of the charge level of the case without unnecessary movements, it has a special indicator (we have already talked about it). So if it lights up green, the case’s battery is fully charged. If it’s yellow, it means there’s only enough energy left to charge the AirPods once. Or you can simply ask Siri how much charge is left.
If you have any other questions or difficulties in the operation of AirPods, you can find a lot of useful information in the manufacturer’s support section support.apple.com/ru-ru/airpods.
Battery life
On average, the headphones work for ≈5 hours on a single charge. Using the charging case, operating time increases to 28 hours. You can find out the battery level through your iPhone, taking into account one of the options:
- using the “Batteries” widget;
- or open the case slightly close to the headphones (up to a meter) until the AirPods animation appears.
To find out how long the accessory has left to charge, you don’t have to have an iOS device at hand. I knocked on it while charging and activated the charge indication mode. A light indicator will help you, the color of which will indicate the battery level:
- orange - the device is charged less than 80%;
- green - above 80%;
- yellow—there is less charge left in the case than one 4-hour cycle;
- gray - means that the AirPods are turned off: “the battery is low” or they are out of range.
If the indicator goes out without actually turning on, this indicates that the case is completely discharged. You should connect it to the network and leave the case for at least 20-30 minutes. Otherwise, attempts to bring the indicator back to life are useless.
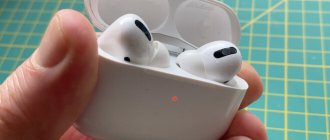
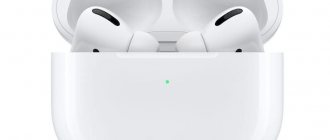
The AirPods Pro case is slightly larger than classic headphones. It needs to be taken out of small pockets more carefully. The lightweight case tends to jump out of your hands, which is why it loses stability and gets scratched. To preserve the case, it is better to use a third-party case. Just like UAG
Useful article: What does headphone impedance affect - 2 types of headphones based on impedance
Interesting fact: AirPods Pro are waterproof headphones that are resistant to exposure to liquids - sweat from sports, rain, swimming pools and small splashes of sea water. But it is recommended to swim with headphones only in fresh water. The “ears” will not survive immersion 10-20 meters deep and the washing cycle in washing machines. In such cases, the manufacturer is not responsible for the condition of the device. Weather resistance standards are at the level of IEC 60529. The charging case is not protected from sweat and water.
Note: Selecting headphones - where and how they will be used: 10 main criteria
Noise suppression
This feature is only available on Airpods Pro. It can operate in active and transparent modes. Typically, the user only has the ability to switch between two modes. But we know how to turn them off or replace them.
To do this you need:
- In the “Settings” section, find the “Bluetooth” item.
- Open the “Air Pods Pro” menu.
- Find the item “Press and hold”.
- Select the earphone whose settings you want to change.
- If it has Noise Control mode active, you can choose between Noise Canceling, Transparent, or Off.
- Selecting "Shutdown" will disable all other options.
If both headphones are set to Noise Control, the following settings will automatically be applied to them together.
AirPods - like a radio nanny
1. Open iPhone settings, go to Control Center and go to items.
2. Add hearing function. Now, with AirPods connected, simply roll up the bottom curtain and launch this function.
Then you can be in another room or anywhere at all and hear everything that happens around the phone. This is a pretty interesting life hack.
Finally
These were the main points to know about this wireless gadget. We wish you high-quality tracks and a long service life for your AirPods.
tell friends
Related posts How to connect AirPods to iPhone - quickly and easily
AirPods: how to charge correctly and quickly
How to connect AirPods to Android - easy
How to connect wireless headphones to iPhone
Comments - 0: