Purpose of "Quick Boot"/"Fast Boot" in BIOS
From the name of this parameter it already becomes clear that it is associated with speeding up the computer boot. But how is the PC startup time reduced?
The "Quick Boot" or "Fast Boot" option makes booting faster by skipping the POST screen. POST (Power-On Self-Test) is a self-test of the PC hardware that runs when turned on.
More than one and a half dozen tests are carried out at a time, and in case of any problems, a corresponding notification is displayed on the screen. When POST is disabled, some BIOS reduce the number of tests performed, and some even disable self-testing.
Please note that the BIOS has a “Quiet Boot” , which disables the display of unnecessary information, such as the motherboard manufacturer’s logo, when booting the PC. It does not affect the startup speed of the device in any way. Don't confuse these options.
What features does Fastboot mode provide?
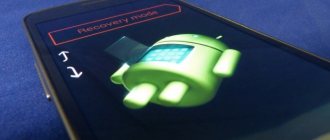
As in the case of recovery, if you are satisfied with the current operation of the device, it is better not to “mess” with this section, but if you just look at its functions, nothing bad will happen. Depending on the brand of the device, its welcome screen is represented by a panel for selecting the boot type (recovery, fastboot or normal boot) or a picture of an open Android, instead of which on Xiaomi phones a branded mascot is presented.
At the bottom of the screen – data about the firmware, processor, RAM, storage; the product's name; battery life level, its status; serial number. By clicking on the Start button, having previously established a USB connection, you can control your smartphone using a computer. If the touchscreen does not work, you should use the sound swing and the standby button.
Disadvantages of Fastboot
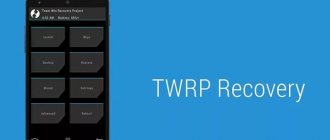
The mode discussed in the article is inferior in terms of the recovery functionality provided, and especially its custom versions, the most popular among which is TWRP, which receives regular updates and is discussed in more detail here . The most “strong” side of fastboot is the installation of various patches, updates and firmware, but it cannot be used to obtain detailed data on the operation of any phone components.
The key problem is the inability to work without connecting to a PC. The connection must be wired - Wi-Fi, NFC and Bluetooth are not supported.
Should I enable fast boot?
Since POST is generally important for the computer, it is reasonable to answer the question of whether it is worth disabling it in order to speed up the computer boot.
In most cases, there is no point in constantly diagnosing the condition, since people have been working on the same PC configuration for years. For this reason, if the components have not been changed recently and everything works without failures, “Quick Boot”/“Fast Boot” can be enabled. Owners of new computers or individual components (especially the power supply), as well as in case of periodic failures and errors, are not recommended to do this.
Enabling Fast Boot in BIOS
Users who are confident in their actions can enable PC fast start very quickly, just by changing the value of the corresponding parameter. Let's look at how this can be done.
- When you turn on/reboot your PC, go to the BIOS.
In Award it will be located in another BIOS tab - “Advanced BIOS Features”.
In some cases, the parameter may be located in other tabs and have an alternative name:
With UEFI things are a little different:
MSI: “Settings” > “Advanced” > “Windows OS Configuration” > “Enabled”;
Gigabyte: “BIOS Features” > “Fast Boot” > “Enabled”.
For other UEFIs, for example, ASRock, the location of the parameter will be similar to the examples above.
- Press F10 to save settings and exit BIOS. Confirm exit by selecting “Y” (“Yes”).
Now you know what the “Quick Boot”/“Fast Boot” parameter is. Be careful when turning it off and take into account the fact that it can be turned on at any time in exactly the same way by changing the value back to “Disabled”. This must be done when updating the PC hardware or when unexplained errors occur in the operation of even a time-tested configuration.
Thank the author and share the article on social networks.
How to exit fastboot on an Android device?
Several methods can be used to restore the functionality of the gadget:
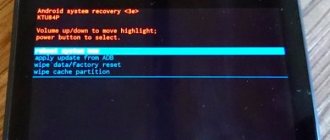
- Booting Android via Recovery. Since the operation completely deletes personal data, it is advisable to remove the SIM card and memory card before doing this. The mode is activated by pressing and holding the volume up and power buttons for a long time at the same time. Next, you can try pressing the power button for a long time or selecting Wipe Data, Factory Reset from the menu. Recovery is an emergency measure to restore the functionality of a gadget, so it should only be used by experienced users.
- How to exit fastboot if it appears even after every device restart? To prevent a dark screen from appearing when you turn on the device, you will need to slightly change the gadget's settings. You can disable fastboot mode by unchecking fastboot in one of the tabs.
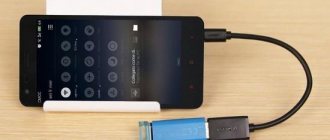
- Fastboot can also be disabled using a computer via USB port. To exit the mode, you will need to download the ADB Run utility. During the operation, you may need to download additional drivers. They can be installed automatically and also found on the Internet. To exit fastboot, you need to run the utility and select reboot.
Step-by-step instructions for exiting fastboot mode using the ADB terminal:
- Download at the office. website archive with fastboot.exe for your operating system.
- Unpack it and install it (fastboot.exe) on your PC (preferably in the root of the disk, it should look like c:adb )
- We connect our smartphone (it is in fastboot mode by default) to the PC.
- Launch the command line (in the “Start” search, type cmd and press Enter)
- Type the command “cd” in the window that appears and press Enter.
- Next, type the command “cd amd” there and press Enter.
- Now type “fastboot reboot” and Enter again.
- That's it, your phone will reboot and exit Fastboot.
Fastboot on Xiaomi: how to enter and how to exit
If the previous measures did not help, then the reason for the dark screen is a serious breakdown of the phone. To fix it, you will need a thorough diagnosis at a service center.
Fast bios mode what is it in the BIOS
What are the advantages of UEFI over BIOS?
Post edited by saintonotole
— 01.06.13, 17:59
Is it possible to update my BIOS to UEFI?
Not really. UEFI cannot be flashed instead of BIOS because it takes up much more memory. But there is such a thing as DUET. This is a BIOS-bootable UEFI environment that can be useful if you intend to use >2TB drives on your older BIOS hardware. More details can be found here: https://www.rodsbooks.com/bios2uefi/
Post edited by saintonotole
— 01.06.13, 16:37
Post edited by saintonotole
— 16.06.13, 18:52
What is GPT?
GUID Partition Table, GPT - standard format for placing partition tables on a hard drive. It is part of the EFI interface. EFI uses GPT where BIOS uses MBR.
Post edited by saintonotole
— 01.06.13, 16:38
What are the advantages of GPT over MBR?
- Support for media >2.2TB
- No limitation on 4 main partitions, and as a result, no need for logical partitions
- Increased security - GPT stores a backup copy of the partition table at the end of the disk, so in case of problems it is possible to restore the partition using a spare table.
- Protection against corruption by outdated programs using Protective MBR
- It is possible to use old boot sectors.
Post edited by saintonotole
— 08.06.13, 18:32
Where are the equivalent boot sectors stored in GPT?
EFI uses the EFI/boot folder, located at the root of the FAT32 partition, to store boot loaders. By default, the file /EFI/boot/bootx64.efi should be loaded. If the boot disk is partitioned in MBR style, then the presence of a FAT32 file system on the first partition (if there are several of them) and a file with a bootloader located on the default path are the only conditions for booting from this media (CD/DVD are also supported). If the disk is partitioned in GPT style, the partition does not have to be the first one, but it must have the boot flag (you can check and set it using gparted)
Post edited by saintonotole
— 01.06.13, 16:38
Is it possible to convert a disk from MBR to GPT and back without losing data?
Yes. To do this, you will need a bootable disk/flash drive with Gparted https://gparted.sourceforge.net/download.php After booting from the bootable media, the gparted window will open, in which the scratch disk (usually /dev/sda) will be displayed in the upper right corner. You need to remember the name of the disk that you want to convert, open a terminal, and type sudo gdisk /dev/sda where instead of sda, if necessary, you need to substitute the name of your disk. Then you need to enter the w command and confirm writing the GPT table to disk. That's it, the disk has been converted to a GPT table. To convert back to MBR, you need to open gdisk for your disk in the same way, and sequentially type the command r, then g, and then confirm the entry of the new table using the w command. Also in the Windows environment, the Partition Guru program or analogues will help you.
Post edited by Shoore
— 21.05.14, 22:22
What is UEFI Shell?
This is an environment for working with an EFI (terminal-like) environment, which allows you to run efi-compatible bootloaders on the go, perform simple operations with files, and also operate the built-in boot manager. You can get it here: https://github.com/tia…/ShellBinPkg/UefiShell Basic commands here: https://software.intel.com/en-us/articles/e. -and-scripting/
Post edited by AndrewP_1
— 17.12.18, 10:03
How to edit/delete/add boot items to the UEFI boot menu?
Download UEFI Shell, copy it to the file /EFI/boot/bootx64.efi on a FAT32 flash drive, and boot from it.
Shell
command line prompt should appear. Above the prompt, a list of available connected drives should be displayed (fs0:, fs1:, BLK0, etc.).
To recall this list if necessary, use the map fs*
. From the full disk name, you can glean some information about the disk. For example: PciRoot(0x0)/Pci(0x1,0x1)/ Ata(0x0) / HD ( 1 , MBR ,0x27212721,0x3F,0x13FA6D9) from here Ata(0x0) is the disk connection interface, as well as the HD controller port is the hard drive 1 - number of partitions on the disk MBR - partitioning scheme
Having found the required disk in this way, you need to go to it fs0:
then, using the good old DOS commands dir and cd, you need to find and go to the directory with the boot efi files.
This is usually /EFI/boot/. Then, while in this directory, you can enter the name of the bootloader file and immediately boot into it. To add the desired file to the list of boot entries, it is advisable to first read the existing entries using the bcfg boot dump
. Then, to add the boot file to this list, you need to enter
bcfg boot add N filename.efi " label "
Where N is the serial number of the entry ( if there was something in its place, this item will be overwritten) filename.efi - the name of the file with the bootloader label - the name under which this entry will be displayed in the list You can view the list of boot entries again using
bcfg boot dump
and make sure that everything is in place .
You can reboot and check. To remove an entry from the list, use the bcfg boot rm N
where N is the entry number
Post edited by Shoore
— 31.10.14, 16:34
Why do you need Fast Boot?
Fast Boot (or Quick Boot depending on the BIOS version) is a BIOS software option that allows you to change how your computer starts and boots.
In normal mode, when you turn on the device, the Power-On Self-Test message first appears on the screen. This is an almost instantaneous process of checking the hardware of a device before booting the system.
The test itself is quick, but within a few seconds of completing the self-test, the computer displays information about the system and test results.
The Fast Boot option allows you to ignore this message and go straight to booting Windows. Simply put, this is a way to speed up OS boot times by about 2 seconds.
And on the one hand, this is great, even 2 seconds sometimes make a difference, but on the other hand, you will no longer be able to trace the presence of errors at the computer startup stage, and the time for calling the menu for selecting the boot volume and BIOS will also be reduced.
In any case, this only makes sense on devices where the POST message takes too long to display.
conclusions
In this article we learned about Fast Boot, what it is, as well as how and when to use this function. Fast Boot in the BIOS is a useful option that allows you to save time reading information that is not interesting to you about testing and activating hardware during the startup process. In Windows, Fast Boot technology is useful and necessary when using hibernation mode. Using these two technologies, you can significantly speed up the process of loading the OS and transitioning it to a working state.
If you find an error, please select a piece of text and press Ctrl+Enter.
Those who have at least once studied the contents of the BIOS tabs and menu items on their motherboard or laptop may have noticed a parameter called Fast Boot. It may also be called Quick Boot. Almost always it is in the off state (disabled). We will talk about what this parameter is and what it is responsible for in this article.
Fast Boot in BIOS settings
How to enable Fast Boot
This is an instruction in case you decide that these seconds are very valuable to you and you don’t want to waste time viewing unnecessary messages.
Preparation
First, make sure your device supports UEFI. This is a new generation of system boot shell used in modern motherboards. Many people confuse UEFI and BIOS. You can read more about this here.
You will also need to convert the disk partition to GTP format, if you have not done so previously, or manually changed it to MBR. To find out:
- Right-click on the Start menu.
- Then select “Disk Management”.
- In the window that opens, look for the partition on which the system is installed.
- Right-click on it
Usually we are talking about drive C
- In the context menu that appears, select “Properties”.
- Go to the “Sections” tab.
This is where the information we need is displayed.
In my case, MBR markup is used. Need GPT
You can read about converting from GPT to MBR here. The reverse process differs only in the command at the end - convert gpt instead of conver mbr .
Enable Fast Boot
Let's move on to the main thing:
- Open Windows power settings.
Reduce hibernation file size if you only use fast startup
If you don't use the hibernation option but use Fast Startup, you can reduce the size of the hibernation file, which can grow to several gigabytes. By default, the file takes up about 75% of the installed RAM. This may seem like a good idea if you have a large hard drive, but if you're working with limited space (like an SSD), every bit matters. Downsizing reduces the file to about half its full size (or about 37% of your RAM). To change the size of the hibernation file (by default it is located in C: hiberfile.sys), press Windows + X and open Command Prompt (Admin).
On the command line, use this command to set the reduced size:
Or use this command to set it to full size:
Source
Purpose of the Fast Boot parameter
For those who are at least a little familiar with English, it is no secret that the translation of the phrase Fast Boot sounds like “Fast boot”. And here a completely logical question may arise - what does fast loading mean?
Oddly enough, this option really allows your PC to boot a little faster, but at what cost...
Disabling Fast Boot in BIOS
And the Fast Boot option speeds up loading due to the fact that it simply skips the Post screen, where you usually see white letters on a black background. And as soon as you press the computer’s power button, the operating system starts loading almost instantly (if there are no problems).
But by activating Fast Boot in the BIOS and gaining this second when booting the computer, you are sacrificing something. Namely, because now it is much more difficult to enter the BIOS settings if necessary. After all, it is now more difficult to catch the moment when you have the opportunity to press the treasured key and get into the BIOS.
Also, you will not see the POST screen, which will display warning messages if problems occur.
Therefore, whether this second of time gained when booting your computer is worth what you will lose in case of problems with your PC is up to you to decide.
Greetings friends! We continue to analyze the BIOS options, today on our agenda is Fast BIOS Mode, we will try to find out what this option is, and you can make a conclusion whether to enable it or not.
Operating principle
When you press the power button on the system unit of a personal computer, the computer does not immediately load the operating system, but performs a preliminary check of all components installed in it. However, many users do not like to wait until the boot process of their personal computer completes, during which the hardware installed in the computer is checked. Testing the RAM installed in the system can take a particularly long time – up to several minutes. Therefore, the desire to shorten this process seems quite natural.
This feature actually exists in many BIOSes. This function is taken over by the Quick Boot option or similar options.
When you enable the Quick Boot option, the BIOS does not perform a full scan of your computer's hardware. In particular, information about RAM modules is taken from the SPD chips built into the memory modules, and a full memory test is not performed. In addition, detailed system information is not displayed on the screen. Due to this, the loading process can be significantly shortened.
Main two disadvantages
- Yes, loading will be faster. However, if you need to go into the BIOS, this can become a problem. Because it will be more difficult to catch the moment when you need to press the BIOS launch button (F1, F2, F8 - depends on the manufacturer). Although, on the other hand, not everyone needs to visit the BIOS often.
- There will be no POST verification. If there are any problems with your PC, you will know this even before Windows boots. And even get some information about what error and in which device it occurred. All this will not happen if the POST check is skipped.
Settings in BIOS, Advanced section (depending on the motherboard):
Accordingly, Enabled is enabled, Disabled is disabled. It can also be simply Enable/Disable, On/Off.
Should I turn it on?
- It's up to you to decide; on regular PCs, the option can indeed be disabled. I mean office, low-power, simple ones. Such PCs, which have a simple office processor, which does not heat up much and the overall risk of something failing is low.
- If you have a gaming computer, then I don’t recommend turning it off. There may even be a situation where Windows boots normally, although the POST check would have thrown an error (if the check had been enabled). This indicates that there is an error, but it is insignificant, but you should not ignore it.
Before answering whether it is necessary or not, it is worth assessing how much the startup time has been reduced with this option enabled? And based on this, make a decision.
A very common problem associated with Fast BIOS Mode is that due to this option being enabled, the BIOS may not see the flash drive. As a result, for example, installing Windows can be problematic. The solution, of course, is to disable the option.
Problems and solutions
"Insufficient rights to perform the operation"
The occurrence of this error indicates that the program on the PC is not running as an administrator. It can be eliminated by right-clicking on the application name and selecting the appropriate item, the absence of which indicates the need to log into another account, which may require entering its access code.
When launching applications through “Run...”, opened with the key combination Win+R , instead of “OK” you should press Ctrl+Shift+Enter .
Switching to recovery instead of fastboot
Most likely, you used the wrong key combination on the side panel of your smartphone. Experiment on your own or ask for help from the manufacturer using the officially provided contact information, or to site users in the comments under the post. You may need to hold down the buttons on the bottom side - those that are used to go back, open the desktop, and display a list of open programs.
Charging is in progress, but files are not transferred
The most likely cause of this problem is USB debugging disabled, discussed above. The problem may also be related to the cable itself, which does not support information exchange. If this is the case, you will need to purchase another wire, having first clarified its functionality.
Share link:
Sources used:
- https://te4h.ru/chto-takoe-fast-boot-v-bios
- https://helpadmins.ru/fast-boot-v-bios-chto-yeto/
- https://lumpics.ru/what-is-quick-boot-in-bios/
- https://propcwin.ru/chto-takoe-fast-boot-quick-boot-v-nastrojkah-bios.html
- https://tehnotech.com/fastboot-na-androide-chto-jeto-za-rezhim-kak-ego-vkljuchit/
How to set up BIOS on Samsung NP 350 V 5 C to install Windows 8/8.1/10
1. We need to enter the BIOS; to do this, turn off the laptop (wait until all the lights go out and the cooler stops spinning).
2. Turn on the laptop and, without waiting for the Samsung logo to appear, press the “F 2” key. Until the same image appears as in the photo.
3. You have entered the BIOS - this is good, but to boot from a flash drive you need to configure it. Go to the “ BOOT” tab. Switch the “Secure Boot” option from “Enabled” to “Disabled ”. This way we will allow the laptop to see and read information from all connected devices.
P. S.: When you confirm the switch, a warning window will appear, warning you that Windows may not start in the future. We confirm.
4. Save all BIOS settings using the “ F 10” key.
5. And so, the basic settings are done, but if your laptop does not see the flash drive or installation disk, then you will need to go into the BIOS again and reconfigure one option , or try inserting the flash drive into USB 2.0 (on the right side of the laptop).
If you decide to reconfigure the option to install Windows with USB 3.0, then go to the “ Advanced” tab and transfer the “Fast BIOS Mode” option from “Enabled” to “Disabled ”. Save the settings.
6. The laptop reboots and the Windows installer boots from USB 3.0.
How to set up BIOS on Samsung NP 350 V 5 C to install Windows 7
1. We repeat the first three points from the previous settings:
- Go to BIOS.
- Disable the “Secure Boot” function.
- Save the settings.
- Disable the “Fast BIOS MODE
” function.
2. Go to the BIOS again and go to the “ Boot ” tab. We see that we have a new option “ OS Mode Selection”, we switch it from “UEFI OS” to “CSM OS ” . Again, the laptop will warn you about the possibility of Windows starting incorrectly, but we don’t care about this, because we are reinstalling Windows.
3. Save the settings.
4. Go to the BIOS and go to the “BOOT ” tab, here you will need to give priority to the flash drive , because The Samsung NP 350 V 5 C laptop recognizes the flash drive as a hard drive. Therefore, we go to the “ Boot Device Priority” option.
From the tab that opens, select the “Hard Drive BBS Priorities” option. In this option we will see two devices connected to the laptop: a hard drive and a flash drive. We distribute priority, namely, we move the flash drive up using the “Enter” and arrow keys.
5. After you have set the priority, two options will appear: save the settings and perform a one-time launch from a flash drive.
- Save settings - the main disadvantage of this setting is the further problem with starting the OS, or more precisely, if a faulty flash drive is connected, or with a recorded image, there is a high chance that Windows will not start. This is due to the fact that you “told” the laptop: Always make the first launch from an external device. This problem is corrected in the fourth step, where after installing Windows you set the initial boot from the hard drive.
- A one-time launch is, in my opinion, the best option, because... To install Windows, you will only need to boot from a flash drive once and will not need to re-enter the BIOS to change priorities.
6. Did you choose a one-time launch from a flash drive? Then do not save the settings at the fifth stage, but only distribute priorities and use the “ Esc” key to exit to the main BIOS menu.
7. Go to the Exit tab. In the “Boot Override” option, select your flash drive and press “Enter ”. The laptop will immediately start installing Windows from the USB flash drive.
That's all for setting up the BIOS of a Samsung NP 350 V 5 C laptop for booting from a flash drive.
Launch CSM in BIOS - what is it? CSM Support
Launch CSM stands for “Launch Compatibility Support Module,” which translated into Russian means “Launch Compatibility Mode Support Module.”
This function, when enabled, activates a special extended compatibility module that allows you to download and install earlier operating systems and their components.
In different versions of BIOS and UEFI, the parameter may be designated differently:
- Launch CSM
- CMS Boot
- UEFI and Legacy OS
- CMS OS
How to enable Launch CSM in BIOS
Launch CSM can be enabled from the BIOS:
- You should restart your computer;
- While the PC is booting, you must press the F2 (or Del) key;
- After entering the BIOS, you need to go to the BOOT section. This is where the Launch CSM function is located, which is disabled by default [Disabled];
- To enable Launch CSM you must select the [Enabled] option;
- It is necessary to save the changes, otherwise they will not take effect;
- The final stage is to restart the PC.
For compatibility mode to work correctly, the user may also need to disable Secure Boot mode.