Almost every home has a Wi-Fi router, thanks to which people connect to the Internet. However, it does not always work stably. If there is poor wireless network reception, or if you have a question about how to change the router frequency, or other problems, you need to understand what to do. In this case, changing the router settings will help. In this article we will tell you how to change the channel on the router and what is needed for this.
How to find a free wifi channel on a router
First, try checking your router by rebooting your Internet modem. The modem will select a free frequency and connect to it. To understand how to change the channel, use two programs: inSSIDer and WiFiInfoView.
inSSIDer
- You can download the program from the official website and install it on your computer.
- Select the “CHANNEL” column to detect occupied zones. You can also find out the encryption type, the router's MAC address, and the type of standard used. For example, the value “1+5” indicates the double range “20-40MHz”.
WiFiInfoView
After launching and analyzing, you will understand which channel is free and can select it. In addition, this program shows the network name, channel number, password availability, signal strength and maximum possible speed.
WiFi Monitor
WiFi Monitor is a convenient scanner and analyzer designed specifically to make it easier to work with connecting to networks. The scanner will automatically collect information about all wireless network equipment and provide you with the necessary information.
Channel selection using special programs
To find an unused or least used channel in the reception area of a router on a PC running Windows, you can use the excellent WifiInfoView and inSSIDer software by downloading it and running it on your PC.
Installation of the WifiInfoView program on the system is not required.
Step 1. Follow the link: https://www.nirsoft.net/utils/wifi_information_view.html#DownloadLinks.
Step 2. Scroll to the bottom of the page and click on the download link “Download WifiInfoView”.
Note! You can find the downloaded file by clicking on the browser’s “Settings” button and selecting “Downloads.”
Step 3. Click on the downloaded archive.
Step 4. Select the files in the window that opens and drag them with the mouse to a folder on your PC.
Step 5. Launch the “WifiInfoView” executable file by double-clicking.
The program will automatically scan Wi-Fi networks located in the router's access area and provide the necessary information about them.
Step 6 : Review the Channel and Signal Quality columns after scanning.
The higher the quality of the signal on the channel you are watching, the worse the other network will work on it, i.e. this channel should be avoided at all costs.
InSSIDer is another popular Wi-Fi network diagnostic program.
Step 1. Follow the link: https://www.softportal.com/get-19027-inssider.html and select the version of the program to download by clicking on the appropriate link.
Step 2. Run the program installation file and click “Next”.
Step 3. Check the “I agree...” checkbox and click “Next”.
Step 4. Click “Next”.
Step 5. Click “Next”.
Step 6. Click “Install”.
Step 7. Click “Finish”.
After launching, the program itself will scan nearby networks and show information about the “Channel” channels and the strength of their “RSSI” signal.
Step 8. Select an unoccupied (missing) channel or the channel with the weakest signal and go to it, setting it in the router settings panel.
Reference! If the WLAN channels of the router and the “neighboring” network are close or coincide, and the neighboring channel has a higher signal strength, it is better to switch to the channel most distant from this network.
Channel selection via smartphone
To select a suitable Wi-Fi channel using a smartphone with Android OS installed on it, Wi-Fi Analyzer software is best suited.
Step 1. Download the program from Google Play on your phone or tablet.
Step 2. Launch the program. It will automatically start analyzing Wi-Fi networks.
Step 3. After analysis, click on the “View” button and select “Channel Rating”.
Step 4. The program will show the rating of channels associated with the level of their interference - i.e. The more stars a channel has, the more “clean” and suitable for connection this channel is.
Login to the web interface
You can change the channel on your Wi-Fi router through the software. To do this, open the browser and type the device’s IP in the address bar. Most routers are available at 192.168.1.1 or 192.168.0.1.
Next, you need to log in to the router’s web interface. The default username is admin, and the password for authorization is usually indicated on a sticker on the bottom of the device, along with the login address. In most cases, he is also admin or 12345.
How to connect TP LINK to Rostelecom?
In order to connect
tp link Rostelecom
router you need to connect your Internet cable to the LAN port (blue), and
connect
to any port that has a digital designation (orange), and the other to your computer.
Interesting materials:
What drains the battery? What to plant flowers in August? What is considered an apartment? What is Nokia producing now? What is sewn from spunbond? What attracts carp so much? What is more difficult than Sekiro or Dark Souls? What happened to Agatha and Pavel? What happened to Damon and Elena? What happened to Daria Moroz's mother?
How to change channel on router
The methods for changing the wifi channel are determined by the router model.
Asus
In order to change the wifi channel, you must:
- Open the section with additional settings.
- Go to the “Wireless Network” tab.
- Find the “Channel” item and instead of “Auto” set one of the suggested numbers.
- Click on the apply button and make sure that the wireless network is working.
D Link
To enter the settings of the D-Link router, enter the address 192.168.0.1 in the address bar, and when prompted for a login and password, enter admin. Information about standard parameters for entering settings is on a sticker on the back of the device (not only on D-Link, but also on other brands).
When opening the web interface, select “Basic Settings”.
In the “Channel” field, set the desired value and change. Then go to the settings again and save the changes you made.
Keenetic
The procedure will be as follows:
- Open the “Home Network” subsection on the “My Networks and Wi-Fi” tab.
- Go to "Advanced Settings" for the desired range.
- Select one of 13 channels in the corresponding settings item and click on the “Save” button.
ZyXEL
As for the ZyXEL router, in its settings you need to open the “Network – Wireless LAN” section, change the channel using the “Channel Selection” drop-down list, and then save the settings using the “Apply” button.
It only takes a couple of manipulations to change the Wi-Fi channel on the router.
TP-Link
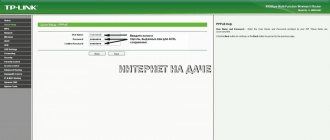
In order to change the Wi-Fi channel on the TP-Link router, use the settings menu: the address is 192.168.0.1, and the login and password are admin. You can check the modem address and password on your router. When the Internet is connected, the specified address tplinklogin.net may not work, use another one consisting of numbers.
In the router interface menu, select “Wireless Mode” - “Wireless Mode Settings”. Select a free channel. Don't forget to save your settings.
What is a Wi-Fi network channel and why change it?
To better understand the situation, let's first figure out what's what. At the moment, almost all routers broadcast a wireless network at a frequency of 2.4 GHz . There are already new ones that operate at a frequency of 5 GHz , but there are few of them yet. They are expensive, and not everyone is ready to throw out their router and buy a new one, so that only the network is at 5 GHz. It's clear. So, at a frequency of 2.4 GHz, in Ukraine and Russia it is allowed to use from the 1st to the 13th channel. This means that each Wi-Fi network operates on channel from 1 to 13. In America, for example, only 11 channels are allowed. Because of this, by the way, problems arise when connecting devices brought from America to wireless networks. They simply do not see Wi-Fi, which operates on the 12th or 13th channel.
As a rule, problems begin when two (or maybe more) Wi-Fi networks are connected to the same channel. If you live in a private house, then most likely there will be no other networks within the range of your Wi-Fi, and if there are, there will be few of them, and the signal will be weak. But in an apartment there can be a lot of networks. And they very often stand on the same channel. Why? I'll explain now. For example, you are setting up your router, and in the settings you select a static channel, let it be 6. Your neighbor is setting up a router and also installing channel 6.
By default, the router settings are set to automatic channel selection mode. This means that when the router turns on, it selects a free channel (or a less busy one) for itself. We reboot it, and it can already select another channel. I don’t know whether this thing works, but I think that even with automatic selection, several networks can be connected to 1 channel. Especially if there are a lot of networks. They simply have nowhere to go.
To be honest, I strongly support the idea of installing a static channel. I think that in auto mode everything should work well. If any problems arise, you can reboot the router and it will select another channel. And if you forcefully install, say, the 1st channel, which will be chosen by several people, then nothing good will come of it. There are programs that show which channel all available networks are on, we will look at them now.
I think this: if you have problems with the Internet via Wi-Fi, then simply reboot your router. Possible several times. If the problem persists, then set some kind of static channel in the settings of your router (try 1.6 and 11 first). Select any channel. And if it was static, then select auto mode. You can try changing several static channels. This should help. If nothing good comes from this, or you have a desire, then you can use the program inSSIDer , or WiFiInfoView to search for a free channel. But we must also not forget that problems can arise not only due to interference on the channel. For example, due to problems with the router’s power supply, interference from other devices, or failure of other components of the router.
Detailed video instructions
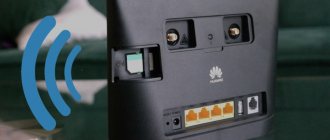
MGTS router
The provider firmware is installed on ONT SERCOM RV6699. It completely replaces the factory software, so some users may have difficulties setting up a wireless connection.
To answer the question of how to change the Wi-Fi frequency of a router, you need to:
- Open the wireless network settings section.
- Go to the “Basic Settings” tab.
- In the “Channel” parameter, instead of auto, select one of the numbers.
- Click on the “Save” button.
Netis
Netis set-top boxes have two different types of firmware. More often there are devices with a graphical and web interface adapted for ordinary users. In order to configure a radio channel in such software, click on Advanced.
Go to the Wireless section. Find the Channel item and set the desired value.
In another interface, you need to open the Wireless section settings.
Tenda
For modems from this company, all firmware versions have a similar design and are configured in the same way. An authorized user must go to Wi-Fi settings and perform the following steps:
- In the settings, select “Channel and Bandwidth”. A window will open with a selection of Wi-Fi parameters for the ranges supported by the router. You should find the radio channel of the desired number and save the settings.
- In another firmware version, go to the Wireless Settings section. A window with wireless connection settings will open.
Router Rostelecom
Find the "Setup" tab. Then go to “WLAN” – “Basic” . "Channel Number" is required . After making changes, click "Apply Changes" .
Quick setup
If you have any of the above applications, you can easily determine the optimal wireless network settings that will ensure high data transfer speeds and connection stability. Everything else remains purely a matter of technique - you need to access the router’s web client and select the necessary settings. If you cannot open the web client, it is better to contact a technician or perform a factory reset, returning to the parameters set by the linker. When using a router with firmware created by a specific provider, you should contact their technical support service to avoid serious errors. Having established a fixed communication frequency, do not forget to periodically check how busy it is so as not to encounter interference again.
Popular problems when changing channel
The most common problems users encounter are the following:
- when logging into the web interface of a Wi-Fi router;
- associated with login and password values.
If you have forgotten your credentials, a hardware restart of the router will solve the problem. This will return the router to its factory settings.
Thanks to simple actions with the router, you can understand how to change the channel to another and do it yourself for stable operation of your wi-fi modem.
conclusions
How to check the congestion of Wi-Fi channels and find a free one
If you change the communication channel to a less busy one, this will increase the speed and “fix” the stability of the Internet.
This problem often occurs in apartment buildings, since a large number of wireless equipment is located quite close to each other. As a result, the same communication channels are used.
Podgornov Ilya Vladimirovich All articles on our site are audited by a technical consultant. If you have any questions, you can always ask them on his page.