Synchronizing iPhone with iPad is needed to provide remote access to your files from any of the gadgets. In addition to convenience, this helps to increase the guarantee of data safety, be it contacts, music, videos, photos or text, and also save memory.
The article discusses algorithms for working with functions and services developed by Apple to synchronize its smartphones and tablets:
- iTunes;
- iCloud;
- AirDrop.
Once you understand these tools, you can easily set up data exchange between Apple gadgets.
Sync using iTunes
Using a computer is the most reliable way to synchronize. Connection is made using standard USB cables. All information is copied and transferred from smartphone to tablet as quickly and safely as possible. But it's not that simple. Without special software, it will not be possible to complete a full data exchange.
That's what iTunes is for. It allows you to backup all the contents of your iPad or iPhone. In addition, there is the possibility of selective file sharing. Below we will explain how to do this.
Creating a Backup
Syncing all iPhone and iPad content consists of four steps:
- It all starts with connecting a device to the computer, the contents of which are copied. Original USB cables are used for connection. iTunes then launches. After detecting the iPhone, which in this case is the original gadget, in the window that appears, you need to click on the “Device” button. It appears in the upper left corner.
- Next, go to the “Summary” tab. It's on the left sidebar. After that, select “Backups” and the next active area: “This PC”. To start a backup, click “Back up now.”
- After the copying procedure is completed, the source device is disconnected and the iPad is connected in its place.
- Then go to the “Summary” tab. From the “Backups” area, select “Restore backup”. In the window that appears, you need to find the file obtained as a result of the last copy and click the “Restore” button. That's it, the process has started. All that remains is to wait for it to finish and make sure that the information is synchronized.
Selective data synchronization
This method is used when you need to transfer not all, but only one or several files from one iOS device to another. Everything is also done in four stages:
- After launching iTunes, you need to go to the “Account” tab, and then click “Sign in”. To continue, you will need to enter the Apple ID you use when purchasing content for your devices.
- After moving from “Account” to “Authorization”, you need to click on “Authorize this computer”. And then connect the source device. As in the previous case, this is done using an Apple USB cable.
- To continue exchanging data, you need to open the "File" menu. Select the “Device” item and click “Transfer purchases from [device].” The file, such as a video, will begin downloading to your iTunes library.
- When copying is completed, the source gadget is disconnected and the target final iPad is connected in its place. In the iTunes menu, you need to find the “Summary” tab. After clicking on it, check the box in the “Manage music and videos manually” area. In the “Movies” tab there is a “Summary” section. From it, the required file is dragged to the “On my device” sector, located in the column on the left.
The considered synchronization options, despite their simplicity and efficiency, have a number of disadvantages. After all, it is not always possible to be near a computer with suitable wires for pairing. And why use or buy another device if everything can be done wirelessly with just an iPad and iPhone? Therefore, we move on to consider other synchronization methods.
Part 3: How to Connect iPhone to iPad via Cord
Compared to wireless communication, a physical connection provides faster and more stable data transfer. Using a special cord, you can physically connect your iPhone to your iPad.
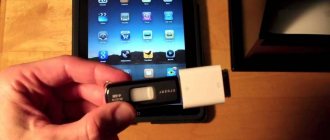
Step 1: Prepare a reversible Lightning cable. Visit Amazon or eBay and search for "USB Apple Lightning Camera Adapter." Better read the review and buy a quality product.
Step 2. Plug one end of the cord into your iPhone and the other end into your iPad device. Make sure the connection to the photo is the same.
Step 3: When the two devices detect each other, a warning message will appear on your iPhone asking whether to allow this device to access your phone. Click Allow to allow the connection.
Step 4: Turn on your iPad and you will see an Import button and content you can transfer to your iPhone. Select photos, videos, and other content and click "Import All" to save data from iPhone to iPad.
Sync using iCloud
The iCloud Internet service is, at its core, an online data storage created by Apple. Let's look at two options for synchronizing iPhone and iPad. The first involves the exchange of contacts, calendars, mail, photos, notes, etc. The second option is used to synchronize a used iPhone with an iPad whose memory is free. Please note that this requires a high-quality Wi-Fi network.
Exchange contacts, calendars, mail, photos, notes, reminders, etc.
Synchronizing information via iCloud takes place in three stages:
- In the settings of the original iPhone, select the “iCloud” menu. Then you mark the data that needs to be synchronized with the target device. This can be photos, mail, calendars, contacts, notes with reminders and other content. If your device is connected to Wi-Fi, your iPhone files will automatically sync with your iCloud account.
- The next step is to use the iPad, which is the ultimate gadget, to log into the account associated with the iPhone. To do this, you will need to enter the appropriate ID and password.
- Data syncs automatically, merging and making changes to apps installed on iPad. You just need to click the “Merge” button after the corresponding request appears on the screen.
Sync iPhone with unused iPad
This method is used to synchronize an existing iOS device with a new tablet from Apple. You can also use it for a used iPad, but you will have to reset its settings to factory settings. The algorithm of actions is as follows:
- In the Settings menu of the original iPhone, select iCloud. After that, find and click “Backup”. The next section will open where “iCloud Backup” and “Back Up Now” are enabled. The process of backing up all device data will begin.
- On the new iPad, through the Apps & Data menu, there is an option to Restore from iCloud Backup. In order for the copied files to reach the target device, you will need to enter the same ID and password with which you logged in from the iPhone.
- In the Internet service, the last saved backup copy is selected, which is synchronized with the iPad.
Part 1: How to Connect iPhone to iPad via Bluetooth
To connect an iPhone to an iPad using Bluetooth, you must place the two devices as close as possible.
Step 1: Unlock your iPhone and open the Settings app on your Home screen. Go to “Personal Hotspot” and set the “Personal Hotspot” switch to the “ON” position. Be sure to turn on Wi-Fi in settings. And click Bluetooth and toggle the slider.
Step 2: Turn on your iPad, go to Settings > Bluetooth and toggle the switch to ON. You can now see your iPhone name appearing under the Device section. Click it in the list to establish a connection.
Step 3: When you see "Connected" displayed next to your iPhone's name, it means the connection is successful; otherwise you can try several times. If prompted for a PIN, enter it on both iPad and iPhone and tap Pair to establish the connection.
Bluetooth is based on geographic location, so you must keep both devices close to each other while transferring files. Additionally, this method only allows you to transfer limited types of data and a small file between iPhone and iPad.
Sync using AirDrop
AirDrop technology developed by Apple is designed to transfer data from one device to another via Bluetooth and Wi-Fi. To transfer files you need:
- Enable “Wi-Fi” and “Bluetooth” in “Control Center” on both paired devices. Then activate the AirDrop function. When the request appears, Fr.
- In the original iPhone, you need to select the data that is supposed to be synchronized. After they are marked, the “Share” button is pressed. In the AirDrop list that opens, select the destination iPad.
- On the target device, the Accept pop-up dialog is clicked. The files obtained in this way are saved in the corresponding applications.
Please note that AirDrop is only available for iPhone 5 and later models. The technology became available on the iPad starting with version 4.
Attention! After AirDrop is completed, you need to immediately disable this feature. This is required to ensure the safety of the device and prevent unauthorized interference in its operation.
Part 4: Best Way to Connect iPhone to iPad
To be honest, there are a lot of cons to connecting iPhone to iPad without a computer. Bluetooth, for example, is unreliable and unable to transfer large files. Why not use your computer as a storage medium to transfer files from iPhone to iPad? From now on we recommend iPhone Transfer. Its main functions are:
iPhone Transfer
- Connect iPhone to iPad, Mac, and Windows PC.
- Support for a wider range of date types such as contacts, messages, photos, call history, PDF, music and more.
- Use a physical connection to quickly transfer data from iPhone to iPad.
- Maintain original quality and format when saving files between iPhone and iPad.
- Compatible with iPhone X/8/7/6/6S/SE/5/5s/4, iPad Pro/Air/Mini and earlier and iPod Touch.
- Available for Windows 10 / 8 / 8.1 / 7 / XP and Mac OS.
In short, this is the easiest way to connect iPhone to iPad.
How to quickly and efficiently connect iPhone to iPad
Step 1. Install the best iPhone to iPad connector on computer
Download and install iPhone Transfer on your computer. There is one version for Windows and Mac respectively. Connect your iPhone and iPad to your computer using Lightning cables.
Step 2. Preview iPhone data before transfer
Launch iOS transfer, select the name of the original iPhone on the left side, and then click the types of data you want to transfer, such as Music, Photos, iBooks and others. You can now view all data and files in the right detail pane. Check the box before each file to transfer.
Step 3. Transfer Files from iPhone to iPad
If you're ready, expand the Export to menu on the top ribbon and select Export to [target device name] to begin transferring your selected files from iPhone to iPad. iOS transfer software can save files to corresponding apps on iPad. Once this is done, remove both devices from your computer and you will be able to view iPhone data on iPad.
Conclusion
Today, many people are multi-device users who have more than one digital device. And iPhone users are more likely to have an iPad as a second screen. This makes connecting iPhone to iPad a necessary skill. On the other hand, you may need to share photos from your iPhone to a friend's iPad. Anyway, we have shared several ways to help you connect iPhone to iPad and transfer files. If you are demanding about speed and security, you'd better try iPhone Transfer, one of the best programs to connect iPhone to iPad.
All about sharing iPhone and iPad
Do you have several Apple devices in your family and are you having trouble syncing them with iTunes? Or, on the contrary, do you have only one iPhone or iPad, which is actively used from time to time by children who constantly try to get into places they don’t need? In this extensive article, we have talked about how to properly share iPhone and iPad in both cases.
How to Sync Two or More iPhones with One iTunes
Many families have only one computer, but two or more Apple mobile devices. In such cases, there is often a problem with synchronizing and creating backup copies of iPhone and iPad. After all, there is only one iTunes and it offers the same content to download to each device, while family members only need their specific songs, movies, etc.
However, Apple foresaw this situation and allowed it to work with several devices (up to five) under one iTunes in a convenient, albeit not the most obvious, way.
So, in order to create a second (and each subsequent) iTunes library for a specific device, you need to perform the following operation.
Step 1: Hold down the Shift and launch iTunes.
Step 2. In the window that opens, click “ Create a media library ”.
Step 3. Specify the folder where the media library will be stored, give it a name and click “ Save ”.
A media library created just for your device! In order to select it in the future, you will also have to launch iTunes while holding down the Shift key, but click “Select Library” and specify the iTunes Library file from the folder with it.
In order not to get confused in media libraries, especially if there are more than two of them, it is recommended to call them by meaningful names when creating them. For example, “iPhone Lena”, “iPad daughter”, etc.
What is the main advantage of using iTunes this way? When you work with a library created exclusively for your device, you can freely move any content to your iPhone or iPad, delete it, change data, and perform other actions without any worries. Other media libraries, such as your wife's iPhone, will not be affected by the changes you make. This allows you to get rid of many unpleasant problems.
How to avoid the main problem when syncing multiple devices with one iTunes
It is very important to give iPhones and iPads that connect to the same iTunes different names. Otherwise, the same combined contact books will be synchronized to the devices - this is the main problem when working together with one iTunes.
Changing the device name is very simple:
Step 1: On your iPhone or iPad, go to Settings → General → About This Device .
Step 2: At the very top of the page, select “ Device Name ”.
Step 3. On the screen that opens, enter the name of your iPhone or iPad and click “ Done ”.
Note that if for some reason there is no “Device Name” item on your iPhone or iPad, you can change the name directly in iTunes. To do this, connect your device to iTunes and click on the current name in the upper left corner of the program window to change.
How to work with multiple Apple IDs in one iTunes
The Apple ID account under which you are logged into iTunes does not change when you change your library. This means that apps (songs, movies, etc.) that are downloaded or purchased on your personal Apple ID account will not be available in iTunes if it is authorized under the Apple ID of one of your household members.
In order to be able to work with content located on your Apple ID, you need to log in to your iTunes account. For this:
Step 1. Select the menu item “ Account ” → “ Sign Out ” to sign out of the Apple ID account under which you are authorized.
Step 2: Click " Account " → " Login ".
Step 3. Sign in using your Apple ID username and password.
After a short download, your personalized content will appear in iTunes.
How to set up Family Sharing on iPhone and iPad
Another great feature for families that actively use multiple Apple devices is Family Sharing. The function allows you to:
- Merge and share purchases from the App Store, iTunes Store, and iBooks Store.
- Share a family subscription to Apple Music.
- Share photos and videos in a family album.
- Locate family members on the map.
Each of the Family Sharing features is extremely useful. Thanks to the feature, you can start spending less money on apps while sharing them across multiple devices without having to change your Apple ID account, share your best photos and videos with your family, and, of course, always stay in the know about where they are. your loved ones and are they safe?
There are no difficulties in setting up Family Sharing. Initially, you must enable the function on the device of the head of the family.
Step 1: Go to Settings → iCloud and click Set Up Family Sharing .
Step 2: Review the feature introduction on the next three screens.
Step 3: On the Payment Method , confirm to use your default payment method. If your account does not have it selected, then go to the “ iTunes Store and App Store ” menu → “ Apple ID: [your_Apple_ID] ” → “ View Apple ID ” → “ Payment information ” and add one of the payment methods.
Step 4: Choose whether you want to share location data with family members by selecting “ Share Location ” or “ Not Now .”
Step 5. Family Sharing is enabled! Click “ Add Family Member ” and enter the email address that is the Apple ID login of one of your family members. Send multiple invitations if necessary. Please note that Family Sharing supports up to six members.
This is how Family Sharing is activated in a simple way. Your family member will only have to accept the invitation in the “ Settings ” → iCloud → “ Invitations”
” and you can start using shared purchases and sharing other various content in the most convenient way.
What restrictions can you set for children on iPhone and iPad?
iPhone and iPad are recognized as the best mobile devices for children. Not only because the App Store offers much more high-quality games and educational applications than Google Play, but also because parents can very flexibly set up the parental control system and protect their children from various bad content.
What is iCloud Photo Streaming?
If we are in the Apple ecosystem with various devices of the company such as iPhone and Mac, we always want all the files to be everywhere. In the specific case of photos, the Photos application allows us to create new local photos in the cloud to have them on any computer. All streaming photos can be viewed on Mac, iPhone, iPad, iPod Touch, Windows PC and even Apple TV.
Unlike iCloud Photos, this streaming feature does not take up your iCloud storage space . Photos and videos from the last 30 days are simply downloaded with a maximum of 1000 videos. The only problem we can find is that the changes we made are not updated on all devices. Also only JPEG, PNG, TIFF and RAW formats are supported.
Correct synchronization of iPhone and iPad
Now the trend in the world is such that every person has more and more different devices and gadgets that he regularly uses. Almost each of us has a laptop, smartphone and tablet at home, on which various programs are installed and all kinds of data are stored. This is not always convenient, because often you want to be able to work with any information, regardless of what gadget is in your hands. This problem is solved by synchronizing devices with each other. Among other companies, Apple has become the most successful in solving this problem. Therefore, in this article we will take a closer look at how to synchronize iPhone with iPad. Let's figure it out. Go!
Import to Mac
You can use the Photos app to import photos from your iPhone, iPad, or iPod touch to your Mac without using iCloud Photos. These steps can also be used to import images from digital cameras or SD cards.
- Make sure your Mac is using the latest version of iTunes. To import photos to your Mac, you need iTunes 12.5.1 or later.
- Connect your iPhone, iPad, iPod touch, or digital camera to your Mac using a USB cable. If you're using an SD card, insert it into your Mac's SD slot or connect it using an SD card reader.
- This may require you to unlock your iOS device using a passcode. Your iOS device may also display a "Trust this computer" warning. Click “Trust” to continue.
- On your Mac, Photos will open automatically. Otherwise, open the Photos app.
- The Photos app opens to the Import screen, displaying all the photos and videos on your connected device. If the Import screen doesn't open automatically, tap the Import tab at the top of the Photos app, or tap the device name in the sidebar.
- To import part of your photo library, click the photos you want, then click Import Selected. To import all new photos, click "Import all new photos."
- You can then disconnect your device from your Mac. If you imported photos from an SD card or other USB device, first safely remove the device.
In macOS High Sierra or later, imported photos appear in the Import album in Photos. If you're using an earlier version of macOS, you'll find them in the Recent Imports album.
Photos and videos synced from your computer to your iPhone, iPad, or iPod touch through iTunes cannot be imported back to your computer.
Collaboration
Let's start right away by discussing the iPad using a wired connection. In order to synchronize between these two devices, you will definitely need to use iTunes. To work with iPad, you must install version 9.1 or newer. If you need to connect one of the above devices to a personal computer, then you must follow all the instructions that the program will provide. But many users may have problems setting up iTunes to work together between two devices. If you process these devices one by one, then all the files will be combined into a single whole. When you decide to synchronize your iPhone with your iPad one at a time and want to delete one of the materials, then erasing will happen on two gadgets at once. Naturally, the problem can be solved quickly, but not many people know how to do it.