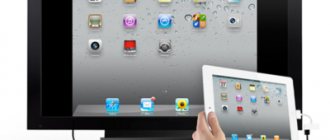
Users often ask how to connect a TV to a Windows 10 and 7 computer via hdmi in order to use a large screen as a second (or main) monitor.
The connection process itself is very simple, but to implement it you need to choose the right type of cable, as well as make a number of settings to correctly display the picture on the TV receiver display.
Why HDMI
Compared to wireless connection methods, HDMI has one drawback - convenience, or rather, the lack thereof. What does this mean? Firstly, when pairing devices, the cable will dangle under the user’s feet. Secondly, the length of the wire is always limited, and therefore the PC and TV receiver must be located in close proximity.
However, if these disadvantages do not play a serious role for you, then you will find a lot of advantages in a wired connection, and you will choose only it because:
- a wired signal is much more reliable compared to Wi-Fi;
- sound is transmitted along with the picture;
- There is an HDMI connector on almost every TV, but SmartTVs with support for a Wi-Fi module are much less common.
Thus, it is not surprising that this type of pairing of two devices is chosen by users. But, despite its apparent simplicity, connecting via HDMI has a number of nuances that need to be taken into account before setting up.
Adding other DLNA-compatible devices to your home network
By setting up a DLNA server on your PC, you can connect other devices to your wi-fi router. Connecting to your home network, possibly via a wireless connection or via cable.
Laptop or other PC
To add a laptop to your home network, you need to configure its connection to the router. In the case of a wired connection, it is enough to connect the LAN connectors of it and the router. When connecting wirelessly, you need to pay attention to the bottom right corner of the monitor. There you will find an icon in the form of gray sticks of different heights.
The icon on the panel indicates that the laptop is currently disconnected from the Wi-Fi network
By clicking on it, you will go to the network connection settings menu; all networks with connection capabilities are displayed here. Select the desired network, click the mouse.
On the “Sharing Center” tab, connect the desired wi-fi network
If the network does not have a password, the connection will occur automatically. Otherwise, a window will pop up in which you must enter a password.
Enter your home network password and click “Done.”
Video: how to connect a laptop to a wi-fi network
Before you can transfer media content to other devices, you need to configure the media server.
To add a laptop to your home network you need:
- Go to the “Start” menu, then “Control Panel” and go to the “HomeGroup” tab.
- If a home group has already been created on one of the devices, the system will prompt you to join it, click “Join”.
To connect the device you need to click the join button
To connect to a homegroup you need to enter a password
Media player
To integrate a media player into your home network, simply connect it to your router. The player automatically connects found DLNA resources. It is enough to open shared access to folders for homegroup devices on the device acting as a media server.
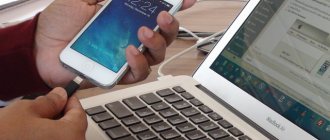
How to connect a laptop to a TV
Displaying a computer screen on a TV is a simple, but at the same time very interesting process.
To avoid any difficulties when connecting, follow the instructions strictly:
- Check the availability of appropriate connectors on the devices.
- Start the computer and also turn on the TV receiver.
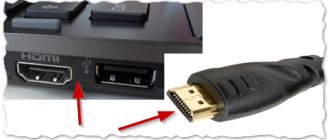
- Insert one part of the cable into the HDMI connector of the computer, and the other into the TV.
- After a cable connection, you will not notice any changes on the TV receiver screen. We need to switch the image source. To do this, press the “Source” button on the remote control, or independently find the “Source” menu item in the settings.
- Select the enabled HDMI port as the source.
On a note. If you have an old TV, you can still connect your PC to it via HDMI. But you will additionally need an adapter with RCA (“tulips”). The same goes for computers that only have a VGA connector.
In general, once the connection is complete, you can start working. The desktop image will be projected onto the TV screen, and control will be carried out in the same way as before, that is, through the keyboard and mouse (touchpad). If necessary, you can use additional settings, which will be discussed below.
Equipment for building a home network with DLNA
To create a DLNA network, you will need a computer or laptop with a media server configured on it. Using a wired or wireless Wi-Fi connection, it connects to a router, which, in turn, distributes a signal to other devices.
DLNA network turns your home into a media center
Such devices can be: TVs, laptops, tablets, phones, stereo systems. If you don’t have a router, you can configure signal distribution directly from your computer, but in this case you will need a Wi-Fi adapter for your computer. The principle of building a DLNA home network is similar to the Internet.
In the end you will need:
- computer or laptop;
- Wi-Fi router or adapter;
- at least one other device that supports DLNA.
It is better to connect the TV to the computer via a cable connection. Wireless communication is convenient and modern, but when viewing powerful media content files, streaming data may be lost and, as a result, the TV may malfunction.
Further customization
After connecting your computer to the TV via an HDMI cable, you can adjust the image. To do this, hold down the “Win” + “P” keys on the keyboard. An interface will appear on the right side of the screen, prompting you to choose one of four options for displaying the image:
- Only the computer screen. The picture will be exclusively on the monitor, but not on the TV.
- Repetitive. The computer desktop will be duplicated on the TV receiver.
- Expand. The TV will act as additional space to display content.
- Only the second screen. The image will be shown exclusively on the TV screen, but not on the PC.
Depending on your own needs, choose the appropriate option. And if for some reason the hotkeys do not open the desired interface, follow other instructions:
- Right-click on a free area of the desktop.
- Go to Display Settings.
- Under the Multiple Displays heading, select how you want to display the image based on the options outlined earlier.
- A little higher you can change the resolution or orientation of the display.
As you can see, the basic parameters are more than enough to properly configure the pairing of a PC with a TV. In addition, you can adjust the sound through the corresponding “Options” item.
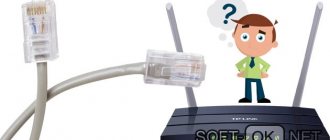
What cable is needed to connect devices?
As mentioned at the beginning of the article, a separate bus in the HDMI cable is responsible for CEC. However, not all interface specifications support Consumer Electronics Control. CEC bus support starts with HDMI 1.4.
Note that to use the technology you do not need to buy a special “sophisticated” cable. This is a standard feature included in the interface by default. It is enough to purchase products from a trusted manufacturer. However, this advice is relevant for the selection of all cables.
Important: It is advisable not to use Standard With Ethernet and High Speed With Ethernet cables. In these varieties, the 13th pin is occupied not by CEC, but by one of the buses responsible for accessing the Internet. All other types of cable can be safely used. This includes adapters that are used to connect a Windows computer or monitor to Android devices.
Possible problems and methods for solving them
Unfortunately, users are not always able to set up the correct connection and image output to the TV the first time. Many people face problems that, however, can always be solved. If you encounter any difficulties, please refer to the recommendations below.
No picture on TV
The most common problem that users complain about. If you think that your computer does not connect to the TV because there is no image on the TV screen, proceed in accordance with the algorithm:
- Check the integrity of the cable and its compatibility with other devices. It is possible that the wire was simply damaged and needs to be replaced with another HDMI.
- Make sure that the correct HDMI connector is selected as the source in the TV settings.
- Also check the image settings on your computer by holding down the “Win” + “P” keys. In the menu that opens, you need to select the most suitable display option.
Be careful when performing any manipulations related to image adjustment, and also do not forget about caring for the wire. Even the slightest damage can result in no pairing.
No sound on TV
HDMI transmits not only the picture, but also the sound. If it is missing, do the following:
- Right-click on the speaker icon in the taskbar.
- Select Playback Devices.
- In the “Playback” tab, right-click on the name of your TV.
- Click on the "Set as default" button.
Sound should now be output from the TV receiver's speakers. If this does not happen, then it would be a good idea to check the integrity of the cable. In rare cases, damage to it will affect both the picture and sound.
The selected resolution is beyond the scope of the TV
If you feel that the image on your TV screen is not displayed correctly, please refer to the instructions:
- Switch your TV to standard viewing mode. Sometimes Kino expands the picture.
- By holding down the “Win” + “P” keys on your computer, make sure that the image is duplicated and not supplemented.
- Open your display settings in Settings and set the resolution to match your TV's resolution.
After this, the problem should be resolved. Remember that the correct display depends on the settings, and only in them you need to look for the key to troubleshooting.
Using DLNA on Android OS
To use your Android device, you first need to connect it to your router:
- To do this, go into the settings and switch the wi-fi connection slider to the “on” position.
When the wi-fi function is turned on, the slider is in the “on” position
In the Wi-Fi settings of your Android OS device, select the desired network
In the wi-fi settings you can see information about the network to which the Android device is connected
Devices running Android OS have great functionality; with their help, you can not only view files with media content, but also allow you to transfer them to other devices. On the Play Market you can download a program that will significantly expand the capabilities of your smartphone or tablet. It's called DLNA server.
Download the program and install it on your phone, then follow these steps:
- Go to the program and click “Add > DLNA Server”, this way you create a DLNA server.
The program will help you create a server on an Android device
In the Server Name item you need to specify a name for the server
On the “Roots” tab of an Android device, you can designate a folder with content for viewing
To start the media server on Android OS you need to click the “Start” button
By going to the TV menu you will find a new media server created on an Android device