Very often, users of Android OS devices encounter problems associated with unstable operation of smartphone/tablet sensors. For example, when you receive a call and you hold the device to your ear, the display does not lock and you accidentally press the call reset button. Or the opposite situation, when after a conversation the screen does not want to light up. This particular problem is caused by the proximity sensor not working properly.
In this article, we will tell users how to calibrate any device sensor and make it work normally.
In order not to deviate from the above, first of all we will consider setting up the proximity sensor. All manipulations will be performed on a device running Android 5.0.2, so there may be slight differences in instructions for different versions.
Calibration of proximity and lighting sensors
The first thing you need to do is get into the engineering menu of your device. To do this, we use a special program, for example, “Launch the MTK Engineering Menu”, which you can download from the specified link
1. Download, install and launch the application.
2. After launch, switch to the tab called “Hardware Testing”
By moving your hand over the sensor you can see how the PS value changes from small to large values. As the hand approaches, it should increase and vice versa. In addition, this value should change depending on the incidence of light on the sensor. If this happens, the sensor does not need calibration.
If it does not react at all, then place the smartphone on a horizontal surface and press the Do calibration button. After this, the message Calibration success will appear. The sensor should now work stably. If this does not happen, move on to the next method.
We will use a third party program "Proximity Sensor: Reset" which you can download here
• Download, install and run “Proximity Sensor: Reset”.
• Click on the huge “Calibrate Sensor” button.
• Then remove your hand from the sensor and press Next again.
• After that, press the red “Calibrate” button and confirm the action by pressing the “Confirm” button. • Then you will be asked to grant root rights to this program. We allow it and after a few seconds the device will reboot.
That's all. If after all these manipulations the proximity sensor continues to be “dull,” then there is only one option left: take the smartphone to a service center, because we cannot do anything else ourselves.
Many users often encounter the following problem: when they tap on the screen, it either does not respond or perceives the touch in the “wrong place”. To deal with this problem, you need to calibrate the screen.
We will use a third party Touchscreen Calibration program, which you can download from here
1. Download, install and launch the above application.
2. Press the blue “Calibrate” button.
4. After a single click, you will need to make a double tap.
5. Then we will be required to make a long press.
We use another popular program Display Calibration, which can be found at the specified link
• Download, install and launch Display Calibration.
• Press the big blue “Calibrate” button.
You can find many similar programs on the Internet that work on the same principle, so you shouldn’t have any problems with mastering them.
Accelerometer calibration (Gsensor)
We need an accelerometer to perform a number of important functions: it is responsible for the orientation of the device in space, it is used by many applications, etc. Thanks to this, we (gamers) can enjoy those games that use this feature. Most often it is, of course, racing. And if Gsensor is “dull”, then this will certainly upset us. However, let's leave this lyrical digression aside and get down to business.
How to turn on the proximity sensor
Before you enable the proximity sensor on your Android device, it is important to find this option in the settings of your mobile device. On equipment of different brands it is placed in different places.
Usually you need to open "System Applications" and go to the "Phone" .
Here you should select the “Incoming calls” and move the slider opposite the line with the module name to the working position (or set the checkbox).
Other reasons
If the previous methods did not have the desired effect, then replacing the screen with a low-quality one may be the reason. Unfortunately, screen modules for xiaomi phones come with a light sensor. If you have already had your screen replaced at a service center, then it is quite possible that, contrary to all the technician’s beliefs, you were simply given a low-quality screen with a bad sensor. If your smartphone does not work correctly from the very beginning of the purchase, then the reason may be a simple defect. We advise you to contact the seller for further instructions.
Remember, all actions are advisory in nature, you perform all actions at your own peril and risk.
We hope these tips helped you, be sure to write in the comments whether this article helped you and what advice helped you.
How to configure (calibrate) the proximity sensor
In cases where the module does not work correctly (the display does not turn off when approaching a person’s head or goes out when moving away from it), it will need to be adjusted. To do this, it is important to know how to calibrate the proximity sensor on Android. This problem can be solved using built-in system tools, through the engineering menu, or through third-party utilities.
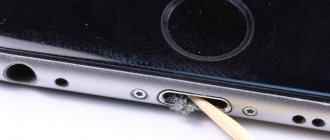
Before you begin calibration, you need to find the module on the smartphone body. Most often it is located at the top of the display, near the front camera. To find it, when making a call, move the mobile device away from your ear so that the screen lights up, and then move your finger to the selfie camera and swipe left or right from it. If the display turns off, it means that the required node is located in this location.
In some cases, the functionality of the module is impaired due to dust. To fix such a breakdown, just turn off the gadget and thoroughly blow and wipe the area around the element. Next, you should restart the device and check its functionality. If the problem persists, you should proceed with calibration.
System capabilities
Built-in services are the easiest way to perform calibration. To do this, you need to go to the settings of your smartphone and select this option “Display” or “Accessibility” Next, you will need to follow the system prompts during the operation.
First you need to remove all objects located in front of the sensor, and then activate the setting. After this, you need to place a sheet of paper a few centimeters opposite the element, and then successively move it closer to the module and away from it. If the screen goes out and lights up again during these steps, it means the calibration was done correctly.
Engineering menu
The module can be diagnosed and, if necessary, adjusted through the engineering menu. To do this you need:
Select number entry and enter *#*#3646633#*#* or *#*#6484#*#* .
- Go to testing components ( “Hardware Testing” ), open the “Sensor” , then “Light/Proximity Sensor” (light and proximity sensor).
- To perform testing, collect module information ( “PS Data Collection” ).
- Click “Get One Data” when “0” lights up on the screen, bring your palm closer to the element and click “Get One Data” .
- “255” appears on the screen , the module is working.
- To configure, you need to select “PS Calibration” , then “Calibration” .
- Click “Calculate min value” , and the module should be open.
- “Calculate succeed” on the screen , move the paper sheet a couple of centimeters closer to the screen and click “Calculate Max Value” , and then “Do Calibration” .
After these steps, you need to restart your mobile device.
Third Party Application
Another convenient way to calibrate the module is to use the free third-party application “Proximity Sensor. Reset" . You can download it on Google Play.
After downloading and installation, you need to run the utility and perform the following steps:
- Click “Calibrate Sensor” .
- Close the sensor and click “Next” .
- Open the module and go to the next step.
- Click “Calibrate” , then “Confirm” .
- Click "Allow" so that the application can use root rights on the phone.
- Wait for the device to reboot and check how it functions.
For the proximity sensor to work properly, it must be included in the phone menu and, if such a need arises, calibration must be done using the system’s built-in tools, through the engineering menu or using third-party applications. If these steps do not bring results and the module still does not work correctly, this indicates a malfunction. You can find out how to fix the breakdown in an article dedicated to this topic.
Owners of Meizu smartphones are faced with a situation where the screen is activated while talking on the phone. Calibrating the Meizu proximity sensor helps solve the problem. Before starting the procedure, you should familiarize yourself with what the sensor is and why the display leaves the lock mode.
Using Applications
Unlike described above, this method is suitable even if you are not an experienced user. Using third-party utilities will greatly simplify the calibration process. In the official Google Play store you can find specialized software, for example, a good option would be “Proximity sensor:
- Open the program on your smartphone.
- Click “Calibrate Sensor”.
- Cover the sensor with your hand or some object and click “Next”.
- Remove your hand or object from the sensor and click “Next” again.
- Click “Calibrate” and “Confirm”.
- We grant root rights to the request and reboot.
Calibration manually or via software helps only in case of software failures; in other situations, when we are talking about mechanical damage to the element, the adjustment is ineffective in solving the problem. You can also try resetting the device to its original settings or take extreme measures by resolving the issue by flashing it (often “left-handed” firmware does not properly support all the functionality of the device and this may be the problem).
To troubleshoot hardware problems, you will have to take your smartphone to a service center, but before going, it is better to check whether the sensor is dirty. It may not work correctly for this reason, as well as if low-quality film or glass is glued to the phone, so you should first exclude these factors.
What is a calibration sensor
There is a proximity sensor near the speaker on the front of the smartphone. The miniature element consists of an infrared detector and an LED. When you bring the phone to your ear, it locks the display; after finishing the call and taking the smartphone away, it unlocks.
This is done so that during a conversation a person does not press the sensor with his ear. The device reacts to an object approaching the phone using infrared radiation. The sensor calculates the distance from the object to the gadget and turns off or starts the display.
Samsung Galaxy S20:
This is the most basic S20 model in the range. It will feature a 6.2-inch OLED display. The resolution of this smartphone is Quad HD. The three cameras on the back will be 12MP + 64MP + 12MP while the camera on the front will be 10MP. It will be powered by Exynos 990 processor. The phone will have 8GB or 12GB RAM, depending on the variant you buy. It will have 128GB of internal storage. The battery will be 4000 mAh, which is not bad. It has an IP68 waterproof rating. An additional 5G variant will also be available. The phone will cost from $1,349.
What is the error in his work?
There may be several reasons for incorrect operation:
- in the Meizu Global or Mini settings the sensor is disabled;
- after the fall, the device has changed position and is not level;
- there is no seal, a small part is lost after removing the screen;
- the device is damaged or burnt out;
- the device may temporarily stop working correctly due to a failure in the firmware or bootloader;
- incorrect installation during repair.
Meizu proximity sensor calibration error may appear due to dirt on the display. It is also recommended to remove the protective accessory and try to make a call without it. In the Android settings you should check whether the element is enabled. If the situation has not changed, you can proceed to calibration.
Advantages and disadvantages
Despite the obvious benefits of Proximity Sensor, the hardware component of a smartphone often causes trouble. Therefore, along with the advantages of the sensor, it is important to highlight its disadvantages.
| pros | Minuses |
| Preventing accidental clicks | Recognition of heat-conducting objects only |
| Durability | Can be triggered not only during calls |
| Low price | Sub-screen sensors are unstable |
| Stealth |
Thus, although Proximity Sensor helps the user, in some scenarios it becomes unnecessary. This is especially true for the sensor installed in a frameless smartphone. The manufacturer has to place it under the screen, which reduces sensitivity, and sometimes the display does not go off when making a call. Users also complain about false alarms of a hardware component when listening to voice messages in instant messengers, which also causes a lot of inconvenience.
ProxLight Override Call Service
The application is called "Proximity/Light Limiting - Call Service", which can also be downloaded from the Play Market. After opening the utility, you need to do the following:
- Click on the center button.
- The application will go to the settings section.
In the program settings you can use the following functions:
- 1 (activate immediately after system boot)
- 2 (download if the function is always active)
- 3 (activate proximity light function)
- 4 (change the parameters of the lighting option).
If none of these methods help, the problem lies in mechanical damage to the device.
Samsung Galaxy S20 Ultra:
This is the best and most powerful option in the S20 series. It will feature a 6.9-inch OLED display. The resolution will be the same - Quad HD. But there is a huge difference in the rear cameras. The rear cameras will be 108MP + 48MP + 12MP + ToF. If you are interested in the front camera, then it will have a 40MP camera. The phone will only be powered by Exynos 990 processor. You will have two RAM options - 12GB and 16GB. Internal memory will again be available in two variants - 128 GB and 512 GB. If you think about the battery, it is increased again to 5000 mAh, which means that your device will last longer than usual. The phone is IP68 waterproof. It will be 5G only and will start at $1,999.
All three smartphones have great features and that is why they are so expensive. It's hard to determine whether it's worth paying nearly $1,999 for a smartphone or not, but one thing is for sure: the quality you'll get will be high.