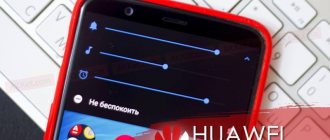
What to do if the screen goes blank during a call
Having problems with the screen on your Android phone? Every time you call someone or answer an incoming call, the phone screen goes dark and it is locked until the call ends. If this situation occurs on your phone, then the proximity sensor, which is responsible for automatically backlighting and turning off the screen during a call, is probably faulty.
Software errors and mechanical failures
The proximity sensor could fail as a result of software errors. The Android operating system is further optimized by the manufacturer for its devices. The company rolls its own shell onto devices, and errors made in the code can lead to disruption of the functioning of smartphone components.
What should I do if the proximity sensor stops working after updating or flashing? There is only one way to solve the problem - reinstalling the operating system. It is necessary to select a proven version of the OS in which all components of the smartphone work stably.
If you have any questions or complaints, please let us know
Ask a Question
Important! It is not recommended to perform flashing yourself. Inexperienced users can make mistakes that will lead to serious problems with the smartphone, including its complete breakdown. It is better to trust such a procedure to specialists, especially if you do not have practical and theoretical knowledge of reinstalling the Android OS.
Has the proximity sensor stopped working? The most common reason is the breakdown of this component. It can also fail during operation and needs to be subsequently replaced.
What is a proximity sensor and how does it work on Android?
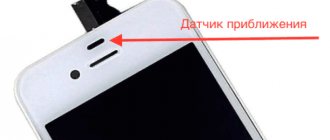
The proximity sensor has several functions, but its main task is to automatically turn off and light up the screen during a call. This happens by detecting when the phone is near your face. The detection is possible thanks to the proximity sensor located above the screen, which recognizes at what distance the object is located (in this case, our face).
When you bring the phone to your ear, the sensor detects a nearby object and the screen turns off so as not to drain the battery and prevent accidental disconnection during a call. In turn, when you move the phone away from your ear, the screen backlight turns on so that you can end the call or use other functions (remove the keyboard, switch the conversation to speakerphone, etc.).
When the proximity sensor is damaged, the mechanism described above does not work; the phone cannot determine what is near the face at that moment. A problem with the proximity sensor usually manifests itself when the screen immediately goes dark during a call and only lights up after it ends. Or it doesn’t go out at all, even when we bring it closer to our face during communication. It’s just that the sensor is fixated on one position and all the time it either detects something nearby or doesn’t do it at all.
Calibration via the engineering menu
If you have experience, the user can calibrate the proximity sensor on Android using the service menu, designed for testing the system and assigning parameters by developers.
When working with Engineering Mode, you need to be careful, since making adjustments to the functionality of the device will affect its operation, and incorrect settings will have consequences.
More about Huawei: How to record a telephone conversation on Huawei Y5 2019 with Android 12, 11, 10.
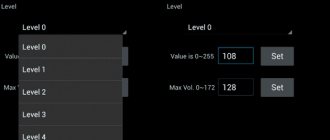
To enter the engineering menu, use the USSD request entered in the dialing field. Character combinations may differ for different models. To manually perform the calibration procedure, follow these steps:
- We dial the command *#*#3646633#*#* on the telephone number dialing panel (other examples of commands for popular mobile device manufacturers can be found in the table below).
- We follow the path “Hardware Testing” – “Sensor” – “Light/Proximity Sensor”.
- Next, click “PS Calibration” – “Calibration” – “Calculate min value”.
- When the message “Calculate succeed” appears at the bottom, bring the object closer to the sensor and click “Calculate max value”.
- Now click “Do calibration”.
- Reboot to apply the changes.
Table with commands for popular device brands.
Causes of problems with the proximity sensor
Sensor malfunctions can occur either due to software failures or due to purely mechanical damage. If the problem is software related, you can often fix it yourself, for example, by recalibrating the sensor, using a factory reset, or reinstalling the Android firmware.
But if the malfunction occurred, for example, as a result of the phone falling, then mechanical damage to the sensor probably occurred. It often occurs when the cord comes to the point of peeling off the upper part of the case from the base of the phone (especially in Sony Xperia devices). This can be detected when the proximity sensor starts working when you tap on the top of the screen.
Of course, if purely mechanical breakdowns occur, it is better to contact a service center, since the solution is to replace the sensor or repair the upper part of the housing. But, if we are talking about software errors, then you can try to fix it yourself. See what needs to be done before calling the service center. There are several solutions that allow you to fix the problem without repairing the proximity sensor.
Advantages and disadvantages of recognition technology
The following advantages of the recognition sensor are highlighted:
- High degree of sensitivity.
- Quite a large detection area.
- Relative accessibility in terms of cost, because Sensors are produced from cheap components - films of tin oxides, copper, printing ink, indium and an external wire sensor.
- Versatility of design.
- Small size.
- Possibility of functioning with the use of different non-conductive coatings, for example, glasses of different thicknesses.
- Temperature stability.
- High reliability and durability.
This method has certain disadvantages:
- The sensing element must be conductive for proximity to be detected. For example, it will not be able to detect a hand wearing a rubber glove.
- Being near a conductive object can cause the system to recalculate the parasitic capacitance to take into account the change caused by this object. Because of this, false alarms often appear in the future, but this trouble can be eliminated by calibrating the proximity sensor.
- The capacitive sensing method works in such a way that when metal objects are within its operating range, the range itself is reduced.
Read Google Play Market is not working today - reasons and what to do
Method 1: Remove the case, protective film or tempered glass
Often the source of the problem is accessories for smartphones, which, through their design features, obscure the sensor and cause an erroneous determination of the distance to the object.
If the device is packaged in a case or some other shell, the sensor sometimes does not work well. Remove it and check if this solves the problem with the proximity sensor. Make a call and check if the screen goes blank after starting a call.
Very often the cause is also tempered glass, which is glued to the entire screen. Good tempered glass won't harm your phone, but online auctions and local GSM stores sell tons of cheap, questionable accessories that can interfere with the sensor.
Peeling off the tempered glass can help restore proper sensor operation.
How to remove screen magnification on a computer?
You can resize only a specific page while maintaining the size of other elements on the screen.
- To zoom in, press Ctrl + Plus ( ).
- To zoom out, press Ctrl + Minus ( ).
- To reset the page zoom, press Ctrl + 0.
Interesting materials:
Who invented Arabic numerals? Where is Ararat? What is artichoke and what is its use? When did Assyria exist? Atlantis what is it? Atoris what is it? What is acetylcysteine? What is workplace certification? What is audit? Wifi authentication what is it and how to fix it?
Method 2: Recalibrate the proximity sensor
Sometimes the source of the problem is an update to the Android version, which for some reason leads to misalignment of the proximity sensor. How to calibrate the sensor? For calibration, you can use the free Proximity Sensor Reset/Repair application, with which you can recalibrate the sensor on Android.
Launch the application, then click “Calibrate sensor” and wait for the wizard to launch, which will go through the calibration process step by step.
The first step is to cover the top of the screen with your palm to cover the proximity sensor and allow it to detect that there is an object nearby. In the second step, you need to open the sensor - remove your hand and wait 2 seconds until it detects the distance from the object.
Finally, you need to confirm the new calibration, which will reboot the phone. After this, you can check whether the calibration helped - if so, then the screen should now go dark and light up during a call.
Enabling and disabling the sensor
If you encounter instability of a hardware element, it is recommended to turn it off. You can also restart it by first turning off and then turning on the sensor again. In the smartphone settings, you can only remove the Proximity Sensor when making calls:
- Open your phone settings.
- Go to the "System Applications" section.
- Select "Calls" or another program through which you make calls.
- Go to the “Incoming Calls” tab.
- Deactivate the Proximity Sensor slider.
The component is restarted in a similar way, but the disadvantage of this method is that it only works during a conversation. That is, if the sensor accidentally triggers while listening to voice messages, disabling it through “Calls” will not help. You will have to turn to the help of third-party applications like Sanity:
- Run the program after pre-installation.
- Go to the "Proximity" section.
- Check the box next to “Turn off in Proximity”.
Therefore, to reactivate the component, the checkbox must be unchecked. Also, using Sanity, you can control other sensors that your smartphone is equipped with. This is a multifunctional application suitable for solving a number of problems, and you will definitely find it useful.
Method 3: Factory reset
There is another way that you can do yourself - reset Android to factory settings. This feature, unfortunately, deletes all data from Android, so before doing this, do not forget to copy or backup all files, photos, music, videos, contacts and SMS messages.
Then go to Settings – Backup and reset and select “Factory settings”. This function may be located in a different place depending on the brand of phone and the version of Android installed.
After confirmation, the phone will reboot and all data will be deleted and the settings will be reset to factory settings. When you turn on your phone for the first time, you will have to go through the setup process again (selecting a language, logging into your Google account, etc.). After completion, check whether the screen works correctly during a call and whether it turns off when approaching your ear.
Sensor Kinetics
Sensor Kinetics allows you to view, track and understand the behavior of all the standard sensors installed on your phone. You can change the delay setting or activate or deactivate certain sensors. This application demonstrates the use of each of the sensors available on the phone. This way you can easily check the sensors in your phone. Each sensor is attached to a viewer circuit with raw and processed data. It also includes documentation with easy to understand examples on how to test each of the sensors on your phone.
Phone tester
The phone tester app not only checks the sensors on the phone, but also checks the health of the device's hardware, Wi-Fi, telephony, GPS, touch, battery and system information. It also checks the ambient temperature, humidity, step detector, heart rate monitor and fingerprint sensor - provided that is supported by your device. A Pro
A version of the application is also available that displays additional information such as phone memory, processor speed and SD card memory.
Sensor Box for Android
Sensor Box for Android app is a good looking app with impressive graphical presentation. It detects all the sensors that are available on your Android device. The application displays all sensors and a corresponding message appears if the selected sensor is not supported by your phone. This application only detects sensor changes, if any, and displays the values. It may not show the correct temperature, proximity, light and pressure values unless some changes occur.