4.6
(16)
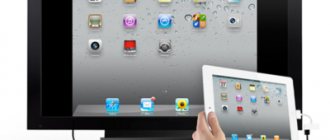
Every user must be able to correctly connect a monitor (and other components) to the system unit of a computer (PC). The need for this arises when purchasing a new monitor (display) instead of an old one, and when doing basic cleaning or rearranging the workplace. To better understand the components of a computer, we suggest reading an article about how a computer works. For connection, the system unit has connectors with holes for connecting cables from the display. The terminal connectors of such cables have pins instead of holes for mating with them. (These two design types of connectors are often called “male” and “female” in everyday technical speech).
Interfaces, designated by the same letters, should be distinguished from connectors. Strictly speaking, connectors are nothing more than switches. Interfaces are a broader concept. They have different technical characteristics. The same interface can be switched using different connectors.
Read about the types of computer connectors.
Before looking at different connectors and interfaces, it is important to remember a few important rules. The first is the mandatory compatibility of the video card, monitor and cable connecting them. Second, long cables with amplifiers can be directional. Therefore, they cannot be connected arbitrarily. Finally, to avoid any trouble, both devices should be unplugged before connecting the display to the computer.
Computer and monitor compatibility
It often happens that everything is connected and should work, but the image either does not appear at all or is of very poor quality.
What is the problem? The video card that is responsible for displaying the picture is not compatible with the connected screen. Before purchasing, you need to decide what diagonal the computer can work with. The larger the screen, the greater the load on the video card and the system unit as a whole.
It is important to understand why you are buying a monitor:
- for games - a large high-resolution monitor, this will require a powerful video card;
- for work and surfing the Internet - a simple screen will do, the load on the video card will not be too heavy;
- for drawing - you will need a wide screen with a high-quality picture and a good video card.
When choosing and purchasing, pay attention to the connectors of the video card and monitor - if they do not match, you need to either buy an adapter or choose another model.
IMPORTANT! If the video card is suitable, the cable is selected correctly, but the graphics leave much to be desired, it is worth updating the drivers.
How to make the connection correctly - instructions
Connecting your PC to the screen is not difficult at all - you can do it in a few steps. In order not to spend a long time looking for connectors, you need to know where the video card is located in the block - that’s where the place for connection will be. So, the step-by-step instructions look like this:
- Find the cable that plugs into the socket and the cable that will connect to the system unit next to the video card;
- Connect the wire to the outlet, check that it works;
- find the hole into which the cable from the computer will be inserted, check whether it matches the cable;
- carefully, without pressing hard, connect the wire to the connector and tighten the screws, check the reliability of the connection;
- turn on the computer and wait for the picture to appear.
IMPORTANT! Many modern system units have several connectors at once; before connecting, you need to see which one fits the cable. The holes on the block indicate what format they are.
What cables are there for connection?
The hole for connecting the cable to the monitor is the largest in the block. In order for the wire to hold well, it is secured using screws that are already provided by the manufacturer.
Modern units and monitors are equipped with the following types of cable connectors:
- VGA is a fairly old connector, but still found in cheap equipment. It can be used to connect even to the oldest models, but the image is almost always of low quality. The VGA port should be used only if there are no other connectors;
- DVI is the best interface; it transmits the most vivid and clear images. If it is in the block and screen, then you need to connect through it;
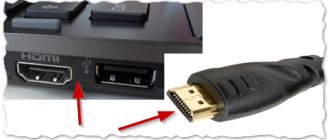
- HDMI is a standard connector that exists on most connectors; it transmits a good quality picture, supports video format, and transmits 4K image format (but only low frequency).
The cable required to connect to the processor is selected depending on the connector. Of course, it is most convenient to use VGA - wires for such an interface are inexpensive and are sold at any hardware store. As a rule, the required cable comes with the monitor.
Using the selected cable, you need to connect the connectors in the system unit and the monitor. Check that everything is connected securely and tightly. Plug the cable coming from the monitor into the outlet. It is most convenient to use an extension cord (pilot). After this, turn on the computer and the screen - if everything is done correctly, an image will appear on the monitor.
Using Explorer
The monitor cable is not always suitable for connecting to the connector of the computer itself. In such a situation, a guide will help. It will also help if a port is simply missing. The conductor has two different sides - one is connected to the hole for the screen in the block, and the other is used to secure the wire of the desired connector. Using cables, the monitor is also connected to the system unit or video card.
After this, you just need to connect the computer and monitor using the selected cable and check their operation.
IMPORTANT! The adapter is inexpensive, the main thing is not to make a mistake with the holes and buy what you need for your wire and equipment.
Monitor connectors for connecting to a computer
HDMI (various types available)
HDMI (various types available)
One of the most popular and popular interfaces today. Found on the vast majority of laptops and computers (can also often be found on tablets). Suitable for connecting monitors, TV (and TV set-top boxes), projectors and other video equipment.
Peculiarities:
- transmits both audio and video signals (simultaneously). In this regard, this is a big plus for the interface: no extra cables are needed to transmit the audio signal;
- Full support for FullHD (1920×1080) resolution, with 3D effects. Maximum supported resolution up to 3840×2160 (4K);
- The cable length can reach 10 meters, which is sufficient in most cases (with the use of repeater amplifiers - the cable length can be increased to 30 meters!);
- has a throughput from 4.9 (HDMI 1.0) to 48 (HDMI 2.1) Gbit/s;
- adapters from HDMI to DVI and vice versa are available for sale (very important for compatibility of old and new devices with each other);
- HDMI has several types of connectors: HDMI (Type A), mini-HDMI (Type C), micro-HDMI (Type D) (see photo above). On laptops/PCs, the classic size type most often used is HDMI (Type A). Micro and Mini are found in portable technology (tablets, for example).
If you have HDMI on your monitor and system unit (laptop), then the entire connection will boil down to purchasing an “HDMI-HDMI” cable (which can be bought at any computer store).
Important!
Please note that before connecting via HDMI, be sure to turn off both devices (PC and monitor). The port may burn out if this is not done.
Display Port
Display Port and Mini Display Port
A new interface that is quickly gaining popularity (a competitor to HDMI). Allows you to connect several monitors at once, supports 4K resolution, 3D image.
There are two sizes: classic and Mini Display Port (the first option is found on regular laptops and monitors, see photo above).
Peculiarities:
- both audio and video signals are transmitted simultaneously;
- The maximum length of the Display Port cable can reach 15 meters;
- data transfer speed up to 21.6 Gbit/s;
- allows you to get a resolution of up to 3840 x 2400 at 60 Hz; or 2560 x 1600 pixels at 165 Hz; or you can connect two monitors at once with a resolution of 2560 x 1600 pixels and a frequency of 60 Hz.
- Please note that in addition to the classic Display Port, there is another form factor: Mini Display Port.
- By the way, the size of the Mini Display Port connector is about 10 times smaller than that of the DVI connector (about it later in the article)!
- the interface has a small “latch” that securely fixes the cable when connected to the port.
USB Type-C (Thunderbolt)
A very, very interesting interface (it began to actively develop just a year ago)!
Allows you to simultaneously transmit audio and video signals to the monitor, charge the device and copy data (i.e. instead of several cables - you can only use 1!). This is very convenient when connecting a monitor to laptops.
USB-C port on top for data transfer, bottom for Thunderbolt 3
By the way! I’d like to make a small remark right away - USB Type-C can be “different”:
- if there are no icons next to the port, most likely this port can only transmit data (see example below);
- if there is an abbreviation “DP” (Display Port) next to the icon, it means you can connect a display to this USB-C;
- The lightning bolt icon next to USB-C indicates full Thunderbolt 3.
DVI
DVI interface
This interface is almost 20 years old and still enjoys wide popularity (it was released in 1999). At one time, I seriously improved the quality of the image on the screen.
The maximum resolution is 1920 x 1080 pixels (however, some expensive video cards can transmit data in dual link mode and the resolution can reach 2560 x 1600 pixels).
Peculiarities:
- Only the image* is transmitted through the DVI connector (the audio signal will have to be transmitted via other channels);
- resolution up to 1920×1200 pixels with cable length up to 10.5 m; resolution 1280×1024 pixels with cable length up to 18 m; in dual-channel data transfer mode - up to 2560 x 1600 pixels.
- There are three types of DVI: DVI-A Single Link - analog transmission; DVI-I - analog and digital transmissions; DVI-D - digital transmission.
- various connectors and their configuration (DVI-A, DVI-D, DVI-I) are compatible with each other.
- Please note that this standard is more likely to experience interference: for example, if there are other devices near the cable that emit an electromagnetic signal (telephone, printer, etc.). This can also happen due to poor cable shielding;
- There are many adapters on sale from VGA to DVI and reverse;
- The DVI connector is quite large, ~10 times larger than the Mini Display Port (Apple even released Mini DVI, but it was not very popular...).
VGA (D-Sub)
VGA interface
This standard was developed back in 1987. Despite this, it is still very popular and is used mainly for simple projectors, video set-top boxes, and small office monitors (where high resolution and very high-quality images are not required).
Officially, resolutions of up to 1280×1024 pixels are supported (not officially - 1920×1080 is usually no problem!), and therefore many are “predicting” a quick eclipse for this interface...
My personal opinion: many people “bury” this interface early, because thanks to hundreds of millions of devices that have been released over these 30 years, VGA will “outlive” some modern ones.
Peculiarities:
- transmits only video signal (for audio it is necessary to use other channels);
- maximum resolution up to 1280x1024 pixels, with a frame refresh rate of 75 Hz (in some cases it is possible to work at a higher resolution, but this is not officially guaranteed, and image quality may also deteriorate);
- there are many VGA to HDMI, VGA to Display Port, VGA to DVI and reverse adapters;
- despite its “moral” obsolescence, the interface is supported by a variety of audio and video equipment, and is still in wide demand.
Setting up an HDMI connection
So, everything is connected and now it remains to configure this matter a little. If only one TV is connected, the picture should appear immediately. Please note that in order for the computer to boot on TV, the monitor must not only be turned off, but disconnected from the system unit!
After loading Windows, all that remains is to select the appropriate screen resolution. You can do this by right-clicking on an empty space on the desktop and selecting “Screen resolution”
Here you can select your preferred resolution. The higher you go, the clearer the picture, but the smaller everything is on the screen. By default, the system selects the maximum resolution that the device supports. You can leave it like that if everything suits you. But if the work is uncomfortable, the font is too small and difficult to read, then you can reduce the resolution, but there are nuances.
LCD TVs and monitors are designed to display a certain number of dots (pixels) horizontally and vertically, for example 1920x1080 (this is the matrix resolution). And if you set a non-standard resolution, then in order to display it on its matrix, the TV will scale it, and this MAY lead to deterioration in quality and blurring of the picture, or maybe everything will be fine.
If your TV supports a resolution of 1920x1080 (Full HD), then it will also display 1280x720 well, with all the details and fonts being larger. For an HD Ready TV (not Full HD), there is no point in setting 1920×1080, because its real resolution is 1366x768 pixels.
Using the “Advanced Settings” button on the “Monitor” tab, you can set the screen refresh rate. I recommend setting it to 60Hz or more if your TV supports it:
The TV on this tab may not be called by its name, but by something like “Universal PnP Monitor”. If, when watching a video, it twitches a little or does not go smoothly, then you can experiment with this parameter. On this tab, select “True Color (32 bit)” for color rendering quality.
If there is any change in resolution, frequency or color depth, the system will display a window to confirm the changes. If the device does not work with the new parameters, then you will not be able to see this window and will not confirm your actions. There is no need to panic, just wait 15 seconds and the system, realizing that you do not see anything, will return the previous settings.
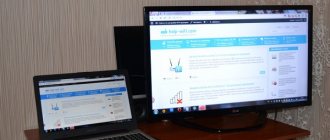
Connecting the monitor to the computer
We have divided the entire algorithm of actions into steps to make it easier. You just need to follow them and perform each manipulation in the correct sequence, then everything will definitely work out. If you have not yet purchased a monitor, we recommend that you read our article at the link below, which discusses the parameters and characteristics in detail, which will help you make your choice.
1. First of all, you should understand the equipment package and install it on the work surface. After these steps, you can proceed to the connection itself. The preparatory work looks like this:
- Nowadays, more and more monitors have a removable mount, so we first advise you to refer to the instructions included in the kit and assemble the components.
- The device is now assembled and ready to be installed on your work surface. Position it as securely as possible so that the monitor does not fall if it accidentally hits the table, for example.
- Find the power cable in the box and prepare it as well. Check for physical damage. If no visible faults are found, proceed to the next step.
- Find the cable connecting to the monitor. Most often it comes with HDMI, but sometimes it can be DVI, VGA or DisplayPort. Please review your monitor package at the time of purchase to ensure you have the required cables.
2.Preparations are complete, it’s time to connect to the PC. There is nothing complicated about this; the whole process will take just a few minutes. You will need to do the following:
- Insert the power cord with one side into the monitor and the other into a free outlet near the work surface.
- Take your chosen video cable and connect the PC and monitor via the appropriate ports. You can find their location by examining the case or reading the instructions. We recommend connecting any type of wire to the ports on a discrete video card, if your computer has one.
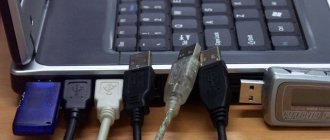
- Connect other peripherals to the USB connectors on the monitor if necessary (and the presence of such connectors on the monitor in principle).
- In most modern monitors, the case has special compartments through which cable management is carried out. Try to organize everything as compactly as possible so that the wires do not interfere with work.
If the PC does not have a discrete graphics adapter, the connection is made through the motherboard using the integrated video card. To display the image correctly on the display, the integrated graphics must be enabled. You will find detailed instructions on this topic in our other material at the link below.
3. A common problem when starting a computer is the absence of an image on the display. Most often it occurs due to uninstalled graphics adapter drivers. We advise you to pay attention to our other articles to understand the installation of files to the GPU.
If installing drivers did not bring any results, read about possible other problems and their solutions in the next article from our author.
In addition, sometimes the monitor itself requires proprietary software to operate correctly. In this case, check the equipment package. Usually there is a disk with software there. However, if you cannot use it, download the driver using third-party programs or through the manufacturer's official website.
4. The last step before you start using the monitor is to set it up. It is important to immediately check the device for dead pixels and correct color display. This can be easily done in one of the special programs, a list of which you can find in the article at the link below.
If the tests are successful, it is recommended to calibrate the monitor, adjust brightness, contrast and other parameters. There is also specialized software for this process, which will allow the user to complete everything as simply and quickly as possible.
Safety of connecting the monitor to the computer power supply
The first question that requires a specific answer is: How safe is it to connect an LCD monitor to a computer power supply?
If we consider the technical side of the issue from the point of view of an inexperienced user, it is necessary to pay attention to three main parameters:
- Voltage (measured in Volts, V)
- Current (measured in Amps, A)
- Power consumption (measured in Watts, W)
The voltage supplied by the computer power supply may vary depending on the connection interface. Most LCD monitors require a 12 V power supply. Below we will see that modern power supplies for desktop computers have connectors that have suitable voltage parameters for us.
The current from the power source required for the normal functioning of most LCD monitors can vary between 1-5 A. When connecting the monitor to the network via a power supply, please note that the more current your power supply can deliver, the better. Fortunately, modern medium-power computer power supplies deliver 18-50 A on 12-volt connectors. As you can see, this is quite enough. There is no need to worry that the monitor may “burn out” due to excessive current. Your device will “take” as many Amperes as it needs for normal operation.
Monitor power consumption can vary greatly depending on the specific model. Moreover, this figure will not grow strictly depending on the screen diagonal of different monitors. Power consumption values can vary over quite large ranges, and therefore it would be incorrect to display the average value of this parameter here. When writing this article, we took a certain framework, which we will rely on, this is about 15-35 W in operating mode (we can neglect the power consumption in standby mode, since it is negligible in comparison with the consumption figures of a working device).
You can roughly calculate the required output power of the power supply for the monitor by multiplying the voltage and current values. That is, if your monitor needs a power source with a voltage of 12 V and a current of 2 A, then the approximate power should be equal to 12 x 2 = 24 W. The output power of a computer power supply can be 450 W, 500 W, or 600 W, and more (maybe, of course, less).
That is, if you are going to connect the monitor to a separate power supply that will not power any other devices, then the output power will be more than enough. If you are going to power the monitor from a power supply that supplies your entire computer, then you first need to sum up the power consumption of all PC equipment (either by looking at the characteristics of each module on the official website, or by using website services that allow you to calculate the required power of the power supply based on the computer configuration). check how much free power reserve the power supply has left (keep in mind that the numbers in the power supply model are often not an indicator of power, but rather an advertising ploy!). And, if the power reserve exceeds the indicator required by the monitor with a good handicap, then the experiment can be continued. Otherwise, doing this is strictly not recommended.
You can find indicators of voltage, current and power consumption of the monitor either on stickers located directly on the back cover of the monitor, or on the power supply that was used in working with this monitor, or on the Internet on the manufacturer’s website or on equipment catalog websites in the information about your device. Technical characteristics of the current strength and output power of the power supply can also be found on the device case and on the Internet.
Checking the monitor and its connection to the computer
Basic methods for connecting a DVR to a computer
VGA/DVI cable. The monitor and system unit can connect several different cords - most often these are power, USB and video cables. We are interested in the latter, and today it comes in two types: VGA and DVI. They can be easily identified by the same colored D-shaped connectors on both sides. In the case of VGA, the connectors are blue, DVI - white. Make sure the cable is connected to both the monitor and the computer and is not damaged.
Damage most often comes in three types:
Do you think teeth are a joke? Hell no! Cats, dogs, hamsters, and rats have more than once chewed computer cables with gusto almost before my eyes. We live in the IT era, everyone is in a hurry to join.
- Bent connector pins.
- A broken or severely bent cable near the colored plastic connector casing.
- Pet teeth marks.
Take a close look at the back of your computer
It is very likely that you will find several connectors suitable for a monitor there. If we think theoretically, there may be, for example, seven of them there. In this case, you should try connecting the monitor to a different connector. Even if you are sure that at the time the problem occurred, the monitor was connected to the desired video output, you cannot exclude spontaneous switching of the primary video card due, for example, to a software glitch or failure of one of the video devices installed in the computer.
The situation with the absence of an image on the monitor often occurs after connecting a TV, projector or another monitor to the computer. If you shut down with an additional output device, and then remove this device and start the computer again, then the poor imagination of the video card driver may not withstand such a difficult test.
Monitor. There should be an LED indicator on the front of the monitor. If it does not light up, then you need to check the power buttons (sometimes there may be two of them - on the front panel and on the back cover) and the power cable. The monitor may be connected to a different electrical outlet than the computer itself. Then you need to check the outlet or connect the monitor to a known good power source.
If everything is fine with the power supply, then the easiest way to check the monitor itself is by connecting it to another computer. When using a laptop as such, do not forget that the video output may have to be activated with a special button on the keyboard.
Sometimes the backlight in the monitor stops working - in such cases, the image can be seen by illuminating the screen with a bright lamp or flashlight.
If you don’t have a computer at hand, try your DVD player, game console or any other device associated with video playback - they may well have a VGA connector.
If it is absolutely impossible to find any source of the format we need, then we need to try to call up the monitor menu or diagnostic message. The menu is called up by the corresponding button on the monitor, but this, to be honest, is an ineffective way to check. Most devices do not display a menu in the absence of a useful video signal, and therefore the lack of response to the “menu” button does not at all indicate a malfunction of the monitor. Another thing is a diagnostic message about the disappearance of this very signal. It should appear when you disconnect the cable from the computer. To prevent anything from burning, the procedure should be as follows:
- Turn off the monitor using the button on the front panel
- Disconnect the VGA/DVI cable from the computer
- Turn the monitor back on and wait a few seconds. Most modern monitors will show a “No Signal” message or something similar in this case.
Having obtained at least some image from the monitor, we can temporarily exclude it from the list of suspects and move on to checking other devices.
Why the processor can work, but the monitor does not turn on
It also happens that the computer itself works, but the picture does not appear. There are many reasons why this happens:
- The most common one is that the monitor is not turned on (the Power button is not pressed);
- the monitor is not connected to a power outlet or system unit;
- there is a problem with the video card;
- the necessary drivers are not installed;
- there are problems with the motherboard.
If the computer is turned on and the monitor is not working, you first need to check whether the power button is lit. You can press it several times, it is possible that the button is “stuck”. If the Power button does not light up at all, then the problem is in the monitor. What can be done? Try changing the cable or rebooting the screen.
If when you turn on there is no image itself, but the screen changes light (flashes or brightens), then the problem may be in the cable. Adjusting the brightness can help (it happens that the brightness settings are at a minimum and the screen appears black). If something is wrong with the computer, a window will appear on the monitor indicating there is no signal.
Be sure to check the cable - it may be bent or poorly connected. Often the screws break and the cable becomes loose. Ideally, completely replace the wire and turn on the equipment again. If after this the problem persists, you should contact a specialist, because the problem is in the operation of the system.
IMPORTANT! During all manipulations, the computer and monitor must be disconnected from the network.
If a new video card or motherboard was installed, it may not be compatible with the screen. To check this, you need to connect the monitor to another computer, or inspect the video card. Most often, if this is the problem, you hear popping noises when you turn it on.
It happens that the processor is broken and this is not why the image is not displayed. At the same time, the computer makes noise as during normal operation.
IMPORTANT! If the fault lies in any part of the system, then only a professional can help. It is he who will be able to identify the problem and, if necessary, replace parts.
Possible problems
The following video explains how the connection connector affects picture quality:
Here I want to talk about problems with screen resolution and colors that you may encounter when connecting a monitor to a computer via an HDMI interface. The fact is that initially this standard was intended for connecting household appliances, not computers.
For example, on TVs that transmit analog images, there is an Overscan mode that masks distortions at the edges of frames - the picture is enlarged and the edges are cropped. When we connect the display to the computer, the video card drivers can turn on the overscan compensation mode, which will give us a smaller picture and black, unused areas at the edges. To avoid this, you need to disable this function in the video card driver.
Another problem is color distortion. Household appliances use a limited range of color values, while computer equipment uses a full range. Therefore, when connecting a monitor to a computer via HDMI, the following problems may occur:
- Narrowing of the image, gray dots instead of black, dull colors.
- Few color gradations.
- Sharp colors.
Only adjusting the RGB range will help here. A similar function is available in the driver for Nvidia and AMD video cards.
Now I want to reassure our reader. You are unlikely to encounter such problems if you have modern computer equipment.