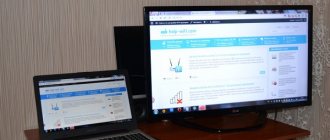
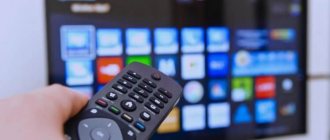
Many users prefer to view media files from their computer on their TV. A home media server for Windows 10 was developed specifically for this. To use this option, you can use standard utilities or download new, free applications. The function is usually used on TVs with Smart TVs. A large display makes it more enjoyable to watch movies, videos and other multimedia files.
Home media server
What you need to stream
If the user decides to use a Windows 10 DLNA server, you need to familiarize yourself with the preparatory steps, then the media server for your Windows 10 home network will work quickly and without problems.
Preliminarily check the presence of the following things:
- connecting both contacting devices to a single network via Wi-Fi or cable (that is, you need to be connected to the same router that distributes the Internet via a wireless network);
- the presence of the “Public Network” function enabled;
- Network discovery or file sharing can be disabled without affecting functionality;
- enabling the Smart TV option on the TV while supporting DLNA technology (on some devices the name changes, for example, Smart Share, AllShare, Simple Share).
In preparation for playback, a separate homegroup setup is required. The user does not need to share the folder to make it public. The service will continue to work.
Further configuration of DLNA on Windows 10 can be carried out using two methods - built-in programs, separately downloaded applications. Both directions are functional and lead to the same result. If we make a comparison, we can say that the use of built-in programs is more reliable, since their security has been thoroughly tested.
DLNA on Windows 10
Enable streaming data in Windows 10
Before we move on to a detailed study of the causes of the problem and methods for resolving it, we note that to enable the function of transferring content to another device of the current account, administrator rights are required.
Perhaps the point is the banal absence of such. The error in question appears due to the following failures:
Each source of the problem has its own method of elimination.
Method 1: Enable services
The most common cause of this problem is disabled auxiliary services, without which the main streaming service cannot start. You can enable these services as follows:
If there is no “Running” sign next to any of them, this means that the service is inactive. To activate it, just click on the “Run” link in the area marked in the image below.
When Windows boots, check if the problem goes away. Otherwise, read on.
Method 2: Enable and configure sharing
Problems with data streaming also occur when sharing is disabled or incorrectly configured on the target computer. The procedure is not complicated - just use the appropriate instructions from the article at the link below.
If for some reason you are using the tens version 1709 and previous ones, creating and setting up a home group should help.
Method 3: Troubleshooting system problems
The most unpleasant causes of the error in question are problems with the OS: damage to system files (including due to virus infection), strict firewall settings, as well as software failures of unknown nature. The algorithm of actions in this situation is as follows:
Conclusion
Now you know how to act in a situation where data streaming does not turn on in Windows 10. As you can see, the reasons are purely software.
Source
How to connect a second screen
To connect a second screen, at the bottom of the “Projection” window, click on the tab – Connect to a wireless device. Make sure the second device you want to connect is turned on. An automatic search for the device will begin. His name should appear in the window.
How to connect devices
– TV, modern TV can be connected via an HDMI cable. Make sure your TV has the appropriate output. Modern TVs can also be connected via Bluetooth if they have this option.
– Projector, connected via VGA or HDMI cable.
– Computer, laptop, connected via Bluetooth.
Screen mirroring from Windows 10 to Android TV using Miracast
Here's how you can stream Windows 10 to Android TV and play any media or games. If you have a powerful computer, a router and Android TV, then you can easily turn your Android TV into a second screen. Anyway, that's all from us. If you want to know more about such Mi TV tips and tricks, check out our related guide. And if you encounter any problem, comment below and let us know. We will definitely try to help you.
Source
How to set 4K resolution on your TV (Ultra High-Definition, 4000 horizontal pixels)
To obtain 4K resolution (Ultra High-Definition, 4000 horizontal pixels), you need to use an HDMI cable (the laptop processor (graphics core) must support 4K resolution). Connect the TV via an HDMI cable and do the following.
Went to "Advanced screen settings"
I chose 1600×900 resolution.
In the “Multiple displays” option, select “Show only on 2”, that is, show the image only on the TV.
Source
Connect an external monitor to a laptop via the HDMI port
So, we have a laptop with an HDMI port (Fig. 1).
Rice. 1. HDMI port on laptop
We need to connect an external monitor to it using a cable and a VGA connector.
All operations described and shown in the pictures below must be done with the laptop turned off and the external monitor turned off, so as not to damage anything during connections.
To connect a monitor with a VGA input, you will need an HDMI-VGA adapter (Fig. 2). It’s a pity, of course, that the adapter is not white for a white laptop, but here, as they say, it’s better to have a functional and working thing than a beautiful and non-working thing. Therefore, a black adapter will also work.
Rice. 2. HDMI-VGA adapter
Then we connect the HDMI-VGA adapter to the HDMI connector of the laptop (Fig. 3).
Rice. 3. HDMI-VGA adapter is connected to the laptop
In the next step, you will need a wire coming from an external monitor with a VGA connector at the end, for subsequent connection to the HDMI-VGA adapter (Fig. 4).
Rice. 4. Preparing to connect the VGA connector of an external monitor to the HDMI-VGA adapter
So, we connect these 2 connectors together and secure the connection, for which we carefully, without much effort, rotate the screws located on both sides of the VGA connector (Fig. 5).
Rice. 5. The VGA connector of the external monitor is connected to the HDMI-VGA adapter
It seemed that that was all, because the monitor was now connected.
However, let's not forget that not only a video signal is transmitted through the laptop's HDMI port, but also an audio signal. Therefore, we will prepare sound speakers to connect them to the same HDMI-VGA adapter (Fig. 6). It is also advisable to connect speakers in the off state, although this is not as important for them as for an external monitor.
Rice. 6. Preparing to connect the audio connector to the HDMI-VGA adapter
The socket for connecting the audio connector is located on the opposite side from the one where we connected the VGA connector of the external monitor (Fig. 7).
Rice. 7. The speakers are connected to the HDMI-VGA adapter - this is the last step in connecting an external monitor to the laptop
Quickly output video from your computer to your TV
To send a video stream from a Windows 10 device to a TV screen, you don’t have to bother with servers. You just need to make a few mouse clicks. Select one of the movies in the folder and right-click on its icon. In the context menu that appears, find the item “Transfer to device” , next to which, when you hover the cursor, a list of available displays is displayed. If your TV is connected to the same local network as your computer, it should definitely be on this list. Sometimes you need to wait a little while the system finds all devices.
So, click on the item with the TV model, and the player window will immediately appear. It will take some time to establish communication between devices.
After this, the TV will start playing the video, be it a movie or a music video. You can control the process either through the player on your computer or using the TV remote control. Closing the window will stop the video stream.
As we can see, this method is simple and requires a minimum of actions. However, it is not reliable, since often the connection is not established for some reason, and a message appears on the TV screen that the device is not ready. Sometimes playback is interrupted and cannot be resumed immediately. This is why using a DLNA server still seems preferable.
Connection on Windows 7
Connecting a TV to a computer running Windows 7 is done in the same way as to a PC running Windows 8 and 10. The only difference will be in the appearance and names of the system partitions that will need to be opened to adjust the image settings or if the PC does not transmit sound to the TV. Thus, a quick change of operating modes with displays is opened the same way on all versions of the OS - with the key combination Win+P. For Windows 10 and 8, the menu is called Project and appears vertically on the right.
It contains modes such as Computer Screen, Repeating, Extend and Second Screen. On Windows 7, the menu opens horizontally and contains the same modes, but under different names: “Disable Projector”, “Duplicate”, “Expand”, “Projector Only”. To adjust image settings, on Windows 10 use the “Display Settings” section. On Windows 7 you need to select "Screen Resolution".
Conclusion Connecting a TV to a computer running Windows OS via HDMI is very easy; to do this, just connect both devices with a cable, turn it on and select on the TV to display the image from the corresponding connector. Controlling the TV from a smartphone on Windows Phone or Android with this connection is not available; all operations are performed using a mouse and keyboard, and the TV receiver is used as a large screen.
If problems occur with sound output, you can determine why the computer does not output an audio signal to the television receiver and correct the error in the settings of your laptop or PC.
Source