Following the instructions for publishing an application in the App Store, we are posting the internal set of Live Typing rules for publishing applications on Google Play, compiled by the management department with the active participation of the team lead of the Android development department, Alexander Mirko. No matter how cool and experienced a project manager you are, there is always a chance of forgetting something. These instructions are intended to make your life easier. So, what does PM need to do during publication:
- Create an account in Google Play Developer Console for the customer, if the customer does not have one, or offer to publish from our account.
- Complete the privacy policy.
- Prepare marketing materials (icon, screenshots, APK, banner, text, promotional video).
- Ensure the assembly has a digital signature certificate.
- Set up payment for using the application.
- Submit your build to Google Play.
All the details are under the cut.
UPD from 04/25/2017:
sections about alpha and beta testing and phased implementation were added, sections “Ensuring the assembly has a digital signature” and “Technical requirements for the apk file” were added, a note was made about ASO and cosmetic changes were made.
Terms of use
Key provisions from the Google Play Software Distribution Agreement that you should know about:
- you are entirely responsible for your product and the content provided in it;
- You agree to respond to user questions within three business days and to “urgent questions as defined by Google” within 24 hours;
- undertake to maintain the confidentiality and security of user data;
- you are not attempting to defraud, harm, or mislead the user or Google;
- you do not distribute prohibited content. All Products distributed through Google Play must comply with the Developer Program Policies;
- You authorize Google to refund the full price of a Product or in-app transaction to a customer on your behalf if the customer requests a refund at any time after purchase. Removing a product does not relieve you of your responsibility for any payment;
- In general, Google disclaims any liability related to your product
Preparation of marketing materials
The following requirements apply to marketing materials:
- store requirements. These requirements are monumental and rarely subject to change, and there are clear descriptions for them;
- requirements that arise from the project’s objectives: what is more relevant for the target audience of this application, what kind of marketing the project has, etc. Sometimes it is important how the client sees it: some clients are ready to use simple screenshots and simple texts, other clients constantly change their opinion about screenshots/texts, and you need to work with this.
For urgent releases or MVP testing, the minimum allowed for the PM is to create marketing materials that meet the store's requirements. In other projects, it is necessary to ensure that marketing materials contribute as much as possible to the success of the project.
Text
You should start preparing marketing materials with texts.
Store requirements for text
Google Play's requirements for them are as follows:
- application name: no more than 30 characters;
- short description: no more than 80 characters;
- short description: no more than 80 characters;
- full description no more than 4000 characters.
The main difference between a short description and a full one is that the full one is available on desktop, while the short one is created for mobile devices.
You can view the full Google Play requirements for text and its features here (How to provide data for Google Play → About the product).
In general, designing an application in stores (App Store Optimization, or ASO) is an entire art that requires a single self-educated person, and it’s impossible to describe it in a few words. There are already good materials on this topic, such as this one.
Coordination of text with the client
The text, like any other marketing material, must be agreed upon with the client.
It happens like this: before the meeting, the PM makes various options for materials and discusses with the client during the meeting. This article on Appractor will help you write good text for Google Play (also suitable for the App Store).
Screenshots
Number of screenshots
The maximum screenshots available for uploading to one application is eight.
The minimum is two. How many screenshots to upload is an open question. On the one hand, we need to clearly and advantageously show the functional features of the application to the user. On the other hand, you need to create a desire in the user to download the application and see what else is there that was not in the screenshots. Therefore, before taking the maximum number of screenshots, you need to think about their necessity. To take screenshots directly from your device, there is the Clean Status Bar application. It will clear the status bar of garbage: make the battery full, set 12:00 on the clock and optionally display the 3G and WiFi icons. You can install the application using the link.
Store requirements for screenshots
Guideline requirements:
- JPEG or 24-bit PNG format (no alpha channel);
- at least 320 pixels;
- no more than 3840 pixels;
- the aspect ratio should not exceed 2:1.
Google Play requirements for screenshots are available here.
Tips for choosing screenshots
The main purpose of screenshots is to let the user immediately understand what your application is about.
Therefore, the first screenshot should be as informative and as attractive as possible. The remaining screenshots show various functional features of the application. If your application has a version for tablets, then you need to upload separate screenshots for seven- and ten-inch screens (this way you will prove that your application is optimized for tablets). A good solution is to make the original screenshot as large as possible (for example, ten inches) and, if necessary, make smaller copies of the screenshots for small devices.
Nice article with lots of information, but no images available.
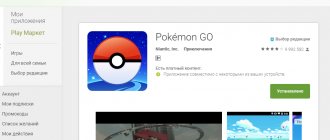
Example of high-quality screenshots
Icon
An icon is a small image that identifies our application among others. If a client has a logo, it is often made into an icon. Perhaps we will be given a goal to develop an icon and logo. In any case, the approach to the icon is the same as to any other marketing material: first we make options, then we go with these options to the customer and discuss them.
Store requirements for an icon
Guideline requirements:
- We always make 32-bit PNG (with alpha channel) without alpha channel;
- dimensions: 512 x 512 pixels;
- maximum file size: 1024 KB
The description requires a high-resolution icon with the same image as the app icon in Android. Follow these guidelines when creating it.
Displaying an icon in the store
Promo clip
This is an important part of the marketing campaign, as it allows you to present the application to the user in the most profitable way. Adding a video in itself is optional, but if we care about the client and users and we have the time and budget, then it is better to do it.
Store requirements for a promotional video
Google Play Requirements:
- indicate the URL of an individual video on YouTube, not a playlist or channel;
- do not use age-restricted videos as a promotional video;
- Use the full YouTube video link instead of the shortened one:
On play.google.com, videos are always located at the beginning of the description. In the Play Market application, the play button for the promotional video will be superimposed on the image for the “Recommended” section at the top of the screen.
Video Making Tips
Videos should be short (30 seconds to 2 minutes) and showcase the app's most compelling features. On a device running Android 4.4 or later, you can record video from the device using the ADB screenrecord shell command.
Banner
The picture for the “Recommended” section can demonstrate to potential users the graphical capabilities of the application. This image is required to show the app on different Google Play pages.
Store requirements for a banner
Google Play requirements for banners:
- JPEG or 24-bit PNG (no alpha channel);
- 1024x500 pixels.
The picture for the “Recommended” section is located above the application information in the Play Market.
If a promotional video is loaded, a button will be placed on top of it. Example of banner placement on Google Play
Adviсe
- Avoid placing important information around the edges, especially in the lower third of the frame.
- It is better to place the logo in the center, aligned horizontally and vertically.
- For text, use large font.
- Remember that the picture can be shown separately, without the application icon.
Why do you need a developer account?
To promote your business using an application, you need not only to take care of its creation, but also not to forget about the presentation to potential users and clients. And for this, the finished application must be published in the Play Market. Almost each of us has an active Google account, which gives us access to email, documents, photos and other popular services of the corporation, including the Play Market.
But with a standard user account, you can only download applications, books, movies and other content in this store. To publish your own programs, you will need a special developer account, with which you can download applications and study statistics on their use. The registration procedure will take approximately 1-2 days and will cost $25.
Age restrictions
Store requirements
The system of age restrictions for games and applications takes into account the specific laws and culture of individual countries.
This allows developers to more accurately define content restrictions and distribute applications to the audience they are intended for. To set an age limit, log into the Google Play Developer Console and fill out a special form for each of your applications. Programs that are not rated may be blocked for individual users or countries.
You are responsible for completing age rating surveys and following content rating guidelines. Apps that are not restricted may be removed from Google Play.
Attention! In the questionnaire, give truthful and as accurate answers as possible, otherwise the application may be deleted or blocked.
Filling out the form
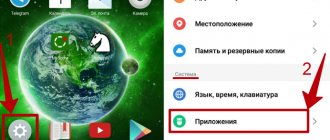
- Sign in to Google Play Developer Console.
- Select an application.
- In the menu on the left, click Age Restrictions.
- Read the application information and enter your email address. IARC representatives will be able to contact you at this address.
- Click Continue
. - Select a category.
- Fill in the form. If you have answered all the questions in a section and want to change one of them, click Edit
.
To finish filling out the survey later, click Save Project
. Only one draft is available for each application. - Click Define age limit
. - Select Set age restriction
on the general restrictions information page.
You can then view age restrictions and profiles on the Age Restrictions
.
If you want to refill the application survey, click New Survey
on the
Age Restrictions
.
Content rating
Rating your content appropriately will help you reach the right audience, which will ultimately increase engagement levels.
An application without rating assignments is listed as “Unrated.” Such products may be removed from the Play Market. To correctly determine the rating of an application, you must fill out questionnaires to evaluate the content.
How to access the questionnaire:
- select the application to be published in the Console;
- go to “Store Availability”;
- Select the “Content Rating” option from the left-hand menu.
You must enter only accurate and reliable information. Distortion of the content of the application may lead to suspension or removal of the application from the Play Market.
Technical requirements for the apk file
- The size of the apk file should not exceed more than 100 MB (and 50 MB for Android 2.2 and below, or for Play Market 5.2 and below, but let's forget about them). It happens that your application runs on static content (don't do this) or is a game and its size is more than 100 MB. Such an application can be divided into parts: the main one - up to 100 MB and several additional APK Expansion Files up to 2 GB each;
- the apk file should not be debuggable;
- The apk file must be signed with a digital signature file (see Ensuring the assembly has a digital signature).
Appmachine.com
– English-language application designer. After registering, you will be asked to fill out a form and then you will be taken to your dashboard. Select the “Build Your App” option. We indicate the name, website, and proceed to choosing a topic.
After choosing a theme, the service will ask you to work on the content - logo, buttons, colors. The application is very stylish, convenient and understandable. However, to publish it on the Play Market, you will need to pay - from $69/month.
Ensuring the assembly has a digital signature
A digital signature is required so that Google Play can identify the developer, and in the future only this developer can update/change the application.
In addition, many services rely on a digital signature, such as Facebook SDK, Vk SDK and most Google services. The digital signature is placed in a keystore (a file with a .keystore or .jks extension). The storage must be accompanied by:
- store password — password for the key store;
- key alias — name of the key in the storage;
- key password — password for the key.
We consider this section important.
From our experience, we have learned a sad lesson that customers, especially those who order applications from outsourcers or freelancers, unknowingly pay little attention to such an important thing as the digital signature of the application. Therefore, the manager must take it upon himself to ensure that the application is signed and that the key and accompanying passwords are not forgotten, lost, or fall into the wrong hands after publication. Attention!
The key storage must be in a secure location. If you lose access to your vault or your passwords, there is no going back. And even Google won't help. You will have to publish the application with a new package name and a new key. You will also need to update the description of the original app and make it unshared. Losing a file or passwords will result in a complete tragedy for your application: users will have to delete the current version and download a new one from Google Play, and you will lose statistics, downloads, audience and much more that you worked so hard for. In general, an unpleasant event. (See “Signature for an application”) It is good practice to sign a group of your applications with the same digital signature. Firstly, you won’t get confused in them, and secondly, you get a number of pleasant bonuses. For example, you can organize secure communication between your applications through a custom Intent and its android:protectionLevel="signature" property. But the developer should already know this.
What is Google Play moderation?
Until a few months ago, GooglePlay did not moderate downloaded applications and almost anyone could download any application regardless of its quality and content. This has now changed and GooglePlay moderates new apps. However, this is not a reason to panic; Google's application selection procedure is much simpler than Apple's. Applications do not have to be created by professionals. During the review process, GooglePlay checks the quality of apps and whether they contain inappropriate content.
To tell if your app has been uploaded to the app store, you need to pay attention to what's happening on your screen. One of two things can happen:
- Your app will be published to the Google Developer Console (however, it will take 2-3 days to appear on GooglePlay).
- Your application will appear as a draft. This means it is under review and will likely be published within 2-3 days.
Setting up payment for using the application
Sometimes the customer plans to sell content in the application, or make the application itself paid. To begin with, in your developer account, after downloading the application, you can select the type of application: paid or free.
Changing application type
You can make a paid application free without re-uploading the application to the store. But in order to make a free application paid, you will need to upload the application to the store with a new package name and price.
Linking to Merchant Center
To price your app, you'll need to link your developer account to the Google Payments Merchant Center.
This is necessary in order to indicate tax rates. Important:
Linking your account to the Merchant Center can only be done
once
, please pay attention to this. If an error is made when linking the Google Payments Merchant Center, you will have to pay $25 for creating a new developer account.
→ Steps to create an account are described here.
After you have linked, you must specify the sales tax for the region. We currently have no experience in such operations, so it would be advisable to consult with someone who does. How to specify sales tax for the region is indicated in the link.
Features of working with taxes in some countries
If the client is Russian, everything is simpler and more complicated at the same time, because for clients from Argentina, Russia, Taiwan, and India, tax deductions are carried out independently.
Thus, we must register as a sole proprietor and pay taxes on the sale of the application ourselves. Based on this, we include in the price of the application ALL taxes, which we will subsequently pay ourselves. Google will not make ANY royalties on sales. Google does not make deductions, but does make an operating fee of 30% of the net price. Net price is the price minus all taxes.
Example
Let's assume that the price of the application is 100 Japanese yen and VAT is 20%.
The developer transfers VAT in the amount of 17 Japanese yen to the relevant authorities. Formula: Application price - (application price * 1/(1 + tax rate)) 100 JPY. yen - (100 Japanese yen * 1/1.2) = 17 Japanese yen
Developer's income after payment of 30% transaction fee and VAT: 58 Japanese yen.
Formula: price excluding VAT * 70% 83 JP. yen * 0.7 = 58 yen yen
More information about taxes and Google Play rules is available here.
Once you've signed up for an account and provided tax information, you can price the app, making sure the price falls within your country's price range. All ranges are here.
Application and currency price
The price of the application is set in local currency. In order to see the price of the application, you must:
- On the Pricing and Distribution
, select the countries you want or select the Select All checkbox. - View the price for each country in the corresponding column: - prices for different countries are calculated at the current exchange rate, taking into account local pricing. - If the local currency is not supported, the default price for the country is in your currency.
As the owner of the application, we have the right to set prices for each country according to our whims. To do this you need:
- next to the desired country, click Change
; - enter price;
- click Apply.
Price update
Important:
if the client plans to make money from the application as the main source of income, it is worth telling him about the need to update the prices for the application in accordance with the exchange rate.
To do this, you need to check the boxes next to the desired countries and click Update exchange rates
on the “Prices and Pricing” screen.
Setting up alpha and beta testing
Alpha and beta testing allows you to test your application on a narrow circle of users.
There is open and closed testing. In both cases, the test group of users will not be able to leave public reviews on Google Play - only personal ones that are not public. In any case, it is useful to offer them an additional common channel for feedback. It is worth noting that it does not matter whether you are publishing an application for the first time, updating an existing one, or changing its description, the changes will not be available on Google Play instantly, but only after a couple of hours. More details can be found here.
Phased implementation of updates
Application updates can be rolled out in stages, starting with a small percentage of users and gradually increasing the number.
Phased rollout is only available for app updates, not the original version. The selection of users is completely random and you cannot specify any selection parameters in any way. Also, you cannot roll back the application version for users who have already installed the update. Despite its limitations, phased implementation is a very powerful and useful tool. Let's say a terrible scenario happened: during the development and regression testing phase, you missed some blocking issue. With a phased implementation, not all of your users will find the problem when the update is published, but only some of them. Of course, you won’t be able to instantly fix or roll back the version, but your other users won’t encounter the problem, and you have the opportunity to fix the problem and roll out updates for the same group of users.
We highly recommend not to neglect and take advantage of this opportunity. For implementation, you can use steps of 10, 25, 50, 75 and 100% and stretch according to the length of the sprint.
More details can be found here.
Publishing an application
If you are ready to publish a version, do the following:
- Open Google Play Developer Console.
- Select an application.
- In the menu on the left, open the Version Management section.
- Next to the name of the version you want, click Continue.
- Review the draft release and make changes as necessary.
- Select View. On the page that opens, you can make sure that nothing prevents you from releasing a version of the application to users.
- Review all warnings and error messages.
- For launched products, enter the version adoption percentage. If this is your first time releasing a production version, this setting will not be available.
- Select Version Deployment Confirmation
. If you're releasing an app for the first time, it will be published to all Google Play users in the countries you select.
Read more about the publication here.
Appypie.com
Appypie.com is a cloud service in English that will help users who do not know programming languages make their own application for the Android and iOS operating systems and place them in the Play Market.
All application checks are carried out online, there is setting up and sending push notifications, placing advertisements, monitoring statistics, setting up GPS location tracking, introducing news feeds of social networks, websites, media, radio, and blogs. There are free and premium versions, with the ability to place programs in stores - $33/month.
There are a lot of designers for mobile applications for Android, but, unfortunately, not all of them can help you realize your own idea. You can make a simple application and figure out how to further improve it.
useful links
- Developer Rules Center
- Google Play Software Distribution Agreement
- Age restrictions for games and applications
- Downloading applications
- Graphic objects, screenshots and videos
- Publishing an application
- Phased implementation of the version
- Example of creating an application description
- How to conduct alpha and beta testing
In the comments, we will be happy to hear about the order in which you publish applications in your studios. Use the instructions, supplement and clarify its contents.