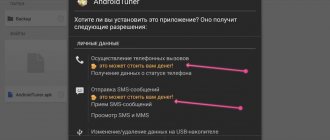
Root rights completely open the hidden functions of the system. If the phone has the manufacturer's firmware, then it is almost guaranteed that it will not have superuser rights. On the contrary, custom firmware often has these rights, which can become a source of problems, such as the cessation of support for contactless payments. And if there are root rights on the phone, how can you find out about it? There are two methods available: independently or using a program.
What are root rights and why are they needed?
Unlike Windows, where when installing the system, an account with administrator rights is automatically created for the first user, a feature of Android is that its owner, by default, does not have the ability to interfere with the operation of the device.
Of course, the user can install new programs, but he is not allowed to remove those installed by the manufacturer. And Root rights, or superuser rights, give the user the ability to change system settings and regulate the operation of the gadget with administrator access level. In other words, obtaining root rights is necessary so that the owner of the smartphone has absolute control over it.
Thus, the user will be able to transfer large amounts of data (for example, game cache) to a memory card, thereby freeing up the device’s memory. This is done using special programs - for example, FolderMount or Link2Sd. You can also increase the performance of your smartphone by freeing it from excess junk with the SdMaid program. However, in the absence of root rights, the functions of all of the above programs will be severely limited or not available at all.
As a rule, manufacturers do not equip devices with superuser rights, so if you purchased a brand new smartphone with factory firmware, the likelihood of having root access on it is zero. But most custom firmwares have root rights initially. If you purchased a used device, there is a high probability that the previous owner has already obtained superuser rights on it.
You can find out whether your gadget has superuser rights using special programs that are easy to find on Google Play.
You should definitely read about it.
Obtaining superuser rights on Android 5.x Lollipop
There is no universal way to install root rights on Android 5. Each gadget model has its own method, which may not work on other, even very similar devices. The most successfully used software method is using a computer. Sometimes it gets by with just one application on Android. The optimal choice is determined by trial and error, that is, practice.
In the most difficult case, to get root rights on Android 5, you may need:
- computer;
- driver set;
- special utility;
- custom Recovery;
- archive for obtaining root rights.
Root using KingRoot
This method is well known and has been successfully used for a long time on a wide variety of firmware and Android models. KingRoot v4.9.6 supports about 10 thousand smartphones and tablets and more than 40 thousand firmware versions from 2.3 to 5.1.
The program is positioned as innovative. The fact is that recently two versions of it have been available - for Android and Windows. You can get root using a mobile application or using a program installed on a PC.
Via PC
This method is recognized by experts as the most reliable. It is also distinguished by a certain complexity, or rather, labor intensity:
- Both devices must be prepared accordingly. The smartphone must be charged to a level of at least 50%, and the PC must be connected to an uninterruptible power source - if the power suddenly goes out, the phone can turn into a brick.
- You need a working USB cable.
- You need to turn off the antivirus on both devices.
- The following manipulations are performed in the gadget settings:
- USB debugging is enabled;
- The ban on downloading from unknown sources is disabled.
To root using this method you need:
- Download KingRoot to your computer.
- Connect Android to your computer and open the application on PC.
- After identifying the gadget, click the “Root” button. The operation may take several minutes, after which the gadget will reboot. If this does not happen automatically, you should do it manually.
- Install KingUser. This application allows you to manage root access and is usually installed automatically, but sometimes you have to do it manually. You can find the program at.
- Remove KingRoot. The application is used only to obtain root rights.
Further distribution of root rights will be handled by KingUser, which has an application manager, startup management menu, as well as a one-touch full backup system. The program allows you to monitor requests for root rights by other applications. It is similar in functionality to SuperSU.
On the gadget
It is clear that it is more convenient for the user to use KingRoot directly on the Android device itself. No computer, no cord needed, and less work. But you still have to charge the gadget and back up (save) important data.
Otherwise, you just need to do a couple of steps:
- Download and open the application.
- Press the “Start Root” button and wait until the procedure is completed.
- After the utility gets used to it, the interface will change - the Android logo will turn red.
This is all over - root rights have been successfully obtained.
Checking with Root Checker
- Find the application on Google Play and install it on your gadget.
- Launch Root Checker. When you first launch the application, you will receive a disclaimer warning. Click on the “Agree” button.
- In the application window, click on the “ROOT Check” button.
After completing the described steps, the application will scan your Android device for root rights and display the result of the scan. If you do not have superuser rights, you will see a message on the screen: “Sorry!” This device does not have proper root access." If the gadget has root rights, the message will be as follows: “Congratulations! This device has root access."
Method 2: Diagnostic Applications
Using the capabilities of some software representatives to determine the technical characteristics and parameters of Android devices is, for some reason, a little in demand, but an effective, fast and simple way to determine whether root privileges are activated. The use of one of the software tools proposed below will be especially relevant if, in parallel with determining the availability of Superuser rights, you need to obtain information about other properties or parameters of the smartphone/tablet.
Option 1: AIDA64
- Follow the link above from your mobile device and thus open the AIDA64 page in the Google Android Software Store. Let's install the application.
If the Google Play Store is missing or access to it is impossible, search the Internet and download (for example, from the APKMirror resource) the installation APK package of the program, and then install it.
Read more: Installing Android applications from APK files
- We launch the tool for obtaining system information of the mobile device, on its main menu screen, tap on the “Android” tab.
- The target item in our case is located fourth on the information page that opens in AIDA64 and is called “Device with Root access.” If the parameter value here is “No”, Superuser privileges on the device have not been activated;
if “Yes” - available.
Option 2: CPU-Z
- Install the CPU-Z application on the device being tested by downloading it from the link above from the Play Store
or by downloading and installing the APK file from the official website of the developers (this is available after going to the “VERSIONS HISTORY” section of the resource).
- Open the software and go to its “SYSTEM” tab.
- In the displayed list of characteristics, find the “Root Access” item and look at the value of this parameter:
- “No”—Superuser privileges on the device are not activated;
- “Yes” - root rights have been obtained.
- “No”—Superuser privileges on the device are not activated;
Checking with Es Explorer
This program is not specialized, but it can also help determine whether your gadget has root rights. It's very easy to do this:
- Find the application on Google Play and install it on your device.
- Launch Explorer.
- Find the “Tools” submenu on the right side of the window.
- Select "Root Manager" and try to enable it. If your gadget is not rooted, this operation will not be possible - the icon will return to its previous position, and you will see a message stating that this function is not supported by the device. If you have root, Explorer will ask you to grant him root rights.
Sometimes users who have purchased a previously used smartphone notice the SuperSu or SuperUser and are firmly convinced that the gadget already has root rights. It also happens that inexperienced owners of Android devices install one of these programs from the Play Market, thinking that by doing so they are equipping the smartphone with superuser rights. However, remember that the presence or absence of SuperSu on a gadget does not automatically mean the presence (absence) of root rights.
Even if you personally carried out the procedure of rooting your smartphone, it is not always possible to say with confidence that your efforts were crowned with success. Therefore, it is always better to check with appropriate programs.
What to do if the procedure is completed, but the “super administrators” mode is not displayed
If you are sure that advanced functionality is unlocked, but is not displayed, follow these steps:
How to erase application data and clear cache.
- Go to “Settings” – “Applications” – root application-administrator.
- Delete data
- Clear cache.
After rebooting, the program should work correctly.
The super-user gives extended rights to work with settings, but not every phone has the option activated. To find out what options are available, check "Root" using one of the described methods. Remember that tampering with the device’s firmware on your own is a common cause of smartphone failure.
How to find out if you succeeded in installing Superuser mode
There are many ways to activate “admin mode” in Android, but the effectiveness of one or another of them depends on the device itself and its firmware - for some, an application like KingROOT is enough, while for others, you will have to unlock the bootloader and install a modified recovery. Actually, there are several options for checking whether this or that method worked.
Method 1: Root Checker
A small application whose sole purpose is to check the device for root access.
Download Root Checker
- Open the application. First of all, a window will appear with a notification warning about the collection of anonymous statistics. If you agree, click “Accept”; if not, click “Reject”.
- After the introductory instructions (it is in English and not very useful), gain access to the main window. In it you should click on “Check Root”.
- During the verification process, the application will ask for appropriate access - a permission window will appear. Naturally, access must be allowed.
- If no problems have arisen, then the main Ruth Checker window will look like this. If there is something wrong with superuser rights (or you did not allow the application to use them), you will receive the message “Sorry! Root access is not properly installed on this device."
If such a window does not appear, this is the first sign of a problem!
If you are sure that you have received root access, but the application says that you do not have it, read the paragraph about problems at the end of the article.
Checking with Root Checker is one of the simplest methods. However, it is not without its drawbacks - the free version of the application contains advertising, as well as annoying offers to buy the Pro version.
Method 2: Terminal Emulator for Android
Since Android is a system based on the Linux kernel, it is possible to install on a device running this OS a terminal emulator for the Linux console familiar to users, in which you can check for root privileges.
Download Terminal Emulator for Android
- Open the application. A command prompt window and keyboard will appear. Pay attention to the appearance of the first line - the user name (consists of the account name, separator and device identifier) and the “$” symbol.
- Type the command “su” on the keyboard. Then press the “Enter” button. Most likely, the Terminal Emulator will ask for access to superuser rights. Allow by clicking on the appropriate button.
- If everything went smoothly, the “$” symbol mentioned above will change to “#”, and the account name before the separator will change to “root”. If Root access is not available, you will receive a message with the words “can't execute: permission denied”.
The only drawback of this method is that it is a little more complicated than the previous one, however, even novice users can cope with it.