Greetings to all readers of my blog, today I will tell you and show you where the fonts are in Windows 10. This can be useful if they are not reflected correctly in some programs, and also if you want to see what is already installed in your operating system.
The vast majority of programs available in the operating system use fonts that were already installed in it. However, sometimes there is a need to install a new one or check what is already installed. This situation is known to all active users of Adobe's Photoshop program. Very often, when opening templates or files not created on your computer, an application information window pops up. As a rule, it says that the program cannot find this or that font, and then we need to install a new one.
In some situations, you know in advance what font is required and you just need to check whether it is installed on your computer, since a great many fonts are not standard, and as a rule they have to be downloaded and installed separately. And sometimes we need to choose a beautiful design option and see how it looks, and then we also need the Fonts folder. No problem, I'll show you where to look.
What fonts are there in Windows 10?
List of system fonts in Windows 10
- Arial: 7.00.
- Arial Italic: 7.00.
- Arial Bold: 7.00.
- Arial Bold Italic: 7.00.
- Arial Black: 5.23.
- Bahnschrift: 2.00.
- Calibri Light: 6.21.
- Calibri Light Italic: 6.21.
Interesting materials:
Why doesn't the alarm clock work on my iPhone when the phone is turned off? Why does mobile internet work poorly on an iPhone? Why doesn't video work on some sites? Why does the cooler work hard on a laptop? Why doesn't my fingerprint work on my phone? Why doesn't English work on the keyboard? Why doesn't the fuel level sensor work? Why does the fan sensor on the VAZ 2110 not work? Why is the DNS server not working? Why doesn't EDGE work?
Second way.
This method is best used when you need to work with several fonts at once and need to install several. We go to the menu with the right mouse button, there we select the install item and just click it.
- Taller, thicker, rounder: how to install any font on Windows 10
You can install several files by selecting the files, and then again through the menu with the right button and select install.
Where can I find all the fonts?
15 sites where you can download fonts for free and legally
- FontSpace. This collection is much richer: you can find more than 36,000 free fonts in it. ...
- 1001 Free Fonts. Despite the name, there are about 10,000 fonts in this collection. ...
- Font Squirrel. Most of the fonts here are free for personal and commercial use. ...
- FontStruct. ...
- DaFont. ...
- Urban Fonts. ...
- Abstract Fonts. ...
- Fontspring.
10 Sep. 2022
How to remove fonts
In order to remove unnecessary fonts from Windows 7, you need to go to the folder where they are stored (as I showed a little above), right-click on the font and select “Delete”.
Everything is exactly the same as with regular files.
Similar articles:
Fonts are used in system inscriptions, messages, programs, and in general - they are an integral part of any interface...
Fonts are used in system inscriptions, messages, programs, and in general - they are an integral part of any interface...
Computers have long turned from an element of luxury into an integral part of human life. They are used for work...
Source
Installing and removing fonts
In order to install a new font, you simply need to drag it into the “Options” window into a special block designated “Drag and Drop Installation”.
To remove a previously installed font, you need to find it in the list and open it. If necessary, you can use the search.
After this, a window will appear with information about this font, the location of its installation, version and author will be indicated here.
In order to delete a font, you need to click on the “Delete” button and confirm the deletion.
Fonts in the Control Panel
Also in Windows 10 you can still manage fonts through the “Control Panel”. This feature will probably be removed in future versions, but for now it works.
In order to open the “Control Panel” in Windows 10, you need to press the Win-R key combination and execute the “control” command in the window that opens.
In the Windows 10 Control Panel window, go to the Appearance and Personalization section.
And open the “Fonts” subsection there.
As a result, a window with font settings will open, exactly the same as in Windows 7.
As with the Options menu, installing a new font is as simple as dragging it into this window. To delete a font, you need to select it in the list and click on the “Delete” button.
Even without a Microsoft office suite installed on your computer, or a free competitor of the giant corporation, such as OpenOffice or Libre Office, the system contains a huge number of different fonts. They can be used both in system windows and messages, and in text editors, web browsers, etc. However, users often wonder where the fonts are located in Windows 7 in order to expand the existing archive.
Where to find fonts for Windows 7
First, you need to figure out where you can find suitable fonts for future use in text editors or system settings. The answer to this question is extremely obvious, because today everything can be found on the Internet.
Font files have a standard TTF extension, which stands for True Type Font. And to download them to their computer, users need to find the letter options they are interested in on the Internet. Today, it is very easy to find appropriate fonts for famous brands, movies, etc. on the Internet. True, finding and downloading the TTF file you are interested in is one thing; fonts also need to be installed on the system.
detailed instructions
- We start by opening the Start menu, where we need to find the Control Panel line, as shown in the screenshot.
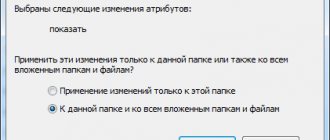
- A standard Explorer window will appear in front of us, in which we look for the Category button in the upper right part, then click on it once with the left mouse button.
- After this, the settings menu will open, where you need to select the Small icons line, as shown in the screenshot. To do this, just click once with the left mouse button on the desired line.
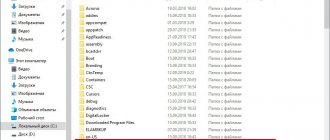
- After this, the window will refresh again, and in it we need to find the Fonts folder. We find and open it.
- This is where, as shown in the screenshot, all the fonts that were installed on your operating system are located. Each of them has a unique name, which is located under the font icon. The icons you see show the graphical execution of a particular version of the font, so you can easily choose the one you like right here.
How to find the fonts folder
There are several ways to go to the desired directory. All of them can be easily implemented in just a few mouse clicks.
Run window
One of them is to use the Run system utility, invented by Windows developers to make it easier for users. The Run window opens in different ways:
1. The easiest and fastest way is to press two keys at the same time - Win (located in the bottom row of buttons and looks like a floating window) and R (top row of the alphabetic keyboard, no need to switch to English).
2. You can click on the magnifying glass located at the bottom of the screen on the taskbar, enter “Run” in the search bar and activate the corresponding application from the search results with two left clicks of the mouse.
3. Launch the desired window from the list of Start commands located on the left functional part of its window.
After the required window appears, to switch to fonts, you need to enter the value %windir%\fonts in its line and confirm execution by pressing OK or Enter.
Control Panel
The next way is to access the “Control Panel” through the “Start” context menu. Easier and faster:
- Click on the “Start” menu, right-click;
- In the context menu that opens, point to “Control Panel” to display a list of all its elements;
- In the list itself, move down by scrolling to the desired “Fonts” folder and go into it with one left click.
If for some reason the desired element is missing from the Start context menu, then:
1. Enter the value “Control Panel” in the “Start” search bar.
2. Launch the corresponding application from the search results (one quick left click of the mouse).
3. At the top of the wizard that opens, where the “View” settings tool is located, open the list of possible options (by default, “Category” is set there, and you need to click on it).
4. Select the “Small icons” value to display all elements of the “Control Panel”.
5. Among the icons that appear, find “Fonts” and go to them with one left click.
System catalog
The directory itself, like all the contents of the system, is located on the local drive C (or a drive with a different letter, but always where Windows is installed). It's easy to find:
1. Launch Explorer (click on the folder icon on the taskbar at the bottom of the desktop or write the word “Computer” in the search bar).
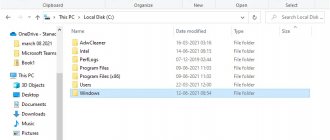
2. With two quick left clicks, go to the system drive (C by default).
3. Go to the Windows directory.
4. Find and expand the Fonts directory.
How to open settings
There is a simple way to get into the font settings.
1. Copy or manually enter the Fonts value into the search bar on the taskbar.
2. Select “Font Options” from the list of search results.
Installing a font via a folder
Before you install fonts in Windows 7, you should learn about another method. The second method will be very useful if you want to install not a couple of fonts, but a whole pack. Instead of opening each one and installing it manually, you can simply copy them all into your fonts folder.
Click the “Start” button and open “Control Panel”. In it, select the “Design and Personalization” item.
Then open the “Fonts” item.
And we find ourselves in the folder where all the system fonts are stored.
Now you just need to copy the font files and paste them into this folder, just like you do when copying any other files.
How to install fonts in Windows 7: two methods with step-by-step instructions
In this article, I will tell you how to install fonts in Windows 7. I will show you two simple methods that are easy to implement and explain them with pictures.
Windows 7 has over two hundred built-in fonts. Among them there are Cyrillic, Latin and even various hieroglyphs. However, during the work you may need to install some additional font, for example, decorative or for a specific language. And now you will learn how to install fonts in Windows 7.
Fonts in the Options menu
Like many other features, Fonts in Windows 10 have moved from the Control Panel to the new Settings menu. Now they are located along the path “Options – Personalization – Fonts”.
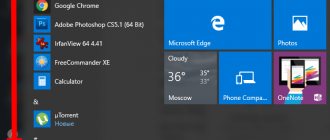
To open “Settings” you need to open the “Start” menu and click on the button with the gear icon. You can also open “Settings” using the Win-i key combination.
In the “Options” window, go to the “Personalization” section
And open the “Fonts” subsection.
This is the location of the Fonts window in Windows 10. Options are available here to install, remove, and customize fonts on the Windows 10 system.